1. Pengenalan
Thank you for choosing the Tengsen X1 MP3 Player. This portable digital music player offers a range of features including Bluetooth 5.3 connectivity, a built-in speaker, FM radio, voice recorder, e-book reader, and touch buttons. This manual provides detailed instructions to help you get the most out of your device.

Imej: Depan dan belakang view of the Tengsen X1 MP3 Player, showcasing its compact design and sleek black finish.
2. Apa yang ada di dalam Kotak
Pastikan semua item ada semasa menyahkotak:
- 1 x Tengsen X1 Bluetooth MP3 Player
- 1 x USB Micro Cable (for charging and data transfer)
- 1 x Fon Telinga
- 1 x Manual Pengguna
3. Persediaan dan Operasi Asas
3.1 Device Layout and Key Functions

Image: Detailed diagram illustrating the key definitions and ports of the Tengsen X1 MP3 Player.
The device features a 1.8-inch color screen with 7 touch keys and 2 physical volume buttons. Refer to the diagram above for button identification.
- Power/Wake/Lock/Reset Key: Located on the side. Long press for 3 seconds to power on/off. Short press to lock/wake the screen. In case of a freeze, long press for 10 seconds to reset.
- Butang Kelantangan (+/-): Located on the side. Short press to adjust volume step-by-step. Long press for continuous volume adjustment.
- Directional Keys (Up/Down/Left/Right): Used to navigate menus and select content.
- Confirm/Play/Pause Key: Center button. Short press to confirm selection, play, or pause.
- Kunci Kembali: Go back to the previous menu or exit the current screen.
- Kekunci Menu: Opens submenus/options in supported interfaces.
- Slot Kad TF: Located on the side for expandable storage up to 128GB (Micro TF card not included). Insert the card with golden contacts facing upward.
- Port Pengecasan: Micro USB port for charging and data transfer.
- Jack fon kepala: Standard 3.5mm jack for wired earphones.
- Pembesar Suara Terbina dalam: Terletak di bahagian belakang peranti.
3.2 Power On/Off and Screen Lock
To power on, long press the Power/Wake/Lock/Reset Key for 3 seconds. To power off, long press the same key for 3 seconds. Short press the key to lock or wake the screen. If the device freezes, long press for 10 seconds to force a reset (this will not delete data).
Video: Demonstrates how to power on/off the device, lock/wake the screen, and perform a reset in case of a freeze.
4. Connecting to a Computer for Music Transfer
4.1 Persediaan
- Muat turun muzik files to your computer. Supported formats include MP3, WMA, APE, FLAC, WAV, AAC-LC, and M4A.
- Use the original USB cable provided. Ensure it supports both charging and data transfer. Avoid cables that only support charging.
4.2 Langkah Sambungan
- Hidupkan komputer anda.
- Plug the larger end of the USB cable into your computer's USB port.
- Plug the smaller end into the MP3 player's charging port.
- Once connected, the screen will show "Charge / Transmission". Use the Left (<) or Right (>) directional keys to select "Transmission". If nothing appears, unplug and reconnect the cable.
- A new removable disk should appear in "My Computer" or "This PC". If using a desktop, try rear USB ports for better connection.
4.3 Memindahkan Muzik
- Open the new disk (your MP3 player) on your computer.
- Find or create a "Music" folder.
- Copy and paste the music files from your computer into this folder.
4.4 Finishing the Transfer
- After the transfer is complete, right-click the disk on your computer and select "Eject", then unplug the cable.
- On the player, go to Music/Songs, refresh the playlist, and your new songs will appear.
- You can also insert a TF card with music files into the player, and it will automatically refresh.
Video: Guide on how to connect the MP3 player to your computer for music and data transfer.
5. Operating the MP3 Player
5.1 Navigating the Main Menu
In the main menu interface, use the Up (^) and Down (V) directional keys to switch between function modules (Music, FM Radio, Video, E-Book, Voice Recorder, Settings, Bluetooth, File Browser). Press the Confirm/Play/Pause key to enter the selected module.

Image: The main menu of the MP3 player, displaying icons for Music, FM Radio, Video, E-Book, Voice Recorder, Settings, and Bluetooth.
5.2 Main balik Muzik
From the main menu, select 'Music'. You can browse by 'All Songs', 'Artist', 'Album', 'Card Folder' (for TF card content), or 'Disc Contents' (for internal memory). Use the Up (^) and Down (V) keys to select, and the Confirm/Play/Pause key to enter.
- Semasa Main Semula:
- Short press Left (<): Previous track. Long press Left (<): Rewind.
- Short press Right (>): Next track. Long press Right (>): Fast forward.
- Press the Menu key to access playback options like 'Add favorites', 'Delete collection', 'EQ', 'Play mode', 'Repeat mode', and 'Variable speed'.

Image: The MP3 music player interface, highlighting supported formats like MP3, FLAC, WMA, WAV, APE, and AAC-LC.
5.3 Kesambungan Bluetooth
The player supports Bluetooth 5.3 for wireless connection to headphones and speakers. It is not compatible with smartphones or PCs via Bluetooth.
- Disconnect other connections: Before use, ensure the Bluetooth headset or speaker is not connected to other devices.
- Turn on the Bluetooth speaker: Turn on the speaker power and enter pairing mode (the Bluetooth indicator light will usually flash quickly).
- Turn on the player Bluetooth: Enter "Bluetooth Settings" in the MP3 player and turn on the Bluetooth function.
- Cari dan sambungkan: Find the speaker name in the Bluetooth device list and click to connect.
- Mula bermain: After successful pairing, the speaker will start playing audio content (if the player is playing).
- Matikan Bluetooth: When no longer using Bluetooth, turn off the player's Bluetooth function to save battery. Alternatively, cancel pairing in the device list.

Image: The MP3 player connected wirelessly to Bluetooth headphones and a speaker, illustrating its Bluetooth 5.3 capability.
5.4 Radio FM
To use the FM radio, wired earphones must be connected as they act as the antenna. Select 'FM Radio' from the main menu. You can scan for stations or manually tune.
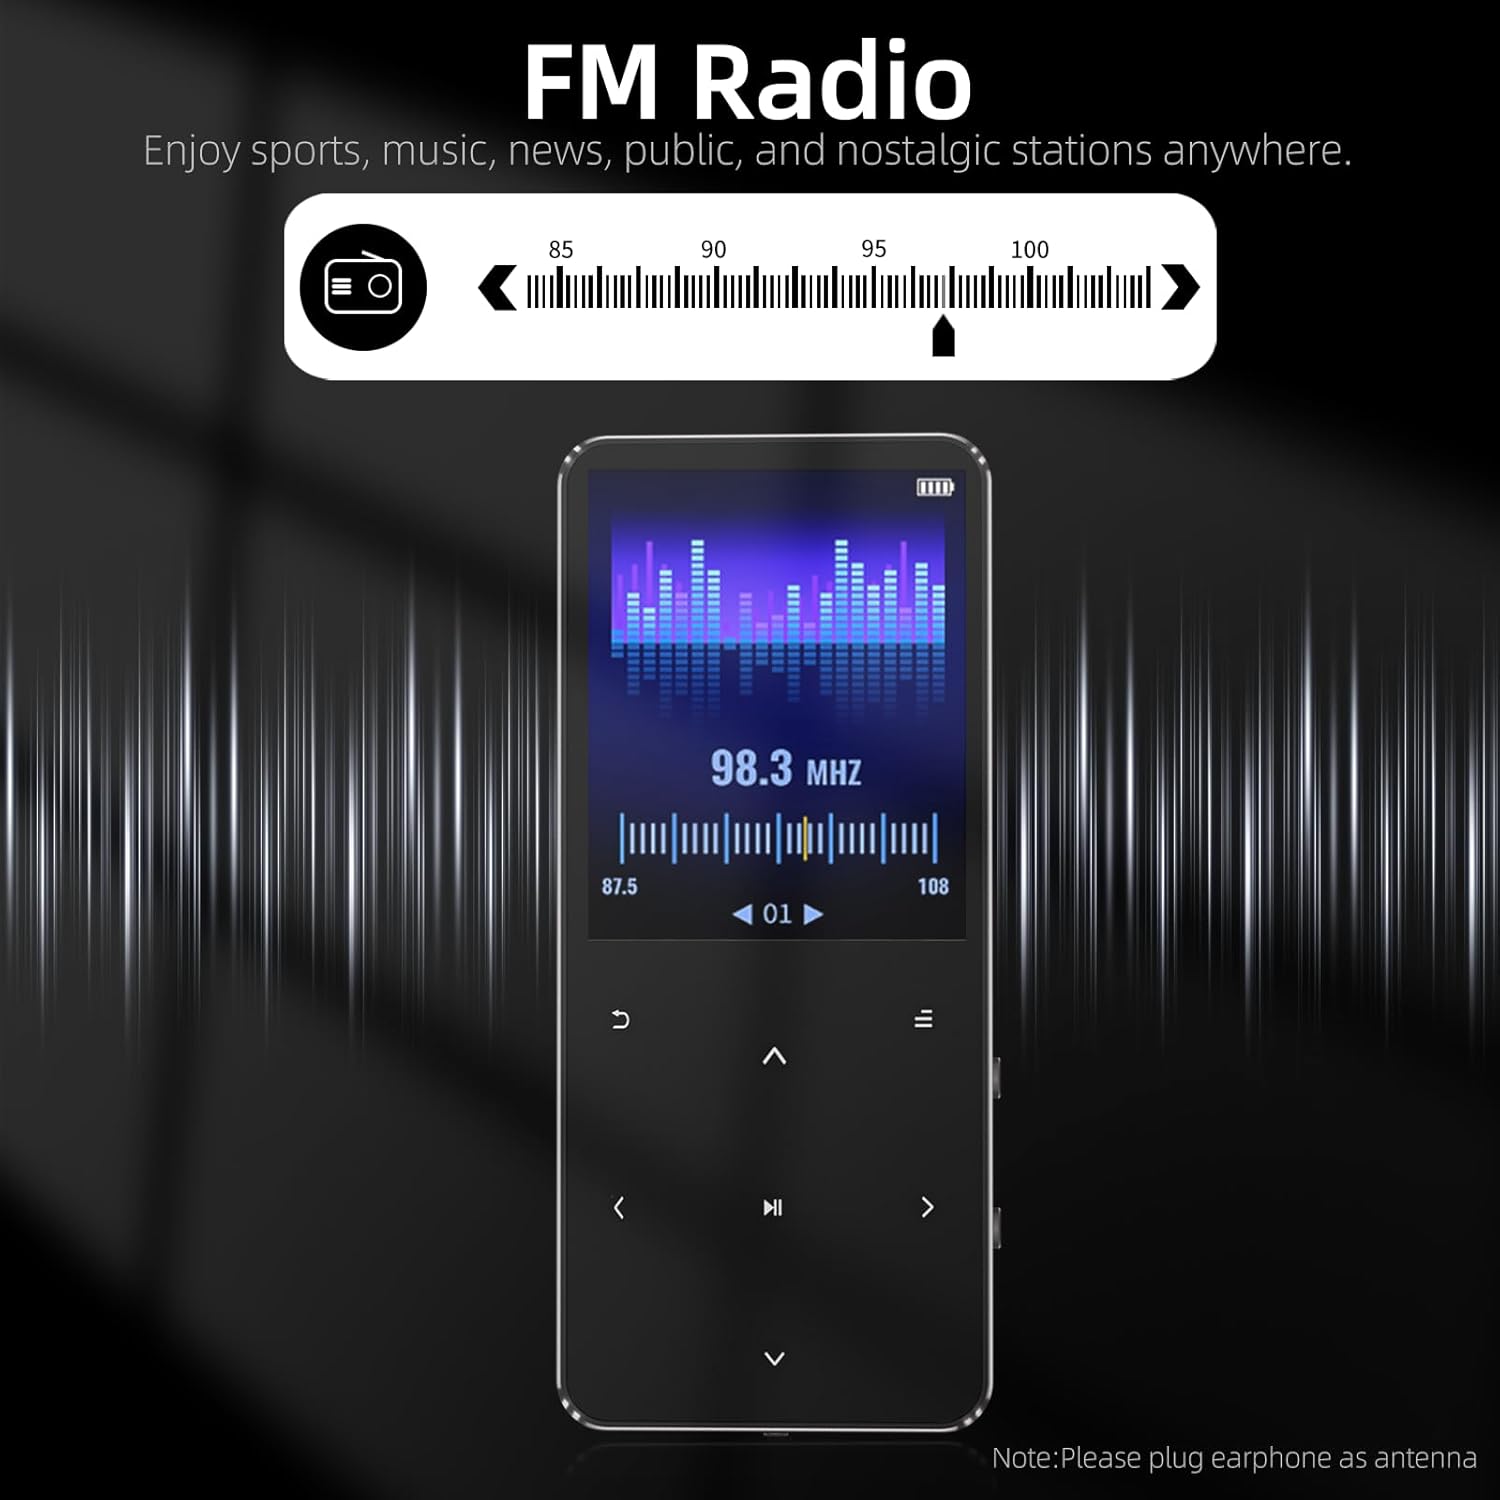
Image: The FM Radio interface of the MP3 player, showing frequency tuning and a note to plug in earphones as an antenna.
5.5 Perakam Suara
Select 'Record' from the main menu to access the voice recorder. Press the Confirm/Play/Pause key to start or pause recording. Press the Return key or Down (V) key to save the recording. You can choose between MP3 and WAV formats and adjust the bitrate.
Video: Instructions on how to record audio, save files, and configure recording settings.
6. Tetapan
From the main menu, select the 'Settings' icon to access various device configurations.
- Bahasa: Supports 12 languages including Simplified Chinese, English, Japanese, German, Spanish, French, Italian, Hebrew, Polish, Portuguese, and Russian.
- Tetapan Paparan: Adjust brightness (levels 1-10), backlight timer (10s, 20s, 30s, Always On), and screen saver (Nothing, Digital Clock).
- Power Saving Shutdown: Set auto-off time from 0-99 minutes. Default is 3 minutes. The device will automatically shut down if idle for the set time. Note: In recording interface (paused), the device is still considered running.
- Timing Shutdown: Set a specific duration for the device to automatically power off (0-99 minutes). This function is single-use and must be reset each time.
- Tarikh dan Masa: Configure time format (12h/24h), time adjustment, date format (Day month year, Month day year, Year month day), and date adjustment.
- Maklumat: View player information, disk space, and Bluetooth information.
- Formatting Equipment: This will erase all data on the device. Proceed with caution.
- Tetapan Kilang: Restores to factory default settings. Only default parameter settings will be reset; no data will be deleted.
Video: Guide to navigating and adjusting settings such as language, display, power saving, and date/time.
7. Penyelesaian masalah
7.1 Device Freezes, Won't Power On, or Cannot Be Charged
- Tetapkan Semula Arahan: If the device is frozen, press and hold the power button for 10 seconds to force a reset. Resetting will not delete any data; it only restarts the device.
- Check the Following Settings:
- Screensaver Time (Backlight Timer): Path: Setting > Display Settings > Backlight Timer (10s / 20s / 30s / Always On). The screen will enter screensaver mode after the set time, but background programs will still be running. Simply press the power button to wake the screen.
- Timing Shutdown: Path: Setting > Timing Shutdown (On: 1-99 minutes / Off: 0 minutes). The device will automatically shut down at the set time, regardless of usage. This function is single-use only and must be reset each time.
- Power Saving Shutdown: Path: Setting > Power Saving Shutdown (On: 1-99 minutes / Off: 0 minutes). When the device is idle, it will automatically shut down after the set time. The factory default setting is 3 minutes. Exception: In the recording interface (paused), the device is still considered running and will not shut down automatically. Other interfaces (e.g., paused music or recording playback) will shut down after the set time if idle.
- If the Problem Still Persists: You can try formatting the device to eliminate potential system errors. Path: Setting > Formatting equipment. Warning: Formatting will erase all data. Please proceed with caution.
7.2 Device Is On but Buttons Are Unresponsive
- Pelindung Skrin: Upon receiving the product, please remove the protective film from the screen.
- Screen Protector Status: If the screen remains on and the buttons are unresponsive after being left idle for an extended period, this indicates the screen is in the screen protector status. Simply press the power button to wake the screen.
- Pembersihan dan Penyelenggaraan: If the screen area around the buttons becomes dirty during use, gently wipe it with a clean cloth.
Video: A self-help guide to common MP3 player issues and quick start tips.
8. Spesifikasi
| Ciri | Perincian |
|---|---|
| Dimensi Produk | 3.72 x 1.61 x 0.32 inci |
| Berat Barang | 1.48 auns |
| Pengeluar | Tensen |
| Bateri | 1 bateri Lithium Ion (termasuk) |
| Jenama | Tensen |
| Nama Model | X1 |
| Ciri Khas | Built-In Speaker, Equalizer, FM Radio, Hi-Res Audio, Voice Recorder |
| Teknologi Ketersambungan | Bluetooth, USB |
| Kapasiti Penyimpanan Memori | 32 GB (expandable up to 128GB with Micro TF card) |
| warna | Hitam |
| Saiz Skrin | 1.8 Inci |
| Peranti Serasi | Headphones, Bluetooth Speakers |
| Jenis Media | Flash, Micro SD |
9. Waranti dan Sokongan
For further assistance, please refer to the user manual for detailed instructions. You can also click "Contact Seller" on your order page or contact Amazon Customer Service for support.


