1. Pengenalan
This manual provides detailed instructions for the installation, operation, maintenance, and troubleshooting of your Pisichen 27-Inch 2K 240Hz QHD Touch Screen Monitor. Please read this manual thoroughly before using the product to ensure proper setup and optimal performance. Keep this manual for future reference.
2. Maklumat Keselamatan
Patuhi langkah berjaga-jaga keselamatan berikut untuk mengelakkan kerosakan pada monitor dan memastikan keselamatan pengguna:
- Jangan dedahkan monitor kepada hujan, kelembapan atau suhu yang melampau.
- Pastikan pengudaraan yang betul di sekeliling monitor untuk mengelakkan terlalu panas.
- Gunakan hanya penyesuai kuasa yang dibekalkan bersama monitor.
- Elakkan meletakkan objek berat pada kord kuasa atau monitor.
- Putuskan sambungan kabel kuasa dari soket sebelum membersihkan monitor.
- Jangan cuba membuka atau membaiki monitor sendiri. Rujuk semua servis kepada kakitangan yang berkelayakan.
3. Kandungan Pakej
Sahkan bahawa semua item terdapat dalam pakej:
- Pisichen 27-Inch 2K 240Hz QHD Touch Screen Monitor
- Stand Monitor (Asas dan Leher)
- Penyesuai Kuasa
- Kabel HDMI
- Kabel DisplayPort (DP).
- Kabel USB-C
- USB-B Cable (for touchscreen functionality)
- Manual Pengguna
4. Produk Lebihview
The Pisichen 27-Inch 2K 240Hz QHD Touch Screen Monitor is designed for high-performance visual and interactive experiences. Key features include:
- paparan: 27-inch QHD (2560x1440) IPS panel for wide viewsudut dan warna yang tepat.
- Kadar Segar Semula: 240Hz for ultra-smooth motion and reduced input lag.
- Skrin sentuh: 10-point multi-touch support for intuitive interaction.
- Ketersambungan: HDMI, DisplayPort, USB-C, and USB-B ports for versatile device connections.
- Penyegerakan Adaptif: Mengurangkan koyakan dan gagap skrin untuk visual yang lancar.
- Ergonomi: Features tilt adjustment for comfortable viewing.
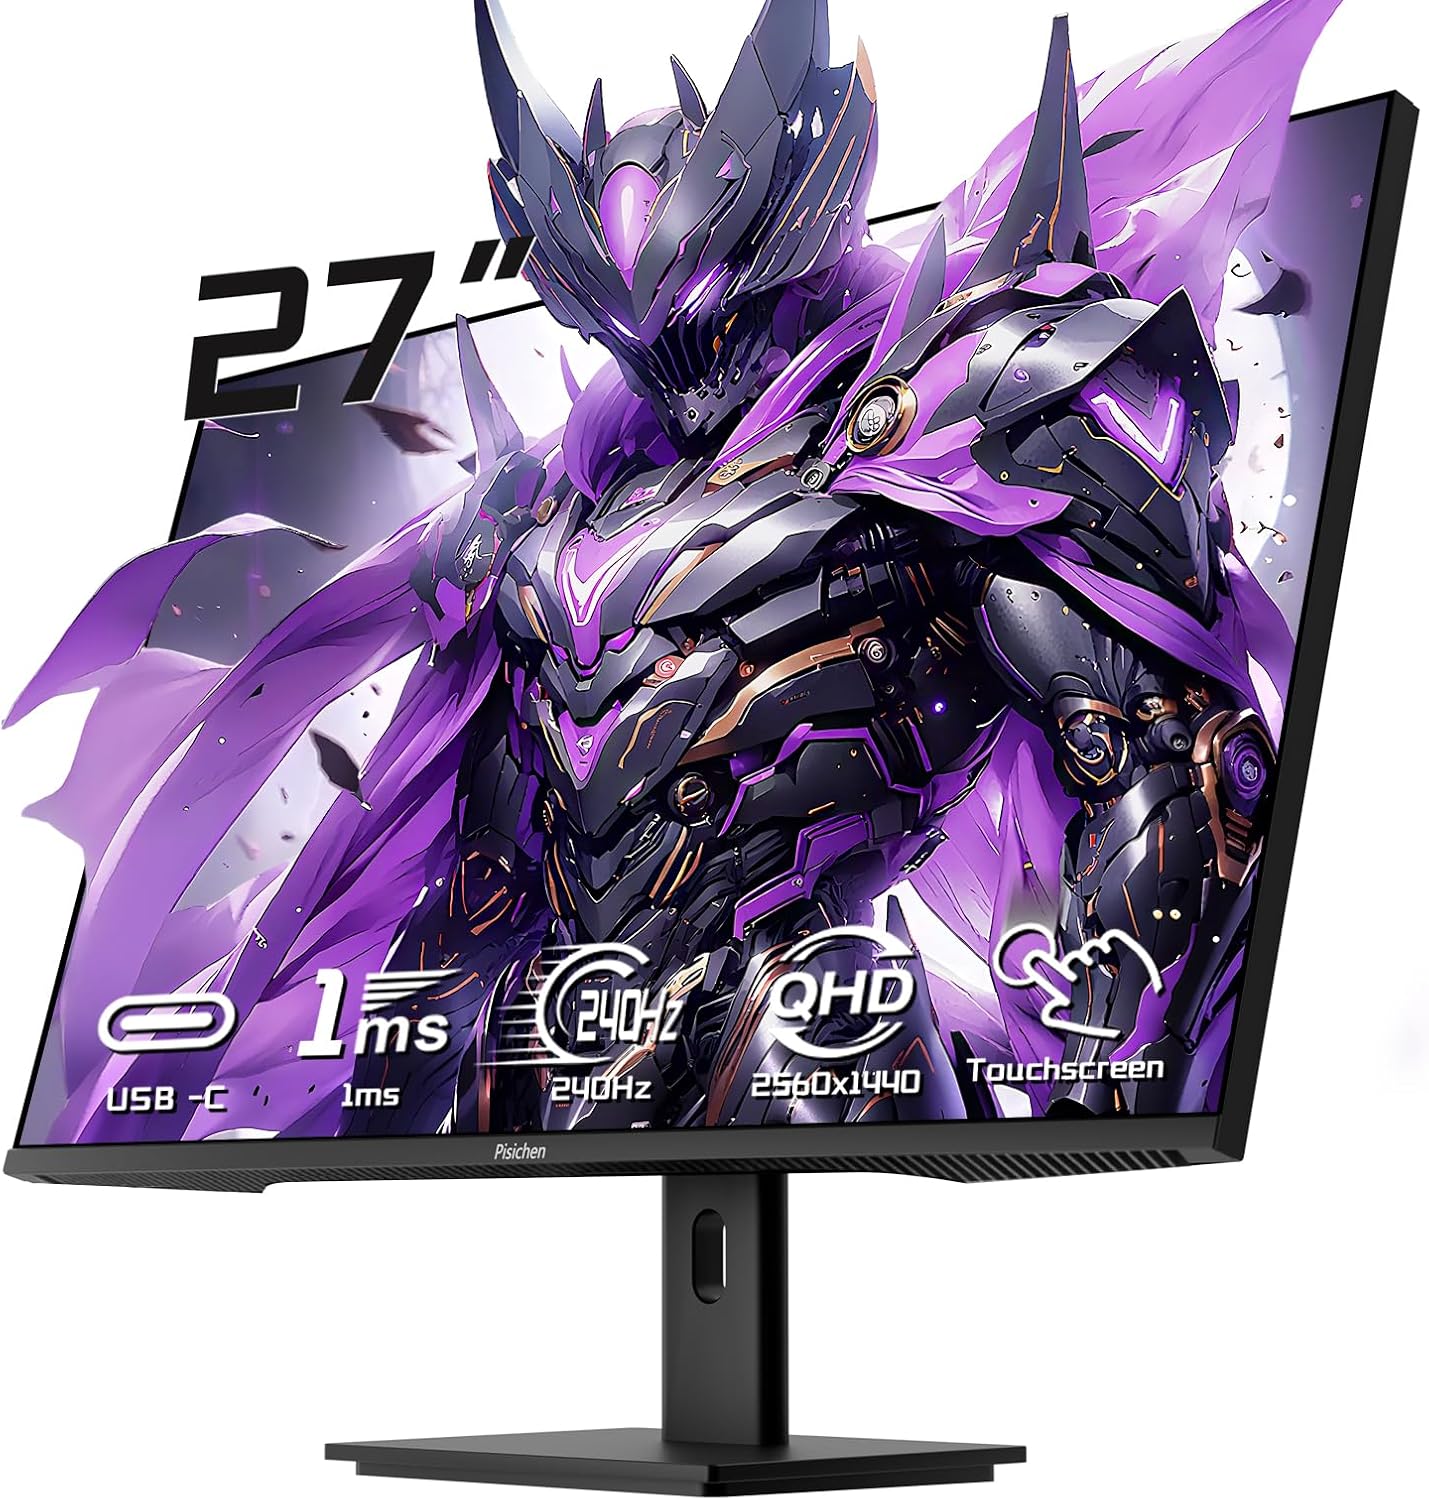
Rajah 4.1: Depan view of the Pisichen 27-Inch Touch Screen Monitor, highlighting its frameless design and key features like USB-C, 1ms response time, 240Hz refresh rate, QHD resolution, and touchscreen capability.
5. Arahan Persediaan
5.1 Memasang Pendirian
- Keluarkan komponen monitor dan berdiri dengan berhati-hati daripada pembungkusan.
- Attach the stand neck to the monitor's rear mounting point.
- Pasangkan tapak penyangga pada leher penyangga menggunakan skru yang disediakan.
- Letakkan monitor yang dipasang pada permukaan yang stabil dan rata.
5.2 Pemasangan VESA (Pilihan)
The monitor supports VESA mounting for wall or arm installation. Remove the stand if attached. Use compatible VESA mounting hardware (not included) according to the VESA standard for this monitor.

Figure 5.1: Illustration comparing VESA wall mounting and the standard monitor base setup, demonstrating space-saving benefits of VESA mounting.
5.3 Menyambung ke Peranti
The monitor offers multiple connection options. Choose the appropriate cable for your device.
- HDMI/Port Paparan: Connect one end of the HDMI or DisplayPort cable to your computer's graphics card and the other end to the corresponding port on the monitor.
- USB-C: For devices supporting video output via USB-C, connect the USB-C cable from your device to the monitor's USB-C port. This may also provide power and touch functionality depending on your device.
- USB-B (for Touchscreen Functionality): To enable the 10-point multi-touch feature, connect the USB-B cable from the monitor's USB-B port to an available USB-A port on your computer. This connection is crucial for touch input.
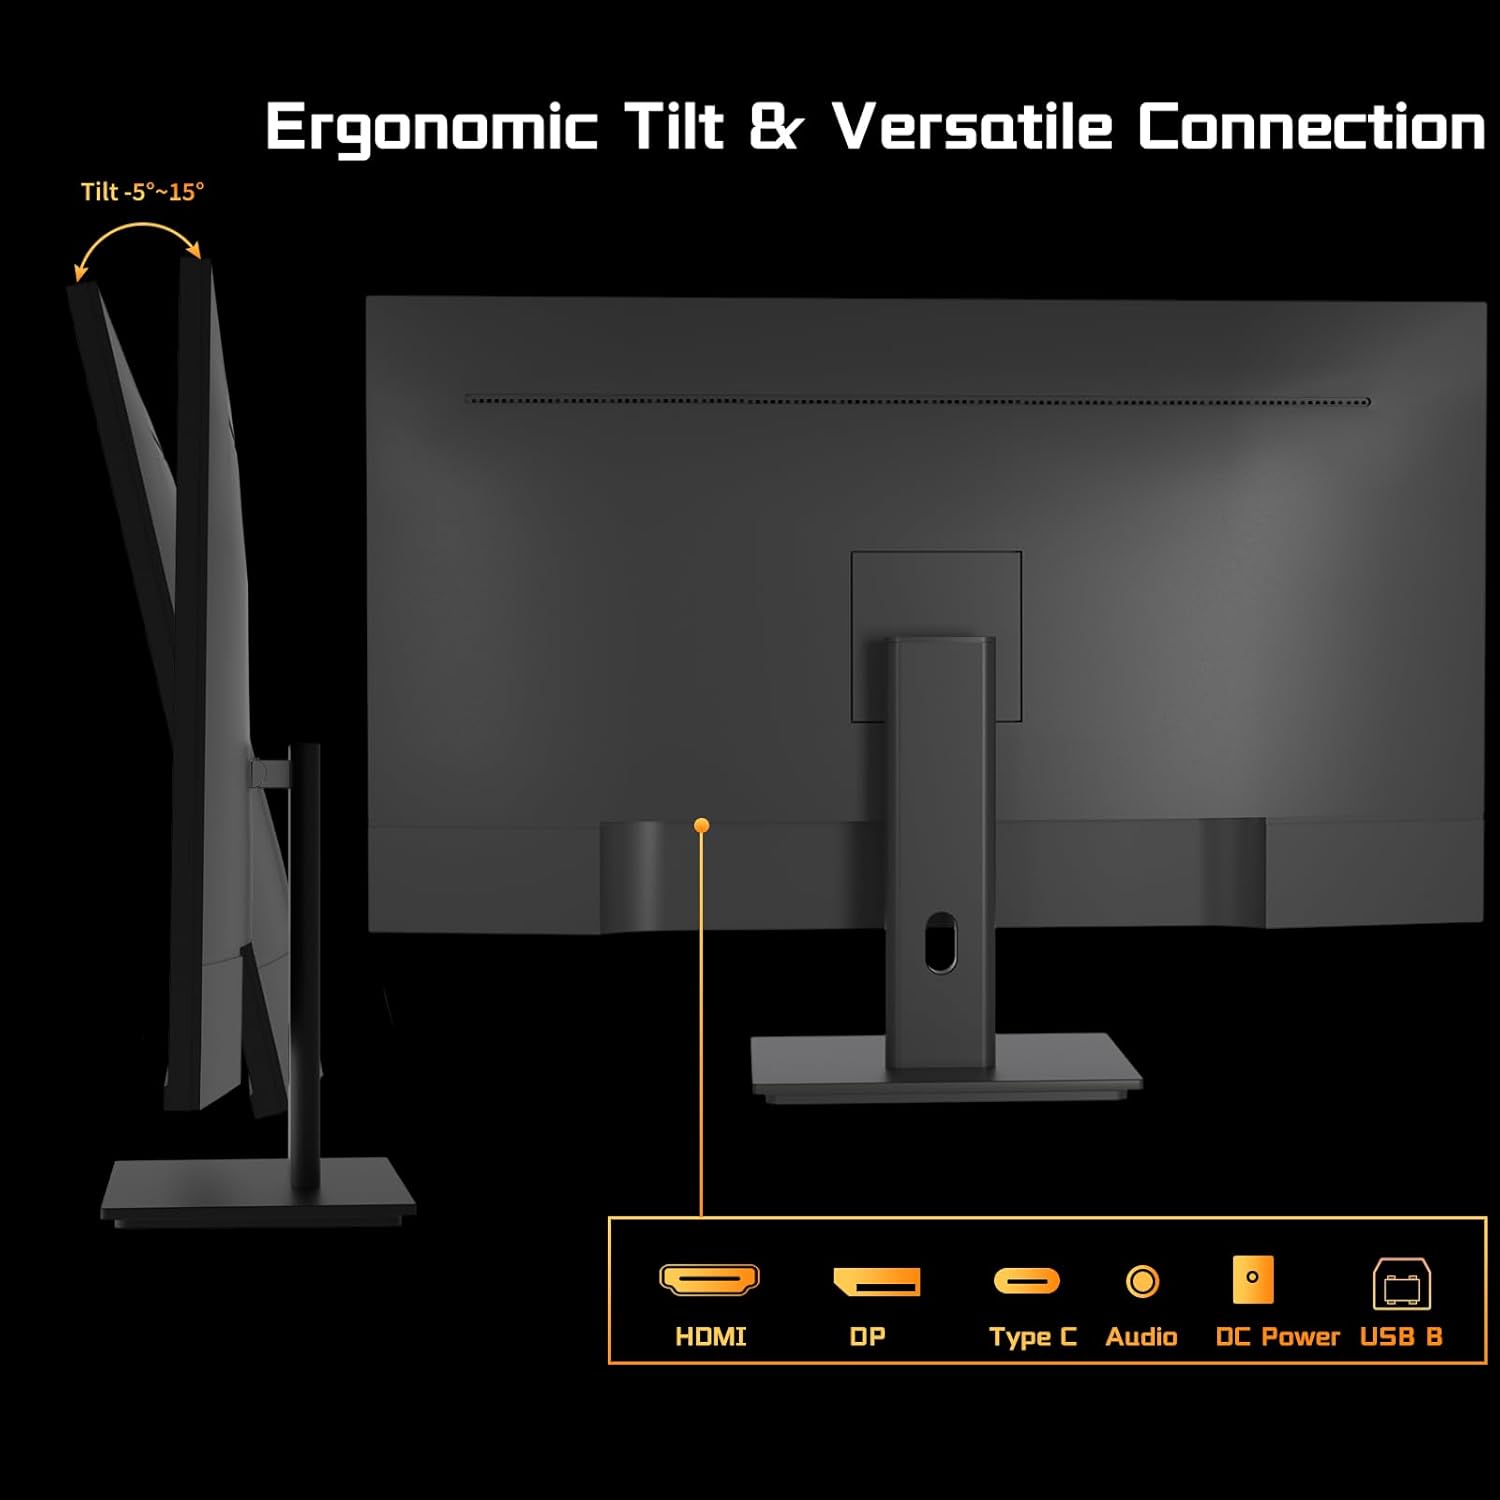
Rajah 5.2: Belakang view of the monitor showing available ports: HDMI, DisplayPort, USB-C, Audio Out, DC Power, and USB-B. The USB-B port is essential for touchscreen functionality.

Figure 5.3: Connection diagram illustrating how to connect the monitor as a second display (HDMI/DP) and as a touchscreen monitor (HDMI/DP + USB-B for touch signal).
5.4 Sambungan Kuasa
Connect the power adapter to the monitor's DC power input, then plug the adapter into a power outlet.
5.5 Kuasa Awal Hidup
Press the power button on the monitor. The power indicator will illuminate, and the display will turn on. If no signal is detected, ensure all cables are securely connected and your computer is powered on.
6. Arahan Operasi
6.1 Hidupkan/Mati Kuasa
Press the power button located on the monitor to turn it on or off.
6.2 Menu Paparan Pada Skrin (OSD).
The OSD menu allows you to adjust various monitor settings. Use the buttons on the monitor (typically located on the back or bottom) to navigate the menu. Common settings include:
- Kecerahan/Kontras: Adjust display luminance.
- Tetapan Warna: Ubah suai suhu warna, gamma dan ketepuan.
- Sumber Input: Manually select HDMI, DisplayPort, or USB-C input.
- Mod Gambar: Select predefined display modes (e.g., Standard, Game, Movie).
- Penyegerakan Adaptif: Enable or disable this feature for compatible graphics cards.
6.3 Kefungsian Skrin Sentuh
With the USB-B cable connected to your computer, the monitor functions as a 10-point multi-touch display. You can use gestures such as:
- Ketik: Setara dengan satu klik tetikus.
- Tekan dua kali: Setara dengan klik dua kali.
- Cubit-untuk-Zum: Gunakan dua jari untuk mengezum masuk atau keluar.
- Leret: Navigate through content or scroll.
- Seret: Move items on the screen.

Figure 6.1: A user interacting with the monitor's touchscreen, demonstrating its application in business or productivity tasks.

Figure 6.2: Compatibility chart showing devices that support multi-touch (Laptops, Smartphones, Tablets, All-in-one PCs, Desktop Hosts) and devices where touch functionality is not supported (iPhone, iPad, Switch, Fire TV, PS3/4/5, Xbox, Steam Deck, and some Apple products like Mac mini).
6.4 Kadar Segar Semula dan Penyegerakan Adaptif
The monitor supports a 240Hz refresh rate. Ensure your computer's display settings are configured to utilize this refresh rate for the smoothest experience. Enable Adaptive Sync in the OSD menu and your graphics card settings to synchronize the monitor's refresh rate with your GPU's frame rate, reducing screen tearing.

Figure 6.3: Visual comparison demonstrating the smoothness of a 240Hz refresh rate compared to lower refresh rates, illustrating reduced lag and delay.
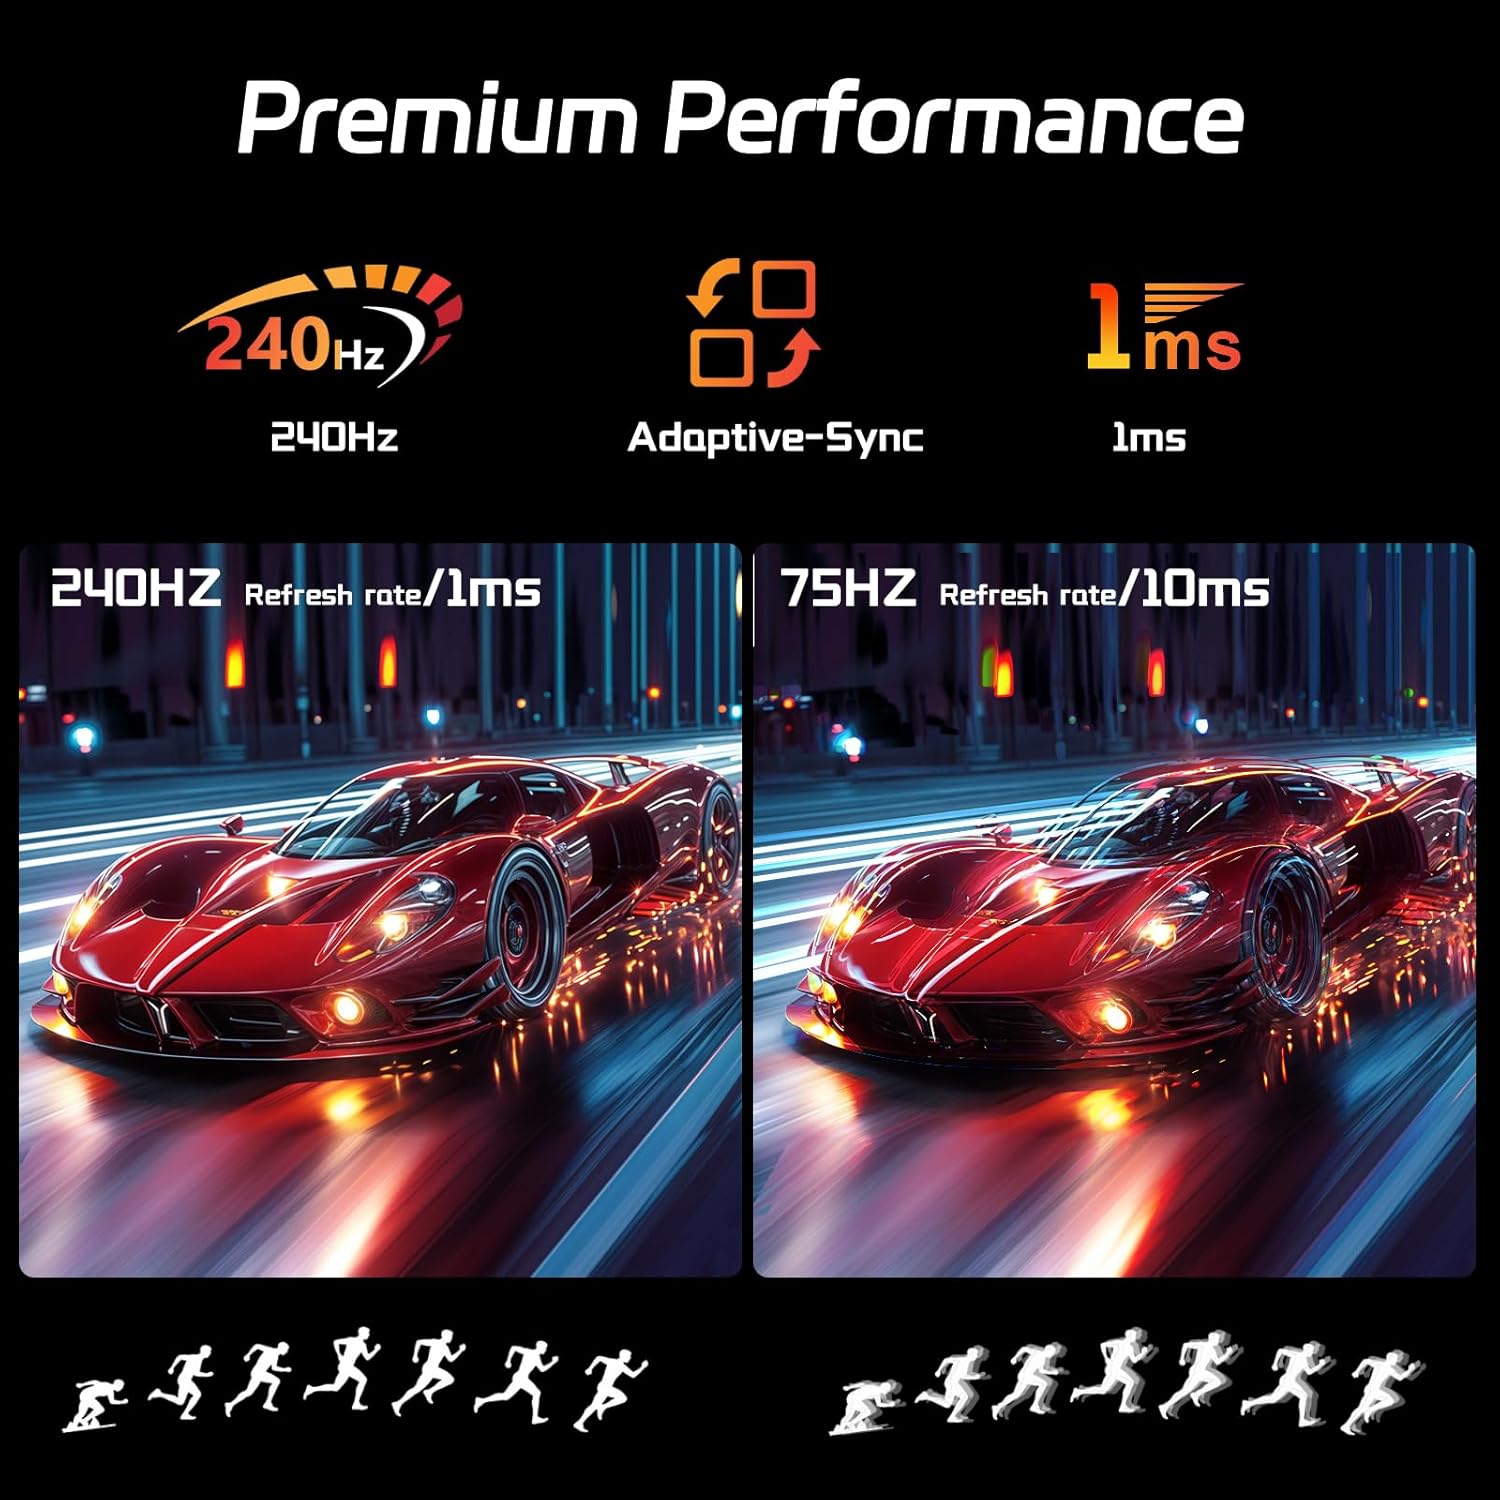
Figure 6.4: Illustration of premium performance features including 240Hz refresh rate, Adaptive-Sync, and 1ms response time, with a visual comparison of motion clarity at 240Hz versus 75Hz.
6.5 Eye-Friendly Technology
The monitor incorporates technology to reduce screen flicker and blue light emissions, aiming to minimize eye strain during prolonged use. These features can typically be adjusted or enabled through the OSD menu.

Figure 6.5: Visual representation of Eye-Friendly Technology, showing how it reduces screen flicker and blue light to enhance user comfort.
7. Penyelenggaraan
- Membersihkan Skrin: Lap skrin perlahan-lahan dengan kain lembut yang tidak berbulu. Untuk tanda degil, ringankan dampbersihkan kain dengan air atau pembersih skrin yang tidak kasar. Jangan sembur pembersih terus ke skrin.
- Membersihkan Casing: Gunakan kain lembut dan kering untuk mengelap monitor casing. Elakkan menggunakan bahan kimia yang keras atau bahan yang melelas.
- Storan: Jika menyimpan monitor untuk tempoh yang lama, putuskan sambungan daripada kuasa, tutupnya untuk melindunginya daripada habuk, dan simpan di tempat yang sejuk dan kering.
8. Penyelesaian masalah
| Masalah | Kemungkinan Punca | Penyelesaian |
|---|---|---|
| Tiada gambar di skrin | Monitor not powered on; incorrect input source; loose video cable. | Ensure power cable is connected and monitor is on. Select correct input source via OSD. Check video cable connections. |
| Skrin sentuh tidak bertindak balas | USB-B cable not connected; incorrect driver; incompatible device. | Ensure USB-B cable is connected from monitor to computer. Check device compatibility. Calibrate touch input in OS settings if multiple touchscreens are present. |
| Imej berkelip-kelip atau herot | Faulty video cable; incorrect resolution/refresh rate; graphics card issue. | Replace video cable. Adjust resolution/refresh rate in OS settings. Update graphics drivers. |
| Tiada bunyi daripada pembesar suara monitor | Volume too low; audio output not selected; no audio signal via video cable. | Increase monitor volume. Ensure monitor is selected as audio output in OS. Check if video cable supports audio transmission. |
9. Spesifikasi
| Ciri | Perincian |
|---|---|
| Saiz Skrin | 27 Inci |
| Resolusi | 2560 x 1440 Piksel (QHD Lebar 1440p) |
| Kadar Segar Semula | 240Hz |
| Jenis Panel | IPS |
| Skrin sentuh | 10-Titik Berbilang Sentuhan |
| Nisbah Aspek | 16:9 |
| Kecerahan Imej | 400 Candela (cd/m²) |
| Ketersambungan | HDMI, DisplayPort, USB-C, USB-B |
| Dimensi Produk | 0.7 x 24 x 14.1 inci |
| Berat Barang | 13.52 paun |
| Pengeluar | Shenzhen Konowa Electronics Co., LTD |
| Nombor Model | 27INTS-2K-240HZ |
10. Waranti dan Sokongan
This Pisichen monitor comes with a standard manufacturer's warranty. For specific warranty terms and conditions, please refer to the warranty card included in your package or visit the official Pisichen website. For technical support, troubleshooting assistance beyond this manual, or to inquire about warranty claims, please contact Pisichen customer service through their official channels.
Sokongan dalam talian: Visit the Pisichen Store on Amazon


