1. Pengenalan
This manual provides detailed instructions for the operation and maintenance of your KEPLUG MX9 Sunrise Alarm Clock. This device combines a digital alarm clock, a sunrise simulation wake-up light, a dimmable bedside night light, and a white noise machine with 30 soothing sounds. Please read this manual thoroughly before use to ensure proper functionality and safety.
2. Maklumat Keselamatan
- Pastikan peranti diletakkan di atas permukaan yang stabil dan rata.
- Jangan dedahkan peranti kepada air atau kelembapan berlebihan.
- Gunakan hanya penyesuai kuasa dan kabel yang disediakan.
- Jauhkan daripada kanak-kanak dan haiwan peliharaan.
- Jangan cuba membuka atau membaiki peranti sendiri. Hubungi kakitangan yang berkelayakan untuk perkhidmatan.
- Cabut plag peranti semasa ribut petir atau apabila tidak digunakan untuk tempoh yang lama.
3. Kandungan Pakej
Sahkan bahawa semua item terdapat dalam pakej:
- Jam Penggera Matahari Terbit KEPLUG MX9
- Penyesuai Kuasa
- Kabel Kuasa
- Manual Pengguna (dokumen ini)
4. Produk Lebihview
Familiarize yourself with the main components and control buttons of your KEPLUG MX9 Sunrise Alarm Clock.

Imej 1: Depan view of the KEPLUG MX9 Sunrise Alarm Clock, showing the main light dome, digital time display, and control buttons at the base.
The device features a large light dome, a digital time display, and several touch-sensitive buttons for control:
- Butang Penggera: Used to set and activate alarms.
- Butang Masa: Used to set the current time and 12/24-hour format.
- Butang Tunda/Cahaya: Activates snooze during an alarm, or turns on/off and adjusts the night light.
- Butang Tambah (+): Increases values (time, volume, brightness) or navigates options.
- Butang Tolak (-): Decreases values (time, volume, brightness) or navigates options.
- Butang Nota Muzik: Selects soothing sounds or white noise.
5. Persediaan
5.1 Sambungan Kuasa
- Connect the power cable to the DC input port on the back of the alarm clock.
- Palamkan penyesuai kuasa ke soket elektrik standard.
- The digital display will illuminate, indicating the device is powered on.
5.2 Menetapkan Masa Semasa
- Tekan dan tahan butang Butang Masa for 3 seconds to enter time setting mode. The hour digits will flash.
- Gunakan Tambahan (+) or Minus (-) Buttons untuk menyesuaikan jam.
- Tekan ke Butang Masa sekali lagi untuk mengesahkan jam dan beralih ke tetapan minit. Digit minit akan berkelip.
- Gunakan Tambahan (+) or Minus (-) Buttons untuk menyesuaikan minit.
- Tekan ke Butang Masa a third time to confirm the minutes and select 12-hour or 24-hour format.
- Gunakan Tambahan (+) or Minus (-) Buttons untuk memilih format masa pilihan anda.
- Tekan ke Butang Masa one last time to exit time setting mode.
6. Arahan Operasi
6.1 Setting an Alarm (Sunrise Simulation & Sound)
The KEPLUG MX9 allows you to set multiple alarms with customizable sunrise simulation and sound options.
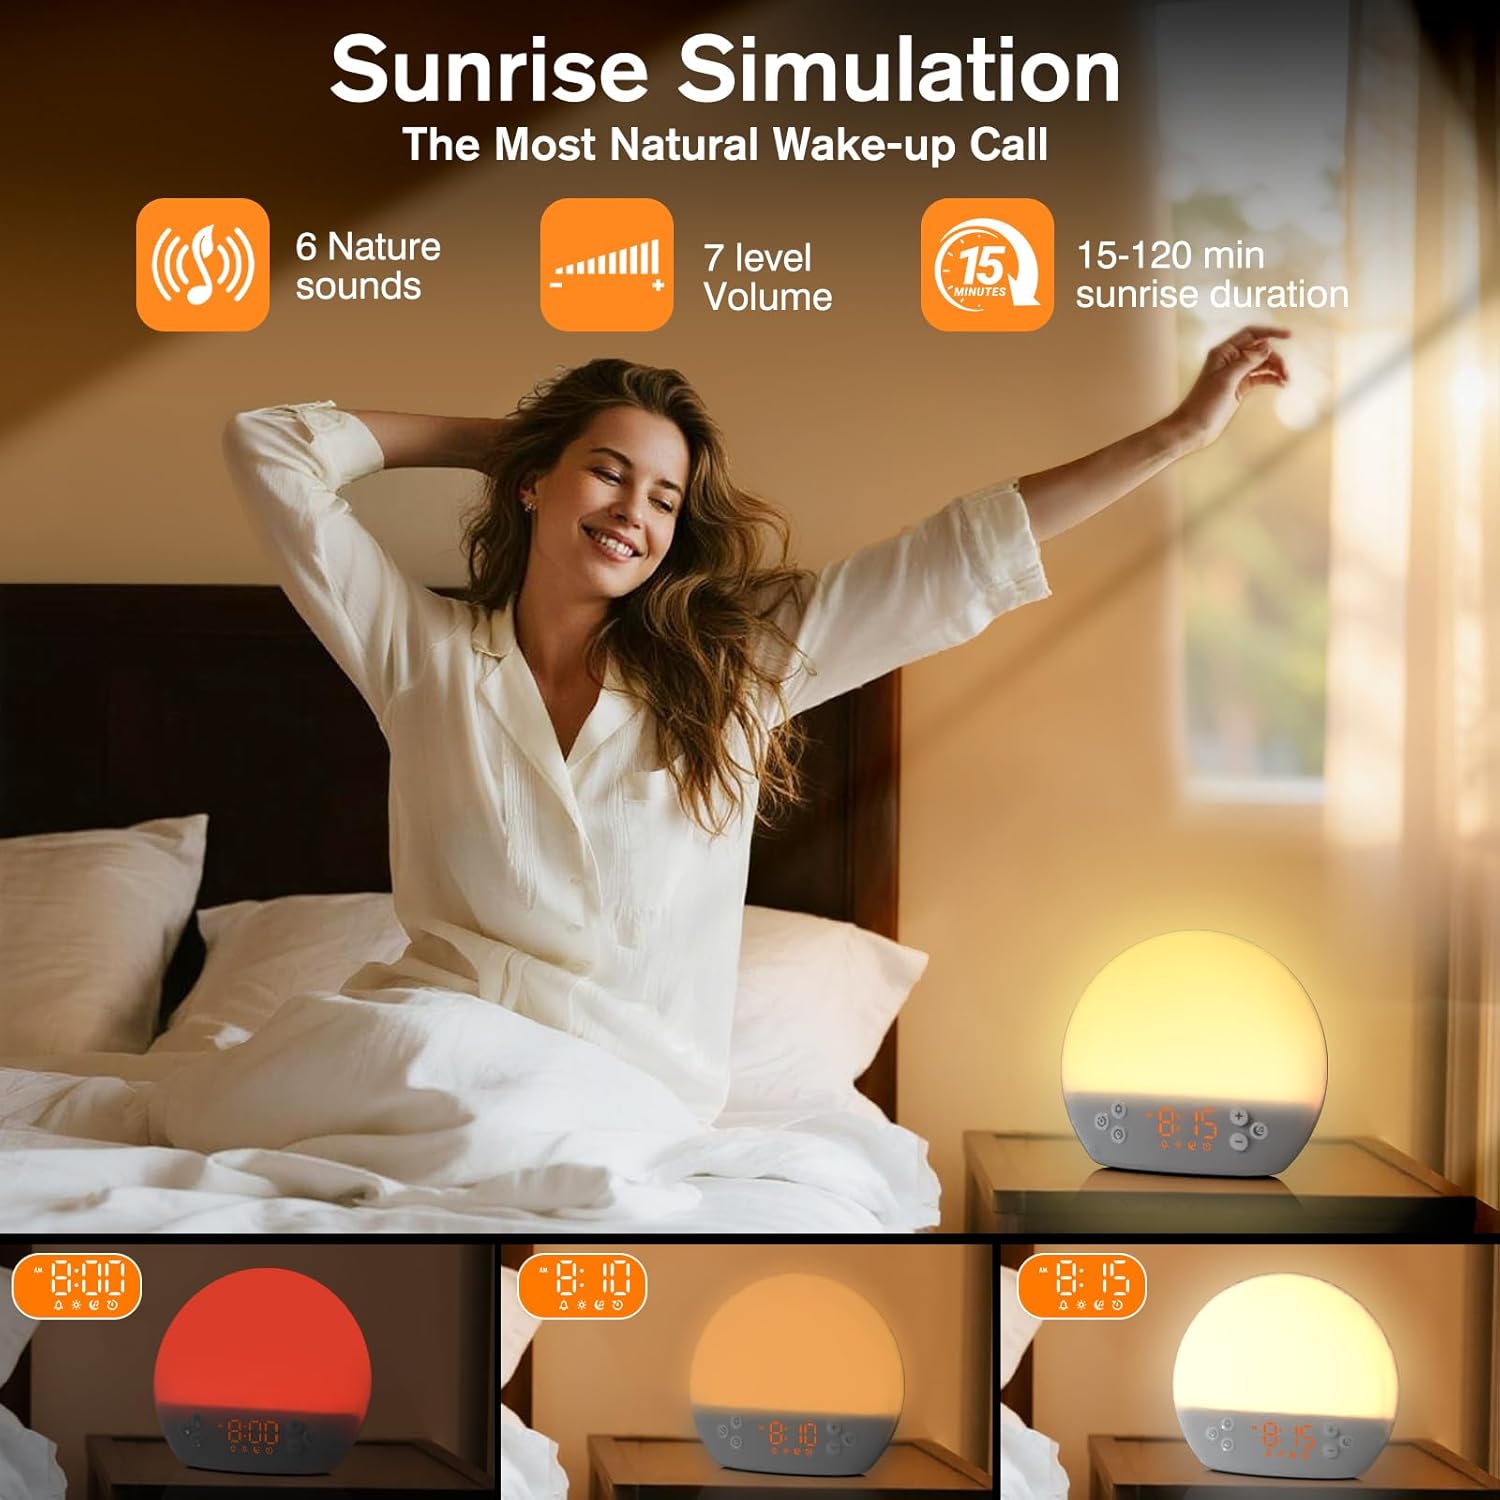
Image 2: Illustration of the sunrise simulation feature, where the light gradually brightens over a set period, mimicking a natural sunrise.
- Tekan ke Butang Penggera to select an alarm slot (e.g., Alarm 1, Alarm 2).
- Tekan dan tahan butang Butang Penggera for 3 seconds to enter alarm setting mode. The alarm hour digits will flash.
- Gunakan Tambahan (+) or Minus (-) Buttons untuk menetapkan jam penggera yang diingini.
- Tekan ke Butang Penggera to confirm the hour and set the minutes.
- Gunakan Tambahan (+) or Minus (-) Buttons untuk menetapkan minit penggera yang dikehendaki.
- Tekan ke Butang Penggera to confirm minutes and set the sunrise duration (15-120 minutes). This is the time before the alarm sound when the light will gradually brighten.
- Gunakan Tambahan (+) or Minus (-) Buttons to select the sunrise duration.
- Tekan ke Butang Penggera to confirm duration and select the wake-up sound.
- Gunakan Tambahan (+) or Minus (-) Buttons to cycle through the available wake-up sounds (e.g., nature sounds, melodies).
- Tekan ke Butang Penggera to confirm the sound and set the alarm volume.
- Gunakan Tambahan (+) or Minus (-) Buttons to adjust the alarm volume (7 levels).
- Tekan ke Butang Penggera one last time to save the alarm settings and activate the alarm. An alarm icon will appear on the display.
6.2 Fungsi Tunda
Apabila penggera berbunyi, tekan butang Butang Tunda/Cahaya to activate the snooze function. The alarm will pause for 9 minutes and then sound again. You can snooze multiple times.
6.3 Turning Off an Alarm
To turn off a sounding alarm, press any button other than the Butang Tunda/Cahaya. To deactivate an alarm completely, press the Butang Penggera until the alarm icon disappears from the display.
6.4 Night Light / Bedside Lamp Fungsi
The device can function as a dimmable night light with various colors.
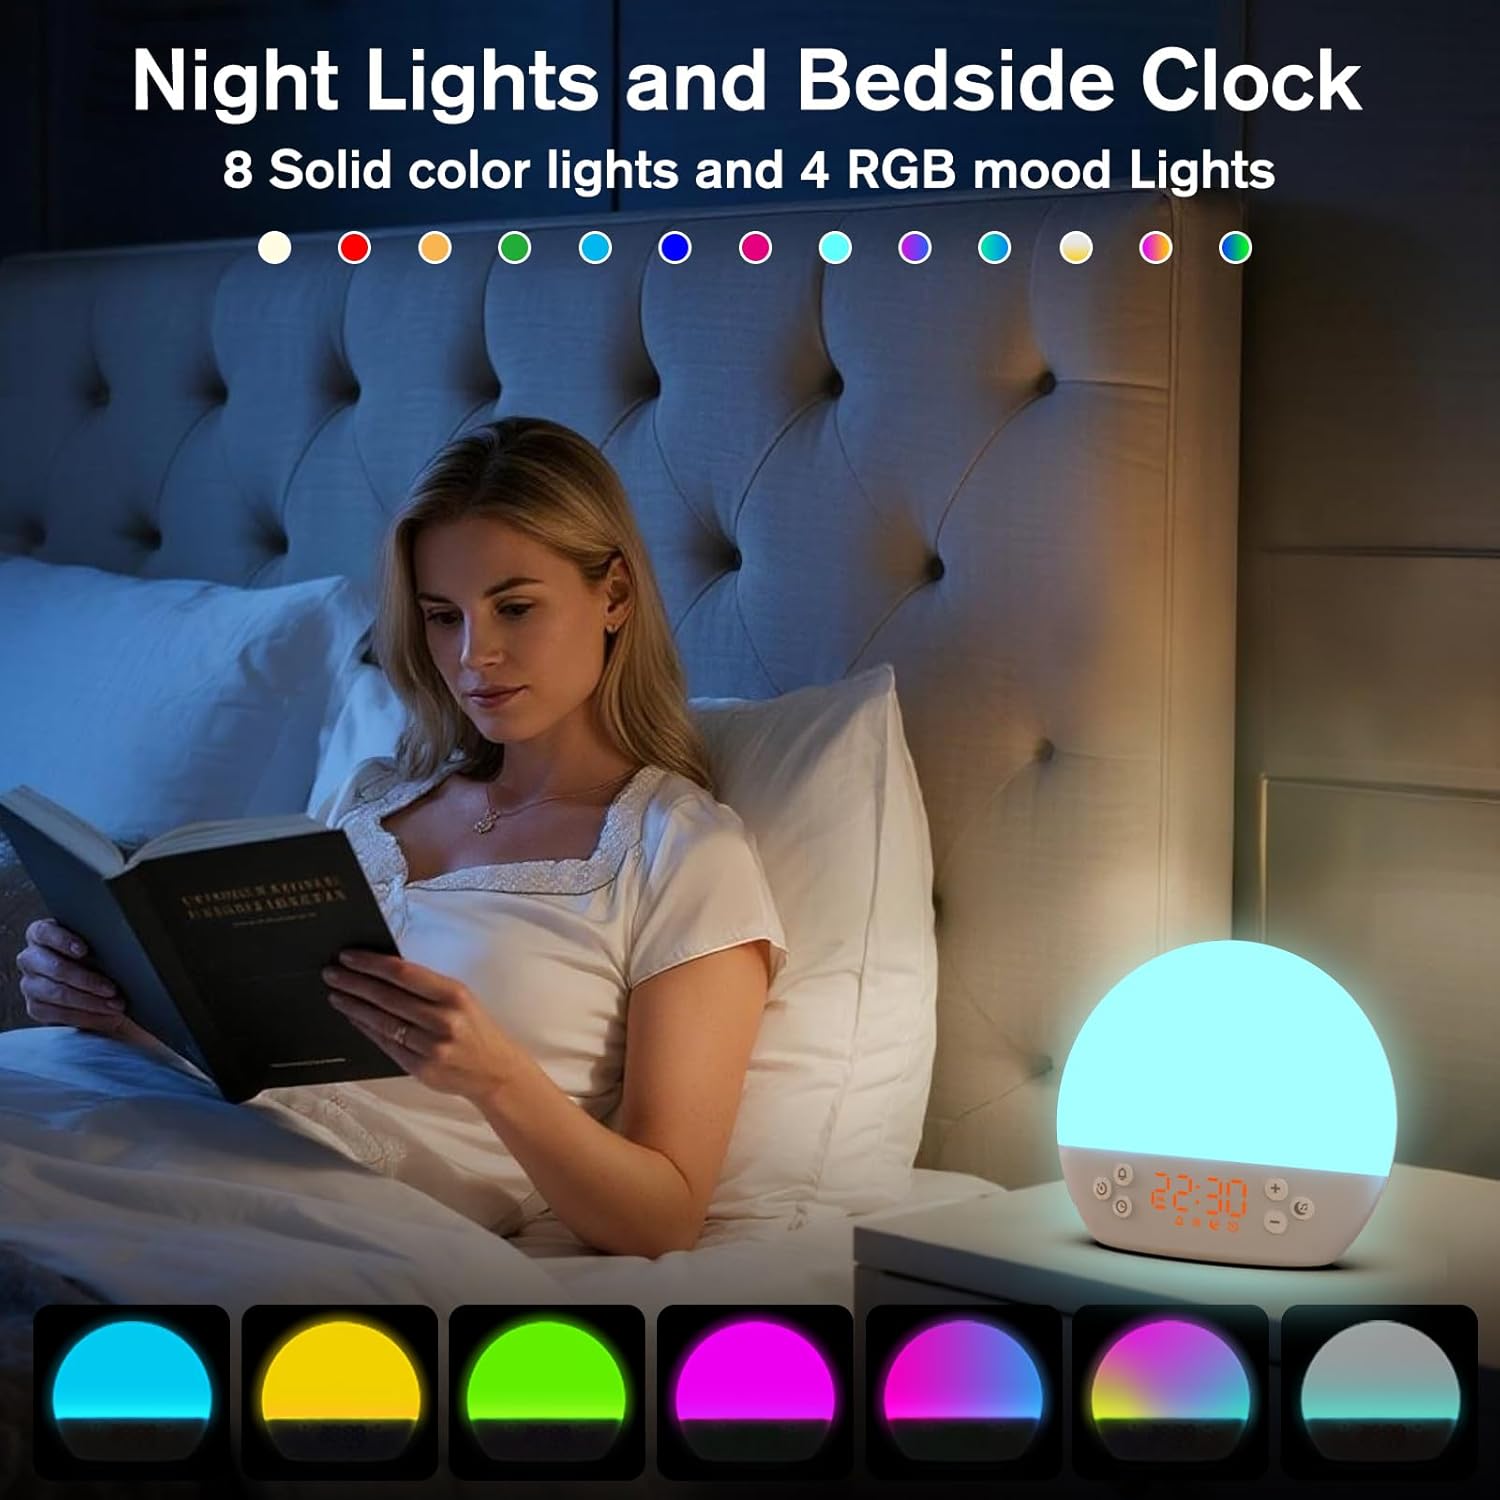
Image 3: The alarm clock used as a bedside lamp, displaying various solid colors and mood lighting options.
- Tekan ke Butang Tunda/Cahaya once to turn on the light.
- Tekan ke Butang Tunda/Cahaya repeatedly to cycle through different solid colors (8 options) and RGB mood lights (4 options).
- To adjust the brightness of the selected light, press and hold the Butang Tunda/Cahaya, kemudian gunakan Tambahan (+) or Minus (-) Buttons to increase or decrease brightness. Release the Butang Tunda/Cahaya apabila selesai.
- Tekan dan tahan butang Butang Tunda/Cahaya sekali lagi untuk mematikan lampu.
6.5 White Noise Machine & Soothing Sounds
The device offers 30 soothing sounds for relaxation or sleep aid.

Image 4: Visual representation of the 30 smooth sounds for sleep, including white noise, nature sounds, and lullabies.
- Tekan ke Butang Nota Muzik to turn on the sound machine. It will start playing the last selected sound.
- Tekan ke Butang Nota Muzik repeatedly to cycle through the 30 available sounds.
- Gunakan Tambahan (+) or Minus (-) Buttons untuk melaraskan kelantangan bunyi.
- To set a timer for the sound playback, press and hold the Butang Nota Muzik. The timer options (e.g., 15 min, 30 min, 60 min, continuous) will appear. Use the Tambahan (+) or Minus (-) Buttons to select a duration. The sound will automatically turn off after the selected time.
- Tekan dan tahan butang Butang Nota Muzik sekali lagi untuk mematikan mesin bunyi.
6.6 Sunset Simulation (Sleep Aid)
The sunset simulation feature gradually dims the light and can play soothing sounds to help you fall asleep.
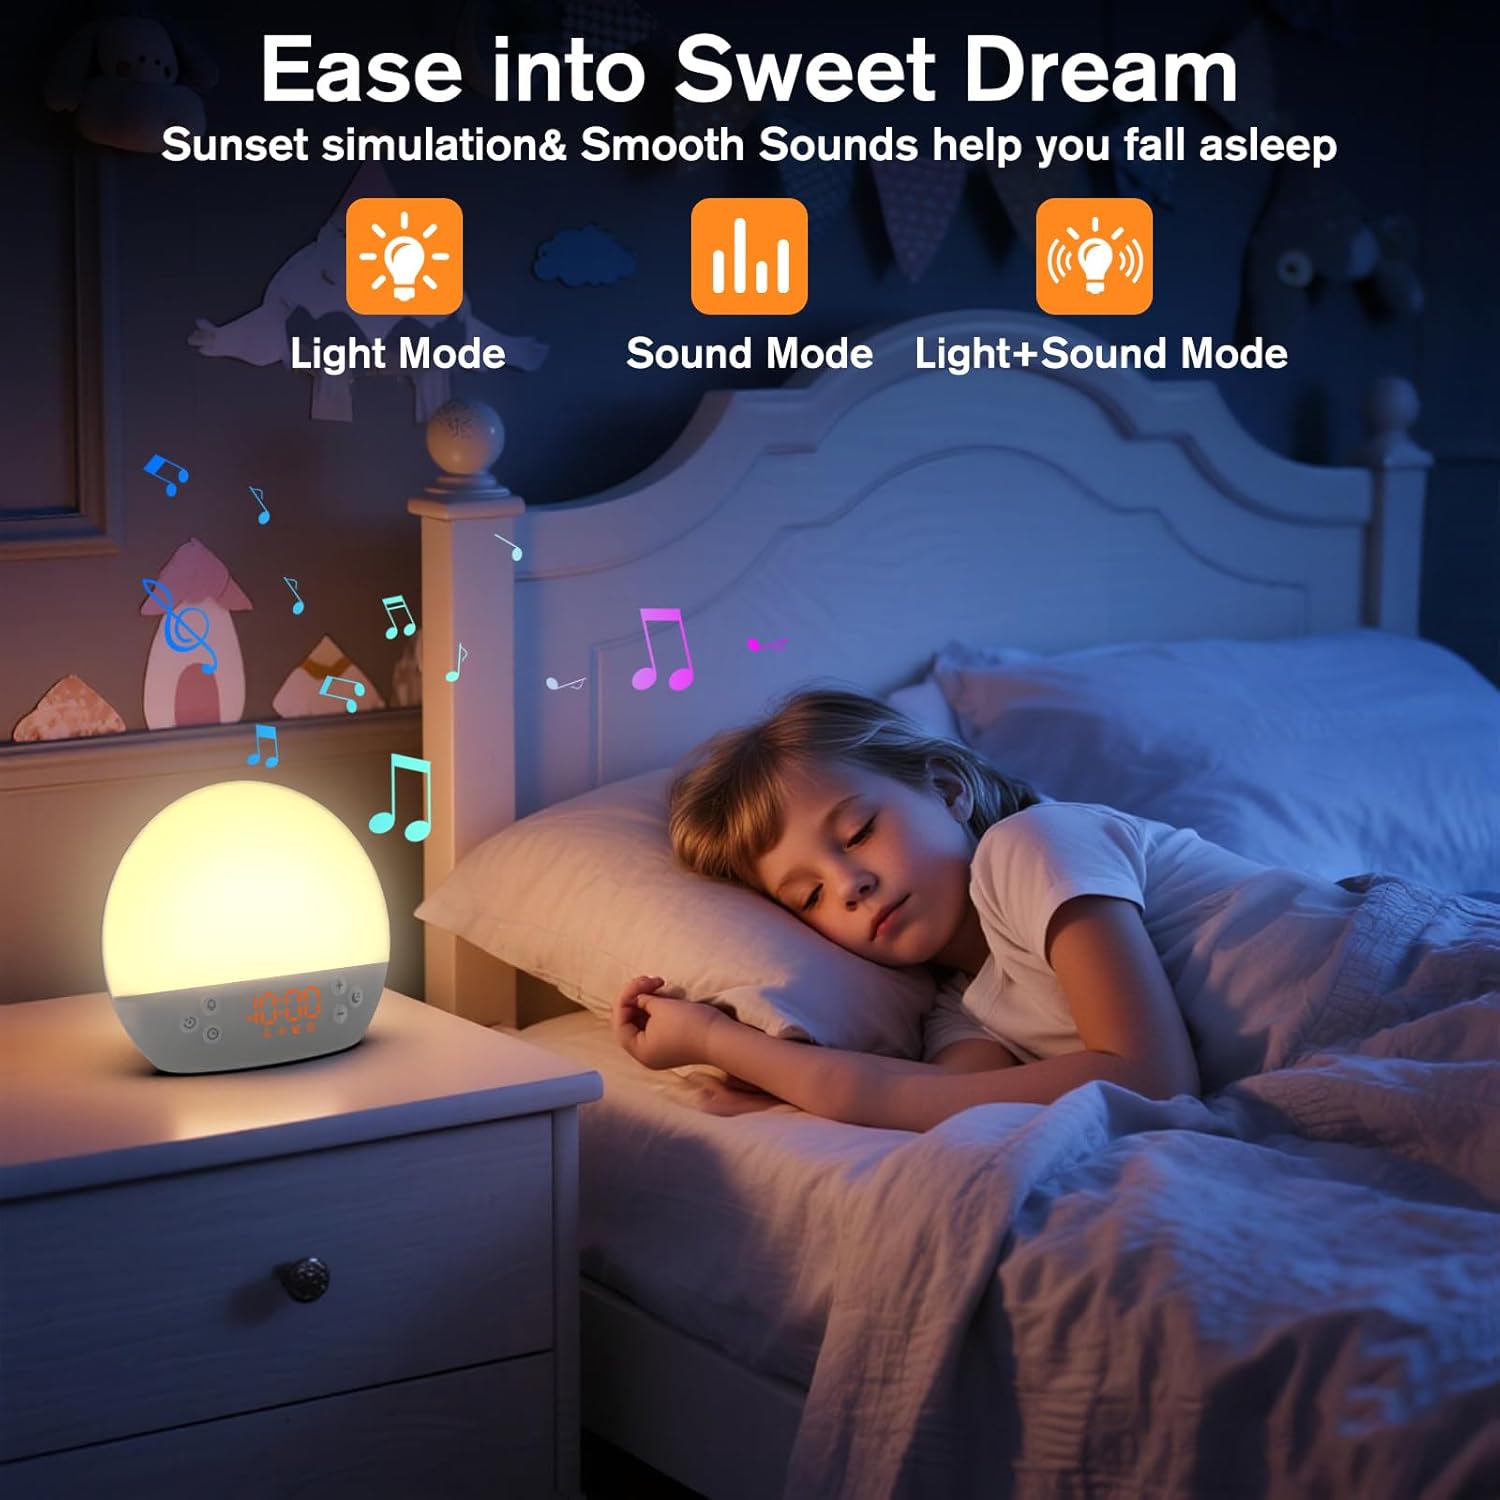
Image 5: The alarm clock in sunset simulation mode, providing a calming light and sound environment to aid sleep.
- To activate sunset simulation, press and hold the Butang Masa until the sunset icon appears.
- Gunakan Tambahan (+) or Minus (-) Buttons to set the duration of the sunset simulation (e.g., 15, 30, 60 minutes).
- Tekan ke Butang Masa to confirm the duration. You can then choose to have light only, sound only, or both light and sound.
- Gunakan Tambahan (+) or Minus (-) Buttons to select the desired mode (Light Mode, Sound Mode, Light+Sound Mode).
- If Light+Sound Mode is selected, you can choose a specific soothing sound and adjust its volume.
- Tekan ke Butang Masa again to start the sunset simulation. The light will gradually dim, and sounds will fade out over the set duration.
6.7 Pelarasan Kecerahan Paparan
The brightness of the digital time display can be adjusted to your preference.
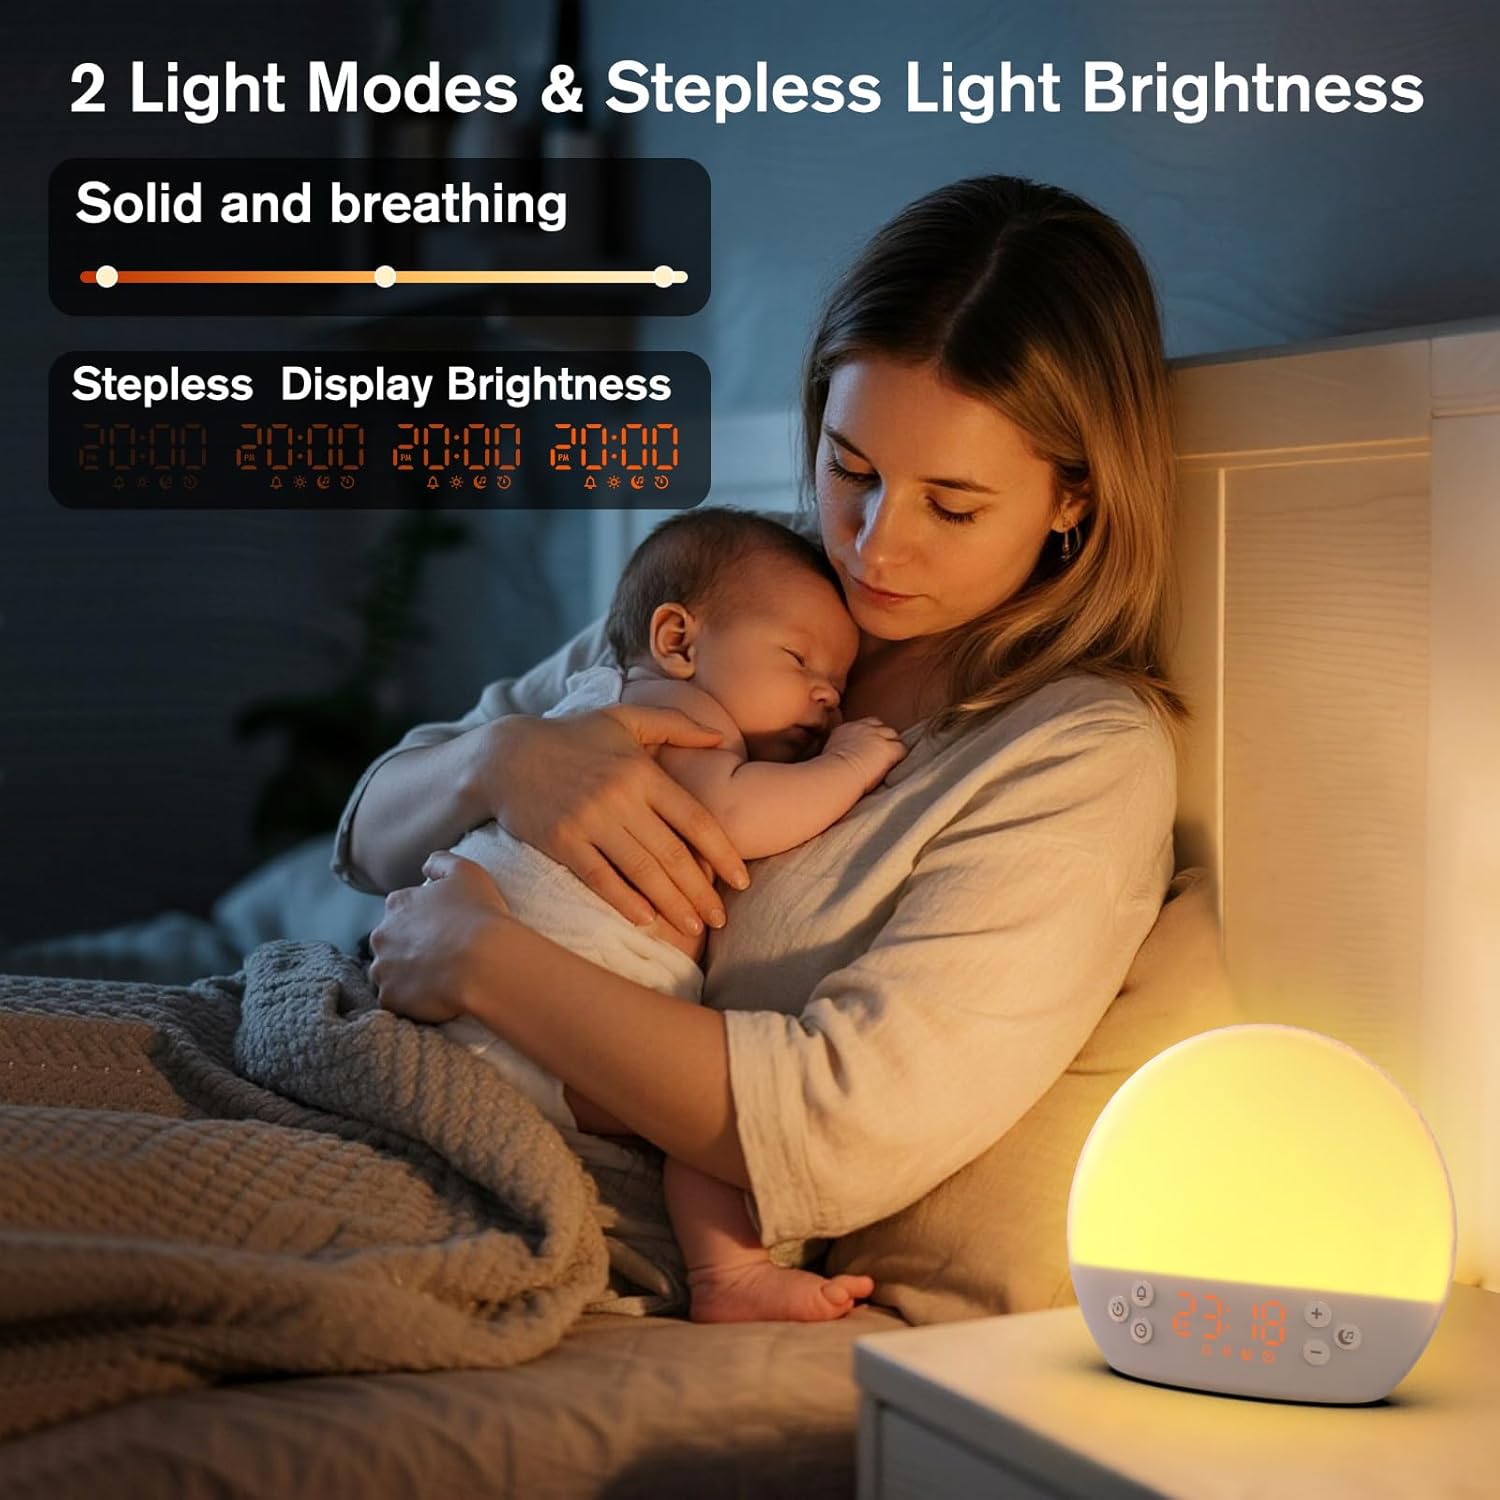
Image 6: The alarm clock demonstrating stepless display brightness adjustment, from very dim to bright.
Untuk melaraskan kecerahan paparan, tekan sebentar Butang Masa (do not hold). Each press will cycle through different brightness levels (e.g., bright, medium, dim, off). Select the level that suits your environment.
7. Penyelenggaraan
- Pembersihan: Unplug the device before cleaning. Use a soft, dry cloth to wipe the surface. Do not use abrasive cleaners or solvents.
- Storan: If not in use for an extended period, unplug the device and store it in a cool, dry place.
8. Penyelesaian masalah
| Masalah | Kemungkinan Punca | Penyelesaian |
|---|---|---|
| Peranti tidak dihidupkan. | Kabel kuasa tidak disambung dengan betul atau soket kuasa rosak. | Periksa sambungan kabel kuasa. Cuba salur kuasa yang lain. |
| Penggera tidak berbunyi. | Alarm not activated or volume is too low. | Ensure the alarm icon is visible on the display. Increase alarm volume during setup. |
| Cahaya tidak menyala. | Light function is off or brightness is set to minimum. | Tekan ke Butang Tunda/Cahaya to turn on. Adjust brightness using Tambahan (+) or Minus (-) Buttons while holding the Butang Tunda/Cahaya. |
| Sounds are not playing. | Sound machine is off or volume is too low. | Tekan ke Butang Nota Muzik to turn on. Increase volume using Tambahan (+) Butang. |
| Time display is too bright/dim. | Display brightness setting needs adjustment. | Tekan sebentar Butang Masa to cycle through display brightness levels. |
9. Spesifikasi
| Ciri | Perincian |
|---|---|
| Nama Model | MX9 |
| Jenama | KEPLUG |
| bahan | plastik |
| warna | putih |
| Sumber Kuasa | Elektrik Bertali |
| Berat Barang | 258 Gram (9.1 auns) |
| Dimensi Produk | 2.36 x 5.59 x 6.3 inci (6 x 14.2 x 16 cm) |
| Bilangan Sumber Cahaya | 2 |
| Ciri Khas | Volume boleh laras |
| Tempoh Simulasi Matahari Terbit | 15-120 minit |
| Bunyi yang Menenangkan | 30 pilihan |
| Tahap Kelantangan Penggera | 7 peringkat |
10. Waranti dan Sokongan
Your KEPLUG MX9 Sunrise Alarm Clock is covered by a standard manufacturer's warranty. For specific warranty details, please refer to the product packaging or contact KEPLUG customer support. If you encounter any issues not covered in the troubleshooting section, or require further assistance, please reach out to our customer service team through the retailer where you purchased the product or visit the official KEPLUG webtapak untuk maklumat hubungan sokongan.


