Arahan Keselamatan Penting
Sila baca semua arahan dengan teliti sebelum menggunakan perkakas. Simpan manual ini untuk rujukan masa hadapan.
- Ensure the appliance is placed on a stable, level surface away from heat sources.
- Jangan rendam perkakas, kord kuasa, atau palamkan ke dalam air atau cecair lain.
- Cabut plag perkakas daripada salur keluar kuasa apabila tidak digunakan dan sebelum membersihkan.
- Jangan kendalikan perkakas dengan kord atau palam yang rosak, atau selepas perkakas tidak berfungsi atau rosak dalam apa jua cara.
- Pengawasan rapi diperlukan apabila sebarang perkakas digunakan oleh atau berhampiran kanak-kanak.
- Gunakan hanya aksesori yang disyorkan oleh pengilang.
- Melecur mungkin berlaku jika penutup tangki air dibuka semasa kitaran pembuatan bir.
- Always ensure the water tank and coffee grounds container are correctly installed before operation.
Produk Selesaiview
The Chef Robot Automatic Espresso Machine AM7203 is designed to provide a versatile coffee experience, allowing you to enjoy various cafe-quality beverages at home or in the office. It features an integrated grinder, milk frother, and an intuitive touch screen interface for ease of use.
Komponen Utama

Figure 1 Description: This image displays the Chef Robot Automatic Espresso Machine in gray, actively dispensing coffee into a glass. The touch screen control panel is visible at the top, showing various beverage options. To the right, the integrated milk tank is attached, filled with milk. The machine features a sleek, modern design with stainless steel accents.

Figure 2 Description: Gambar rajah ini memberikan butiran view of the espresso machine's components, including the coffee bean container, control panel, water tank assembly, used coffee grounds container, detachable power cord, removable milk tank, drip tray, and cup mat. Each part is clearly labeled to assist with identification and understanding of the machine's structure.
Persediaan
1. Membongkar
Carefully remove all packaging materials and ensure all components are present. Clean all removable parts with warm, soapy water before first use.
2. Pemasangan Tangki Air

Figure 3 Description: This image highlights the large capacity of the water tank (1.5L) and the milk tank (300ml), along with the overall dimensions of the espresso machine. The water tank is located on the left side of the machine. To install, slide the water tank assembly into its designated slot on the left side of the machine. Fill the 1.5L water tank with fresh, cold water. Ensure it is securely in place to avoid alerts.
3. Coffee Bean Hopper
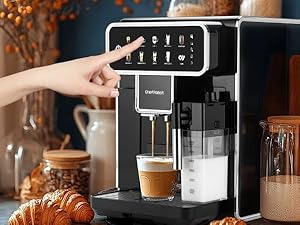
Figure 4 Description: This image shows a close-up of the coffee bean hopper with a built-in burr grinder. The grind adjustment knob is visible within the hopper. Open the lid of the coffee bean container located on top of the machine. Pour fresh coffee beans into the hopper. Close the lid securely.
4. Milk Tank Assembly
Attach the removable milk tank to the designated slot on the front-right side of the machine. Ensure it clicks into place. Fill the milk tank with your desired milk (up to 300ml).
Arahan Operasi
1. Menghidupkan/Mematikan
Press the power button on the touch screen to turn the machine on or off. The machine will perform an automatic rinse cycle upon startup.
2. Selecting a Beverage

Figure 5 Description: This image displays the machine's touch screen interface, showing a variety of coffee options including Espresso 1 & 2, Cappuccino 1 & 2, Latte 1 & 2, Milk Foam 1 & 2, Americano, and a Clean function. Select your desired beverage directly from the intuitive touch screen interface.

Figure 6 Description: A hand is shown interacting with the touch screen of the espresso machine, selecting a beverage. This illustrates the ease of use of the intuitive interface for choosing coffee styles and milk foam levels.
3. Adjusting Grind Level
The machine features a 4-level grind control. Turn the grind adjustment knob inside the coffee bean hopper to select your preferred grind level, tailored for espresso, cappuccino, Americano, or latte. Adjusting the grind level should ideally be done while the grinder is running to prevent damage.
4. Adjusting Coffee Strength/Volume
After selecting a beverage, the touch screen may allow you to customize the coffee strength (amount of coffee grounds) and volume (amount of water/milk). Follow the on-screen prompts to adjust these settings to your preference.
5. Membancuh Kopi
Place your cup under the dispenser. Press the 'Play' or 'Start' button on the touch screen. The machine will automatically grind the beans, brew the coffee, and dispense it into your cup. For milk-based drinks, it will also froth and dispense milk.
6. Buih Susu
For milk-based beverages, ensure the milk tank is filled and properly attached. The machine will automatically froth and dispense milk according to the selected beverage. You can adjust the milk foam level via the touch screen options.
Penyelenggaraan
1. Fungsi Pembersihan Diri
The machine has an automatic self-cleaning function. Select the 'Clean' option on the touch screen to initiate a cleaning cycle. This helps maintain performance and ensures residue-free brewing.
2. Emptying Coffee Grounds Container

Figure 7 Description: This image illustrates the five intelligent reminder functions of the espresso machine, including alerts for water scarcity, full coffee grounds container, milk tank installation, used grounds container installation, and water tank installation. The reminder for a full coffee grounds container is shown as a blinking indicator. The machine will alert you when the coffee grounds container is full. Slide out the drip tray and the integrated grounds container from the front of the machine. Empty the used coffee grounds and clean the container. Reinsert securely.
3. Cleaning the Milk System
The removable milk tank and its components should be cleaned regularly. Disassemble the milk tank and wash all parts with warm, soapy water. Rinse thoroughly and reassemble. The machine also has an automatic cleaning function for the milk system, which can be activated via the touch screen.
4. Penyahkelasan
The machine will prompt you when descaling is required. Follow the instructions in the full manual or on the screen to perform the descaling process using a suitable descaling solution.
Intelligent Reminder Functions
The Chef Robot Espresso Machine is equipped with 5 intelligent reminder functions to ensure optimal operation:
- Water Scarcity: An indicator blinks when the liquid level sensor detects low water.
- Full Coffee Grounds Container: The indicator for the full coffee grounds container will start blinking after brewing approximately 8 cups of coffee. Only the power switch and cleaning function will be active at this time.
- Pemasangan Tangki Susu: If the milk tank is not properly installed or is missing, milk-related functions will not work, and a blinking reminder for the milk tank will appear.
- Used Grounds Container Installation: A prompt will appear if the container is not installed or not properly installed.
- Pemasangan Tangki Air: A reminder will appear if the water tank is not installed or not installed correctly.
Menyelesaikan masalah
If you encounter any issues, please refer to the following common solutions:
- Tiada Kopi yang dikeluarkan: Check if the water tank is full and correctly installed. Ensure the coffee bean hopper has enough beans. Verify the brewing unit is properly inserted.
- Susu Tidak Berbuih: Ensure the milk tank is clean and properly assembled. Check that the milk spout is not clogged. Use fresh, cold milk.
- Mesin Tidak Dihidupkan: Periksa sama ada kord kuasa dipasang dengan selamat ke soket yang berfungsi.
- Error Message on Screen: Refer to the Intelligent Reminder Functions section or the full product manual for specific error code meanings and solutions.
- Kopi Tidak Cukup Panas: Ensure the machine has preheated fully. Pre-warm your cups before brewing.
Spesifikasi
| Ciri | Spesifikasi |
|---|---|
| Jenama | Robot Chef |
| Nama Model | Coffee Maker (AM7203) |
| warna | Kelabu |
| Dimensi Produk | 20"D x 12"W x 15"H |
| Berat Barang | 28 paun |
| Kapasiti Tangki Air | 1.5 Liter |
| Kapasiti Tangki Susu | 300 ml |
| Kawalan Kisar | 4 Peringkat |
| Ciri Khas | Milk Frother, Touch Screen, Self-Cleaning |
Waranti dan Sokongan
This Chef Robot product is covered by a standard manufacturer's warranty against defects in materials and workmanship. For specific warranty details, please refer to the warranty card included with your product or contact Chef Robot customer support. For technical assistance or service inquiries, please visit the official Chef Robot webtapak atau hubungi bahagian perkhidmatan pelanggan mereka.
Video Produk Rasmi
Watch these official product videos for visual guides and demonstrations of your Chef Robot Automatic Espresso Machine.
High-End, Easy Set-Up, Easy-Use, Cappuccino, Espresso, Americano, FULLY AUTOMATIC
Video ini memberikan gambaran menyeluruhview of the Chef Robot Automatic Espresso Machine, demonstrating its easy setup and use for preparing various beverages like cappuccino, espresso, and Americano. It highlights the fully automatic features of the machine.
A Great Entrant to Automatic Coffee Brewers
This video showcases the Chef Robot Automatic Espresso Machine as a great option for those new to automatic coffee brewing. It covers general operation and user experience, emphasizing its accessibility for beginners.
Very nice SuperAutomatic coffee machine
This video offers another perspective on the Chef Robot Automatic Espresso Machine, highlighting its super-automatic capabilities and overall user satisfaction. It provides a general demonstration of the machine's features.


