1. Pengenalan
The NDI ND0988 Stud Detector utilizes advanced electronic signals technology to detect the precise location of studs hidden behind walls. This tool is ideal for indoor decoration wiring, installation of electric equipment such as air conditioners and range hoods, and detecting metal in wooden furniture and wood product structures. It offers clear audio and visual indicators to ensure safe drilling and hanging, making it perfect for home improvement tasks like hanging shelves or installing appliances.
2. Produk Lebihview
The NDI ND0988 is designed for user-friendly operation and accurate results. Below are its key features and components.
- Accurate Stud Detection: Locates wooden studs with precision at depths of 12mm, 25mm, and 38mm.
- User-Friendly LCD Interface: Bright backlit LCD screen displays detection strength, battery level, and stud depth indicators.
- Multiple Depth Modes: Three depth settings (0.5", 1.0", and 1.5") adapt to various wall thicknesses.
- Battery Indicator & Power Saving: Features a battery level indicator and automatically shuts down after 2 minutes of inactivity.
- Reka Bentuk Padat & Tahan Lama: Lightweight, easy to handle, and built to withstand everyday use.
Komponen Produk

Figure 1: NDI ND0988 Stud Detector with labeled components.
- LCD bercahaya belakang: Displays all operational information.
- Butang Kuasa: Menghidupkan/mematikan peranti.
- Butang Mod: Switches between different detection modes (depths).
- Detection Button: Press and hold to initiate scanning.
- Petak Bateri: Menempatkan bateri AAA.
3. Persediaan
Pemasangan Bateri
The NDI ND0988 requires two AAA batteries (not included). Follow these steps to install them:
- Cari penutup petak bateri di bahagian belakang peranti.
- Luncurkan penutup terbuka.
- Masukkan dua bateri AAA, pastikan kekutuban (+/-) betul.
- Luncurkan penutup petak bateri kembali ke tempatnya sehingga ia berbunyi dengan selamat.
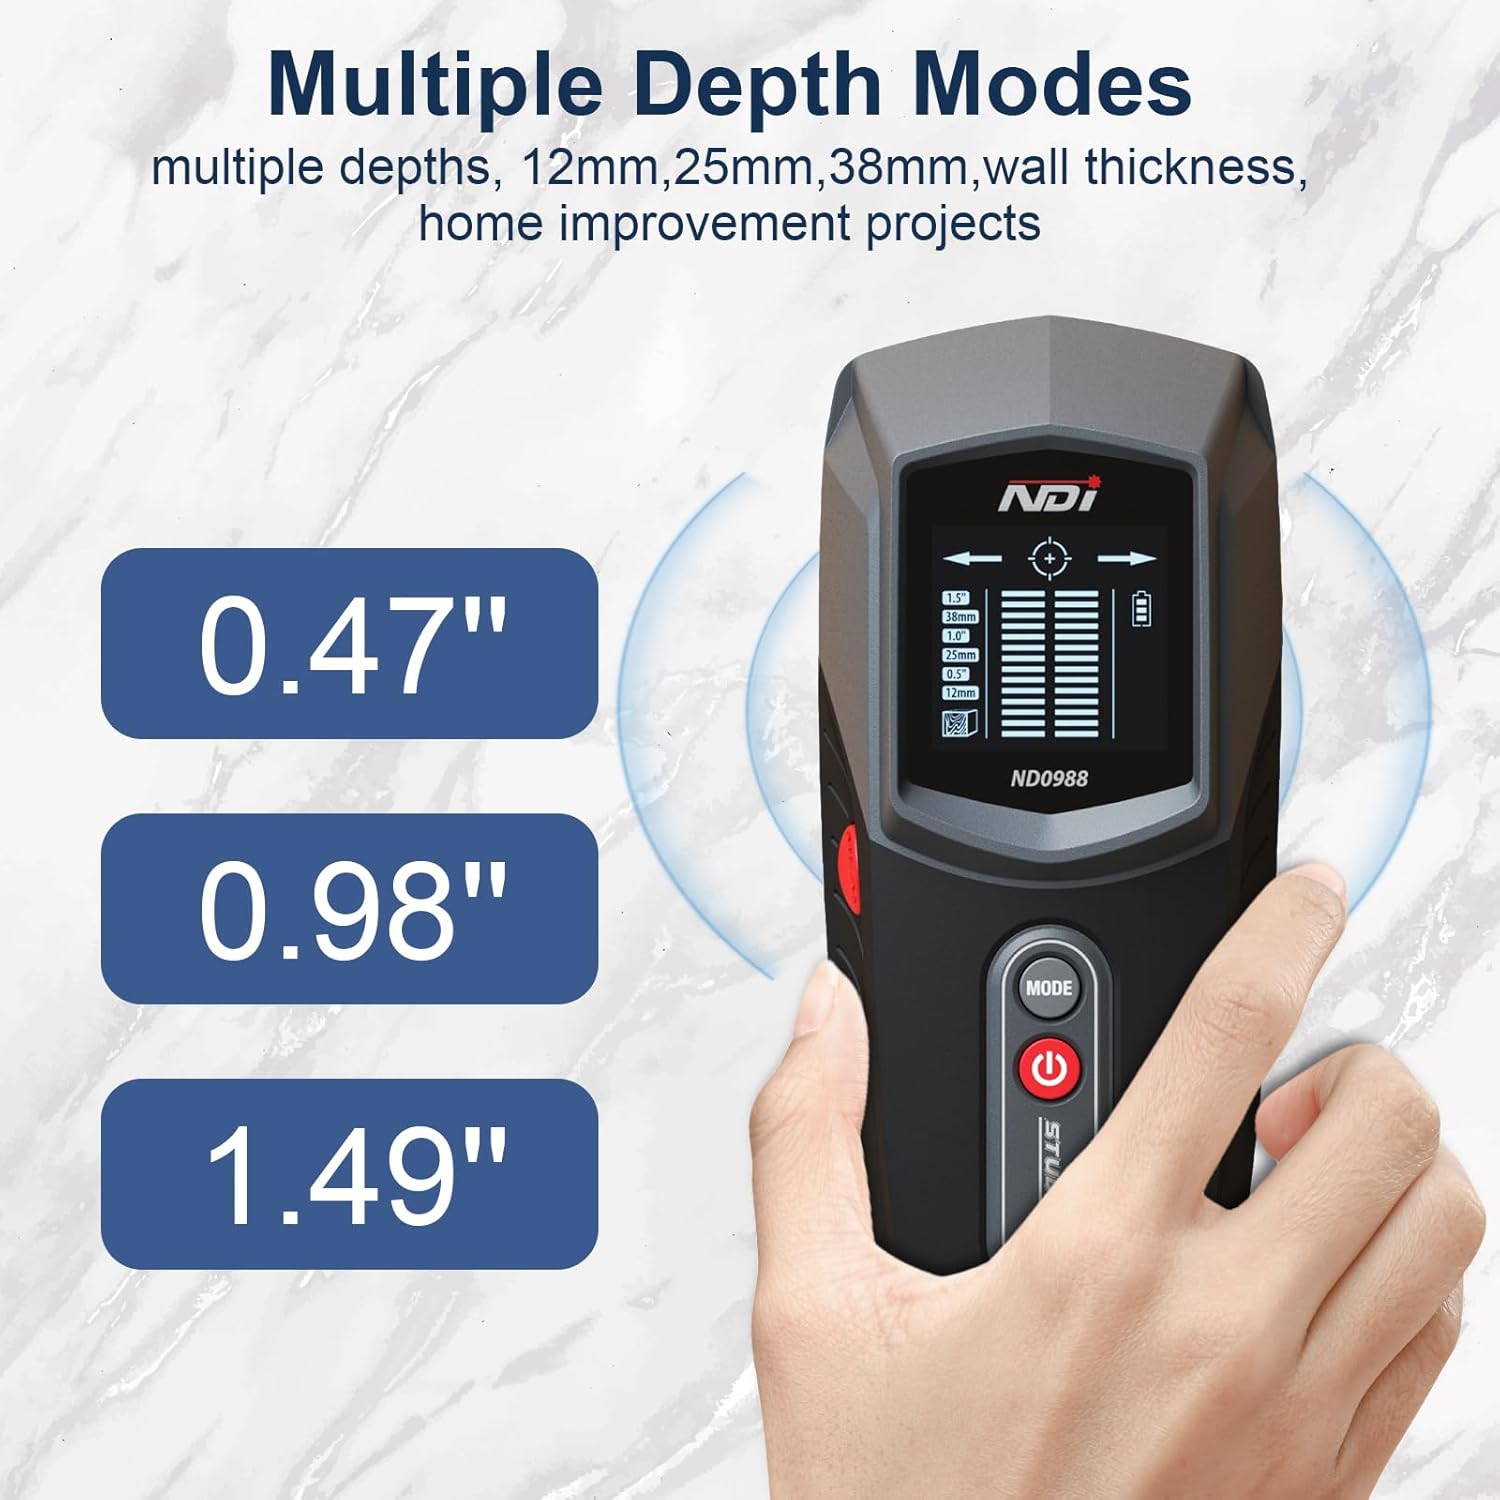
Figure 2: NDI ND0988 Stud Detector.
4. Arahan Operasi
Hidupkan/Mati Kuasa
- Untuk Menghidupkan: Short press the Power button. The tool will display full information on the LCD screen.
- Untuk Mematikan: Long press the Power button until the screen turns off. The device also features an automatic shutdown after 2 minutes of inactivity to preserve battery life.
Mode Selection and Unit Switch
- To Switch Depth Modes: Short press the MODE button to cycle through the available stud detection depths (12mm, 25mm, 38mm).
- To Switch Units: Long press the MODE button to switch between Metric (mm) and Imperial (inches) units.
Stud Detection Procedure
For accurate results, ensure the device is calibrated before scanning.
- Place the detector flat against the wall surface where you intend to scan.
- Press and hold the Detection button (MEAS). The device will calibrate automatically. Wait for the calibration to complete (usually a short beep and stable display).
- Slowly slide the detector horizontally across the surface. Keep the device flat against the wall.
- When a stud is detected, the LCD screen will show signal strength indicators, and an audible beep will sound. Arrows on the display will guide you towards the center of the stud.
- Mark the center of the stud once the display indicates maximum signal strength and a bullseye icon.
- Repeat the scan from the opposite direction to confirm the stud's edges and center for maximum accuracy.
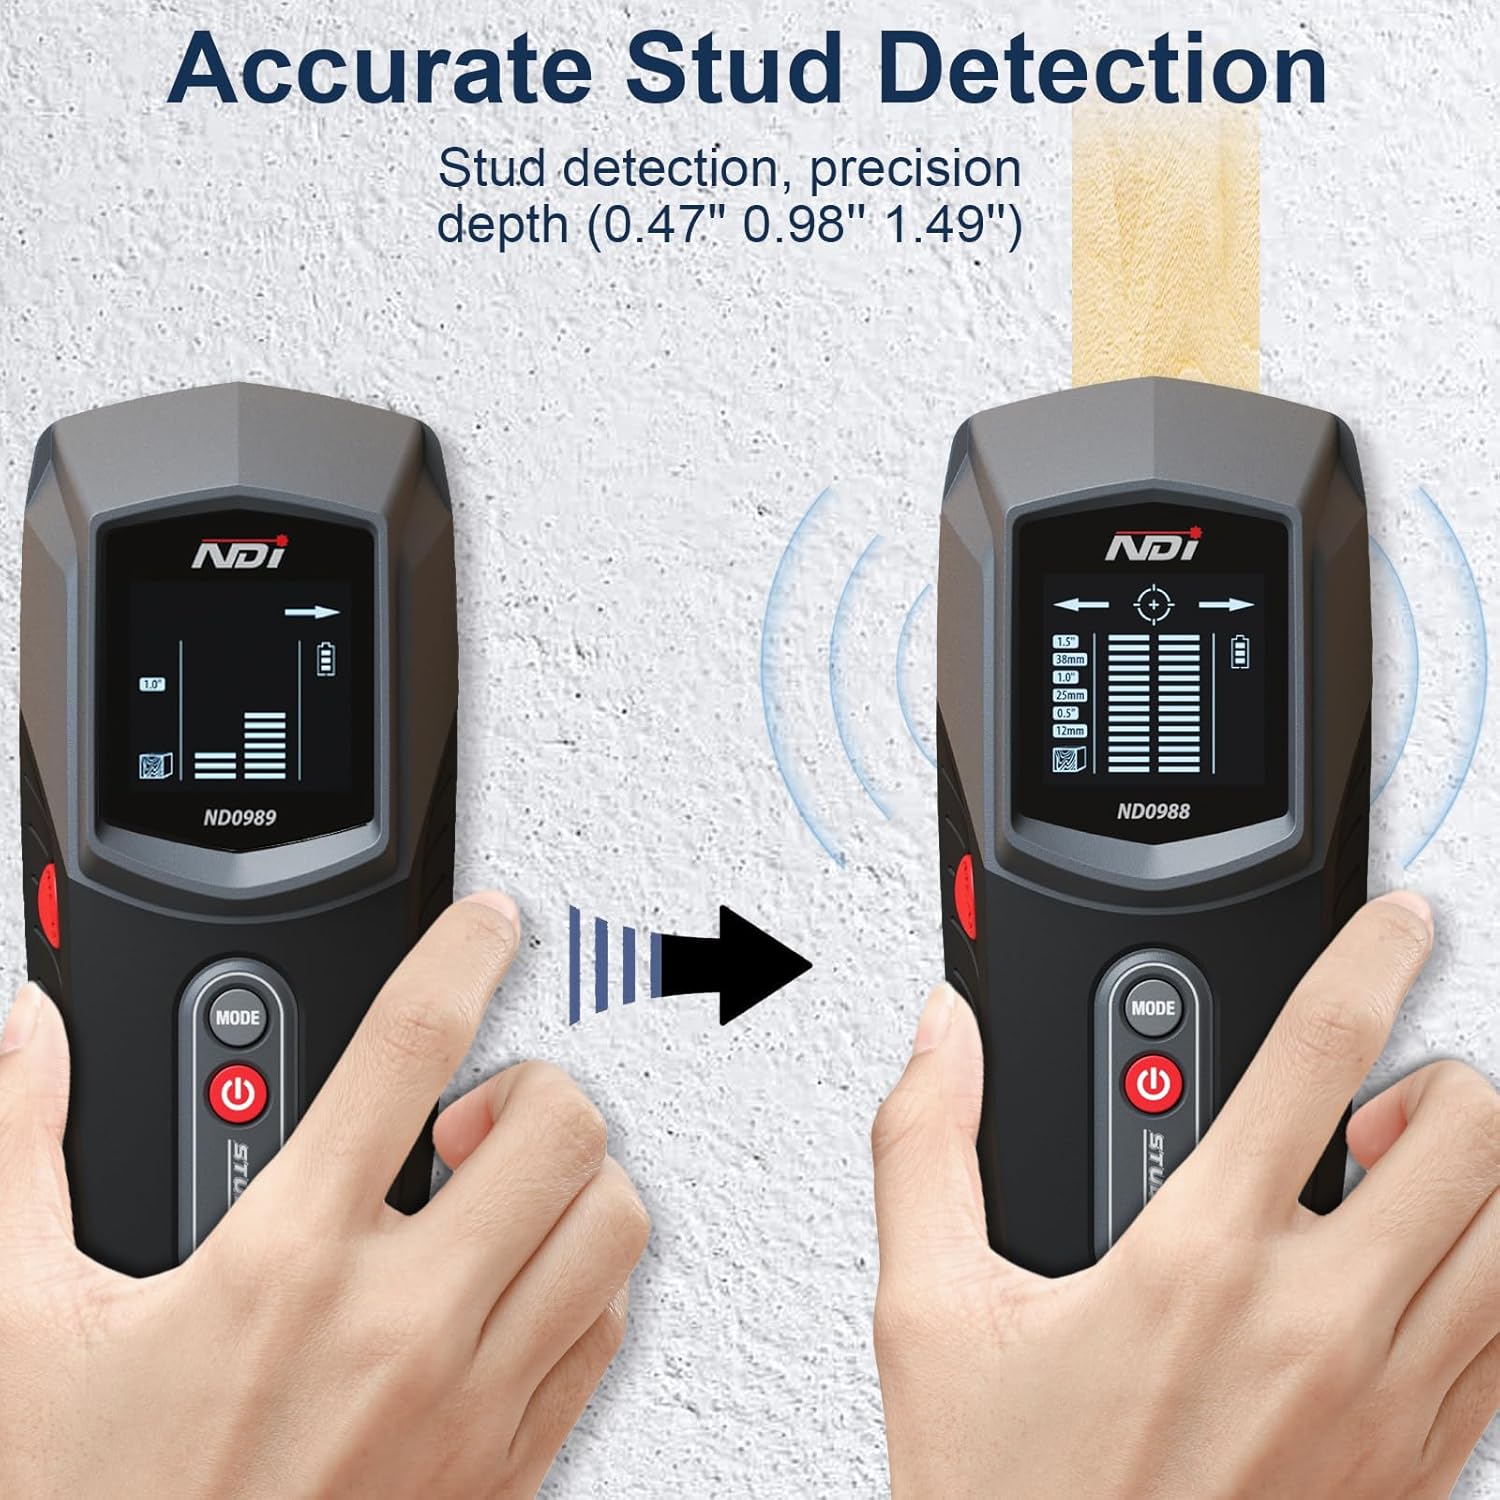
Figure 3: Accurate Stud Detection in progress.
Video 1: Demonstration of NDI ND0988 Stud Detector in action, showing detection of studs behind a wall.
5. Depth Modes
The NDI ND0988 offers three distinct depth modes to accommodate various wall thicknesses and material types:
- Mode 1 (12mm / 0.5"): Ideal for detecting studs closer to the surface.
- Mode 2 (25mm / 1.0"): Suitable for standard wall thicknesses.
- Mode 3 (38mm / 1.5"): For deeper stud detection through thicker materials.
Select the appropriate mode based on your wall's construction for optimal accuracy.

Figure 4: Multiple Depth Modes for versatile scanning.
6. Maklumat Bateri
The NDI ND0988 is powered by two AAA batteries. The device includes a battery level indicator on the LCD screen to inform you when the batteries are running low and need replacement. To conserve battery life, the tool automatically shuts down after 2 minutes of inactivity.
Petua Keselamatan Bateri
- Always remove batteries when storing the product for extended periods.
- Buang bateri terpakai dengan betul mengikut peraturan tempatan.
- Jangan dedahkan bateri kepada suhu tinggi atau cahaya matahari langsung.
7. Penyelenggaraan
To ensure the longevity and optimal performance of your NDI ND0988 Stud Detector, follow these maintenance guidelines:
- Pembersihan: Lap peranti dengan kain lembut dan kering. Jangan gunakan pembersih atau pelarut yang melelas.
- Storan: Store the detector in a cool, dry place away from direct sunlight and extreme temperatures. Remove batteries if storing for an extended period.
- Pengendalian: Elakkan daripada menjatuhkan peranti atau terkena hentaman kuat, kerana ini boleh merosakkan komponen dalaman.
8. Penyelesaian masalah
If you encounter issues with your NDI ND0988 Stud Detector, refer to the following common troubleshooting tips:
- Bacaan Tidak Tepat: Ensure the device is properly calibrated by pressing it flat against the wall before scanning. Avoid scanning over wet paint or wallpaper, which can affect accuracy.
- Tiada Pengesanan: Check if the batteries are correctly installed and have sufficient charge. Try switching to a different depth mode. Ensure the device is held flat against the wall and moved slowly.
- Peranti Tidak Dihidupkan: Verify that the batteries are new or fully charged and inserted with correct polarity. If the issue persists, replace the batteries.
For further assistance, please contact NDI customer support.
9. Spesifikasi
| Ciri | Spesifikasi |
|---|---|
| Jenama | NDI |
| Nombor Model | ND0988 |
| warna | Kelabu |
| bahan | plastik |
| Sumber Kuasa | Dikuasakan Bateri (2 x AAA) |
| Berat Barang | 8 auns |
| Dimensi Produk | 2.7"L x 1.6"W x 6.4"H |
| Kedalaman Pengesanan Stud | 12mm (0.5"), 25mm (1.0"), 38mm (1.5") |
| Paparan | LCD bercahaya belakang |
| Makluman Audio | ya |
10. Waranti dan Sokongan
NDI products are manufactured to high-quality standards. For information regarding warranty coverage, product support, or to purchase replacement parts, please refer to the contact information provided with your product packaging or visit the official NDI webtapak. Sila simpan bukti pembelian anda untuk sebarang tuntutan waranti.


