1. Pengenalan
This manual provides comprehensive instructions for the safe and effective use of your Artfone Smart_500 Smartphone. Please read this manual thoroughly before operating the device and retain it for future reference. The Artfone Smart_500 is designed with ease of use in mind, featuring large icons, a clear display, and essential functions for communication.
2. Peranti Lebihview
Familiarize yourself with the components of your Artfone Smart_500 smartphone.

Imej 2.1: Depan dan belakang view of the Artfone Smart_500 smartphone placed in its charging dock. The front displays a simplified interface with large icons for Phone, Contacts, Camera, and Photos. The back shows the camera module and the SOS button.

Imej 2.2: Berbilang views of the Artfone Smart_500 smartphone, illustrating its front, back, and side profiles. This provides a comprehensive look at the device's physical design and button placement.
Komponen Utama:
- Paparan Hadapan: 5-inch IPS screen for clear viewing dan interaksi.
- Butang Fizikal: Dedicated buttons for call answer/end, volume control, and power.
- Butang SOS: Located on the rear for emergency alerts.
- Kamera: Rear 13MP camera with LED flash, Front 5MP camera.
- Port Pengecasan: Port USB-C di bahagian bawah.
- Stesen Pengecasan: Included for convenient desktop charging.
3. Persediaan
3.1 Pemasangan Kad SIM dan Kad Mikro SD
- Matikan peranti sepenuhnya.
- Locate the SIM/Micro SD card tray on the side of the phone.
- Gunakan alat ejektor SIM yang disediakan untuk membuka dulang.
- Carefully place your Nano-SIM card(s) and/or Micro SD card into the designated slots. Ensure correct orientation.
- Tolak dulang perlahan-lahan ke dalam telefon sehingga ia berbunyi pada tempatnya.
3.2 Kuasa Awal Hidup
- Tekan dan tahan butang Kuasa (biasanya di sebelah kanan) sehingga skrin menyala.
- Ikut gesaan pada skrin untuk melengkapkan persediaan awal, termasuk pemilihan bahasa, sambungan Wi-Fi dan persediaan akaun Google.
3.3 Mengecas Peranti
The Artfone Smart_500 can be charged using the included USB-C cable or the charging station.
- Menggunakan Stesen Pengecasan: Place the phone into the charging station, ensuring the charging contacts align. The phone will indicate that it is charging.
- Menggunakan Kabel USB-C: Connect the USB-C cable to the phone's charging port and the other end to a compatible power adapter.
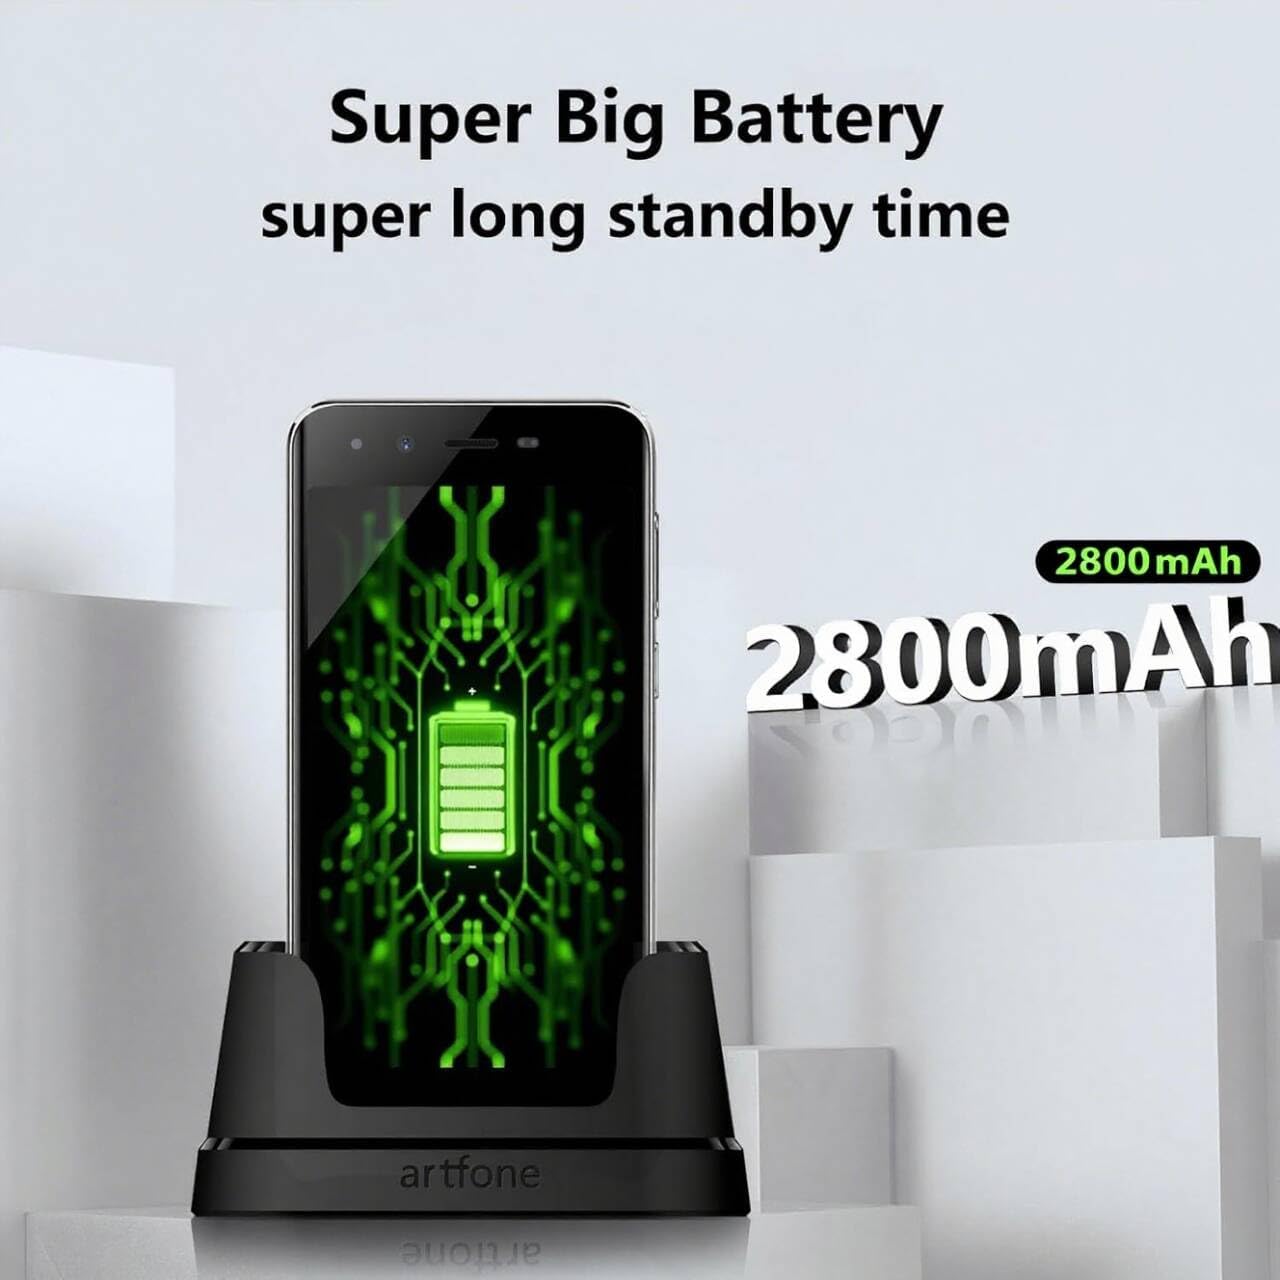
Image 3.1: The Artfone Smart_500 smartphone in its charging dock, displaying a battery icon on the screen. Text indicates 'Super Big Battery' and 'super long standby time', highlighting the device's 2550mAh battery capacity.
4. Operasi Asas
4.1 Navigasi
- Skrin Sentuh: Tap icons to open applications, swipe to navigate between screens.
- Skrin Utama: Features large, easy-to-identify icons for common functions like Phone, Contacts, Camera, and Photos.
- Butang Belakang: Kembali ke skrin sebelumnya.
- Butang Apl Terkini: Memaparkan aplikasi yang baru digunakan.
4.2 Membuat dan Menerima Panggilan
- Membuat Panggilan: Tap the 'Phone' icon, enter the number using the large keypad, then tap the green call button.
- Menerima Panggilan: When a call comes in, tap the green 'Answer' button on the screen or press the dedicated answer button.
- Menamatkan Panggilan: Tap the red 'End Call' button on the screen or press the dedicated end call button.
4.3 Kenalan
- Menambah Kenalan: Tap the 'Contacts' icon, then tap the '+' or 'Add New Contact' button. Enter the contact's name and phone number, then save.
- Memanggil Kenalan: Tap the 'Contacts' icon, select the desired contact, then tap the phone icon next to their name.
4.4 Pemesejan
- Tap the 'Messages' icon (if available on home screen, otherwise find in app drawer).
- Tap 'Start new chat' or the '+' icon.
- Enter the recipient's number or select from contacts, then type your message and tap 'Send'.
Kamera 4.5
The Artfone Smart_500 features a 13MP rear camera and a 5MP front camera.

Image 4.1: A hand holding the Artfone Smart_500 smartphone, with text emphasizing its 13-megapixel camera for high-definition photography.
- Tap the 'Camera' icon on the home screen.
- Halakan kamera ke arah subjek anda.
- Tap the shutter button on the screen to take a photo.
- Use the LED flash in low-light conditions.
4.6 Fungsi Kecemasan SOS
The SOS button is a critical safety feature for emergencies.

Image 4.2: A visual representation of the SOS button located on the back of the Artfone Smart_500 smartphone. The diagram illustrates how pressing this button can alert pre-set emergency contacts such as family members (daughter, son, spouse), a doctor, or first responders.
- Setting up SOS Contacts: Navigate to the SOS settings in the phone's menu to add up to 5 emergency contact numbers.
- Mengaktifkan SOS: In an emergency, press and hold the SOS button on the back of the phone.
- The phone will automatically call the pre-set emergency numbers one by one until a connection is made.
- Simultaneously, an emergency SMS message, including your location, will be sent to these contacts.
5. Ciri Lanjutan
5.1 Sistem Pengoperasian Android 12
Your Artfone Smart_500 runs on Android 12, providing access to a wide range of applications and features.
- Gedung Google Play: Access the Play Store to download additional applications such as WhatsApp, social media, and utility tools.
- Pelayaran Internet: Use the pre-installed browser to access the internet.
- Multimedia: View videos, photos, and listen to music.
5.2 Ketersambungan

Image 5.1: A prominent 4G logo positioned above the Artfone Smart_500 smartphone, which displays a strong 4G signal indicator. This highlights the device's 4G connectivity for high-definition voice calls and faster internet.
- 4G/3G/2G: Supports various cellular networks for reliable communication.
- 4G VoLTE: Ensures high-quality voice calls with reduced background noise.
- Wi-Fi: Sambung ke rangkaian wayarles untuk akses internet.
- Bluetooth: Pair with wireless headphones or other Bluetooth devices.
6. Penyelenggaraan
6.1 Penjagaan Bateri
- To prolong battery life, avoid exposing the phone to extreme temperatures.
- Charge the battery regularly, but avoid leaving it fully charged or fully depleted for extended periods.
- Use only the original charger and charging station provided with the device.
6.2 Pembersihan
- Lap skrin dan badan dengan kain lembut dan tidak berbulu.
- Elakkan menggunakan bahan kimia yang keras atau bahan yang melelas.
7. Penyelesaian masalah
Isu dan Penyelesaian Biasa:
- Telefon tidak dihidupkan: Pastikan bateri telah dicas. Sambungkan ke pengecas dan cuba lagi.
- Kualiti panggilan yang lemah: Check network signal strength. Ensure VoLTE is enabled in settings if available.
- Pembekuan aplikasi: Close background applications. Restart the phone.
- Bateri cepat habis: Reduce screen brightness. Close unused apps. Check battery usage in settings to identify power-hungry apps.
- SOS button not working: Verify that emergency contacts are correctly set up in the SOS settings.
Jika masalah berterusan, sila hubungi sokongan pelanggan.
8. Spesifikasi
| Ciri | Spesifikasi |
|---|---|
| Nama Model | SMART_500 |
| Sistem Operasi | Android 12.0 |
| Paparan | Skrin Sentuh IPS 5-inci |
| Pemproses | 1.5 GHz Quad-Core (MTK 6739WW) |
| RAM | 3 GB |
| Storan Dalaman | 32 GB (Expandable via Micro SD) |
| Kamera Belakang | 13 MP dengan Lampu Kilat LED |
| Kamera Depan | 5 MP |
| Kapasiti Bateri | 2550 mAh Litium-ion |
| Masa Tunggu Sedia | 50-80 hours (average) |
| Masa Berbual | 5-6 hours (average) |
| Ketersambungan | 4G, 3G, 2G (4G VoLTE) |
| Port Pengecasan | USB Jenis-C |
| Ciri Khas | SOS Button, Charging Station, Large Icons, High Volume |

Image 8.1: A visual representation of the phone's internal platform, highlighting the MTK 6739WW processor, 32GB of ROM (internal storage), and 3GB of RAM.
9. Waranti dan Sokongan
For warranty information and customer support, please refer to the documentation included in your product packaging or visit the official Artfone website. Information regarding spare parts availability and software updates is not available at this time.
Pengeluar: artfone


