1. Pengenalan
This manual provides detailed instructions for the setup, operation, and maintenance of your cenmate Aluminum Dual Bay 10Gbps Hard Drive Enclosure. Please read this manual thoroughly before use to ensure proper functionality and data safety.

Imej: Depan view of the cenmate Aluminum Dual Bay Hard Drive Enclosure.
Produk Selesaiview
The cenmate Dual Bay Hard Drive Enclosure is designed for external storage of 2.5-inch and 3.5-inch SATA HDDs and SSDs. It features a 10Gbps USB 3.2 Gen 2 interface for high-speed data transfer, a built-in cooling fan for optimal heat dissipation, and supports hot-swapping and daisy chain expansion. The aluminum alloy construction ensures durability and efficient cooling.
Ciri-ciri Utama
- Pemindahan Data Berkelajuan Tinggi: Up to 10Gbps with USB 3.2 Gen 2, allowing 1GB file transfers in 3-5 seconds.
- Sokongan Dua Teluk: Accommodates two 2.5-inch or 3.5-inch SATA HDDs/SSDs, with a maximum capacity of 20TB per drive (40TB total).
- Penyejukan yang cekap: Integrated aluminum-alloy housing and a 2-inch cooling fan for superior heat dissipation.
- Boleh Tukar Panas: Allows for drive replacement without powering down the device.
- Daisy Chain Expansion: Features a USB HOST port for connecting up to three additional enclosures, expanding storage capacity up to 120TB.
- Pemasangan Tanpa Alat: Easy setup for 3.5-inch drives.
- Keserasian Luas: Compatible with Windows 7 and above, Mac 9.1 and above, and Linux. Supports USB 3.0, USB 3.1, USB 3.2, Thunderbolt 3, and Thunderbolt 4 interfaces.
Kandungan Pakej
- cenmate Dual Bay 10Gbps Hard Drive Enclosure (NO RAID)
- USB A/C 3.2 Cable
- Manual Pengguna (dokumen ini)
- Penyesuai Kuasa
2. Panduan Persediaan
Memasang Pemacu Keras
The enclosure supports both 3.5-inch and 2.5-inch SATA HDDs/SSDs. Follow these steps for installation:
- Gently press the blue clasp on the front of a drive bay and pull out the drive tray.
- For 3.5-inch HDDs: Place the 3.5-inch hard drive into the tray. The blue clasps on the sides of the tray will secure the drive without the need for screws.
- For 2.5-inch SSDs/HDDs: Remove the blue side clasps from the tray. Place the 2.5-inch drive into the tray and secure it using the provided screws through the bottom of the tray.
- Slide the loaded drive tray back into the enclosure until it clicks into place.
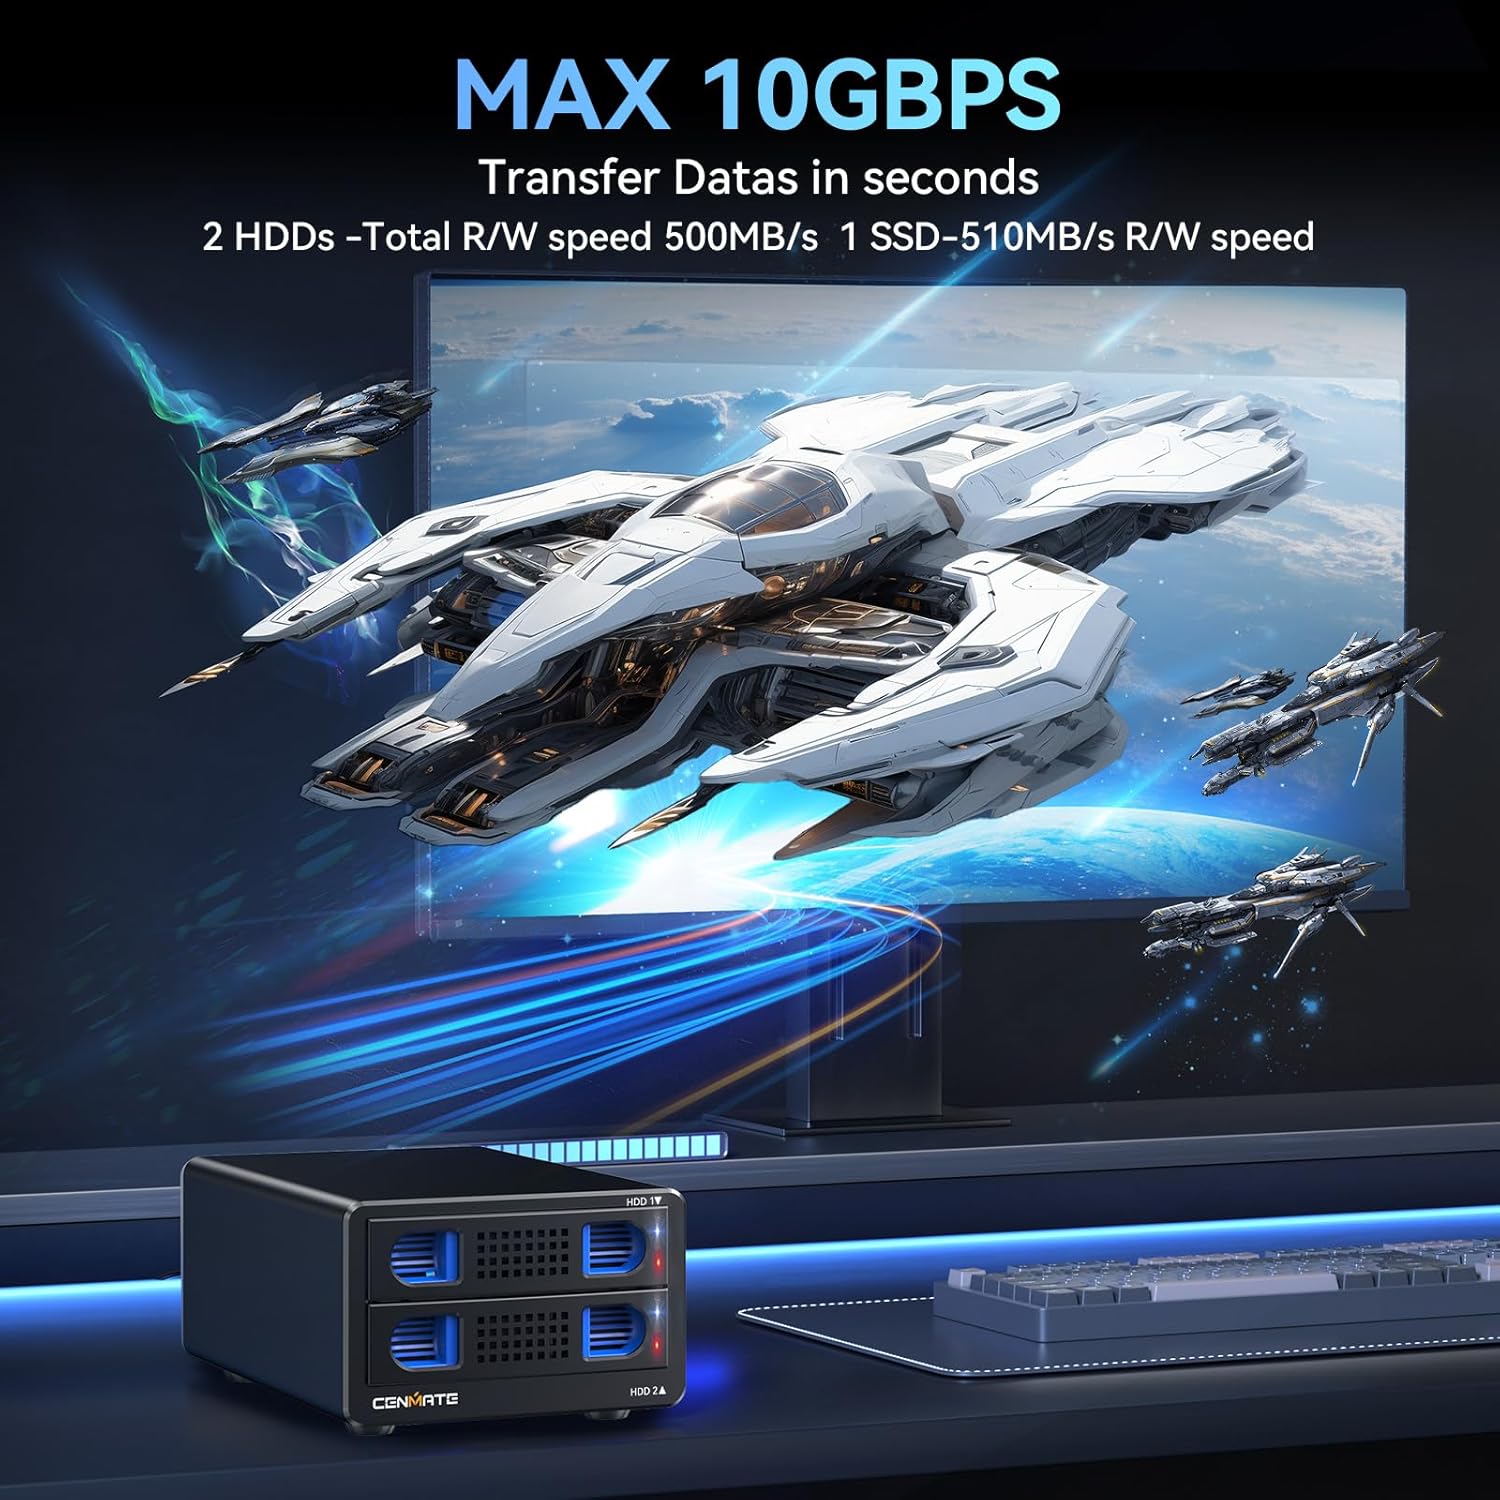
Image: Drive tray for 3.5-inch HDD installation.
Video: Official CENMATE guide demonstrating hard drive installation and enclosure features.
Connecting the Enclosure
- Connect the power adapter to the DC 12V input port on the back of the enclosure and then to a power outlet.
- Connect one end of the provided USB A/C 3.2 cable to the USB port on the back of the enclosure.
- Connect the other end of the USB cable to an available USB 3.2 (or compatible) port on your computer (desktop or laptop).

Image: Enclosure connected to a laptop, illustrating power and USB connections.

Image: The versatile USB A/C cable included with the product.
3. Operasi
Hidupkan/Mati Kuasa
Use the rocker switch located on the back of the enclosure to power the device on or off. Ensure all connections are secure before powering on.
Penunjuk LED
The front panel of the enclosure features LED indicators for each drive bay:
- LED biru: Menunjukkan mod siap sedia.
- Red Flashing LED: Indicates active reading or writing operations.

Image: LED indicators showing drive status.
Pemindahan Data
The enclosure utilizes a USB 3.2 Gen 2 interface, providing data transfer speeds up to 10Gbps. Actual read and write speeds may vary based on the hard drive version, computer specifications, and other factors.

Image: Data transfer speed capabilities.
Hot Swappable Functionality
The enclosure supports hot-swapping, allowing you to replace hard drives without needing to power down the device. This feature enhances convenience for data management.
Daisy Chain Expansion
For expanded storage, the enclosure includes a USB HOST port that allows for daisy-chaining up to three devices. This enables a total storage capacity of up to 120TB across multiple enclosures.

Image: Daisy chain setup for storage expansion.
4. Penyelenggaraan
Kipas Penyejuk
The built-in cooling fan helps maintain optimal operating temperatures for your hard drives. Please note that the fan noise is typically around 40-50 decibels. If you are highly sensitive to noise, this should be considered.

Image: Internal cooling fan for heat management.
Pembersihan
To clean the enclosure, power it off and disconnect all cables. Use a soft, dry cloth to wipe the exterior. Avoid using liquid cleaners or abrasive materials that could damage the finish.
Kaki Anti-gelincir
The enclosure is equipped with silicone anti-slip feet on the bottom to prevent movement and protect surfaces from scratches. Ensure these feet are clean and intact for stable placement.

Image: Silicone anti-slip pads on the enclosure base.
5. Penyelesaian masalah
If you encounter issues, please refer to the common problems and solutions below. If the problem persists, contact cenmate technical support.

Image: Common troubleshooting questions and solutions.
Q1: After connecting a new hard drive, why can't I find it or see a disc letter?
A1: After connecting a new hard drive, it must be formatted before your system can recognize and use it. In Windows, right-click 'This PC' (or 'My Computer'), then click 'Manage', open 'Disk Management'. Find the new hard drive, right-click to 'Initialize Disk' (choose MBR for drives ≤ 2TB or GPT for drives > 2TB), then create a 'New Simple Volume' and follow the prompts to format the partition. After formatting, the drive will be ready for use.
S2: Pemacu keras muncul dalam format RAW dalam Pengurusan Cakera kerana pengekstrakan yang tidak betul atau kegagalan kuasa. Apa yang patut saya buat?
A2: You may attempt recovery using the chkdsk command. Open Command Prompt as an administrator and type chkdsk I: /f (replace 'I' with the actual drive letter). This will scan and attempt to repair the drive. A reboot may be required.
Q3: The hard drive is dynamically invalid in Disk Management because it was previously removed from an old computer.
A3: This is a system-related issue. Reinstall the hard drive into its original computer motherboard and back up the data. If the old computer is unavailable, you may need dynamic disk conversion software to convert it to a basic disk.
Q4: Hard drive shows up but has no disc letter.
A4: In Disk Management, right-click on the disk partition section and select 'Change Drive Letter and Paths' to assign a drive letter for use.
Q5: The enclosure automatically disconnects during transmission and then reconnects after a while.
A5: This could be due to issues with the computer's USB interface, the USB cable, computer USB drivers, the hard drive itself, or the hard drive enclosure. Please contact cenmate technical support for assistance in diagnosing and resolving the problem.
6. Spesifikasi Teknikal
| Ciri | Spesifikasi |
|---|---|
| Jenama | cenmate |
| Nombor Model | 2 Teluk |
| bahan | aluminium |
| Peranti Serasi | Desktop, Komputer riba |
| Faktor Bentuk Cakera Keras | 2.5 Inci, 3.5 Inci |
| Bilangan Maks Peranti yang Disokong | 2 (per enclosure) |
| Kapasiti Penyimpanan Memori | 40 TB (20TB per drive) |
| Kadar Pemindahan Data | 10 Gigabit Sesaat |
| Antara Muka Perkakasan | USB 3.2 Gen 2 |
| Platform Perkakasan | Windows, Mac, Linux |
| warna | Hitam |
| Dimensi Produk | 7.95"L x 5.2"W x 3.5"H |
| Berat Barang | 2.11 paun |
7. Waranti dan Sokongan
cenmate is committed to providing quality products and customer satisfaction. If you have any questions about your product, require technical assistance, or need to report an issue, please do not hesitate to contact cenmate technical support. We aim to reply and resolve your problem within 24 hours.
For support, please refer to the contact information provided with your purchase or visit the official cenmate webtapak.