1. Pengenalan
Thank you for choosing the Empisal EES200 Electronic Sewing Machine. This machine is designed to provide a versatile and user-friendly sewing experience, suitable for a wide range of projects. It features 100 built-in stitches, 8 one-step buttonholes, and various convenient functions to assist you in your creative endeavors. Please read this manual thoroughly before operating the machine to ensure safe and efficient use.
2. Arahan Keselamatan Penting
Apabila menggunakan perkakas elektrik, langkah berjaga-jaga keselamatan asas hendaklah sentiasa dipatuhi, termasuk yang berikut:
- Baca semua arahan sebelum menggunakan mesin jahit ini.
- Simpan arahan ini di tempat yang mudah berhampiran mesin.
- Always unplug the machine from the electrical outlet immediately after using and before cleaning, removing covers, lubricating, or making any other user servicing adjustments mentioned in the instruction manual.
- Jangan biarkan digunakan sebagai mainan. Perhatian rapi diperlukan apabila mesin ini digunakan oleh atau berhampiran kanak-kanak.
- Gunakan perkakas ini hanya untuk kegunaan yang dimaksudkan seperti yang diterangkan dalam manual ini.
- Never operate this sewing machine if it has a damaged cord or plug, if it is not working properly, or if it has been dropped or damaged.
- Jangan sekali-kali menjatuhkan atau memasukkan sebarang objek ke dalam mana-mana bukaan.
- Jangan gunakan di luar rumah.
- Jangan beroperasi di tempat produk aerosol (semburan) digunakan atau di mana oksigen diberikan.
- Untuk memutuskan sambungan, matikan semua kawalan ke kedudukan mati, kemudian tanggalkan palam dari alur keluar.
- Never operate with any air openings blocked. Keep air openings of the sewing machine and foot controller free from the accumulation of lint, dust, and loose cloth.
- Jauhkan jari dari semua bahagian yang bergerak. Penjagaan khas diperlukan di sekitar jarum mesin jahit.
- Sentiasa gunakan plat jarum yang betul. Plat yang salah boleh menyebabkan jarum patah.
- Jangan gunakan jarum bengkok.
- Jangan tarik atau tolak fabrik semasa menjahit. Ini boleh memesongkan jarum sehingga menyebabkan ia patah.
- Pakai cermin mata keselamatan semasa mengendalikan mesin jahit.
3. Produk Lebihview
The Empisal EES200 is an electronic sewing machine equipped with features designed for ease of use and versatility. Familiarize yourself with the main components of your machine.
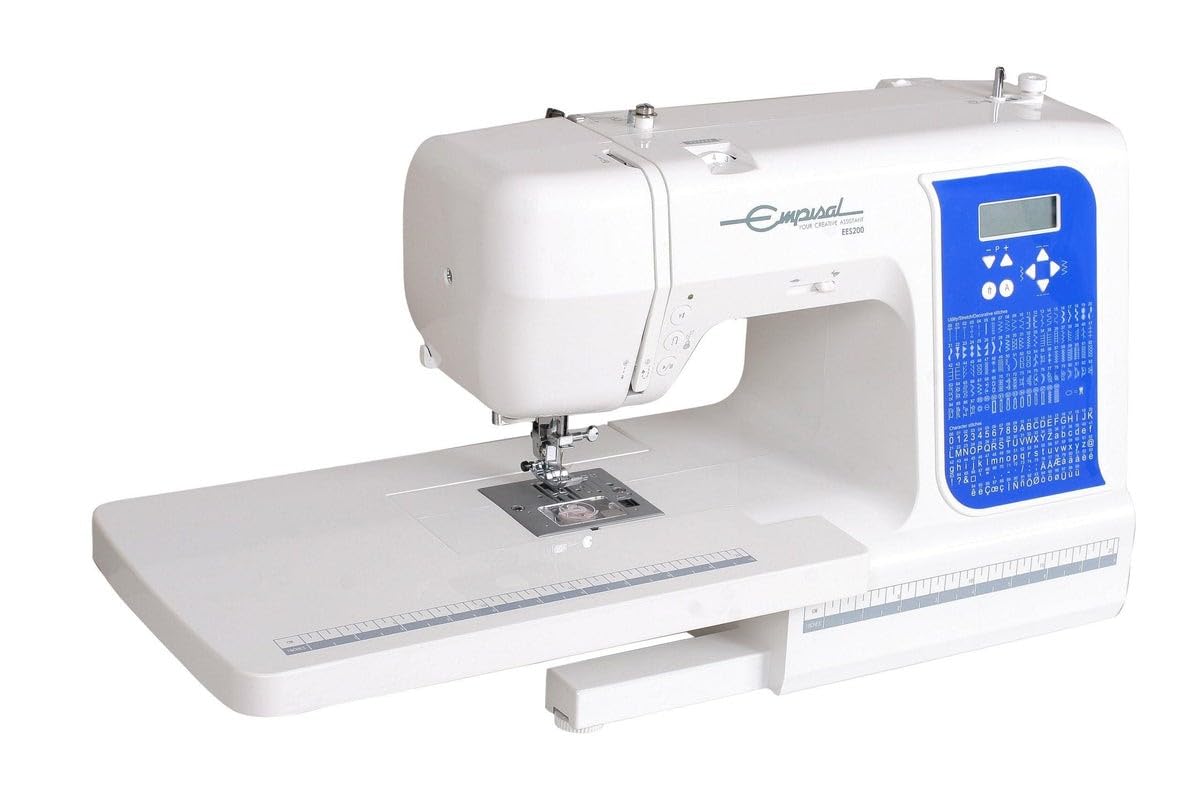
Rajah 3.1: Depan view of the Empisal EES200 Electronic Sewing Machine. This image displays the main body of the machine, including the needle area, presser foot, stitch selection panel, and the free arm base.
Ciri-ciri Utama:
- 100 Jahitan Terbina dalam: Offers a wide range of decorative, utility, and stretch stitches.
- 8 One-step Buttonholes: For quick and consistent buttonhole creation.
- Rotary Hook and Drop-in Bobbin: Ensures smooth operation and easy bobbin access.
- Lengan Bebas: Facilitates sewing cuffs, sleeves, and other small, circular items.
- Pengulir Jarum: Memudahkan proses penyambungan benang.
- Pemotong Benang: Conveniently located for quick thread trimming.
- Number Display Screen: Provides clear stitch information.
- Horizontal and Vertical Spool Pins: Accommodates various thread types and sizes.
- Double Presser Foot Lift: Allows for sewing thicker fabrics.
- Clip-on Feet: For easy changing of presser feet.
- Jadual Lebar: Provides an extended work surface for larger projects.
- Plastic Dust Cover: Protects the machine when not in use.
4. Persediaan
4.1 Membongkar dan Meletakkan
- Keluarkan mesin dari pembungkusannya dengan berhati-hati.
- Letakkan mesin pada permukaan yang stabil dan rata.
- Pastikan terdapat pencahayaan dan ruang yang mencukupi untuk operasi yang selesa.
4.2 Sambungan Kuasa
- Connect the power cord to the machine's power input jack.
- Palamkan kord kuasa ke salur keluar elektrik yang sesuai.
- Connect the foot controller to its designated jack on the machine.
4.3 Menggulung Bobbin
- Place a spool of thread on the horizontal or vertical spool pin.
- Pandu benang melalui cakera tegangan penggulungan gelendong.
- Letakkan gelendong kosong pada gelendong penggulung gelendong.
- Lilitkan benang beberapa kali secara manual di sekeliling gelendong.
- Tolak gelendong penggulung gelendong ke kanan.
- Press the foot controller or start/stop button to begin winding.
- The machine will stop automatically when the bobbin is full.
- Potong benang dan tolak gelendong penggulung gelendong kembali ke kiri.
4.4 Memasukkan Bobbin
- Pastikan jarum berada pada kedudukan tertinggi.
- Buka plat penutup gelendong.
- Masukkan gelendong lilit ke dalam bekas gelendong dengan benang dilonggarkan melawan arah jam.
- Guide the thread through the tension spring and into the thread guide slot.
- Pull out approximately 10-15 cm of thread.
- Gantikan plat penutup gelendong.
4.5 Menjahit Benang Atas
- Naikkan tuas kaki penekan.
- Letakkan gelendong benang pada pin gelendong.
- Pandu benang melalui panduan benang atas.
- Follow the numbered threading path down to the tension discs and up to the take-up lever.
- Putar tuil pengambil dari kanan ke kiri.
- Continue guiding the thread down through the lower thread guides.
- Use the needle threader to thread the needle eye, or thread it manually from front to back.
- Pull about 15 cm of thread through the needle eye.
4.6 Membuka Benang Bobbin
- Pegang benang atas dengan lembut menggunakan tangan kiri anda.
- Pusingkan roda tangan ke arah anda untuk menurunkan jarum, kemudian angkat semula.
- The needle thread will catch the bobbin thread, forming a loop.
- Pull the loop up with the upper thread, then pull both threads under the presser foot and towards the back of the machine.
5. Operasi
5.1 Memilih Jahitan
The Empisal EES200 offers 100 built-in stitches. Use the control panel to select your desired stitch.

Rajah 5.1: Close-up of the control panel and stitch selection chart. The display screen shows the selected stitch number, and the buttons allow for navigation and adjustment of stitch parameters.
- Hidupkan mesin.
- Refer to the stitch chart on the machine body.
- Use the stitch selection buttons (usually marked with '+' and '-') to navigate through the stitch numbers on the display screen.
- The machine will automatically set the recommended stitch length and width for the selected stitch.
5.2 Melaraskan Panjang dan Lebar Jahitan
While the machine suggests optimal settings, you can adjust stitch length and width for specific fabrics or desired effects.
- Use the dedicated length and width adjustment buttons on the control panel.
- Increase the stitch length for basting or thicker fabrics.
- Decrease the stitch length for finer, stronger seams.
- Adjust stitch width for zigzag or decorative stitches.
5.3 Jahitan Asas
- Place your fabric under the presser foot, aligning the edge with a seam guide.
- Turunkan tuas kaki penekan.
- Slowly press the foot controller or the start/stop button to begin sewing.
- Bimbing fabrik dengan lembut; jangan tarik atau tolaknya.
- To secure the beginning and end of a seam, use the reverse stitch button.
- When finished, stop the machine, raise the needle to its highest position, and lift the presser foot.
- Pull the fabric away from the machine and cut the threads using the built-in thread cutter.
5.4 Menggunakan Lengan Bebas
The free arm feature allows you to sew cylindrical items such as cuffs, sleeves, and pant hems with ease.

Rajah 5.2: sebelah view of the Empisal EES200 with the accessory box removed, exposing the free arm. This feature is useful for sewing small, tubular items.
- Remove the accessory box from the front of the machine to expose the free arm.
- Slip the cylindrical item over the free arm.
- Teruskan menjahit seperti biasa.
5.5 Using the Wide Table (Optional Accessory)
For larger projects, the optional wide table provides an extended work surface.

Rajah 5.3: The Empisal EES200 with the wide extension table attached. This accessory provides a larger, flat work area, ideal for quilting or handling larger fabric pieces.
- Slide the wide table onto the free arm base until it clicks into place.
- Ensure it is securely attached before beginning to sew.
5.6 One-Step Buttonholes
The machine features 8 different one-step buttonhole styles for various fabric types and button sizes.
- Attach the appropriate buttonhole foot.
- Place your button in the buttonhole foot's button holder.
- Select the desired buttonhole stitch from the control panel.
- Position your fabric and lower the presser foot.
- The machine will automatically sew the buttonhole to the correct size.
6. Penyelenggaraan
6.1 Cleaning Your Machine
Regular cleaning ensures optimal performance and extends the life of your sewing machine.
- Sentiasa cabut plag mesin sebelum membersihkan.
- Remove the needle, presser foot, needle plate, and bobbin case.
- Gunakan berus kecil untuk menghilangkan habuk dan kotoran dari anjing makanan dan kawasan gelendong.
- Wipe the exterior of the machine with a soft, dry cloth. Do not use liquid cleaners.
- Pasang semula komponen.
6.2 Pelinciran
This machine is designed to operate without user lubrication. Do not oil any part of the machine unless specifically instructed by an authorized service center.
7. Penyelesaian masalah
Bahagian ini menangani isu biasa yang mungkin anda hadapi. Untuk masalah yang tidak disenaraikan di sini, sila hubungi sokongan pelanggan.
| Masalah | Kemungkinan Punca | Penyelesaian |
|---|---|---|
| Jahitan Terlangkau | Incorrect needle size/type, bent needle, improper threading, low tension. | Change needle, re-thread machine, adjust tension. |
| Pecah Benang | Incorrect threading, high tension, damaged needle, poor quality thread, lint in tension discs. | Re-thread, adjust tension, replace needle, use quality thread, clean tension discs. |
| Gelung Benang Bobbin | Upper thread tension too loose, bobbin incorrectly inserted, lint in bobbin case. | Increase upper thread tension, re-insert bobbin correctly, clean bobbin area. |
| Mesin Tidak Bermula | Power cord not plugged in, foot controller not connected, bobbin winder spindle engaged. | Check power connections, ensure bobbin winder is disengaged. |
| Pecah Jarum | Bent needle, wrong needle for fabric, pulling fabric, hitting pins, needle not fully inserted. | Replace needle, use correct needle, guide fabric gently, remove pins, ensure needle is fully inserted. |
8. Spesifikasi
- Nombor Model: 861139
- Jenama: Empisal
- Jenis: Electronic Sewing Machine
- Built-in Stitches: 100
- Lubang butang: 8 (One-step)
- Jenis Bobbin: Drop-in Rotary Hook
- Jenis Lengan: Lengan Percuma
- Pengulir Jarum: Automatik
- Pemotong Benang: ya
- paparan: Number Display Screen
- Pin Kili: Mendatar dan Menegak
- Angkat Kaki Penekan: Angkat Berganda
- Feet Type: Clip-on
- Bahan: Logam, Plastik
- Berat Barang: 8.48 kg
- Dimensi Produk: 42D x 22W x 33H sentimeter
- Sumber Kuasa: Elektrik Bertali
9. Waranti dan Sokongan
9.1 Maklumat Waranti
This Empisal EES200 Electronic Sewing Machine comes with a Waranti 1 Tahun from the date of purchase. This warranty covers manufacturing defects under normal household use. It does not cover damage resulting from misuse, abuse, accident, alteration, neglect, or failure to follow the instructions for care and cleaning. Please retain your proof of purchase for warranty claims.
Spare part availability information is not available or provided at this time. For any warranty-related inquiries, please contact your retailer or authorized service center.
9.2 Sokongan Pelanggan
For technical assistance, service, or questions regarding your Empisal EES200 sewing machine, please contact Empisal customer support or your local authorized dealer. Contact information can typically be found on the Empisal official webtapak atau melalui peruncit pembelian anda.


