1. Pengenalan
Welcome to the user manual for your Tawson 3-Light Convertible Chandelier. This manual provides essential information for safe installation, operation, and maintenance of your lighting fixture. Please read all instructions carefully before beginning installation.
Maklumat Keselamatan:
- Always turn off the power at the main fuse or circuit breaker before installation or maintenance.
- Rujuk juruelektrik bertauliah jika anda tidak pasti tentang proses pemasangan.
- Pastikan semua sambungan elektrik mematuhi kod dan ordinan tempatan.
- Jangan melebihi wat yang disyorkantage untuk mentol.
- Handle glass components with care.
2. Kandungan Pakej
Sahkan bahawa semua komponen hadir sebelum memulakan pemasangan.
- Chandelier fixture body
- Glass shades (3)
- Kit perkakasan pemasangan
- Adjustable rods (various lengths)
- Manual arahan

Image: A diagram illustrating the chandelier's dimensions, including the 28-inch height and 18-inch width, along with adjustable rods (two 6-inch and two 12-inch) and a note that bulbs are not included. Various compatible bulb types are shown at the bottom, indicating an E26 base.
3. Spesifikasi
| Ciri | Perincian |
|---|---|
| Jenama | Tawson |
| Nombor Model | 13810 |
| warna | Nikel Berus |
| bahan | Kaca, Logam |
| Gaya | moden |
| Borang Lampu | Chandelier (Convertible) |
| Dimensi Produk | 18.1"L x 18.1"W x 13.8"H |
| Penggunaan Dalaman/Luar | Dalaman |
| Sumber Kuasa | AC |
| Jenis Pemasangan | Pemasangan Semi Flush |
| Jenis Sumber Cahaya | Incandescent, LED, Fluorescent, Halogen |
| Jenis Selesai | Disikat |
| Bahan Teduh | kaca |
| Bilangan Sumber Cahaya | 3 |
| Voltage | 110-120V (AC) |
| Pangkalan Mentol | E26 |
| Wattage | Up to 100 watts per bulb |
| Kecerahan | 5100 lumen (total) |
| Kecekapan | 51 lumen setiap watt |
| Perhimpunan Diperlukan | Perhimpunan Minimum Diperlukan |
4. Persediaan dan Pemasangan
This chandelier can be installed as a pendant or a semi-flush mount fixture. Follow these steps carefully.
4.1 Alat Diperlukan (Tidak Termasuk)
- Pemutar skru
- Strippers wayar
- Tang
- Pita elektrik
- Tangga
4.2 Pra-Pemasangan
- Matikan kuasa: Cari pemutus litar atau kotak fius dan matikan kuasa ke kotak simpang tempat lekapan akan dipasang.
- Bongkar: Keluarkan semua komponen dari pembungkusan dengan berhati-hati.
- Periksa: Check for any damage during shipping. Do not install if damaged.
4.3 Langkah Perhimpunan
- Pasang Plat Pemasangan: Pasangkan plat pelekap pada kotak simpang menggunakan skru yang disediakan.
- Determine Height (Pendant Option): Select the desired length of adjustable rods. Connect the rods to the fixture body and the canopy.
- Pendawaian:
- Connect the fixture's ground wire to the supply ground wire (usually bare copper or green).
- Connect the fixture's neutral wire (usually white) to the supply neutral wire (white).
- Connect the fixture's hot wire (usually black) to the supply hot wire (black).
- Selamatkan semua sambungan dengan nat wayar dan pita elektrik.
- Kanopi Selamat: Carefully push the canopy up to the ceiling, covering the junction box, and secure it with the provided screws or nuts.
- Pasang Lorek Kaca: Attach the three satin etched glass shades to the fixture arms.
- Pasang Mentol: Insert three E26 base bulbs (not included) into the sockets. Do not exceed 100W per bulb.

Imej: A terperinci view highlighting the brushed nickel metal components and the white frosted glass shades, emphasizing the quality of materials and finish.
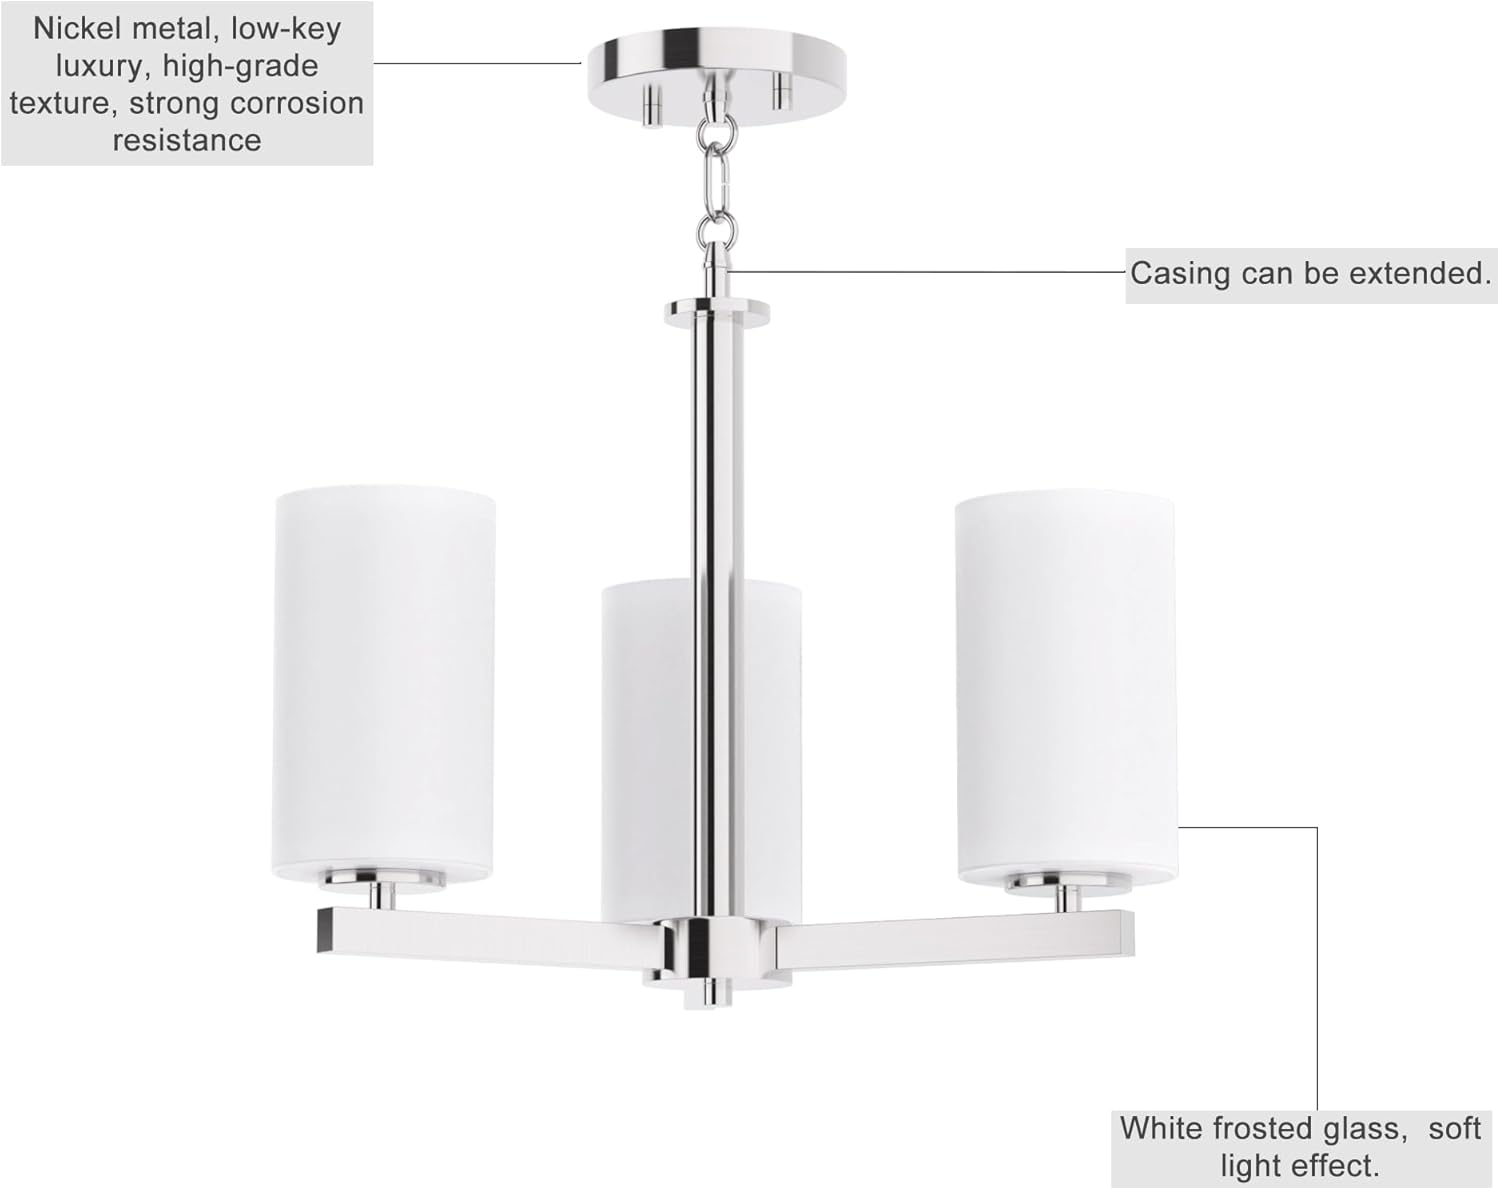
Image: A composite image showing close-ups of various parts of the chandelier: the connection point of the glass shade to the arm, the ceiling canopy with chain link, the central rod connection, and the arm connection to the central body. This illustrates the modular design and connection points.
5. Arahan Operasi
Once installed, restore power at the circuit breaker. The chandelier operates via your wall switch.
- Menghidupkan/Mematikan: Use the standard wall switch connected to the fixture to turn the lights on or off.
- Fungsi Peredupan: If you have a compatible wall dimmer switch, use dimmable bulbs to utilize the dimming feature. Bulbs are not included.
Video: Tayangan video pendekasing the Tawson 3-Light Chandelier in various room settings, demonstrating its aesthetic appeal and how it illuminates different spaces. The video highlights the brushed nickel finish and the soft glow from the glass shades.
6. Penyelenggaraan dan Penjagaan
Regular cleaning and proper care will ensure the longevity and appearance of your chandelier.
- Pembersihan:
- Matikan kuasa sebelum membersihkan.
- Lap bahagian logam dengan kain lembut dan kering.
- Clean glass shades with a mild glass cleaner and a soft cloth. Avoid abrasive cleaners.
- Penggantian mentol:
- Pastikan kuasa dimatikan.
- Benarkan mentol sejuk sebelum disentuh.
- Unscrew old bulbs and replace with new E26 base bulbs (max 100W each).
- Pemeriksaan: Periksa secara berkala semua sambungan dan perkakasan pelekap untuk kesesakan.
7. Penyelesaian masalah
Jika anda menghadapi masalah dengan candelier anda, rujuk masalah dan penyelesaian biasa berikut:
| Masalah | Kemungkinan Punca | Penyelesaian |
|---|---|---|
| Lampu tidak menyala | Tiada kuasa untuk lekapan | Periksa pemutus litar/fius. Pastikan suis dinding dihidupkan. |
| Bulbs not working | Mentol longgar atau rosak | Ensure bulbs are screwed in tightly. Replace with new bulbs. |
| Lampu berkelip-kelip | Pendawaian longgar atau dimmer yang tidak serasi | Turn off power, check wire connections. If using a dimmer, ensure bulbs are dimmable and compatible with the dimmer switch. |
| Lekapan longgar | Mounting hardware not secure | Turn off power, tighten mounting screws and canopy nuts. |
8. Waranti dan Sokongan
For warranty information or technical support, please contact Tawson customer service. Keep your purchase receipt for warranty claims.
Maklumat Hubungan: Refer to your product packaging or the Tawson official webtapak untuk mendapatkan butiran sokongan terkini.
9. Penggunaan Cthamples
The Tawson 3-Light Convertible Chandelier is versatile and suitable for various indoor settings.
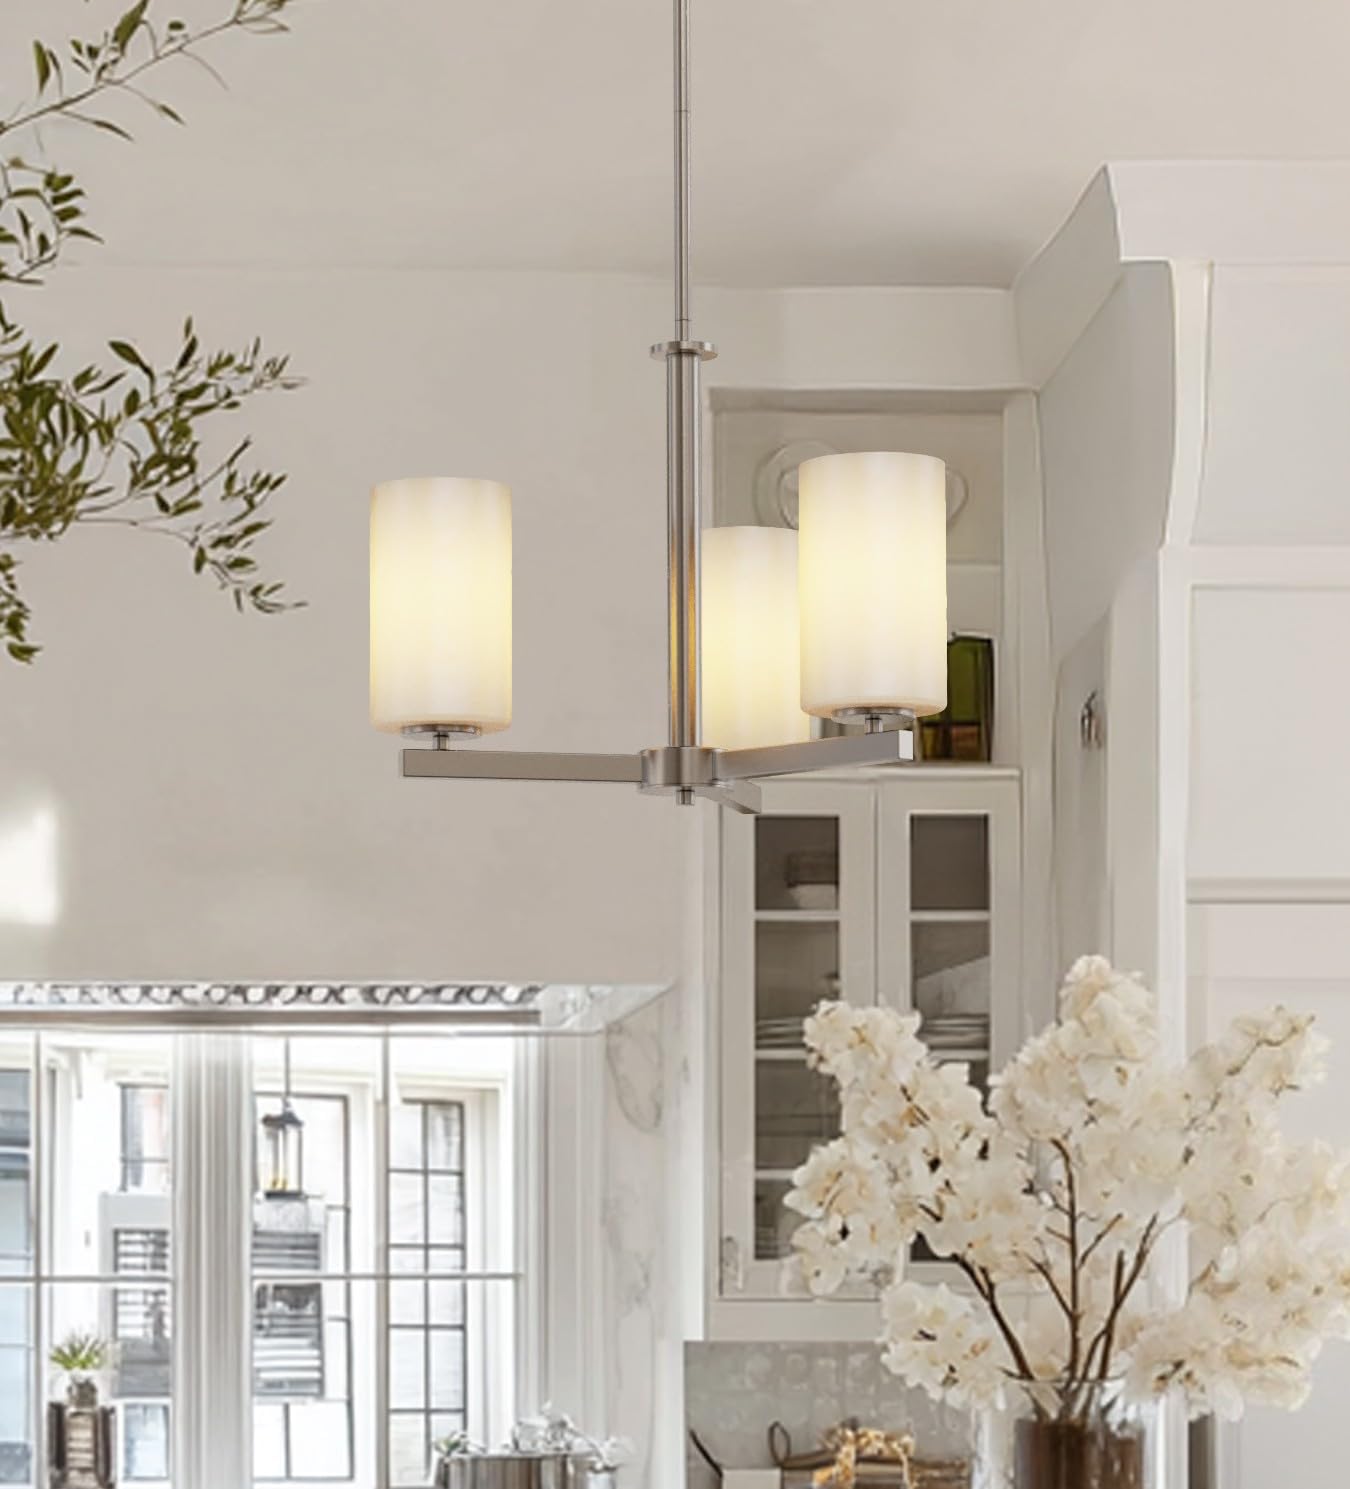
Image: The chandelier illuminating a contemporary kitchen space, featuring white cabinetry, a dark island, and light-colored flooring. The fixture provides ambient lighting above the island.

Image: The chandelier positioned above a dining table in a room with large windows, demonstrating its suitability for dining areas and its ability to complement natural light.

Image: The chandelier installed in a spacious bathroom, featuring a large vanity mirror, a white marble fireplace, and patterned floor tiles, showcasing its elegant integration into a sophisticated bathroom design.

Image: The chandelier hanging above a home bar or serving station, which includes patterned wallpaper, wooden shelves with bottles, and glassware, illustrating its use in a stylish entertainment space.


