1. Pengenalan
This instruction manual provides essential information for setting up, operating, and maintaining your db-tronic Raspberry Pi 3 B Starter Kit. This kit is designed to offer a complete solution for various computing projects, including home automation, media centers, and educational programming. Please read this manual thoroughly before beginning to ensure proper usage and to maximize the performance and longevity of your components.

Imej: Selesaiview of the db-tronic Raspberry Pi 3 B Starter Kit, showcasing semua komponen yang disertakan.
2. Apa yang Termasuk
Your db-tronic Raspberry Pi 3 B Starter Kit contains the following components:

Imej: Terperinci view of all components included in the kit, numbered for easy identification.
- Raspberry Pi 3 B+ (1GB RAM): The core single-board computer with a 1.4GHz quad-core processor.
- Bekalan Kuasa (13W): A stable 5.1V/2.5A micro USB power adapter for reliable operation.
- Kes: A protective enclosure designed for the Raspberry Pi 3 B, ensuring airflow and physical protection.
- Kad Memori 64GB: Pre-formatted for use, providing ample storage for the operating system and projects.
- USB Card Reader: For easily writing operating system images to the memory card from another computer.
- HDMI Cable (1m): For connecting the Raspberry Pi to a display.
- Heat Sink Set: Three aluminum heat sinks to help dissipate heat from the main processing units.
3. Panduan Persediaan
Follow these steps to assemble and prepare your Raspberry Pi 3 B Starter Kit for first use.
3.1. Installing Heat Sinks
The heat sinks help maintain optimal operating temperatures. Carefully peel off the protective backing from each heat sink and firmly attach them to the designated chips on the Raspberry Pi board. Typically, the largest heat sink goes on the main CPU (Broadcom chip), and smaller ones on the RAM and Ethernet controller.

Image: The Raspberry Pi 3 B board, its protective case, and the three aluminum heat sinks.
3.2. Assembling the Case
Once the heat sinks are in place, carefully position the Raspberry Pi board into the bottom half of the protective case. Ensure all ports align correctly with the case openings. Then, snap the top half of the case into place. The case is designed for easy assembly and provides protection while allowing access to all ports.
3.3. Preparing the Memory Card
The 64GB memory card is where your operating system will reside. You will need to flash an operating system image onto it using another computer.
- Insert the 64GB memory card into the provided USB card reader.
- Connect the USB card reader to your computer.
- Download an operating system image (e.g., Raspberry Pi OS) from the official Raspberry Pi webtapak (raspberrypi.com/software).
- Use an imaging tool (like Raspberry Pi Imager) to write the OS image to the memory card. Follow the instructions provided by the imaging tool.
- Safely eject the USB card reader and remove the memory card.
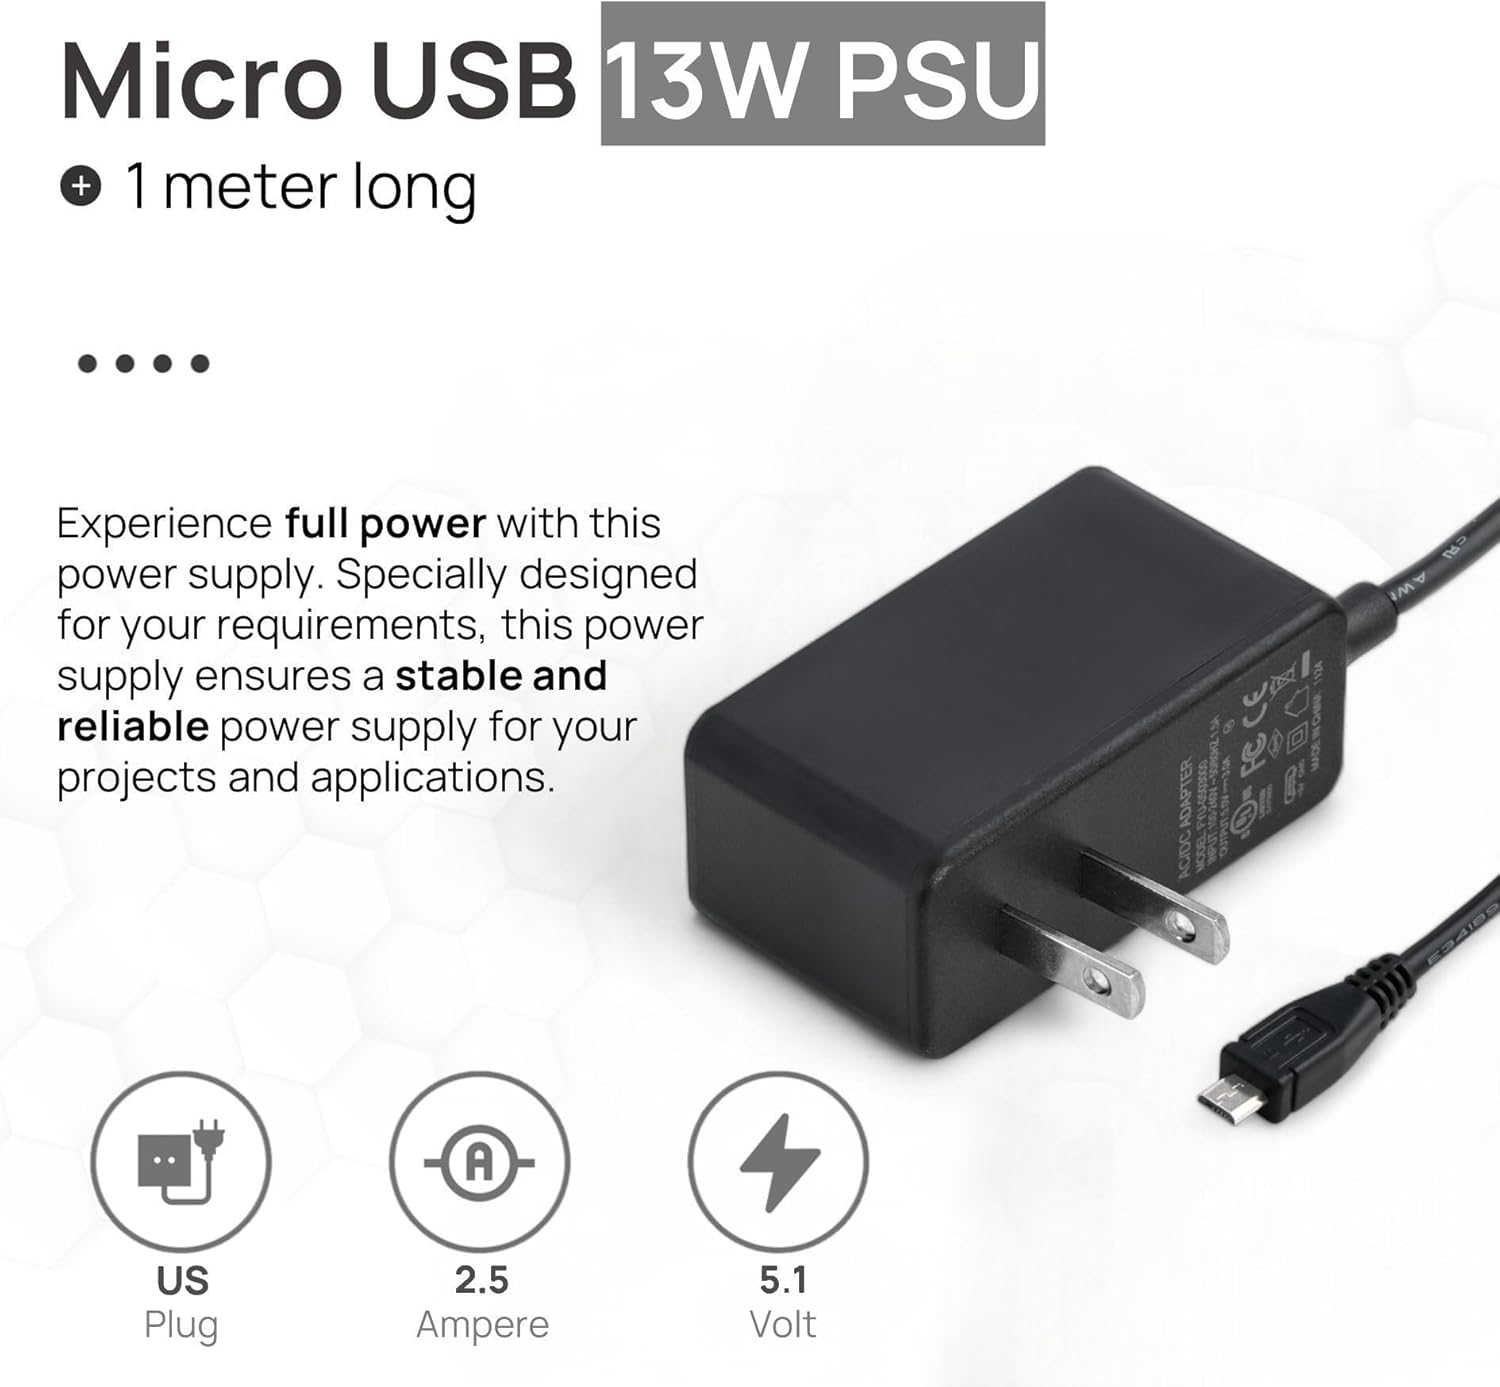
Image: The 64GB memory card and USB card reader, essential for loading the operating system.
3.4. Sambungan Awal
Before applying power, make the following connections:
- Insert the prepared memory card into the microSD card slot on the Raspberry Pi.
- Connect one end of the HDMI cable to the HDMI port on the Raspberry Pi and the other end to your display (monitor or TV).
- Connect a USB keyboard and mouse to the USB ports on the Raspberry Pi.
- (Optional) Connect an Ethernet cable for wired network access, or prepare for Wi-Fi setup later.
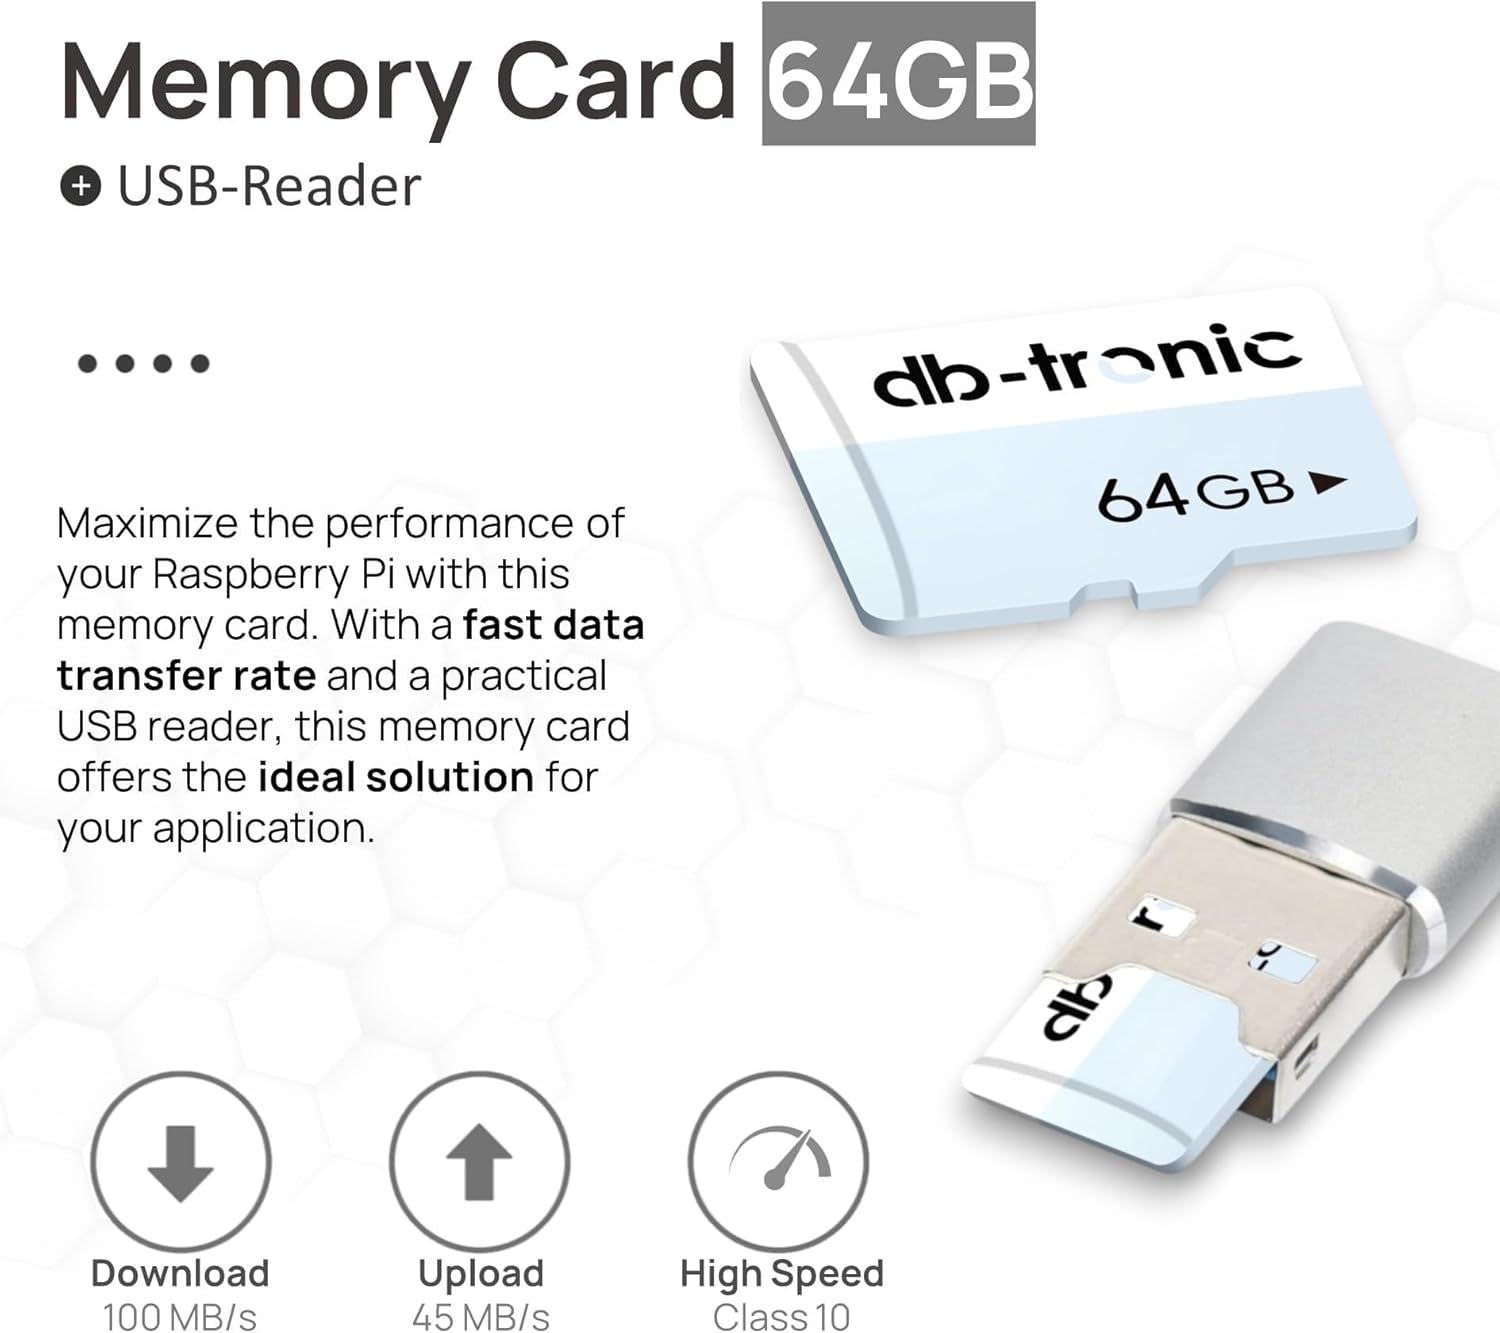
Image: The 1-meter HDMI cable, used for connecting the Raspberry Pi to a display.
3.5. Menghidupkan
Finally, connect the micro USB power supply to the power input port on the Raspberry Pi. Then, plug the power supply into a wall outlet. The Raspberry Pi will automatically begin to boot up. You should see output on your connected display.

Image: The 13W Micro USB power supply, providing stable power to the Raspberry Pi.
4. Arahan Operasi
Once your Raspberry Pi has booted, you can begin interacting with its operating system.
4.1. First Boot and Configuration
Upon the first boot of Raspberry Pi OS, a setup wizard will guide you through initial configurations such as:
- Setting your country, language, and timezone.
- Changing the default password.
- Connecting to a Wi-Fi network (if not using wired Ethernet).
- Updating software.
Follow the on-screen prompts to complete these steps.
4.2. Penggunaan Asas
- Persekitaran Desktop: Navigate the graphical desktop using your connected mouse and keyboard.
- Permohonan: Access pre-installed applications from the main menu (usually in the top-left corner).
- Terminal: For command-line operations, open the Terminal application.
- Akses internet: Gunakan web browser to access online resources.
4.3. Mematikan
Always shut down your Raspberry Pi properly to prevent data corruption on the memory card. Do not simply unplug the power.
- From the desktop, click the Raspberry Pi icon (menu) in the top-left corner.
- Select "Shutdown" or "Reboot".
- Wait for the screen to go blank and for the activity lights on the Raspberry Pi to stop flashing before disconnecting power.
5. Penyelenggaraan
Proper maintenance ensures the longevity and reliable performance of your Raspberry Pi kit.
- Pastikan ia bersih: Regularly clean the case and ports with a soft, dry cloth to prevent dust buildup. Avoid using liquid cleaners directly on the device.
- Pengudaraan: Ensure the case's ventilation holes are not obstructed to allow for proper airflow and heat dissipation.
- Kemas Kini Perisian: Periodically update your operating system and installed software to benefit from bug fixes, security patches, and new features. This can usually be done via the terminal with commands like
sudo apt updatedansudo apt full-upgrade. - Data Sandaran: Regularly back up important data from your memory card to another storage device.
- Bekalan Kuasa: Use only the provided power supply or a compatible, high-quality alternative to ensure stable power delivery.
6. Penyelesaian masalah
Berikut ialah penyelesaian kepada beberapa isu biasa yang mungkin anda hadapi:
- Tiada Output Paparan:
- Ensure the HDMI cable is securely connected to both the Raspberry Pi and the display.
- Verify the display is set to the correct input source.
- Check if the memory card has a valid operating system image flashed onto it.
- Cuba kabel atau paparan HDMI yang lain jika boleh.
- Raspberry Pi Not Powering On:
- Confirm the power supply is correctly plugged into the Raspberry Pi and a working wall outlet.
- Ensure the power supply is providing sufficient current (5.1V/2.5A).
- Check the micro USB cable for damage.
- Papan Kekunci/Tetikus Tidak Membalas:
- Ensure USB devices are firmly plugged into the Raspberry Pi's USB ports.
- Cuba port USB yang berbeza.
- If using wireless devices, check their batteries and ensure dongles are properly connected.
- Isu Sambungan Wi-Fi:
- Verify your Wi-Fi network name (SSID) and password are correct.
- Ensure the Raspberry Pi is within range of your Wi-Fi router.
- Mulakan semula penghala Wi-Fi anda.
- Check for any software updates that might include Wi-Fi driver improvements.
- Terlalu panas:
- Ensure the heat sinks are properly attached.
- Verify the case has adequate ventilation and is not obstructed.
- Avoid placing the Raspberry Pi in direct sunlight or enclosed spaces without airflow.
7. Spesifikasi
Key technical specifications for the db-tronic Raspberry Pi 3 B Starter Kit:
| Komponen/Ciri | Spesifikasi |
|---|---|
| Model | Raspberry Pi 3 Model B+ |
| Pemproses | Broadcom BCM2837B0, Quad-core Cortex-A53 (ARMv8) 64-bit SoC @ 1.4GHz |
| RAM | 1GB LPDDR2 SDRAM |
| Kesambungan Wayarles | 2.4 GHz and 5 GHz IEEE 802.11ac wireless LAN, Bluetooth 4.2/BLE |
| Ethernet | Gigabit Ethernet over USB 2.0 (maximum throughput 300 Mbps) |
| Port USB | 4 × USB 2.0 port |
| HDMI | Full-size HDMI port (supports 4K @ 30Hz with included cable) |
| Penyimpanan | Micro SD card slot (64GB card included) |
| Input Kuasa | 5.1V/2.5A DC via Micro USB connector |
| Sistem Operasi | Linux (cth., Raspberry Pi OS) |
8. Waranti dan Sokongan
For warranty information and technical support, please refer to the official db-tronic website or contact their customer service directly. Details regarding product registration, warranty claims, and additional support resources can typically be found on the manufacturer's official channels.
Always ensure you are using official resources for support to receive accurate and timely assistance.


