1. Pengenalan
This user manual provides detailed instructions for the installation and maintenance of the ASMAX Z1 Motorcycle Bluetooth Headset Mount Kit. This kit is designed to securely attach your Z1 headset to various motorcycle helmets, ensuring stability and ease of use during rides.
2. Produk Lebihview
The ASMAX Z1 Mount Kit includes essential components for a robust and reliable attachment of your Z1 headset. It offers two primary methods of attachment: a metal clip for edge mounting and an adhesive plate for flat surfaces.
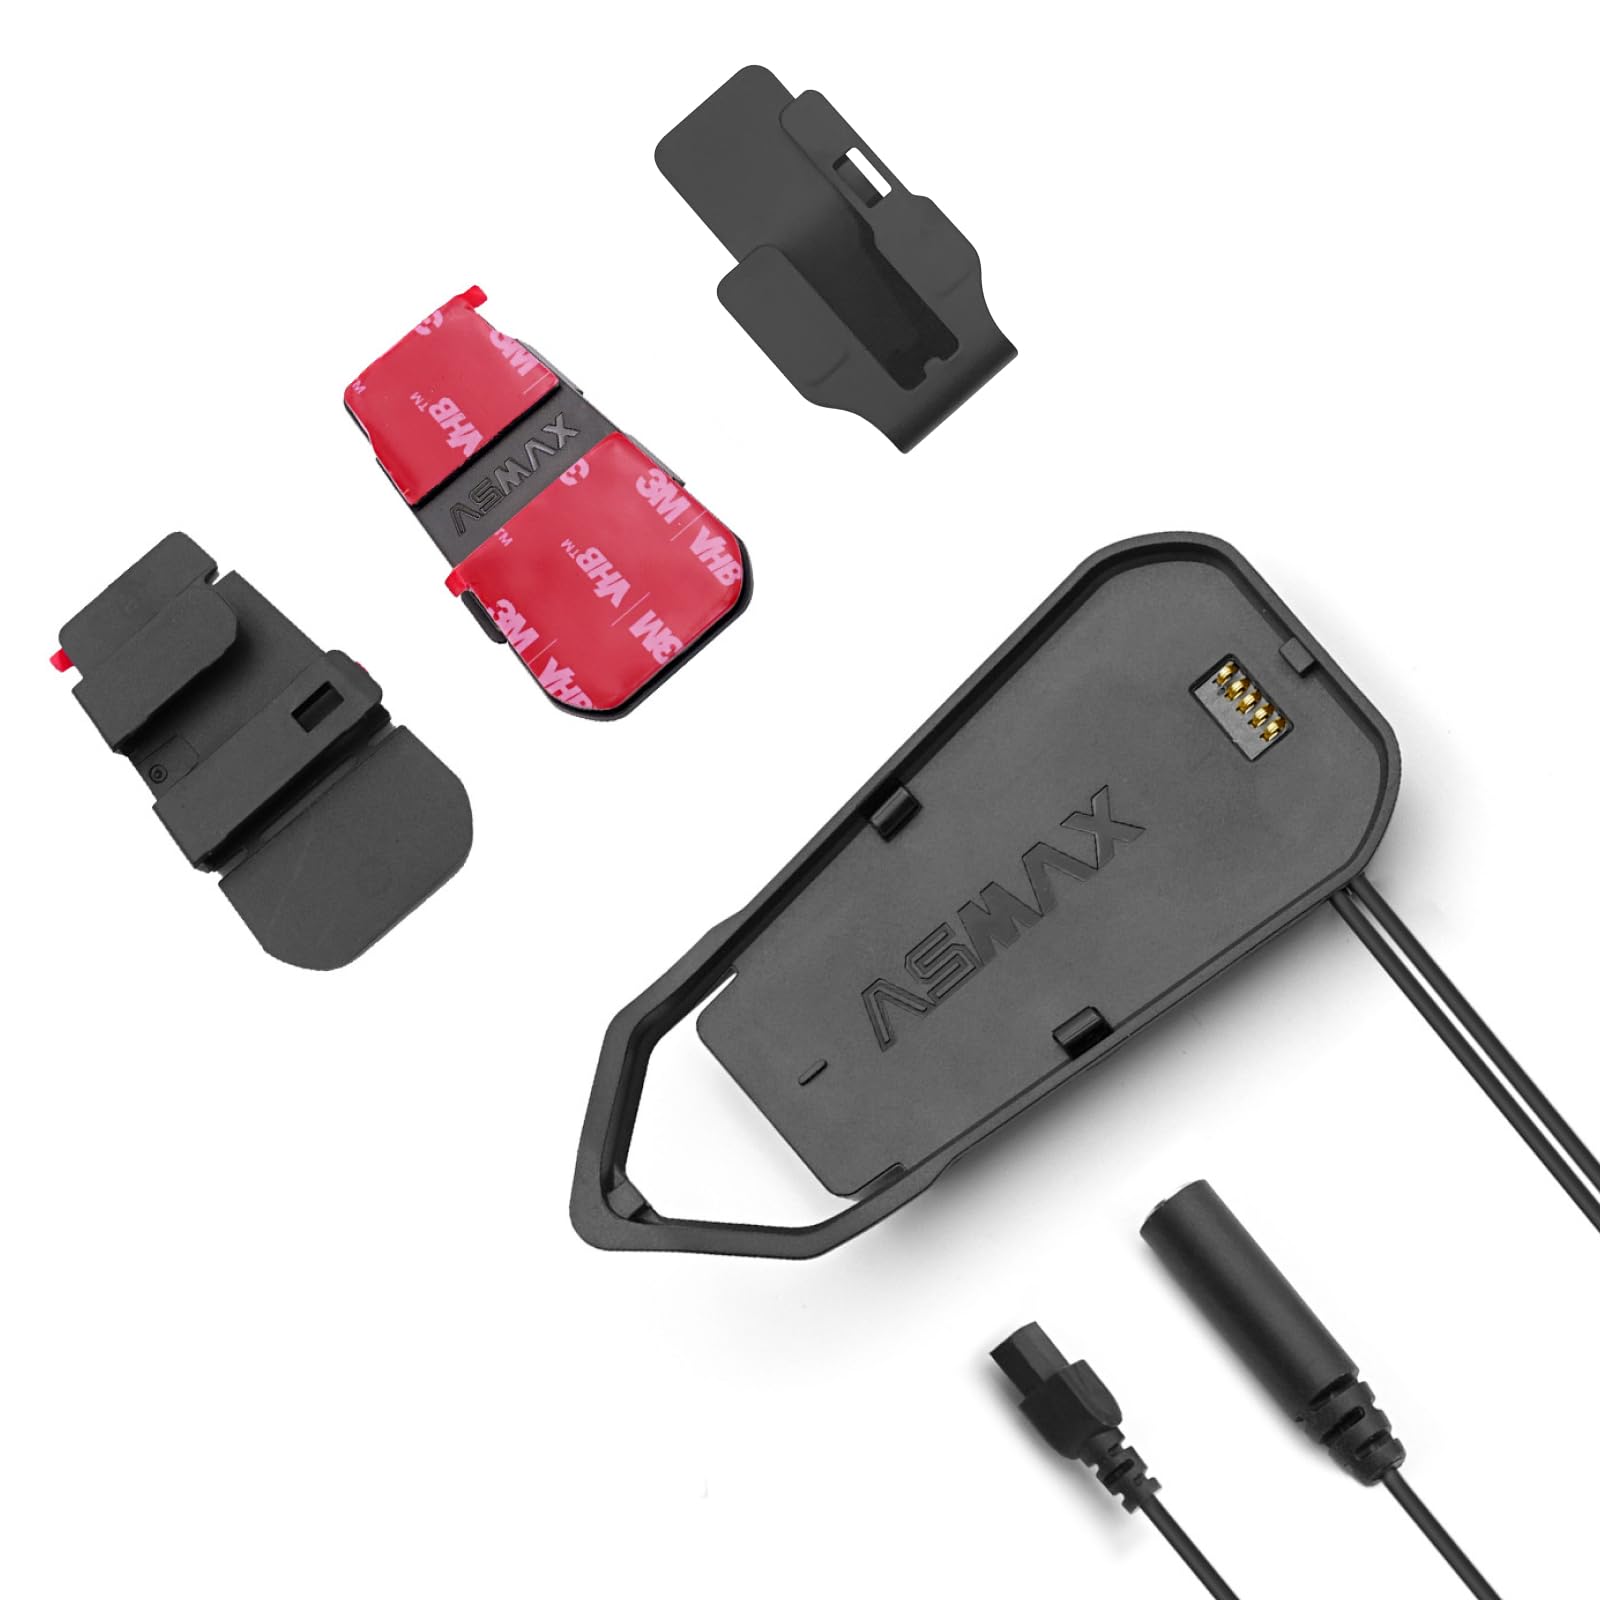
Figure 1: Components of the ASMAX Z1 Mount Kit.
3. Kandungan Pakej
Selepas membuka pakej, sila sahkan bahawa semua item berikut disertakan:
- ASMAX Z1 Headset Main Mount
- Metal Clip Attachment
- Adhesive Plate (with 3M VHB tape)
- Manual Pengguna (dokumen ini)
4. Persediaan dan Pemasangan
Before installation, ensure your helmet surface is clean and dry. Choose the appropriate mounting method based on your helmet type and preference.
4.1. Using the Metal Clip Attachment
- Identify a suitable location on the helmet's left side, near the bottom edge, where the clip can securely grip the helmet shell without obstructing the visor mechanism or ventilation.
- Slide the metal clip onto the edge of the helmet, ensuring it is firmly seated.
- Align the ASMAX Z1 Headset Main Mount with the clip and slide it downwards until it clicks into place.
- Verify that the mount is stable and does not wobble.

Gambar 2: Cthample of clip attachment on a helmet.
4.2. Using the Adhesive Plate Attachment
- Clean the chosen helmet surface thoroughly with an alcohol wipe and allow it to dry completely. This ensures optimal adhesion.
- Peel off the protective backing from the 3M VHB tape on the adhesive plate.
- Carefully position the adhesive plate on the desired flat surface of the helmet, ensuring it is level.
- Press firmly on the adhesive plate for at least 30 seconds to ensure strong bonding.
- Allow the adhesive to cure for at least 24 hours before attaching the headset. This is crucial for maximum bond strength.
- Once cured, align the ASMAX Z1 Headset Main Mount with the adhesive plate and slide it downwards until it clicks into place.

Figure 3: Headset mounted on a helmet (adhesive method implied).
5. Pertimbangan Operasi
Once the mount kit is securely installed, the ASMAX Z1 headset can be easily attached and detached. Ensure the headset is fully seated in the mount before riding. The sturdy design prevents accidental detachment during normal operation.
6. Penyelenggaraan
- Regularly inspect the mount kit for any signs of wear, damage, or loosening.
- Clean the mount and helmet surface around the mount periodically with a soft, damp cloth. Avoid harsh chemicals that could degrade the adhesive or material.
- If using the adhesive plate, avoid exposing it to extreme temperatures or prolonged direct sunlight immediately after installation, as this can affect curing.
- If the adhesive bond weakens over time, replace the adhesive pad with a new 3M VHB equivalent.
7. Penyelesaian masalah
| Masalah | Kemungkinan Punca | Penyelesaian |
|---|---|---|
| Gunung terasa longgar atau goyah. | Improper installation; adhesive not fully cured; clip not fully engaged. | Re-install, ensuring clip is fully engaged or adhesive is properly cured (wait 24 hours). Ensure surface is clean before adhesive application. |
| Headset does not click into mount. | Misalignment; debris in mounting slot. | Ensure correct orientation and clear any debris from the mounting slot on both the headset and the mount. |
| Adhesive pad detaches. | Surface not clean; insufficient pressure during application; premature use; old adhesive. | Clean surface thoroughly, apply firm pressure for 30 seconds, allow 24 hours to cure. Replace with new 3M VHB adhesive if necessary. |
8. Spesifikasi
| Ciri | Perincian |
|---|---|
| Jenama | ASMAX |
| Nombor Model | Aksesori Z1 |
| Jenis Pemasangan | Helmet Mount (Clip or Adhesive) |
| bahan | Metal (for clip), Plastic (for mount body) |
| warna | Hitam |
| Berat Barang | 1.76 auns |
| Dimensi Pakej | 3.54 x 2.83 x 1.65 inci |
| Ciri Khas | Lightweight, Sturdy, Easy Installation |
| Keserasian | ASMAX Z1 Motorcycle Bluetooth Headset, suitable for virtually all helmets. |
9. Waranti dan Sokongan
For warranty information and technical support, please refer to the official ASMAX website or contact ASMAX customer service directly. Keep your purchase receipt as proof of purchase.
ASMAX Customer Service: Visit the ASMAX Store on Amazon


