1. Pengenalan
Thank you for choosing the Pristar 2.4Ghz 4WD Gesture Sensing RC Stunt Car. This manual provides essential information for the safe operation, setup, and maintenance of your new RC stunt car. Please read this manual thoroughly before use to ensure optimal performance and longevity of the product.
Video: Selesaiview of the Pristar RC Stunt Car's features and capabilities.
2. Maklumat Keselamatan
- Sentiasa kendalikan kereta RC di kawasan terbuka, jauh daripada orang ramai, haiwan peliharaan dan halangan.
- Jangan kendalikan berhampiran air atau dalam keadaan basah untuk mengelakkan kerosakan elektrik.
- Jauhkan jari, rambut dan pakaian longgar daripada bahagian yang bergerak.
- Adult supervision is recommended for children aged 6-12.
- Jangan cuba mengubah suai atau membuka produk.
- Use only the provided charging cable and batteries.
3. Apa yang ada di dalam Kotak

Image: All components included in the Pristar RC Stunt Car package.
- 1 x Kereta Lagak Ngeri RC Pengesan Gerak Isyarat
- 1 x Pengawal Jam Sensor Graviti
- 1 x Alat Kawalan Jauh
- 2 x Rechargeable Lithium Ion Batteries
- 1 x Kabel Pengecasan
- 1 x Water Dropper
- 1 x Pemutar skru
- 1 x Manual Pengguna (dokumen ini)
4. Komponen Selesaiview
4.1 RC Stunt Car

Image: The RC Stunt Car, showcasing its flexible design and omni-directional wheels.
The RC Stunt Car features a flexible bionic joint design, allowing it to transform between on-road and off-road modes. It is equipped with powerful 4WD, LED lights, sound effects, and a mist spray function.
4.2 Remote Controller & Gesture Sensor Watch

Imej: Terperinci view of the remote controller and the gesture sensor watch, highlighting their respective buttons and controls.
The car can be controlled using either the traditional remote controller or the innovative gravity sensor watch controller, which responds to hand gestures.
5. Persediaan
5.1 Battery Installation (RC Stunt Car)

Image: Visual instructions for connecting and inserting the car's rechargeable battery.
- Using the provided screwdriver, open the battery compartment on the underside of the RC car.
- Connect the rechargeable Lithium Ion battery to the car's power connector. Ensure correct polarity.
- Place the battery inside the compartment and close the cover securely with the screw.
Video: Demonstrating the correct procedure for installing the battery in the RC Stunt Car.
5.2 Battery Installation (Remote Controller)
- Buka petak bateri di belakang alat kawalan jauh.
- Insert 2 x AA batteries (not included), observing the correct polarity.
- Tutup petak bateri.
5.3 Battery Installation (Gesture Sensor Watch)
- Open the battery compartment on the back of the gesture sensor watch.
- Insert 2 x AAA batteries (not included), observing the correct polarity.
- Tutup petak bateri.
5.4 Mengecas Bateri
- Connect the rechargeable Lithium Ion battery to the provided USB charging cable.
- Plug the USB cable into a standard USB power adapter (e.g., phone charger, computer USB port).
- Lampu penunjuk pada kabel USB akan menyala semasa pengecasan dan padam apabila dicas sepenuhnya.
- Masa pengecasan adalah kira-kira 2-3 jam.
5.5 Adding Water for Spray Function
- Locate the water inlet on the top of the RC car.
- Use the provided water dropper to carefully fill the water tank with clean water. Do not overfill.
- Tutup penutup salur masuk air dengan selamat.
6. Arahan Operasi
6.1 Hidupkan/Mati Kuasa
- To power on the RC car, slide the power switch located on the underside of the car to the 'ON' position.
- To power on the remote controller, slide its power switch to 'ON'.
- To power on the gesture sensor watch, press and hold the power button until the indicator light illuminates.
- Untuk mematikan kuasa, terbalikkan langkah.
6.2 Pairing Controllers
The RC car and controllers should automatically pair upon powering on. If pairing fails, power off all devices and restart the process. Ensure they are within close proximity during pairing.
6.3 Operasi Alat Kawalan Jauh
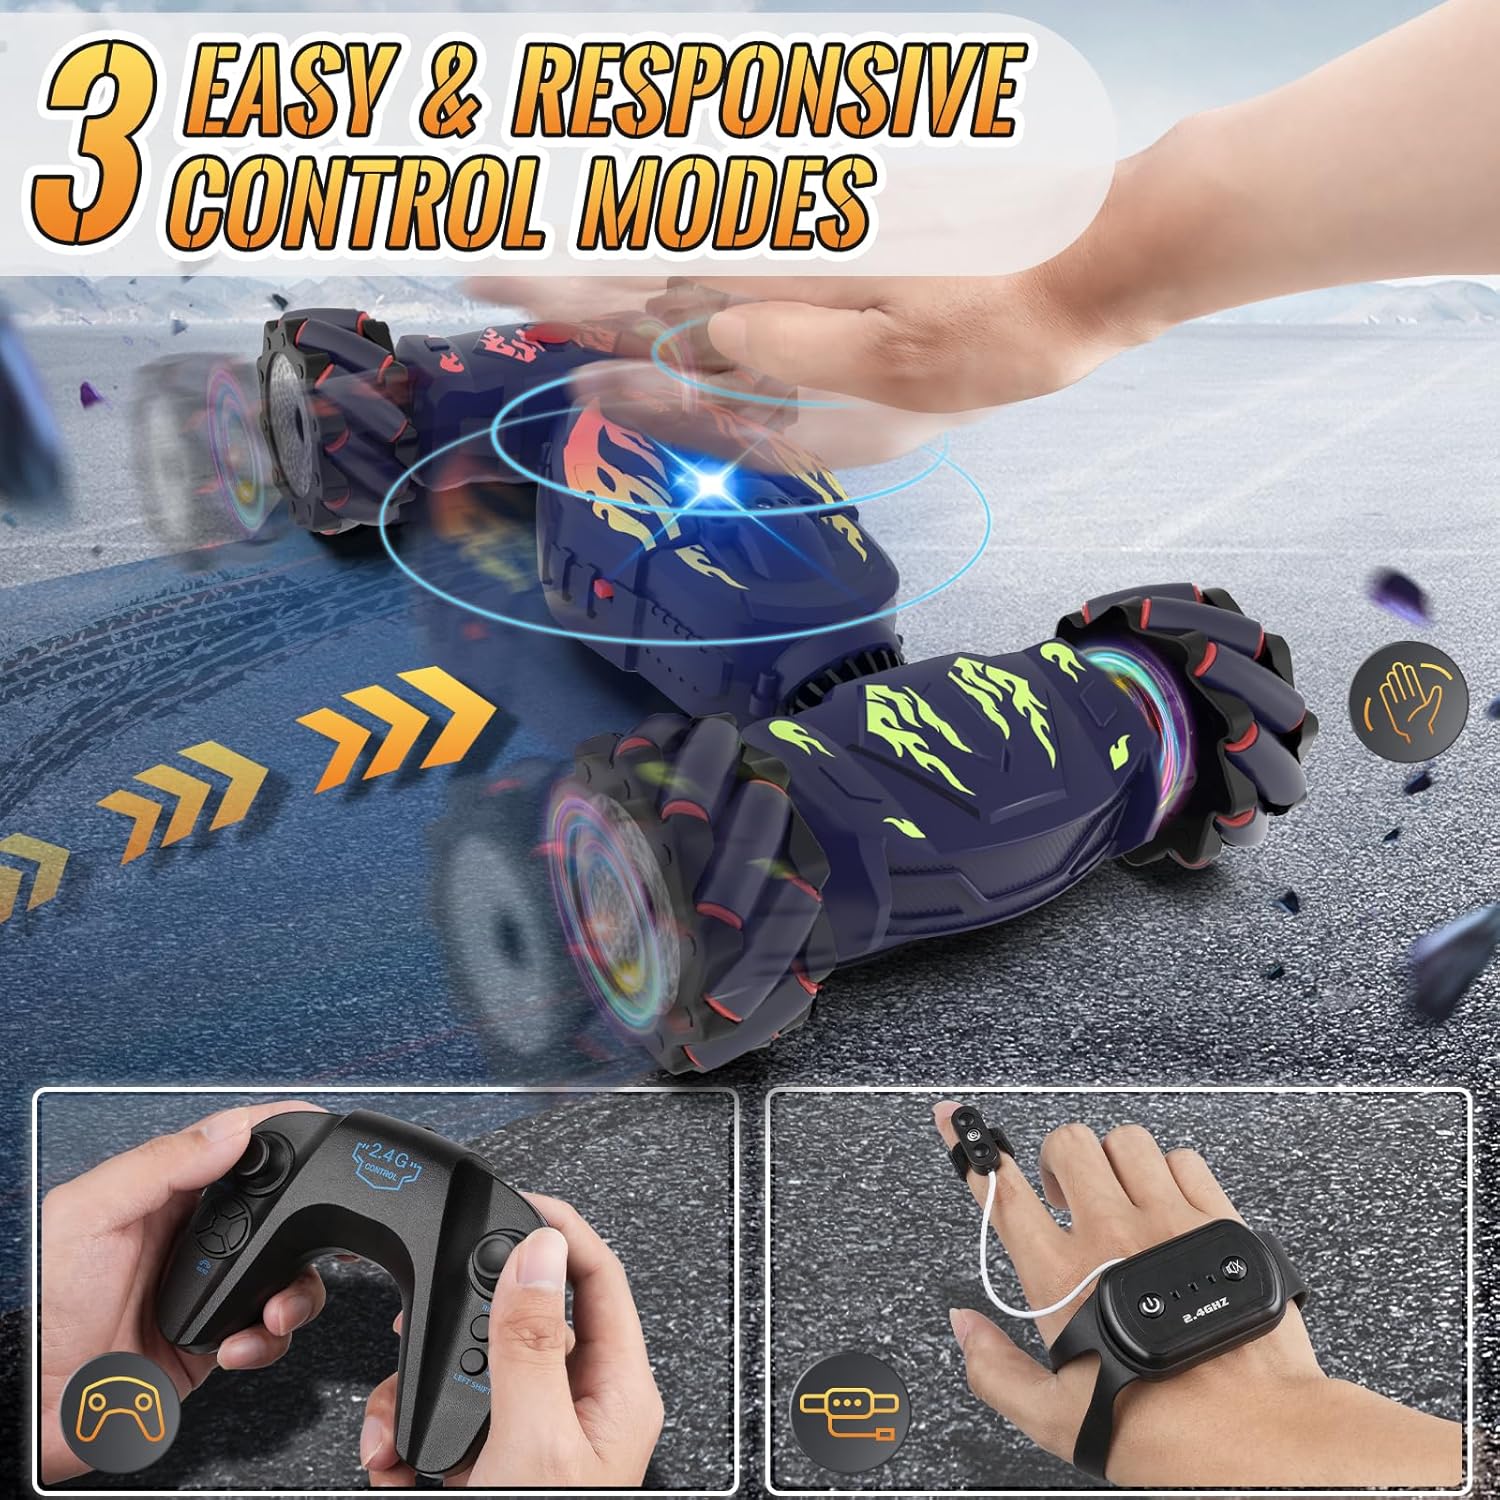
Image: Demonstrating the use of the remote controller for the RC Stunt Car.
- Kayu Joy Kiri: Mengawal pergerakan ke hadapan dan ke belakang.
- Joystick Kanan: Mengawal stereng kiri dan kanan.
- Left Shift Button: Moves the car laterally to the left.
- Right Shift Button: Moves the car laterally to the right.
- One Key Deformation Button: Transforms the car between on-road and off-road modes.
- Automatic Demonstration Button: Initiates a pre-programmed stunt sequence.
- Short Press Spray Button: Activates the mist spray function.
- Long Press Light Button: Toggles the car's LED lights.
- Short Press Induction Mode Button: Switches to gesture control mode.
- Long Press Sound Button: Toggles the car's sound effects/music.
6.4 Gesture Sensor Watch Operation
Image: Operating the RC Stunt Car using the gesture sensor watch.
- Wear the watch controller on your hand and secure the finger key to your index finger.
- Finger Key (Short Press): Switches between different control modes (e.g., normal, serpentine, twist-drift).
- Finger Key (Long Press): Activates a one-key demonstration.
- Boot Button (Short Press): Starts the car.
- Boot Button (Press and Hold for 3 Seconds): Turns off the car.
- Function Key (Short Press): Activates the mist spray.
- Function Key (Long Press): Toggles the car's sound effects/music.
- Move your hand to control the car's direction and stunts (e.g., tilt forward for forward, tilt left for left turn).
6.5 Driving Modes & Stunt Functions
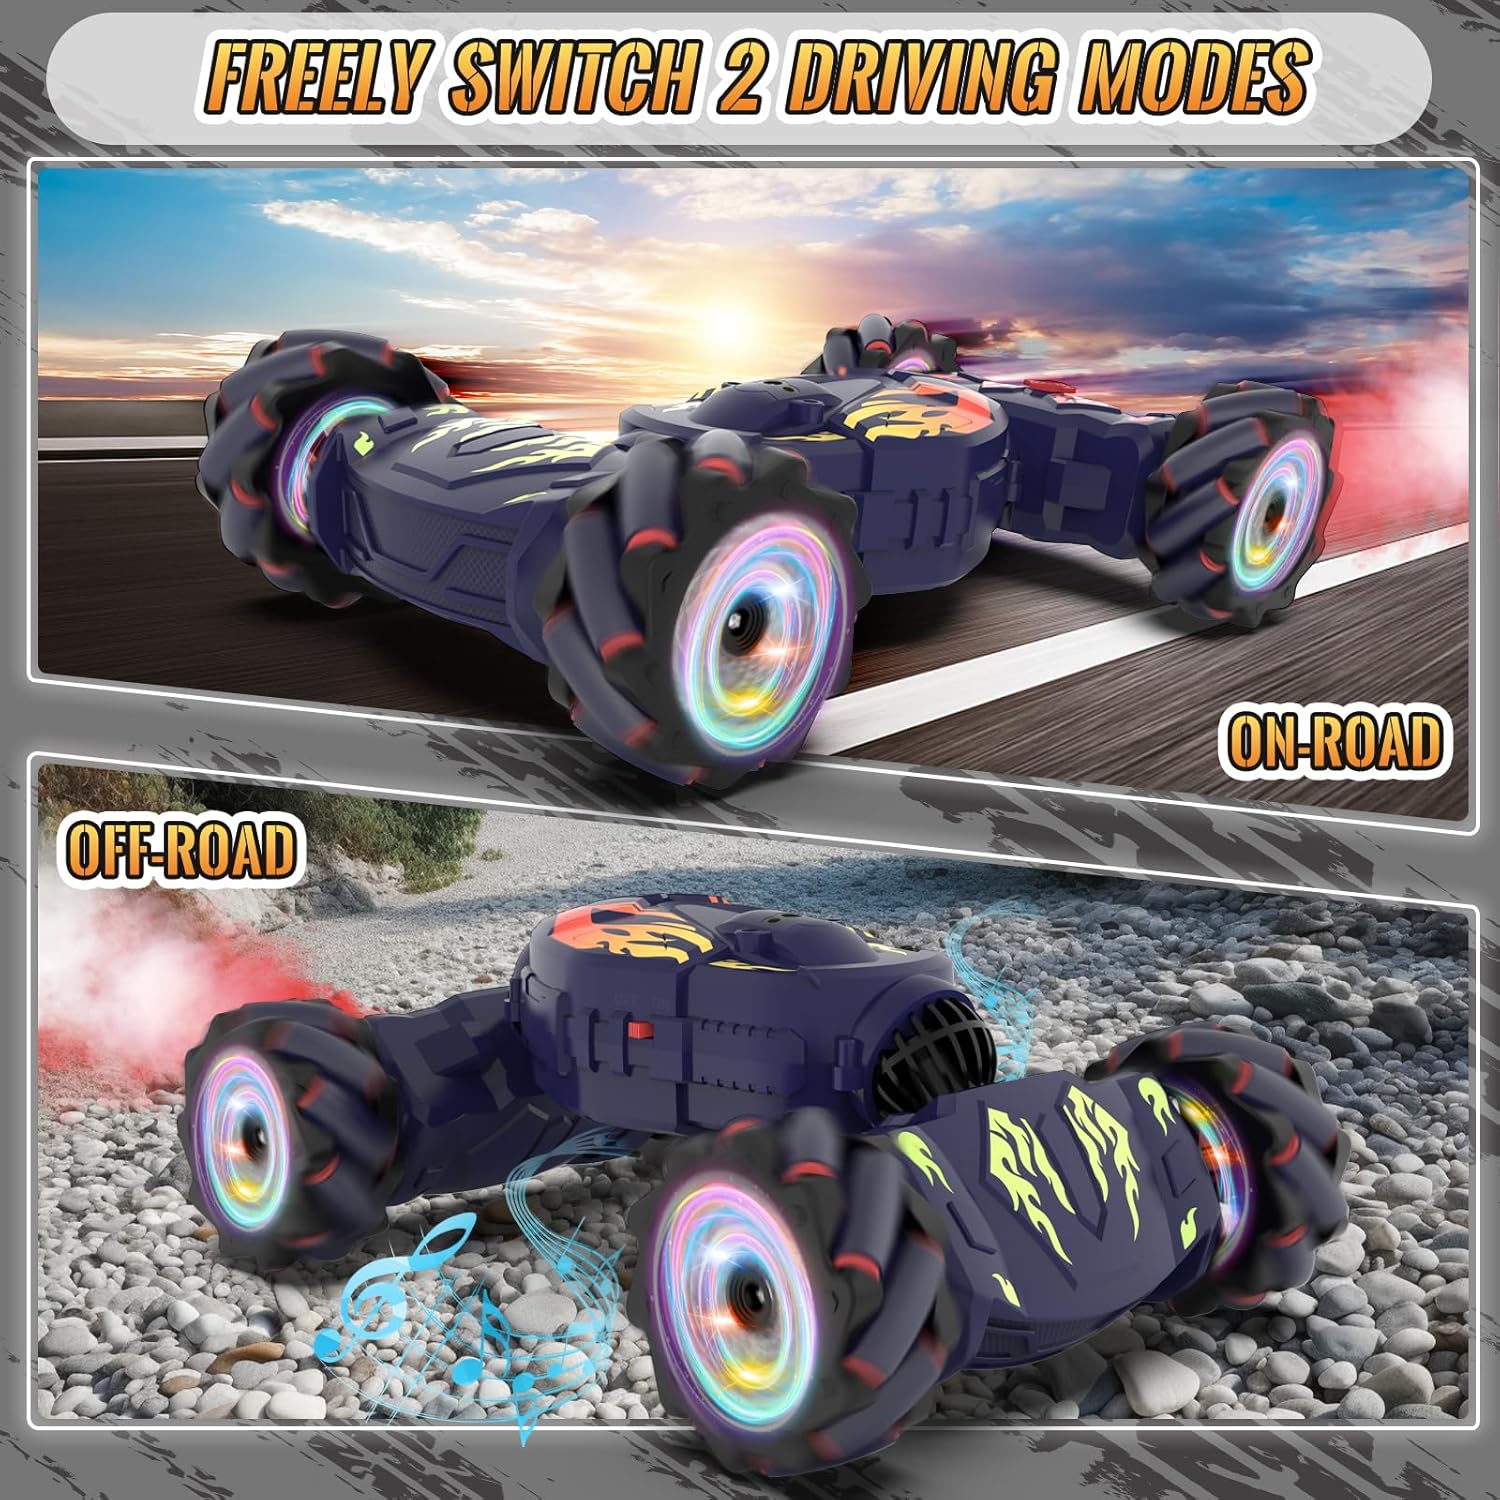
Image: The RC Stunt Car in both its on-road and off-road configurations.
- On-Road Mode: Ideal for smooth surfaces, offering speed and agility.
- Mod Luar Jalan: Transforms the car for enhanced traction and climbing ability on rougher terrains.
- Putaran 360°: Perform full rotations in place.
- Omni-Directional Drift: Move and drift in any direction, including sideways.
- Balik Dua Sisi: The car can continue driving even after flipping over.
- 45° Climbing: Conquer inclines up to 45 degrees.
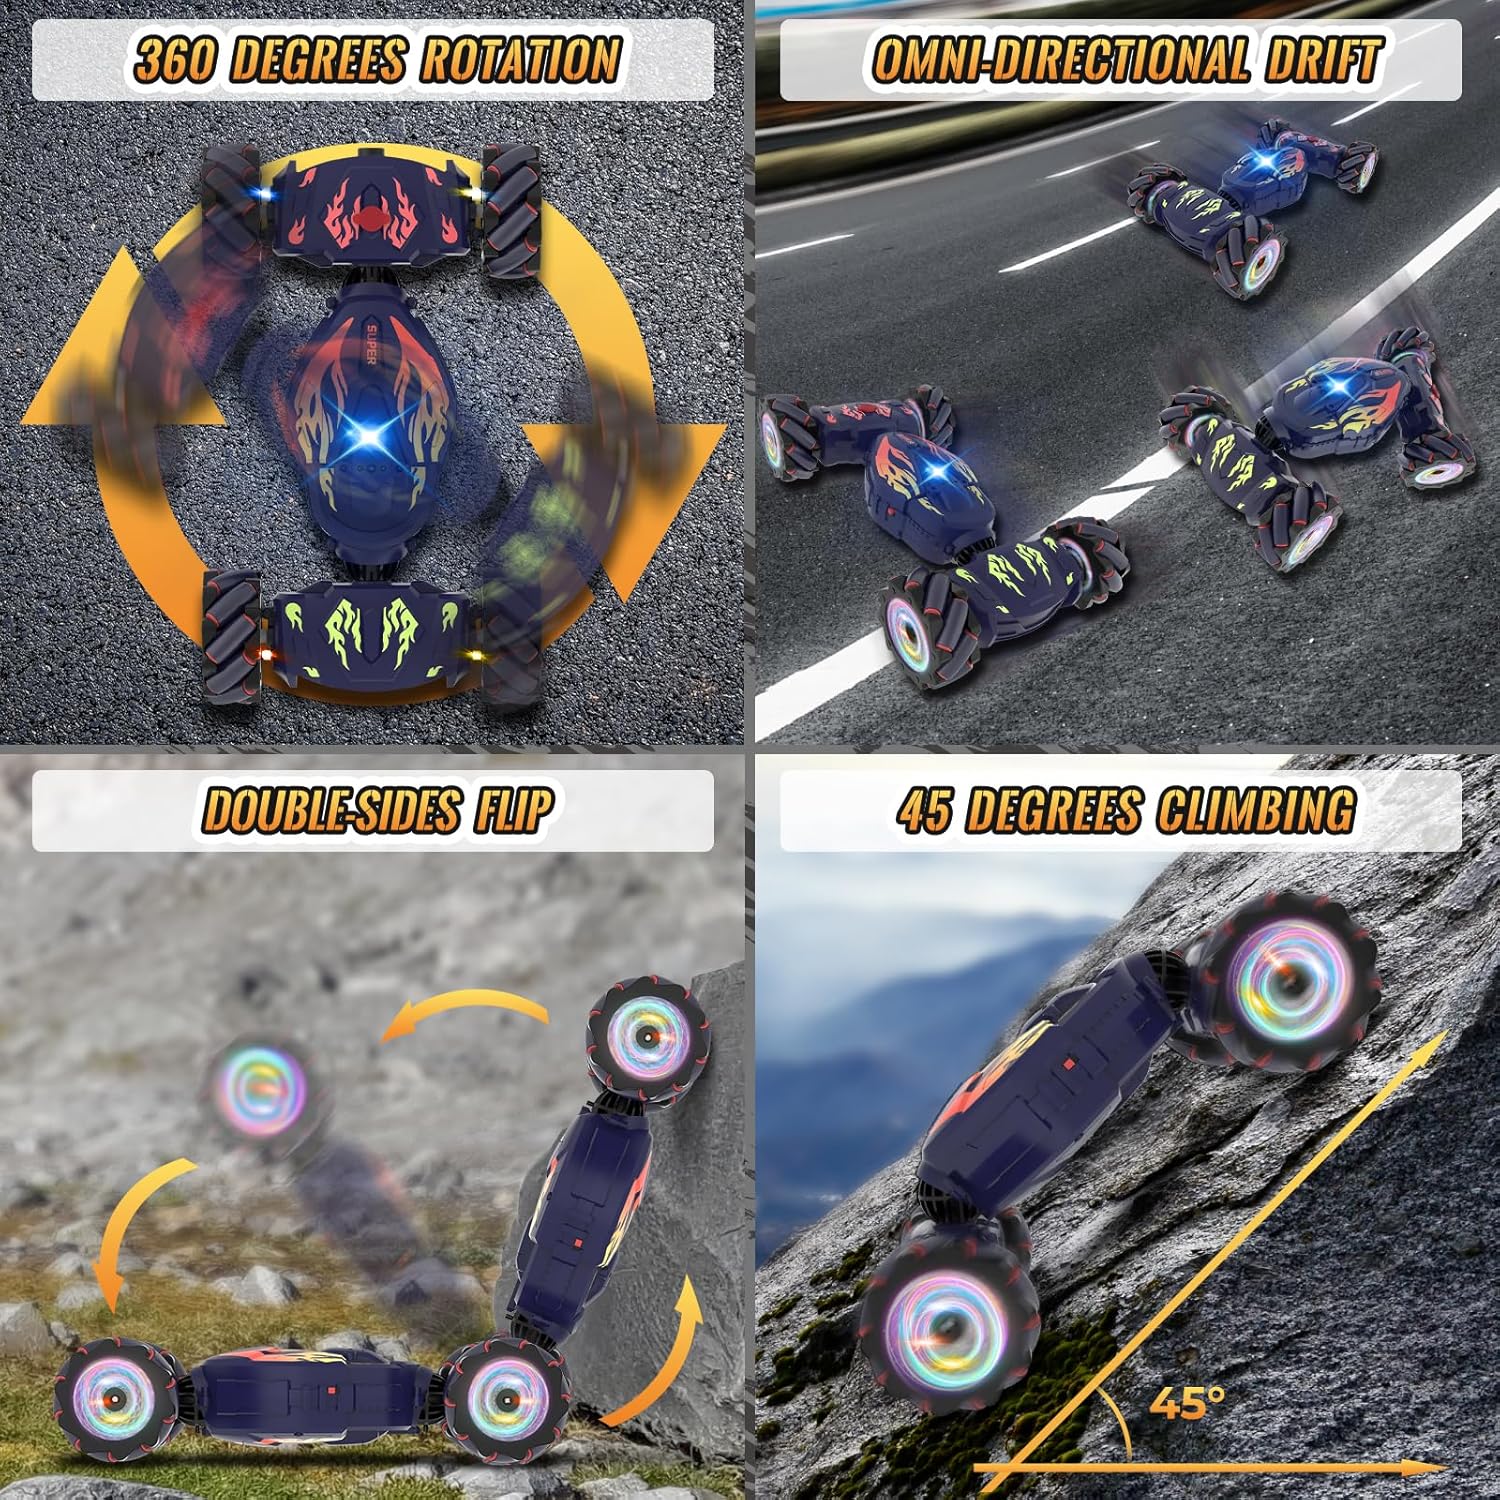
Image: The RC Stunt Car demonstrating its diverse stunt capabilities.

Image: The RC Stunt Car demonstrating its ability to conquer different types of terrain.
6.6 Ciri Istimewa
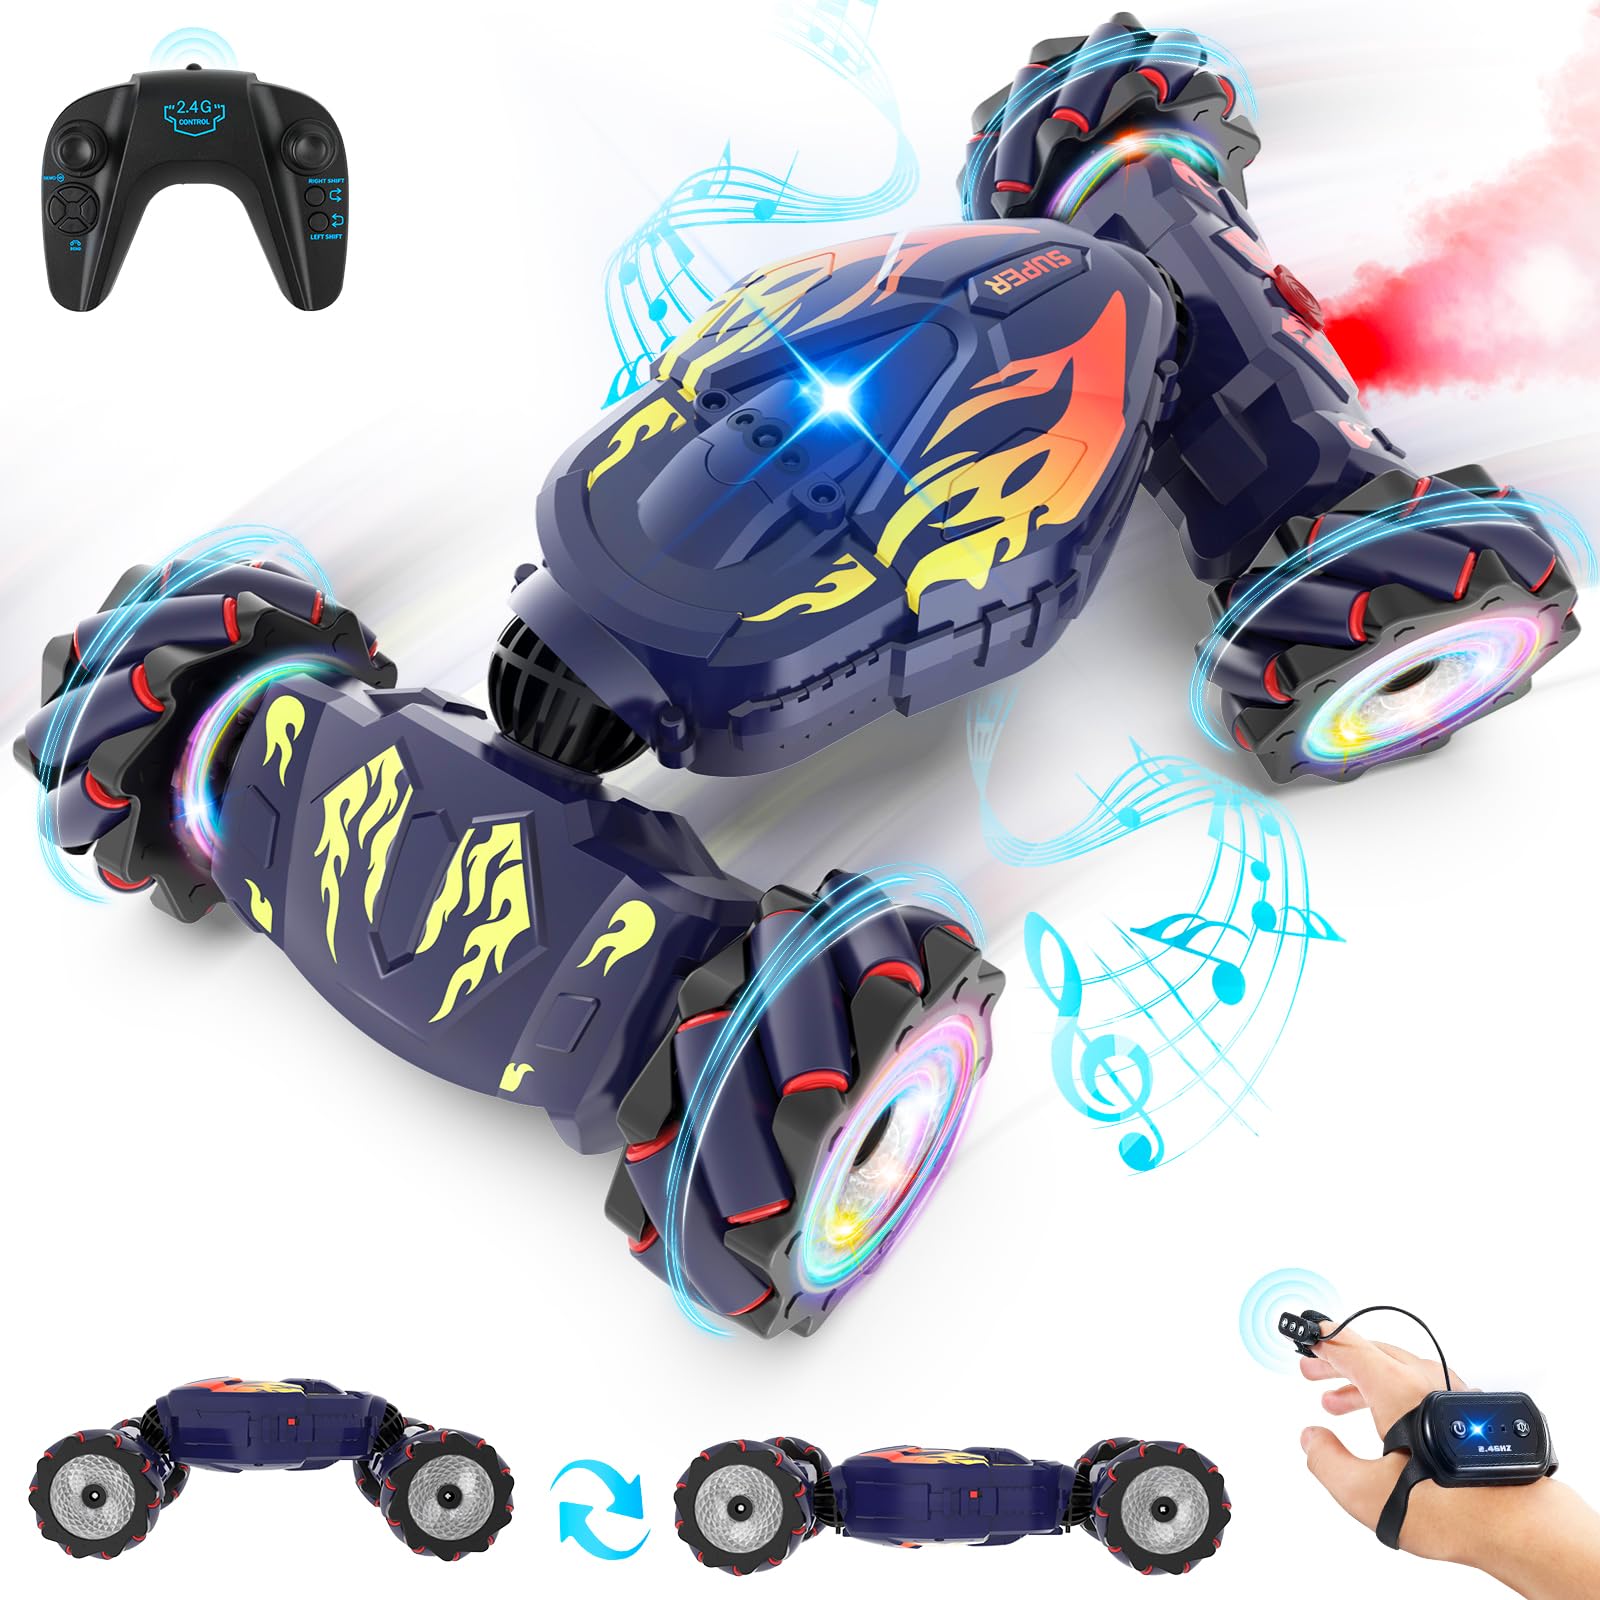
Image: The RC Stunt Car showcasing its mist spray, lights, and music features.
- Semburan Kabus: Emits a cool mist from the rear, simulating exhaust.
- Lampu LED: Dynamic color-changing lights on the wheels and body enhance the visual experience.
- Music & Sound Effects: Plays cheerful music and realistic car sounds during operation.
7. Penyelenggaraan
- Pembersihan: Wipe the car with a soft, dry cloth after each use. Avoid water contact with electronic components.
- Penjagaan Bateri: Remove batteries from controllers and car if not in use for extended periods. Store batteries in a cool, dry place.
- Storan: Store the RC car and accessories in a dry, cool environment, away from direct sunlight.
8. Penyelesaian masalah
- Kereta tidak bertindak balas: Ensure all batteries are charged and correctly installed. Check if controllers are paired.
- Weak performance: Recharge the car's battery. Replace controller batteries if needed.
- Spray function not working: Check if the water tank is filled. Ensure the spray button is pressed correctly.
- Gangguan: Operate the car away from other 2.4Ghz devices or strong electromagnetic fields.
9. Spesifikasi
- Dimensi Produk: 10.23 x 7.68 x 3.94 inci
- Berat Barang: 1.81 paun
- Umur Disyorkan Pengilang: 6 - 12 tahun
- Bateri: 2 Lithium Ion batteries required (included for car), AA/AAA for controllers (not included).
- Kekerapan Kawalan: 2.4Ghz
- Sistem Pemacu: 4WD

Image: Visual representation of the RC Stunt Car's dimensions.
10. Waranti dan Sokongan
For warranty information or technical support, please refer to the contact details provided on the product packaging or visit the official Pristar webtapak. Simpan resit pembelian anda sebagai bukti pembelian.


