1. Pengenalan
Thank you for choosing the Phanteks XT Pro Ultra Mid-Tower Gaming Chassis. This manual provides essential information for setting up, operating, and maintaining your new PC case. Designed for high airflow and extensive component compatibility, the XT Pro Ultra offers a robust foundation for your gaming system.
The Phanteks XT Pro Ultra is a mid-tower gaming chassis featuring a high-airflow performance mesh design and a tempered glass window. It comes equipped with four M25-140 DRGB fans for optimal cooling and aesthetic appeal. This chassis supports a wide range of components, including the latest rear-side connector mainboards and large graphics cards.

Figure 1: Phanteks XT Pro Ultra Mid-Tower Gaming Chassis (Black)
2. Ciri-ciri Utama
- Keserasian Papan Induk: Supports E-ATX, ATX, Micro ATX, and Mini ITX motherboards, including the latest rear-side connector mainboards.
- Cooling Versatility: Accommodates up to 10x 120mm or 6x 140mm and 3x 120mm fan positions. Dedicated 360mm radiator support in the top without restrictions.
- Graphics Card Support: Designed to support the largest graphics cards without compromise.
- Kipas yang disertakan: Comes with 4x M25-140 DRGB Fans for immediate high-performance cooling and vibrant lighting.
- Reka Bentuk Aliran Udara Tinggi: Performance mesh front and top panels ensure excellent ventilation.
- Tempered Glass Window: Menyediakan yang jelas view komponen dalaman anda.
- I/O Depan: Features USB-C 3.2 Gen2 and USB 3.0 ports for modern connectivity.
3. Panduan Persediaan
3.1. Menyediakan Casis
Before installing components, ensure you have a clean, static-free workspace. Remove the side panels by unscrewing the thumbscrews at the rear of the chassis and gently sliding them off.

Gambar 2: Dalaman view daripada casis
3.2. Pemasangan Papan Induk
Align your motherboard with the standoffs inside the chassis. Secure it using the provided screws. The XT Pro Ultra supports various motherboard form factors, including E-ATX.
3.3. Pemasangan Unit Bekalan Kuasa (PSU).
Install your power supply unit into the dedicated compartment at the bottom rear of the chassis. Secure it with screws from the rear. Route necessary cables through the cable management cutouts.
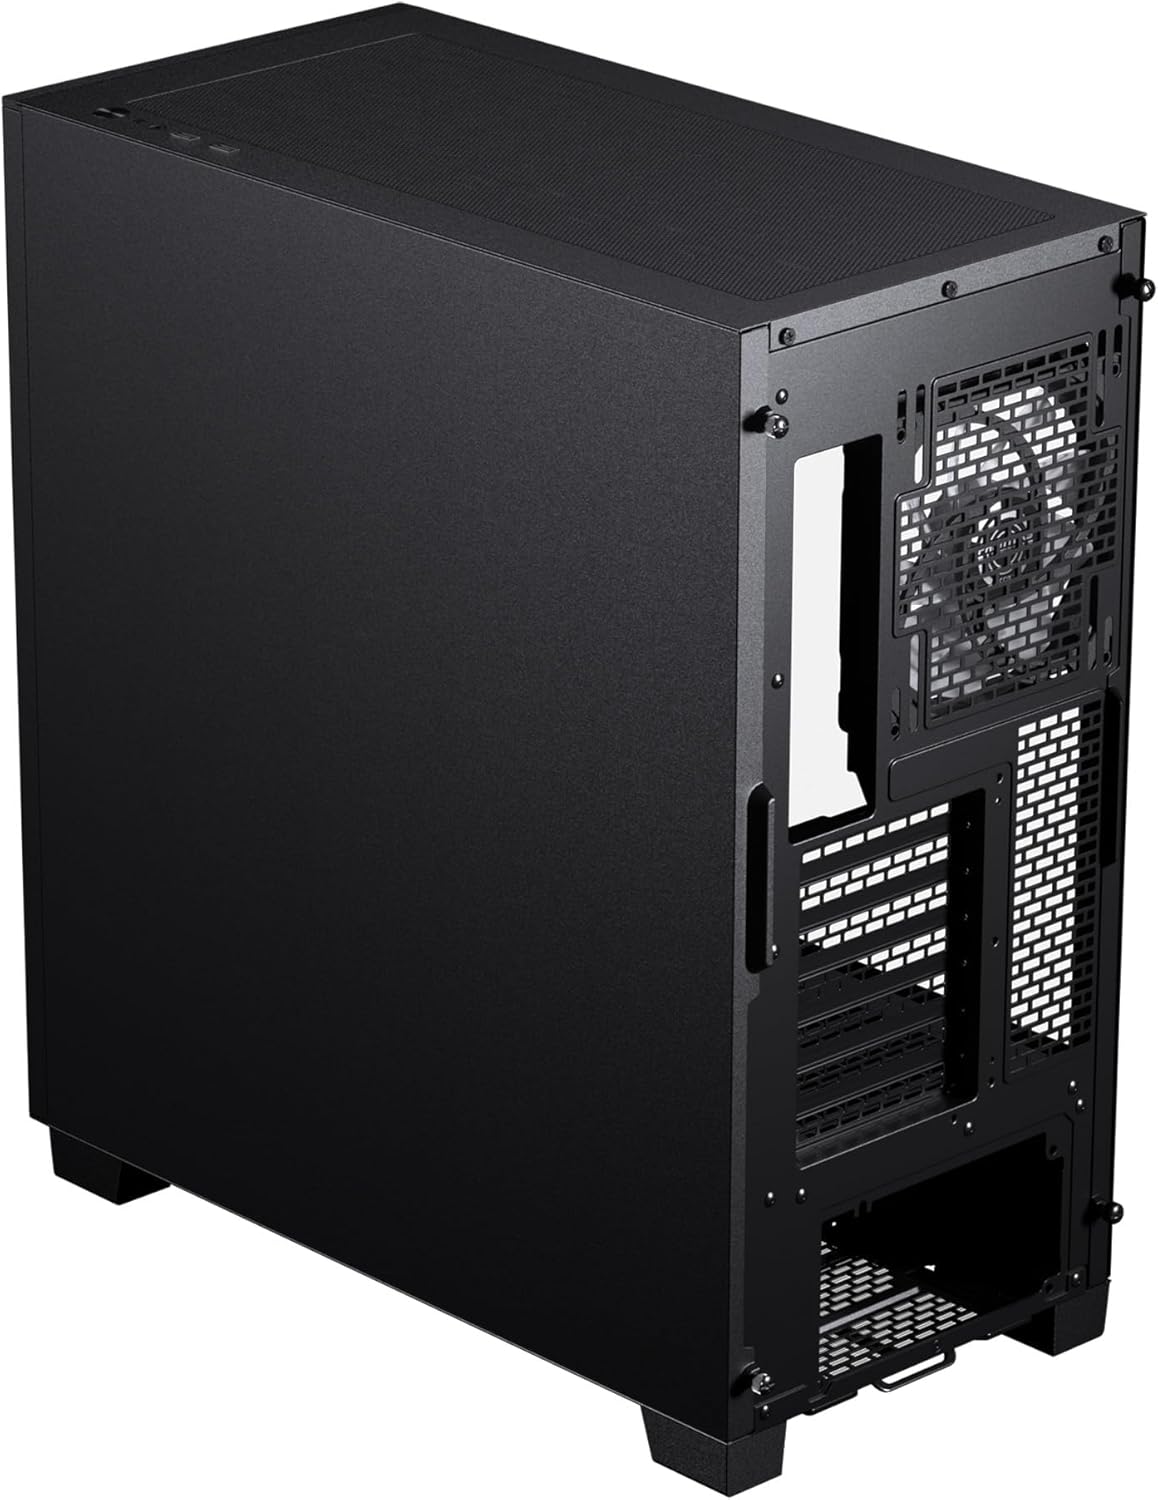
Figure 3: Rear internal view with PSU mounting area
3.4. Pemasangan Pemacu Storan
The chassis offers flexible storage options for 3.5" HDDs and 2.5" SSDs. Utilize the designated mounting points behind the motherboard tray and within the PSU shroud area.

Figure 4: Storage drive mounting locations
3.5. Pemasangan Kad Grafik
Install your graphics card into the appropriate PCIe slot on your motherboard. The XT Pro Ultra provides ample space for even the largest graphics cards.
3.6. Cooling System Setup (Fans & Radiators)
The chassis supports various fan and radiator configurations for optimal thermal performance. The included 140mm DRGB fans are pre-installed for convenience.

Figure 5: Fan and Radiator Support Diagram
3.7. Sambungan I/O Hadapan
Connect the front panel cables (USB 3.0, USB-C 3.2 Gen2, Audio, Power, Reset) to their respective headers on your motherboard. Refer to your motherboard manual for specific header locations.

Figure 6: Front I/O Port Layout
4. Arahan Operasi
Once all components are securely installed and cables are connected, you can power on your system. Press the power button located on the top front panel of the chassis.
4.1. Kawalan Pencahayaan RGB
The included M25-140 DRGB fans feature addressable RGB lighting. Connect the fan RGB cables to a compatible motherboard header or a dedicated RGB controller (if included or purchased separately) to customize lighting effects. Refer to your motherboard's software or RGB controller's manual for detailed instructions on managing lighting.
4.2. Prestasi Aliran Udara
The XT Pro Ultra is designed for optimal airflow. Ensure that no obstructions block the front mesh panel or the top ventilation area to maintain efficient cooling. The pre-installed fans are configured to provide a balanced airflow path.
5. Penyelenggaraan
5.1. Pembersihan Penapis Habuk
Regularly clean the dust filters located on the front, top, and bottom of the chassis to prevent dust buildup and maintain optimal airflow. Filters can typically be removed by hand for easy cleaning with water and mild soap, or by vacuuming.
5.2. Pembersihan Am
Gunakan yang lembut, damp cloth to clean the exterior surfaces of the chassis. Avoid abrasive cleaners or solvents that may damage the finish or tempered glass. For internal cleaning, use compressed air to remove dust from components and fans.
6. Penyelesaian masalah
6.1. System Does Not Power On
- Check if the power cable is securely connected to the PSU and the wall outlet.
- Pastikan suis PSU berada dalam kedudukan 'ON'.
- Sahkan bahawa kabel butang kuasa panel hadapan disambungkan dengan betul ke pengepala papan induk.
- Confirm all internal power connections (24-pin ATX, CPU, GPU) are seated properly.
6.2. Fans Not Spinning / RGB Not Lighting Up
- Check if fan power cables are securely connected to the motherboard fan headers or fan controller.
- Verify that RGB cables are correctly connected to the motherboard RGB headers or RGB controller.
- Ensure any fan or RGB controllers are receiving power.
6.3. Port USB Tidak Berfungsi
- Confirm that the USB 3.0 and USB-C 3.2 Gen2 front panel cables are correctly connected to their respective motherboard headers.
- Semak tetapan BIOS/UEFI papan induk anda untuk memastikan port USB diaktifkan.
For further assistance, please refer to the Phanteks official support resources.
7. Spesifikasi
| Ciri | Perincian |
|---|---|
| Jenama | Phanteks |
| Siri | XT Pro Ultra |
| Nombor Model | PH-XT523P1_DBK01 |
| Jenis Kes | Mid Tower |
| warna | Hitam |
| bahan | Steel Chassis, Tempered Glass Window, ABS plastic |
| Berat Barang | 18.01 paun |
| Dimensi Produk (LxWxH) | 17.7 x 9.05 x 19.68 inci |
| Keserasian Papan Induk | Extended ATX, Mini ITX, micro ATX, M-ATX, MINH-IIX, Mini ATX |
| Bilangan USB 3.0 Port | 1 |
| Bilangan USB 2.0 Port | 1 |
| Jenis Pemasangan Bekalan Kuasa | Pelekap Bawah |
| Kaedah Penyejukan | Udara |

Figure 7: Chassis Dimensions
8. Waranti dan Sokongan
For detailed warranty information, please refer to the warranty card included with your product or visit the official Phanteks webtapak. Simpan bukti pembelian anda untuk tuntutan waranti.
For technical support or further inquiries, please visit the Phanteks support page or contact their customer service directly. Contact information can typically be found on the official Phanteks webtapak.