1. Pengenalan
Terima kasih kerana membeliasing the Ankilo Projection Alarm Clock. This device is designed to provide convenient timekeeping with a unique projection feature, allowing you to view the time on your ceiling or wall. It also includes an alarm, temperature display, and USB charging capabilities. Please read this manual carefully to ensure proper use and maintenance of your new alarm clock.
2. Maklumat Keselamatan
- Jangan dedahkan peranti kepada suhu yang melampau, cahaya matahari langsung atau kelembapan yang tinggi.
- Jauhkan peranti daripada air atau cecair lain.
- Jangan cuba membuka atau membaiki peranti ini sendiri. Rujuk semua servis kepada kakitangan yang berkelayakan.
- Gunakan hanya kabel USB yang disediakan untuk kuasa.
- The CR2032 battery is for backup only; the clock requires continuous USB power for full functionality.
3. Kandungan Pakej

- 1 x Ankilo Projection Alarm Clock
- 1 x USB Power Cable (1.5m)
- 1 x CR2032 Memory Battery (pre-installed for backup)
- 1 x Manual Pengguna
The image above shows the complete contents included in your Ankilo Projection Alarm Clock package. Please verify all items are present upon unboxing.
4. Produk Lebihview

This diagram illustrates the various buttons and ports on your Ankilo Projection Alarm Clock for easy identification and operation.
| Komponen | Penerangan |
|---|---|
| Butang SNOOZE / LIGHT | Press to snooze alarm or adjust display brightness. |
| PROJECT Button | Press to adjust projection brightness. |
| Butang ALARM | Press to set or activate/deactivate alarm. |
| Butang SET | Press to enter time/date setting mode. |
| Butang KE ATAS | Increase values during setting, or switch 12/24H format. |
| Butang BAWAH | Decrease values during setting, or switch temperature unit. |
| Unjuran Lamp | Emits time projection onto surface. |
| Pelabuhan Kuasa | Connect USB power cable here. |
| Petak Bateri CR2032 | Houses the backup battery. |
| Penceramah | Outputs alarm sound. |
5. Persediaan
5.1 Menguasakan Peranti
The Ankilo Projection Alarm Clock is primarily powered by a USB cable. Connect the provided USB cable to the power port on the back of the clock and plug the other end into a standard USB power adapter (not included) or a USB port.
Nota Penting:
- The LED screen will only remain on when the USB power supply is connected.
- The included CR2032 battery serves as a backup to retain time and alarm settings during power outages, but it does not power the display or projection.
5.2 Penetapan Masa dan Tarikh Awal
- Tekan dan tahan butang SET butang selama 3 saat untuk memasuki mod tetapan masa. Digit jam akan mula berkelip.
- Gunakan UP or TURUN butang untuk melaraskan jam.
- Tekan SET sekali lagi untuk mengesahkan jam dan beralih ke tetapan minit. Digit minit akan berkelip.
- Gunakan UP or TURUN butang untuk melaraskan minit.
- Tekan SET again to confirm the minute and move to year setting.
- Ulangi proses menggunakan UP/TURUN dan SET to set the year, month, and day.
- Selepas menetapkan hari, tekan SET sekali lagi untuk keluar dari mod tetapan.
6. Arahan Operasi
6.1 Menetapkan Penggera
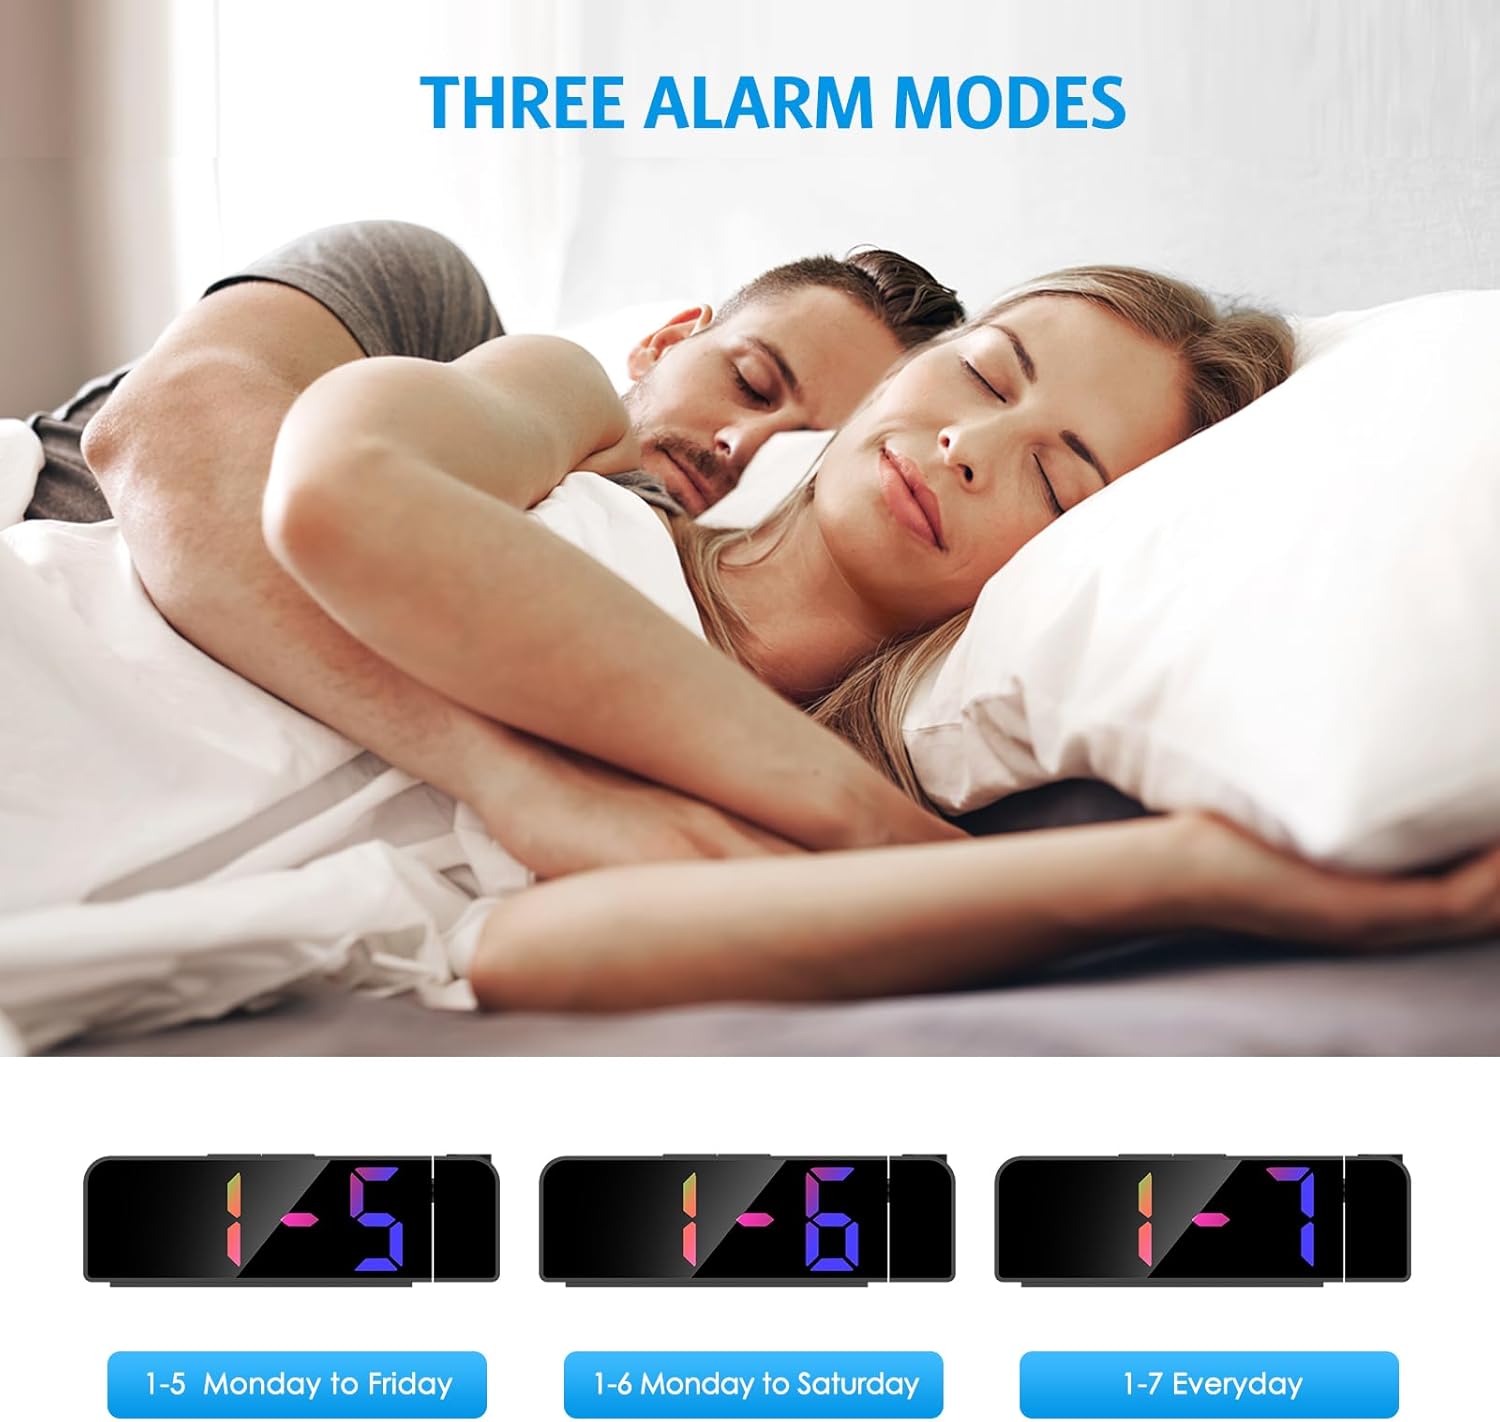
- Tekan dan tahan butang PENGGERA butang selama 3 saat. Angka jam penggera akan berkelip.
- Gunakan UP or TURUN butang untuk menetapkan jam penggera yang diingini.
- Tekan PENGGERA again to confirm the hour and move to minute setting.
- Gunakan UP or TURUN butang untuk menetapkan minit penggera yang diingini.
- Tekan PENGGERA again to select the alarm mode:
- 1-5: Penggera berbunyi Isnin hingga Jumaat.
- 1-6: Penggera berbunyi Isnin hingga Sabtu.
- 1-7: Alarm sounds Everyday.
- Tekan PENGGERA one last time to confirm and exit alarm setting mode.
The image above illustrates the three available alarm modes: weekdays, weekdays plus Saturday, and every day.
6.2 Fungsi Tunda

Apabila penggera berbunyi, tekan besar SNOOZE / CAHAYA button on the top of the clock to activate the snooze function. This will provide an additional 5 minutes of sleep before the alarm sounds again. You can repeat this process as needed.
The image highlights the prominent SNOOZE/LIGHT button, easily accessible for quick snooze activation.
6.3 Melaraskan Kecerahan Paparan

Tekan ke SNOOZE / CAHAYA button (short press) to cycle through 4 levels of display brightness: Bright, Medium, Low, and Off. Select the brightness level that best suits your environment.
This image demonstrates the four distinct brightness settings for the main LED display, from bright to completely off.
6.4 Adjusting Projection Brightness and Orientation

Tekan ke PROJEK button (short press) to cycle through 3 levels of projection brightness: Off, Dim, and Bright. The projection lamp can be rotated 180 degrees to project the time onto your ceiling or wall.
The image illustrates the projection feature, showing the clock projecting time onto a wall and the three available brightness levels for the projection.

Important Projection Orientation: The projection digits are only displayed correctly when the projection direction is towards the back of the alarm clock (away from the front display). If you project forward, the numbers will appear reversed. Ensure the projection is directed appropriately for correct readability.
This image clearly demonstrates the correct and incorrect projection orientations, emphasizing that projection should be directed backward for proper display.
6.5 Mod Malam

The alarm clock features an automatic night mode. By default, the display brightness will automatically dim between 18:00 (6 PM) and 5:59 (5:59 AM). This time range can be adjusted to suit your preferences within the settings menu (refer to the full manual for advanced settings).
The image depicts the alarm clock operating in a low-light environment, showcasing the automatic dimming feature of the night mode.
6.6 Format 12/24 Jam

Untuk bertukar antara format masa 12 jam dan 24 jam, tekan sebentar butang UP button during normal time display. The display will toggle between AM/PM indication (12-hour) and military time (24-hour).
This image visually compares the appearance of the time display in both 12-hour and 24-hour formats.
7. Penyelenggaraan
To maintain your Ankilo Projection Alarm Clock, gently wipe the surface with a soft, dry cloth. Avoid using abrasive cleaners or solvents, as these may damage the finish or electronic components. Keep the projection lens clean for clear time display.
8. Penyelesaian masalah
| Masalah | Kemungkinan Punca | Penyelesaian |
|---|---|---|
| Paparan dimatikan atau malap. | Not connected to USB power, or display brightness set to 'Off'. | Ensure USB cable is securely connected. Press SNOOZE / CAHAYA untuk melaraskan kecerahan. |
| Projection numbers are reversed. | Unjuran lamp is facing forward. | Rotate the projection lamp 180 degrees so it projects towards the back of the clock. |
| Penggera tidak berbunyi. | Penggera tidak ditetapkan atau dinyahaktifkan. | Tekan dan tahan PENGGERA to set the alarm time and mode. Ensure the alarm icon is visible on the display. |
| Masa/tetapan ditetapkan semula selepas kuasa dimatikantage. | CR2032 backup battery is dead or missing. | Replace the CR2032 battery in the battery compartment. |
| Projection is blurry. | Projection lens is dirty or surface is too far/close. | Clean the projection lens with a soft cloth. Adjust the clock's distance from the projection surface (ideal 1.6ft-16ft). |
9. Spesifikasi
| Ciri | Perincian |
|---|---|
| Jenama | Ankilo |
| Nombor Model | WA113B&C-MA06US-HY |
| Jenis Paparan | LED digital |
| Saiz Paparan | 7.9 inci |
| Dimensi Produk | 1.7"W x 3.3"H |
| Sumber Kuasa | Corded Electric (USB cable) |
| Bateri Sandaran | 1 x CR2032 (termasuk) |
| Ciri Khas | 180° Projection, Adjustable Brightness (Display & Projection), USB Charging Port, Night Mode, Temperature Display, Snooze Function, Multiple Alarm Modes (1-5, 1-6, 1-7) |
| bahan | logam |
| Berat Barang | 6.7 auns |
10. Waranti dan Sokongan

- Polisi Pemulangan: Enjoy a 6-month return period from the date of purchase.
- Waranti: Your Ankilo Projection Alarm Clock is covered by a 24-month warranty against manufacturing defects.
- Sokongan Sepanjang Hayat: Ankilo is committed to providing lifetime technical support for this product.
The image above summarizes our commitment to customer satisfaction, including return policy, warranty, and ongoing support.
For any questions, troubleshooting assistance, or warranty claims, please contact Ankilo customer support through the platform where you purchased the product or visit our official webtapak untuk maklumat hubungan.


