pengenalan
This user manual provides essential information for the proper installation, operation, and maintenance of your CPVAN 3-in-1 Carbon Monoxide Detector. This device is designed to detect carbon monoxide (CO) gas, and also displays ambient temperature and humidity. It features a 10-year electrochemical sensor and is powered by a 4-year replaceable battery, certified to EU standard EN50291. Please read this manual thoroughly before using the product to ensure safe and effective operation.

Rajah 1: Depan view of the CPVAN 3-in-1 Carbon Monoxide Detector, showing the display and indicator light.
Maklumat Keselamatan
Penting: This device is a carbon monoxide (CO) detector, not a smoke detector or a carbon dioxide (CO2) detector. It is designed to detect carbon monoxide gas from sources such as faulty combustion appliances.
- Do not paint the detector. Paint may clog the openings and interfere with the sensor's ability to detect CO.
- Do not block the ventilation openings on the detector.
- Uji pengesan secara kerap seperti yang diarahkan dalam manual ini.
- Do not install the detector in areas with high humidity, extreme temperatures, or excessive dust.
- In case of an alarm, evacuate the premises immediately and call emergency services. Do not re-enter until the area has been declared safe.
- The device cannot replace a smoke or gas alarm.
Kandungan Pakej
Please check the package contents upon opening to ensure all items are present and undamaged.
- 1 × CPVAN Carbon Monoxide Detector (Model: COS-X3 plus)
- 2 × 1.5V AA Alkaline Batteries
- 2 × Palam Dinding
- Skru 2 ×
- 1 × Manual Pengguna
Produk Selesaiview
The CPVAN 3-in-1 Carbon Monoxide Detector integrates CO detection with temperature and humidity monitoring.

Rajah 2: The detector's display indicates Carbon Monoxide (CO) levels, relative humidity (%RH), and temperature (°C). When CO concentration is below 25 ppm, only temperature and humidity are displayed.
Komponen Utama:
- Paparan LCD: Shows CO concentration (PPM), relative humidity (%RH), and temperature (°C).
- Butang Uji/Tetapkan Semula: Used to test the alarm function and reset the device.
- Lampu Penunjuk: Displays device status (Green for normal, Yellow for fault, Red for alarm).
- Buzzer Penggera: Emits a loud sound during a CO alarm.
- Petak Bateri: Located on the back for AA batteries.

Rajah 3: Visual representation of the indicator light states: Green for normal operation, Yellow for fault, and Red for CO alarm.
Persediaan
1. Pemasangan Bateri
The detector requires two 1.5V AA alkaline batteries (included).
- Open the battery compartment cover on the back of the detector.
- Remove the plastic insulating strip from the pre-installed batteries.
- Insert the two AA batteries, ensuring correct polarity (+ and -).
- Close the battery compartment cover securely. The device will automatically power on.

Rajah 4: Illustration of the battery compartment on the back of the detector, showing where to insert the two AA alkaline batteries.
2. Pemasangan dan Penempatan
Proper placement is crucial for effective CO detection. Install the detector in locations where CO may be produced. The closer it is to a potential CO source, the sooner the alarm will activate.
- Lokasi Disyorkan: Near combustion appliances (furnaces, water heaters, fireplaces), in living areas, and bedrooms.
- Elakkan: Directly above heat sources, in direct sunlight, near windows or vents, in dusty or humid areas, or behind curtains/furniture that could obstruct the sensor.
- Ketinggian Pemasangan: For optimal detection, install the detector at a height between your waist and head level, or as per local regulations.
- Pilih lokasi dinding yang sesuai.
- Mark the positions for the two screws using the detector's mounting holes as a guide.
- Drill two holes and insert the wall plugs.
- Insert the screws, leaving a small gap from the wall.
- Align the detector's mounting slots with the screws and slide it down to secure it.
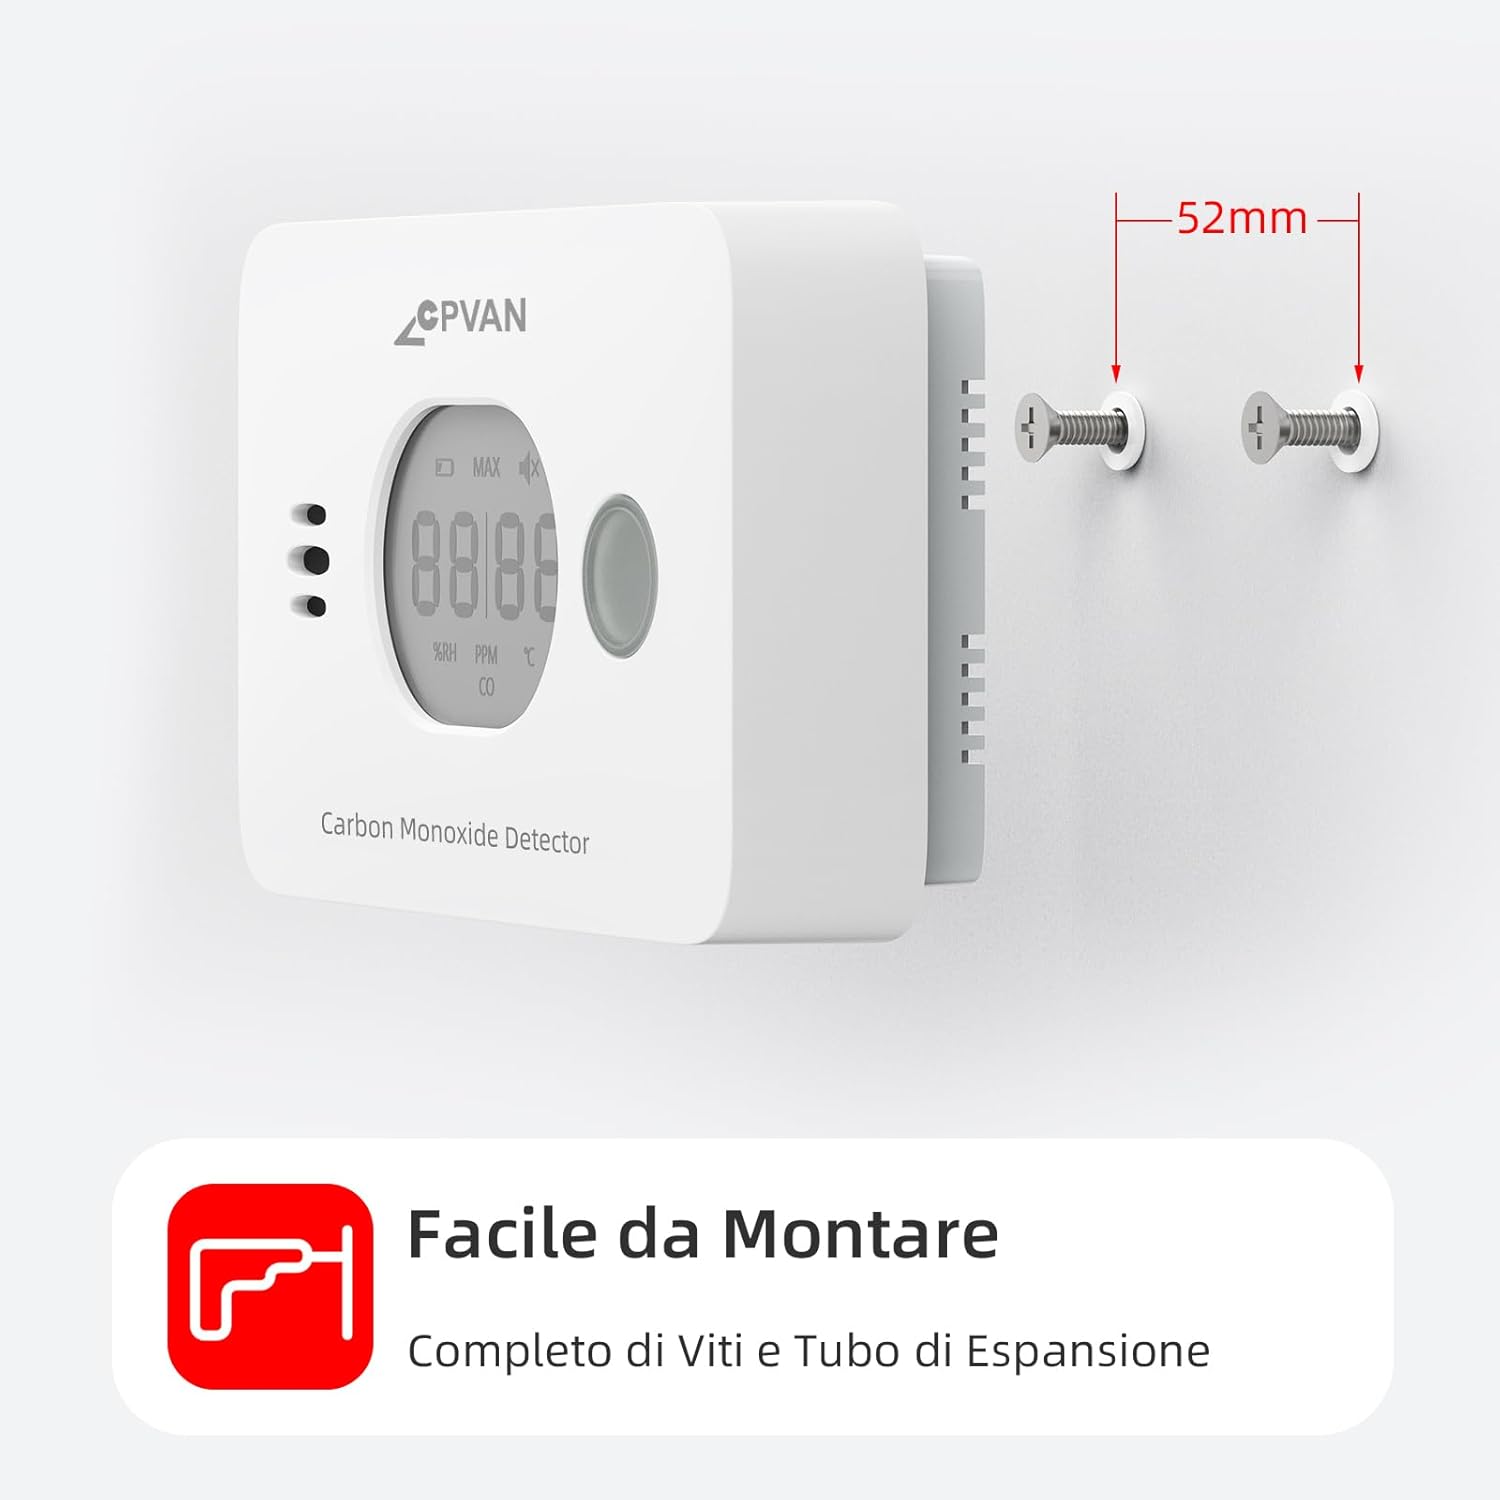
Rajah 5: The detector can be easily mounted on a wall using the provided screws and wall plugs.

Rajah 6: Example of optimal placement for CO detectors (red squares), heat alarms (green triangles), and smoke alarms (blue circles) within a typical home layout.
Operasi
1. Hidupkan Kuasa Awal
After battery installation, the device will perform a self-test. The display will show a brief sequence, and the green indicator light will flash. Once initialized, it will display temperature and humidity. The green light will flash approximately every 60 seconds in standby mode.
2. Paparan Maklumat
Paparan LCD memberikan maklumat masa nyata:
- Suhu: Shown in degrees Celsius (°C).
- Kelembapan: Shown as relative humidity (%RH).
- CO Concentration: Displayed in parts per million (PPM). If CO concentration is below 25 ppm, only temperature and humidity are shown. CO concentration is updated every 4 seconds.

Rajah 7: The real-time display shows current humidity and temperature. CO concentration is displayed when it exceeds 25 PPM, with different alarm cycles based on CO levels.
3. Menguji Penggera
It is recommended to test the detector weekly to ensure proper function.
- Press and hold the Test/Reset button on the front of the detector.
- The alarm will sound loudly, and the red indicator light will flash. The display will show a high CO reading (e.g., "MAX 58 PPM CO").
- Release the button to stop the test.
Alternatively, you can test by holding the detector near burning materials like paper or cigarettes for 5-10 seconds. Incomplete combustion typically produces carbon monoxide. If the detector functions correctly, it will display CO concentration and sound an audible alarm.

Rajah 8: When CO is detected above the alarm threshold, the red light flashes and the alarm sounds.
4. Alarm Conditions and Behavior
The detector is certified to EN-50291 standards. Alarm thresholds are as follows:
| CO Concentration (PPM) | Masa Penggera |
|---|---|
| 50 ppm | 60-90 minit |
| 100 ppm | 10-40 minit |
| 300 ppm | 0-3 minit |
When an alarm occurs, the red indicator light will flash rapidly, and the buzzer will emit a loud, continuous alarm sound. The display will show the detected CO concentration.
What to do if the alarm sounds:
- Segera beralih ke udara segar di luar atau buka semua pintu dan tingkap untuk mengudarakan kawasan tersebut.
- Lakukan kiraan bilangan orang untuk memastikan semua orang telah diambil kira.
- Jangan masuk semula ke dalam premis sehingga penggera berhenti dan kawasan tersebut telah diudarakan sepenuhnya.
- Hubungi perkhidmatan kecemasan anda atau juruteknik yang berkelayakan untuk menyiasat punca CO.
Penyelenggaraan
1. Penggantian Bateri
The detector is designed with a 4-year replaceable battery life. When the batteries are low, the device will indicate this with a specific warning (e.g., a chirp or a low battery icon on the display). Replace both AA alkaline batteries promptly when this occurs. Refer to the "Battery Installation" section for replacement steps.
2. Pembersihan
Clean the detector regularly to prevent dust buildup from affecting its performance.
- Gunakan yang lembut, damp cloth to wipe the exterior of the detector.
- Do not use cleaning sprays, solvents, or abrasive cleaners.
- Jangan cat pengesan.
3. Ujian Biasa
Test the detector weekly using the Test/Reset button to ensure the alarm and sensor are functioning correctly.
Menyelesaikan masalah
| Masalah | Kemungkinan Punca | Penyelesaian |
|---|---|---|
| Detector not powering on after battery installation. | Batteries incorrectly inserted or dead. Plastic insulating strip not removed. | Ensure batteries are inserted with correct polarity. Remove the plastic insulating strip. Try new batteries. |
| Penggera berbunyi dengan kerap tanpa sumber CO yang jelas. | False alarm due to strong fumes (e.g., cleaning products, paint). Detector placed too close to a combustion source. | Ventilate the area. Relocate the detector if it's too close to a potential source or in an area with frequent fumes. |
| Detector chirps or shows low battery indicator. | Bateri lemah. | Gantikan kedua-dua bateri alkali AA dengan segera. |
| Green light not flashing every 60 seconds. | Device fault or low battery. | Check battery level. Perform a test. If issue persists, contact customer support. |
| Display shows only temperature and humidity, not CO. | CO concentration is below 25 ppm, which is normal. | This is normal operation. The CO reading will appear if the concentration exceeds 25 ppm. |
Spesifikasi
| Ciri | Perincian |
|---|---|
| Nombor Model | COS-X3 plus |
| Jenis Sensor | Elektrokimia |
| Julat Pengesanan CO | 0 hingga 999 PPM |
| Julat Suhu | -9°C hingga 99°C (±1°C) |
| Julat Kelembapan | 1% hingga 99% RH (±3% RH) |
| Sumber Kuasa | 2 x 1.5V AA Alkaline Batteries (included) |
| Hayat Bateri | Up to 4 years (replaceable) |
| Jangka Hayat Sensor | 10 tahun |
| Kelantangan Penggera | Boleh didengari |
| Pensijilan | EN 50291 |
| Dimensi | 11 x 6 x 3 cm |
| Berat badan | 200 g |
| bahan | ABS |
| UPC | 765142658068 |
Waranti dan Sokongan
For warranty information and customer support, please refer to the documentation provided with your purchase or contact CPVAN customer service directly.
Manufacturer: SafeBay
Contact information may be available on the product packaging or the official CPVAN webtapak.
Video Produk Rasmi
Tiada video produk rasmi dengan "Penjual" sebagai jenis pencipta ditemui dalam data yang diberikan.


