pengenalan
This manual provides detailed instructions for the setup, operation, and maintenance of your ClocTeck Transparent Digital Alarm Clock. Please read this manual thoroughly before using the product to ensure proper function and longevity.
Maklumat Keselamatan
- Jangan dedahkan peranti kepada suhu yang melampau, cahaya matahari langsung atau kelembapan yang tinggi.
- Elakkan daripada menjatuhkan atau meletakkan peranti kepada kesan yang kuat.
- Jauhkan peranti daripada air dan cecair lain.
- Jangan cuba membuka atau membaiki peranti sendiri. Hubungi kakitangan yang berkelayakan untuk perkhidmatan.
- Use only the specified Type-C charging cable for power.
Kandungan Pakej
Sila semak kandungan pakej semasa membuka kotak:
- ClocTeck Transparent Digital Alarm Clock (Gold)
- Kabel Pengecas USB Jenis-C
- Manual Pengguna (dokumen ini)
Produk Selesaiview
The ClocTeck Transparent Digital Alarm Clock features a clear LCD display that shows time, date, day of the week, temperature, humidity, and a weather icon. It is designed with a sleek aluminum alloy case.
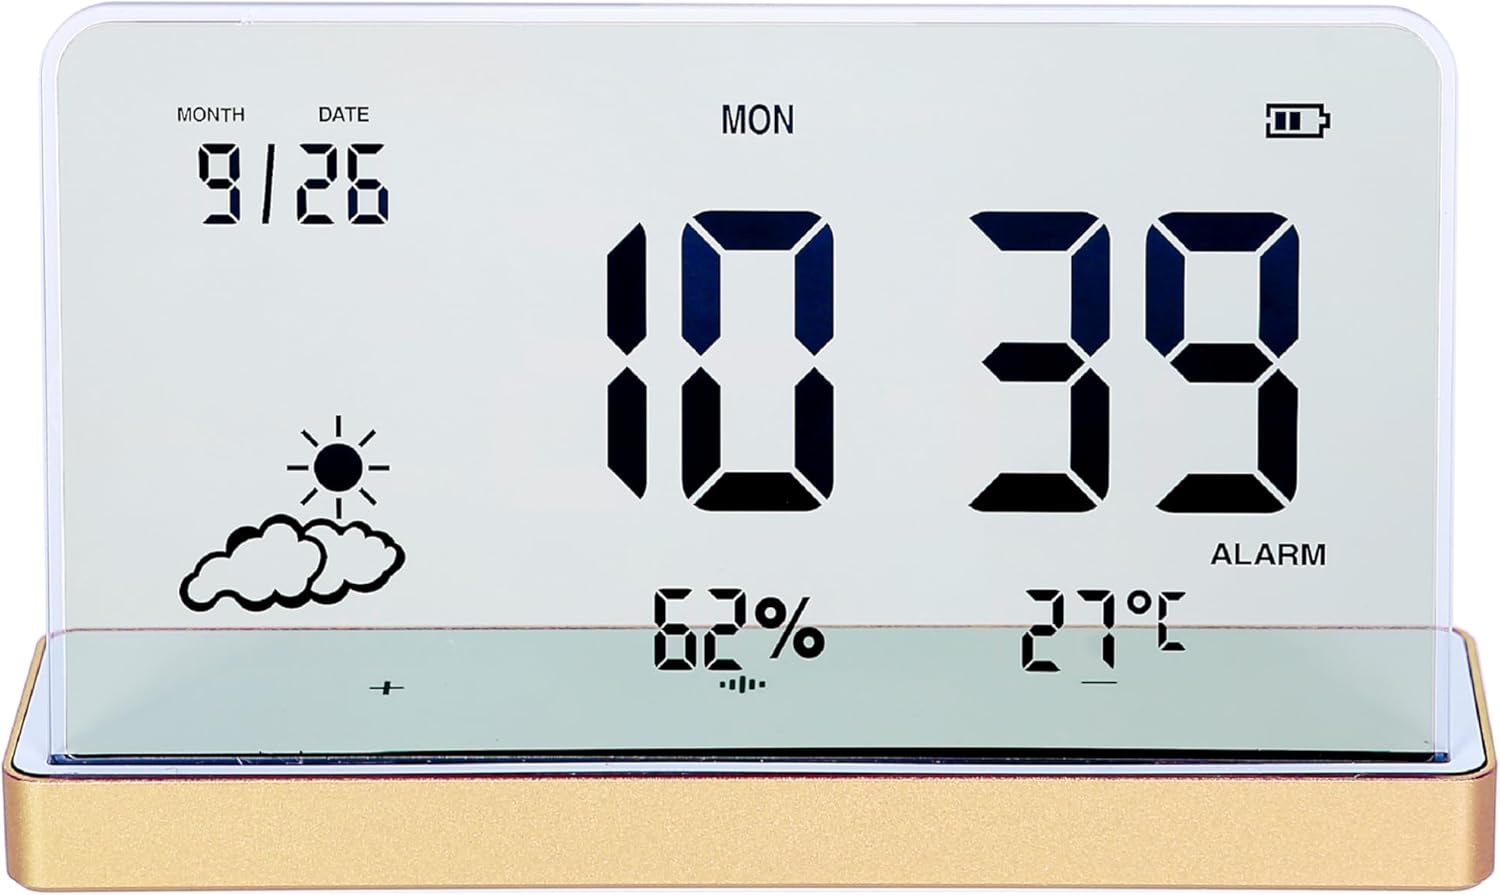
Rajah 1: Depan view of the ClocTeck Transparent Digital Alarm Clock. The display shows the current time (10:39), date (9/26), day (MON), humidity (62%), temperature (27°C), and a partly cloudy weather icon. A battery indicator is visible in the top right corner.
Ciri-ciri Utama:
- Transparent LCD Display
- Time, Date, and Day Display
- Indoor Temperature and Humidity Monitoring
- Up to 3 Programmable Alarms
- Rechargeable Battery with long standby time
- Durable Aluminum Alloy Case
Persediaan
1. Menghidupkan dan Mengecas
The clock is powered by a built-in rechargeable battery. Before first use, or if the battery indicator is low, connect the provided Type-C USB charging cable to the charging port on the back or side of the clock and plug the other end into a standard USB power adapter (not included).
- A full charge provides approximately 75 days of operation.
- Penunjuk bateri pada paparan akan menunjukkan status pengecasan.
2. Penempatan Awal
Place the clock on a stable, flat surface. For accurate temperature and humidity readings, avoid placing it near heat sources, direct sunlight, or in areas with extreme drafts.
Arahan Operasi
The clock features several buttons, typically located on the back or bottom, for setting time, alarms, and other functions. Refer to the specific button labels on your device.
1. Menetapkan Masa dan Tarikh
- Tekan ke SET butang untuk memasuki mod tetapan masa.
- Gunakan UP dan TURUN butang untuk melaraskan jam. Tekan SET untuk mengesahkan dan beralih kepada minit.
- Ulang selama beberapa minit, tahun, bulan dan tarikh.
- Tekan SET sekali lagi untuk keluar dari mod tetapan.
2. Menetapkan Penggera
The clock supports up to 3 independent alarms.
- Tekan ke PENGGERA button to cycle through Alarm 1, Alarm 2, Alarm 3, and alarm off modes.
- When an alarm is selected, press and hold the PENGGERA button to enter alarm setting mode for that specific alarm.
- Gunakan UP dan TURUN buttons to set the alarm hour and minutes. Press PENGGERA untuk mengesahkan setiap langkah.
- After setting the time, you may be prompted to set the alarm's activation days (e.g., weekdays, weekends, daily). Use UP/TURUN dan PENGGERA untuk memilih.
- Untuk mengaktifkan atau menyahaktifkan penggera, tekan sebentar PENGGERA button until the alarm icon appears or disappears next to the corresponding alarm number on the display.
3. Paparan Suhu dan Kelembapan
The clock continuously displays indoor temperature and humidity. The temperature range is -20°C to 65°C, and the humidity range is 10% to 99%.
- Temperature is displayed in Celsius (°C).
- Humidity is displayed as a percentage (%).
4. Fungsi Tunda
When an alarm sounds, press any button (other than the alarm off button, if present) to activate the snooze function. The alarm will sound again after a short interval (typically 5-10 minutes).
5. Pelarasan Kecerahan Paparan
The clock may feature automatic brightness adjustment or manual control. Consult the device's physical buttons for a dedicated brightness control button or a combination of buttons to adjust display intensity.
Penyelenggaraan
- To clean the display and casing, use a soft, dry cloth. Do not use abrasive cleaners or solvents.
- Pastikan port pengecasan bebas daripada habuk dan serpihan.
- Store the clock in a cool, dry place when not in use for extended periods.
Menyelesaikan masalah
| Masalah | Kemungkinan Punca | Penyelesaian |
|---|---|---|
| Paparan kosong atau malap. | Low battery or power saving mode. | Charge the device using the Type-C cable. Check brightness settings. |
| Penggera tidak berbunyi. | Penggera tidak diaktifkan atau kelantangan terlalu rendah. | Ensure the alarm is set and activated (alarm icon visible). Check if there's a volume setting. |
| Bacaan suhu/kelembapan yang salah. | Device placed in an unsuitable environment. | Relocate the clock away from direct heat, cold, or high drafts. Allow time for readings to stabilize. |
| Butang tidak bertindak balas. | Gangguan perisian sementara atau bateri lemah. | Recharge the device. If issue persists, try a soft reset (refer to manual for reset procedure, if available, or let battery drain and recharge). |
Spesifikasi
- model: ClocTeck-CL01
- Dimensi: Approximately 12.5 cm (Width) × 3.2 cm (Depth) × 8 cm (Height)
- Berat Badan: Kira-kira 0.13 kg
- Bahan kes: Aloi Aluminium
- Jenis Paparan: Transparent LCD Digital Display
- Julat Suhu: -20°C hingga 65°C
- Julat Kelembapan: 10% hingga 99%
- Sumber Kuasa: Bateri Boleh Dicas Semula (Pengecasan USB Jenis-C)
- Hayat Bateri: Approximately 75 days on a full charge
- Alarms: 3 penggera boleh atur cara

Figure 2: Dimensions of the ClocTeck Transparent Digital Alarm Clock. The image shows the clock with labels indicating a height of 8cm and a width of 12.5cm.
Waranti dan Sokongan
ClocTeck provides a 12-month refund and exchange guarantee dari tarikh pembelian. Waranti ini meliputi kecacatan pembuatan dan isu-isu yang timbul daripada penggunaan biasa.
If you encounter any problems or have questions regarding your ClocTeck Transparent Digital Alarm Clock, please do not hesitate to contact our customer support team. We are committed to providing assistance and ensuring your satisfaction.
For support, please refer to the contact information provided on the product packaging or the seller's page where you purchased the item.


