1. Pengenalan
This manual provides detailed instructions for the safe and efficient operation of your ViewSonic PA700W projector. Please read this manual thoroughly before using the projector and keep it for future reference. The ViewSonic PA700W is a high-brightness WXGA projector designed for business and education environments, offering vivid images and flexible connectivity.
2. Maklumat Keselamatan
Sentiasa patuhi langkah berjaga-jaga keselamatan berikut untuk mengelakkan kebakaran, kejutan elektrik atau kecederaan:
- Jangan sekat bukaan pengudaraan. Pastikan ruang yang mencukupi di sekeliling projektor untuk aliran udara yang betul.
- Jangan lihat terus ke dalam kanta projektor apabila lamp dihidupkan, kerana cahaya terang boleh merosakkan mata anda.
- Jangan letakkan projektor pada troli, kaki atau meja yang tidak stabil.
- Gunakan hanya kord kuasa yang dibekalkan dengan projektor.
- Jangan cuba servis produk ini sendiri. Rujuk semua perkhidmatan kepada pegawai perkhidmatan yang berkelayakan.
- Keep the projector away from water or moisture.
3. Apa yang ada di dalam Kotak
Sahkan bahawa semua item terdapat dalam pakej:
- ViewSonic PA700W Projector
- Kord Kuasa
- Alat Kawalan Jauh (dengan 2 bateri AAA disertakan)
- Kabel HDMI
- Kabel VGA
- Panduan Mula Pantas
- Manual Pengguna (dokumen ini)

Figure 3.1: Contents of the ViewSonic PA700W package. Includes the projector, power cord, remote control, HDMI cable, VGA cable, and quick start guide.
4. Produk Lebihview
4.1 Hadapan dan Tepi View

Rajah 4.1: Depan view daripada ViewSonic PA700W projector, highlighting the main lens and front ventilation grilles.

Rajah 4.2: Bersudut view daripada ViewSonic PA700W projector, providing a perspective of the lens, control panel, and side ventilation.
4.2 Dimensi

Figure 4.3: Physical dimensions of the PA700W projector, showing its length, width, and height for placement planning.
4.3 Port Kesambungan
The PA700W offers a variety of input and output ports for flexible connectivity:
- HDMI1.4: x2 (for digital video and audio)
- VGA (In/Out): x2 (for analog video)
- USB 2.0 Jenis-A: x1 (for media playback or firmware updates)
- Ethernet LAN (RJ45): x1 (for network control)
- Audio (Masuk/Keluar): x2 (3.5mm jacks for audio input/output)

Figure 4.4: Rear panel of the projector displaying all available input and output ports for connecting various devices.
4.4 Alat Kawalan Jauh
The included remote control allows for convenient operation of the projector from a distance. It requires 2 AAA batteries (included).
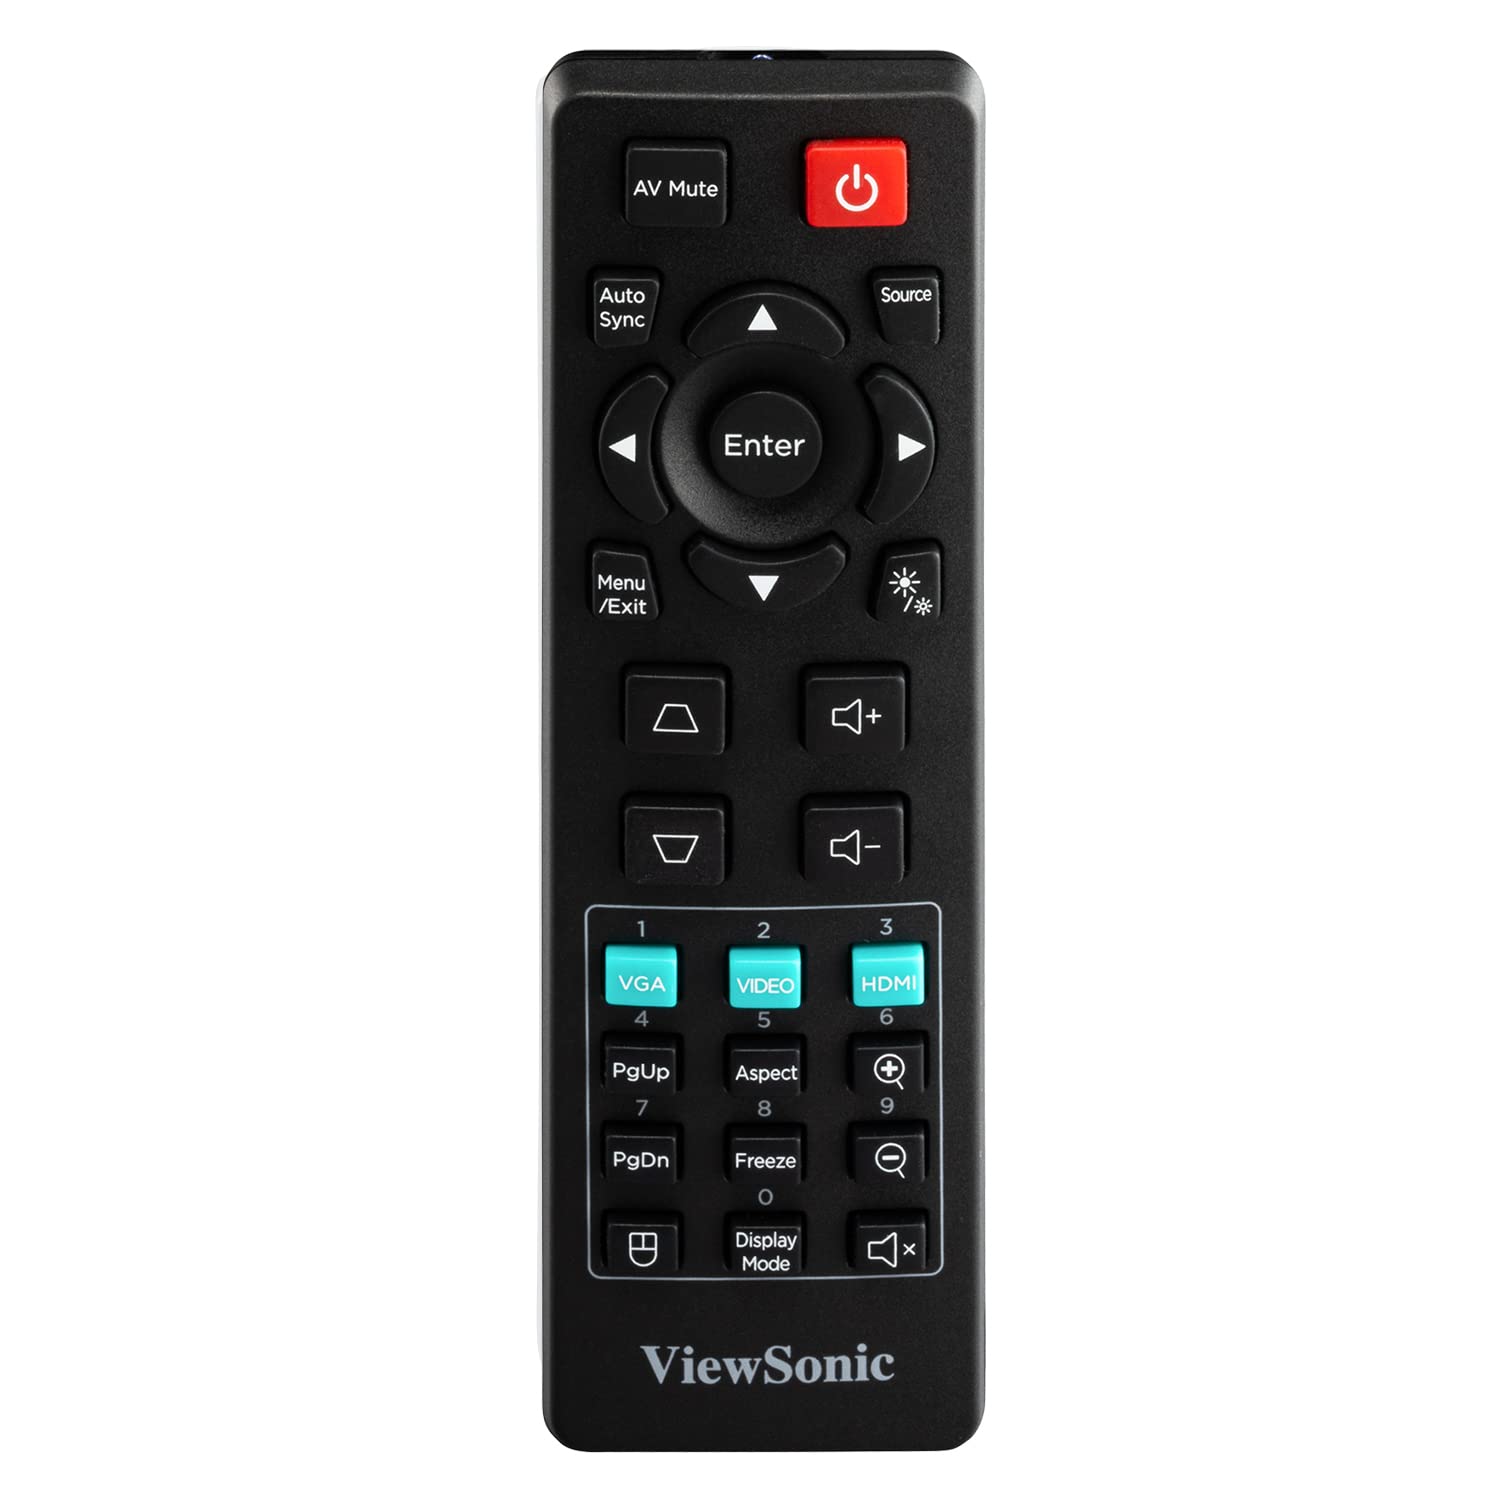
Figure 4.5: The remote control for the PA700W projector, showing its button layout for various functions.
5. Persediaan
5.1 Penempatan
Position the projector on a stable, flat surface or mount it securely. Ensure there is adequate ventilation around the unit. The PA700W can project a 100-inch screen from approximately 3.3 meters (10.9 feet) away.

Figure 5.1: Recommended projection distances for different screen sizes, illustrating the flexibility of placement.
5.2 Kuasa Penyambung
- Sambungkan kord kuasa ke salur masuk kuasa projektor.
- Palamkan hujung kord kuasa yang lain ke dalam salur keluar elektrik yang dibumikan.
5.3 Menyambungkan Peranti Input
Use the appropriate cables to connect your source devices (e.g., laptop, DVD player, gaming console) to the projector's input ports (HDMI, VGA, etc.).
- For digital video and audio, use an HDMI cable to connect your device to an HDMI port on the projector.
- For analog video, use a VGA cable to connect your device to a VGA port. If audio is also needed, connect a 3.5mm audio cable from your device's audio out to the projector's Audio In port.
6. Mengendalikan Projektor
6.1 Menghidupkan/Mematikan
- Untuk Menghidupkan: Tekan ke kuasa button on the projector's control panel or the remote control. The power indicator light will turn blue.
- Untuk Mematikan: Tekan ke kuasa button again. A confirmation message may appear; press the button a second time to confirm shutdown. The power indicator light will turn orange.
6.2 Pemilihan Sumber
After powering on, the projector will automatically detect an active input source. If multiple sources are connected, or if the desired source is not automatically selected:
- Tekan ke Sumber butang pada alat kawalan jauh atau projektor.
- Use the arrow keys to navigate through the available input sources (HDMI 1, HDMI 2, VGA 1, VGA 2, USB).
- Tekan Masuk untuk memilih sumber yang dikehendaki.
6.3 Pelarasan Imej
- Fokus: Putarkan gelang fokus pada kanta projektor sehingga imej tajam dan jelas.
- Zum: Putarkan gelang zum pada kanta projektor untuk melaraskan saiz imej.
- Pembetulan Keystone: Jika imej kelihatan trapezoid, gunakan Batu kunci buttons (up/down arrows) on the remote or projector to correct the image shape. The PA700W supports 40-degree vertical keystone correction.
6.4 Menu Navigasi
To access and adjust projector settings:
- Tekan ke Menu/Keluar button on the remote or projector.
- Gunakan kekunci anak panah untuk menavigasi melalui pilihan menu.
- Tekan Masuk to select a sub-menu or confirm a setting.
- Tekan Menu/Keluar sekali lagi untuk keluar dari menu.
Common menu settings include:
- gambar: Brightness, Contrast, Color, Tint, Sharpness, Aspect Ratio, Display Mode.
- Audio: Kelantangan, Bisu.
- Persediaan: Language, Projection Mode, Auto Power Off.
- Lanjutan: Lamp Settings (SuperEco Mode), Information.

Figure 6.1: The projector's capability to display bright and clear images with WXGA resolution, suitable for various environments.

Gambar 6.2: Cthample of the projector's performance in a bright room, demonstrating its ability to produce crystal clear images even with ambient light.
7. Penyelenggaraan
7.1 Membersihkan Projektor
- Projector Case: Gunakan kain yang lembut dan tidak berbulu dampened with a mild detergent solution to wipe the case. Do not use abrasive cleaners or solvents.
- Kanta Projektor: Use a lens cleaning cloth and lens cleaning solution specifically designed for optical lenses. Avoid touching the lens directly with your fingers.
- Bukaan Pengudaraan: Use a soft brush or compressed air to remove dust from the ventilation openings. Ensure the projector is turned off and unplugged before cleaning.
7.2 Lamp kehidupan
The PA700W utilizes a long-life lamp. In SuperEco Mode, the lamp can last for up to 12,000 hours, significantly reducing maintenance and replacement costs. The projector will display a warning message when the lamp semakin hampir ke penghujung hayatnya.
8. Penyelesaian masalah
| Masalah | Kemungkinan Punca | Penyelesaian |
|---|---|---|
| Tiada gambar di skrin |
|
|
| Imej kabur |
|
|
| Imej adalah trapezoid |
|
|
| Tiada audio |
|
|
9. Spesifikasi
| Jenama | ViewSonic |
| Model | PA700W |
| Jenis Paparan | LED |
| Kecerahan | 4500 ANSI Lumen |
| Resolusi Asli | WXGA (1280 x 800 Pixels) |
| Nisbah Aspek | 16:10 |
| Nisbah Kontras | (Not specified in provided data, typical for LED projectors) |
| Lamp kehidupan | Up to 12,000 hours (SuperEco Mode) |
| Pembetulan Batu Kunci | Vertical (40 degrees), Digital Keystone Correction |
| Ketersambungan | 2x HDMI 1.4, 2x VGA (In/Out), 1x USB 2.0 Type-A, 1x Ethernet (RJ45), 2x 3.5mm Audio (In/Out) |
| Pembesar Suara Terbina dalam | ya |
| Tahap Kebisingan | 25 dB |
| Penggunaan Kuasa | 300 Watt |
| Dimensi (LxWxH) | 23.4 x 31 x 11.4 cm (9.2 x 12.2 x 4.5 inci) |
| Berat badan | 2.72 kg (5.99 lbs) |
| Termasuk Aksesori | Power Cord, Remote Control, HDMI Cable, VGA Cable, User Manual |
10. Waranti dan Sokongan
10.1 Maklumat Waranti
ViewSonic products are manufactured to the highest standards of quality and performance, and we back them with a comprehensive warranty. For specific warranty terms and conditions applicable to your region and product, please refer to the warranty card included with your product or visit the official ViewSonic webtapak.
10.2 Sokongan Pelanggan
Jika anda menghadapi sebarang masalah atau mempunyai soalan mengenai anda ViewSonic PA700W projector that are not covered in this manual, please contact ViewSonic customer support. You can find contact information (phone numbers, email, or online chat) on the official ViewSonic webtapak:
melawat ViewSokongan Sonic Webtapak
Please have your product model number (PA700W) and serial number ready when contacting support.


