1. Pengenalan
This manual provides detailed instructions for the assembly, operation, and maintenance of your Sharkoon SHA-VS4-WBK Mid-Tower PC Case. Please read this manual thoroughly before beginning installation to ensure proper setup and to maximize the lifespan of your components.
2. Produk Lebihview
The Sharkoon SHA-VS4-WBK is a mid-tower PC case designed for ATX and Micro-ATX motherboards, featuring a full black aesthetic and an acrylic side window panel. It offers ample space for various components and efficient cable management.
Ciri-ciri Utama:
- Acrylic side window panel for component visibility.
- Three 5.25-inch drive bays (two with tool-less mounting).
- Three 3.5-inch drive bays.
- Four 2.5-inch drive bays.
- Two external USB 3.0 ports on the front panel.
- Expansion card clearance up to 385mm (with 2.5-inch drive cage removed).
- CPU cooler height support up to 160mm.
- Convex side panel design for improved cable management space.
Rujukan Visual:

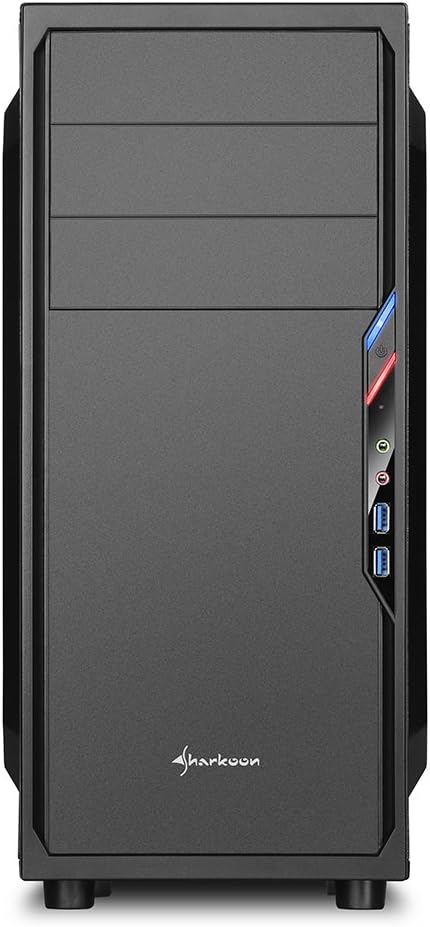
Rajah 2.1: Bahagian hadapan view of the Sharkoon SHA-VS4-WBK Mid-Tower PC Case, showcasing the acrylic side panel and front I/O ports.
Rajah 2.2: Depan view of the PC case, highlighting the drive bays and front panel design.

Rajah 2.3: Sisi view of the PC case, clearly showing the acrylic window panel.

Rajah 2.4: Belakang view of the PC case, showing expansion slots and power supply mounting area.

Rajah 2.5: Dalaman view of the PC case, illustrating the motherboard tray, drive bays, and cable routing options.
3. Persediaan dan Pemasangan
Follow these steps for proper installation of your PC components into the SHA-VS4-WBK case.
3.1 Menyediakan Kes
- Carefully unpack the case and remove all packaging materials.
- Remove the side panels by unscrewing the thumbscrews at the rear of the case.
3.2 Pemasangan Motherboard
- Install the necessary standoffs onto the motherboard tray according to your motherboard's form factor (ATX or Micro-ATX).
- Letakkan pelindung I/O ke dalam bukaan belakang bekas.
- Carefully align your motherboard with the standoffs and I/O shield, then secure it with screws.
3.3 Pemasangan Drive
- Pemacu 5.25 inci: For the two tool-less bays, simply slide the drive in until it clicks into place. For the third bay, secure with screws.
- Pemacu 3.5 inci: Mount 3.5-inch HDDs into the designated drive cages.
- Pemacu 2.5 inci: Mount 2.5-inch SSDs/HDDs into the designated drive cages. The 2.5-inch drive cage can be removed to accommodate longer expansion cards.
3.4 Pemasangan Kad Pengembangan
- Tanggalkan penutup slot pengembangan yang diperlukan dari bahagian belakang bekas.
- Insert your expansion card (e.g., graphics card) into the appropriate PCIe slot on your motherboard.
- Secure the expansion card with the provided screws. Note the maximum clearance of 310mm, or 385mm if the 2.5-inch drive cage is removed.
3.5 Pemasangan Bekalan Kuasa
- Install your power supply unit into the rear-mount power supply bay at the bottom of the case.
- Secure it with screws from the outside of the case. Ensure the power supply's fan faces the correct direction for optimal airflow.
3.6 Pengurusan Kabel
Utilize the space behind the motherboard tray and the convex design of the side panel to route cables neatly. This improves airflow and the overall aesthetic of your build.
3.7 Menyambungkan Port I/O Hadapan
Connect the front panel cables (USB 3.0, audio, power, reset, LED indicators) to the corresponding headers on your motherboard. Refer to your motherboard manual for specific header locations.
4. Pertimbangan Operasi
Once all components are installed, ensure all cables are securely connected and the side panels are reattached. Power on your system and verify all components are functioning correctly. Monitor temperatures to ensure adequate cooling.
5. Penyelenggaraan
Penyelenggaraan tetap membantu memastikan prestasi optimum dan jangka hayat komponen PC anda.
- Pembersihan Habuk: Periodically clean dust from the interior of the case, especially from fans and heatsinks, using compressed air or a soft brush.
- Pembersihan Luaran: Lap permukaan luar dengan lembut, damp kain. Elakkan pembersih yang kasar.
- Acrylic Panel Care: Clean the acrylic side panel with a soft, lint-free cloth and a mild plastic cleaner to prevent scratches.
6. Penyelesaian masalah
Jika anda menghadapi masalah, pertimbangkan langkah penyelesaian masalah biasa berikut:
- Tiada Kuasa: Check all power connections, including the power supply to the wall outlet, the 24-pin ATX connector, and the 8-pin CPU power connector on the motherboard. Ensure the power button cable is correctly connected to the motherboard.
- Komponen Tidak Sesuai: Double-check component dimensions against the case specifications. For long graphics cards, ensure the 2.5-inch drive cage is removed if necessary.
- Aliran Udara yang Buruk/Terlalu Panas: Verify all fans are spinning correctly and are oriented for optimal airflow. Ensure cables are neatly managed to avoid obstructing airflow.
- Front Panel I/O Issues: Confirm that all front panel connectors (USB, audio) are correctly plugged into the motherboard headers.
7. Spesifikasi
| Ciri | Spesifikasi |
|---|---|
| Jenama | Sharkoon |
| Nombor Model | SHA-VS4-WBK |
| Jenis Kes | Mid Tower |
| Keserasian Papan Induk | ATX, Mikro-ATX |
| Dimensi (L x W x H) | 44.5 x 20 x 43 cm |
| Berat badan | 3.5 kg |
| bahan | Acrylic (Side Panel) |
| Teluk Drive 5.25 inci | 3 (2 tool-less) |
| Teluk Drive 3.5 inci | 3 |
| Teluk Drive 2.5 inci | 4 |
| Pelabuhan I / O Depan | 2 x USB 3.0 |
| Expansion Card Clearance | Max 310mm (385mm with 2.5-inch drive cage removed) |
| CPU Ketinggian Max Cooler | 160mm (Note: May be 155mm depending on motherboard/cooler) |
| Power Supply Max Depth | 250mm |
| Kaedah Penyejukan | Penyejukan Udara |
8. Waranti dan Sokongan
For warranty information and technical support, please refer to the official Sharkoon webtapak atau hubungi pengedar tempatan anda. Simpan bukti pembelian anda untuk tuntutan jaminan.


