pengenalan
Terima kasih kerana membeliasinJam Penggera Nedis dengan Pengecas Tanpa Wayar. Peranti ini menggabungkan jam penggera digital dengan pad pengecas tanpa wayar yang diperakui Qi, port pengecasan USB-A, paparan boleh dimalapkan, tetapan penggera berganda dan lampu malam yang berubah warna. Manual ini menyediakan maklumat penting untuk penggunaan peranti baharu anda yang selamat dan cekap.
Maklumat Keselamatan
- Baca semua arahan dengan teliti sebelum digunakan.
- Jauhkan peranti daripada air, kelembapan dan suhu yang melampau.
- Jangan cuba membuka atau membaiki peranti ini sendiri. Rujuk semua servis kepada kakitangan yang berkelayakan.
- Pastikan penyesuai kuasa yang digunakan serasi dengan keperluan kuasa peranti. Untuk pengecasan pantas, penyesuai kuasa QC3.0 (tidak disertakan) disyorkan.
- Elakkan meletakkan objek logam pada pad pengecas tanpa wayar, kerana ini boleh mengganggu pengecasan atau menyebabkan terlalu panas.
Kandungan Pakej
- Jam Penggera Nedis dengan Pengecas Tanpa Wayar (Model WCACQ30WT)
- Penyesuai Kuasa (jika disertakan, jika tidak dijual secara berasingan)
- Manual Pengguna
Produk Selesaiview
Biasakan diri anda dengan pelbagai komponen jam loceng anda:

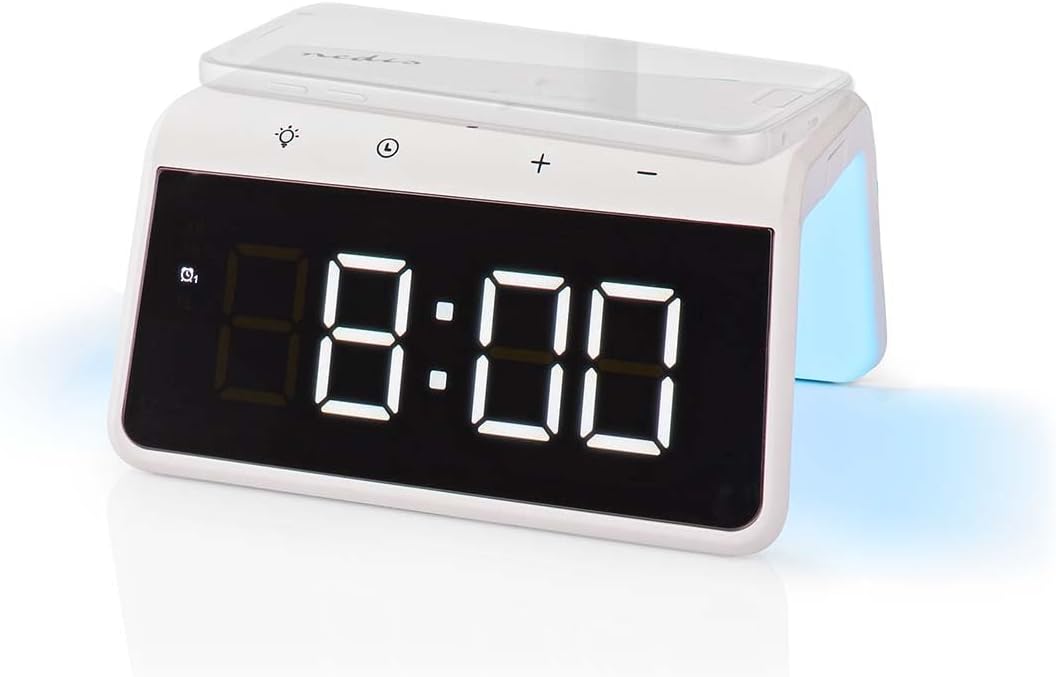
Imej 1: Depan View. Imej ini memaparkan bahagian hadapan jam loceng, yang menampilkan paparan masa digital yang besar dan butang kawalan sensitif sentuhan yang terletak di atasnya. Butang-butang tersebut merangkumi kawalan untuk kecerahan paparan, tetapan masa dan pelarasan penggera.
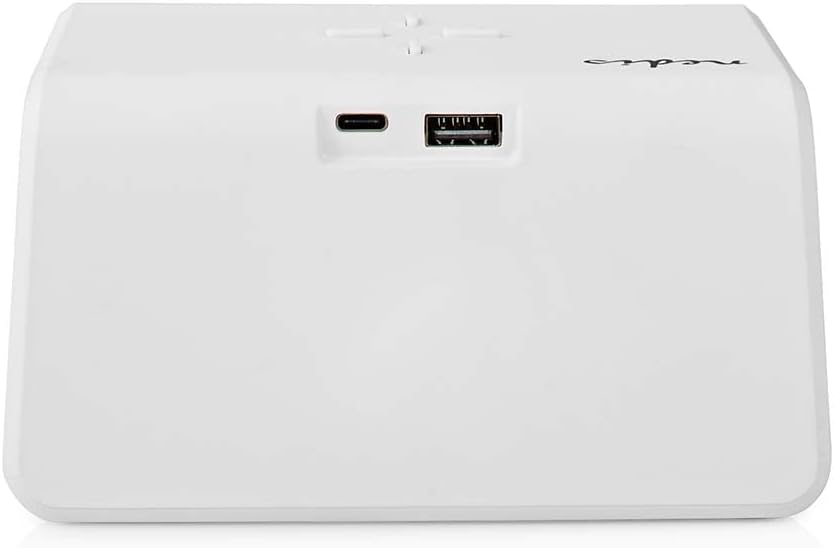
Imej 2: Belakang View. Bahagian belakang jam loceng ditunjukkan, menonjolkan port USB-C untuk input kuasa dan port USB-A standard untuk mengecas peranti luaran.
- Paparan Digital: Menunjukkan masa, status penggera dan penunjuk lain.
- Butang Kawalan: (Terletak di atas)
- Butang Lampu: Mengawal cahaya malam.
- Butang Tetapan Masa/Penggera: Untuk menetapkan masa dan penggera.
- +/- Butang: Laraskan nilai.
- Pad Pengecasan Wayarles: (Permukaan atas) Untuk peranti yang serasi dengan Qi.
- Input USB-C: (Belakang) Untuk menyambungkan penyesuai kuasa.
- Keluaran USB-A: (Belakang) Untuk mengecas peranti lain melalui kabel.
- Panel Lampu Malam: (Sisi/Belakang) Memancarkan cahaya ambien.
Persediaan
- Sambungkan Kuasa: Pasangkan penyesuai kuasa yang disediakan ke port input USB-C di bahagian belakang jam loceng. Sambungkan hujung yang satu lagi ke soket dinding. Paparan akan menyala.
- Tetapan Masa Awal: Jam mungkin memaparkan masa lalai. Teruskan ke bahagian 'Arahan Pengendalian' untuk menetapkan masa yang betul.
Arahan Operasi
1. Menetapkan Masa
- Tekan dan tahan butang Tetapan Masa/Penggera butang (biasanya ditanda dengan ikon jam) sehingga digit jam mula berkelip.
- Gunakan + or - butang untuk melaraskan jam.
- Tekan ke Tetapan Masa/Penggera butang sekali lagi untuk bertukar kepada pelarasan minit. Digit minit akan berkelip.
- Gunakan + or - butang untuk melaraskan minit.
- Tekan ke Tetapan Masa/Penggera butang sekali lagi untuk mengesahkan dan keluar dari mod tetapan masa.
2. Menetapkan Penggera (Penggera 1 dan Penggera 2)
Peranti ini menyokong dua masa penggera bebas.
- Tekan ke Tetapan Masa/Penggera butang sekali untuk memasuki mod tetapan Penggera 1. Ikon penggera dan digit jam untuk Penggera 1 akan berkelip.
- Gunakan + or - butang untuk melaraskan jam bagi Penggera 1.
- Tekan ke Tetapan Masa/Penggera butang sekali lagi untuk bertukar kepada pelarasan minit untuk Penggera 1.
- Gunakan + or - butang untuk melaraskan minit bagi Penggera 1.
- Tekan ke Tetapan Masa/Penggera butang sekali lagi untuk mengesahkan Penggera 1 dan beralih ke mod tetapan Penggera 2 (jika berkenaan). Ulangi langkah 2-4 untuk Penggera 2.
- Selepas menetapkan Penggera 2, tekan butang Tetapan Masa/Penggera butang untuk mengesahkan dan keluar dari mod tetapan penggera.
- Untuk mengaktifkan/menyahaktifkan penggera, tekan sebentar Tetapan Masa/Penggera butang sehingga ikon penggera yang diingini (cth., 'AL1' atau 'AL2') muncul atau hilang pada paparan.
3. Fungsi Tunda
Apabila penggera berbunyi, tekan mana-mana butang (kecuali butang mati penggera, jika ada) untuk mengaktifkan fungsi tunda. Penggera akan berhenti sementara dan berbunyi semula selepas beberapa minit (biasanya 5-10 minit, rujuk butiran model tertentu jika ada). Untuk mematikan penggera sepenuhnya, tekan butang mati penggera yang ditetapkan atau ikut arahan untuk menyahaktifkan penggera.
4. Pengecasan Tanpa Wayar (Qi)
Imej 3: Pengecasan Tanpa Wayar. Sebuah telefon pintar ditunjukkan terletak di permukaan atas jam loceng, yang berfungsi sebagai pad pengecas tanpa wayar Qi.
- Letakkan telefon pintar atau peranti yang serasi dengan Qi anda terus pada pad pengecas tanpa wayar yang terletak di permukaan atas jam loceng.
- Pastikan peranti berada di tengah-tengah pad pengecas untuk prestasi optimum.
- Penunjuk pengecasan (cth., ikon pada paparan atau lampu LED) biasanya akan menyala untuk mengesahkan bahawa pengecasan telah bermula.
- Pengecas ini menyokong output 5W, 7.5W, 10W dan 15W, yang akan dilaraskan secara automatik mengikut keperluan peranti anda. Untuk pengecasan pantas 15W, penyesuai kuasa QC3.0 (tidak disertakan) diperlukan.
5. Output Pengecasan USB-A
Jam loceng ini mempunyai port USB-A tambahan untuk peranti pengecas yang tidak serasi dengan Qi atau untuk pengecasan serentak.
- Sambungkan kabel pengecas USB peranti anda ke port output USB-A di bahagian belakang jam loceng.
- Sambungkan hujung kabel yang lain ke peranti anda.
- Pengecasan akan bermula secara automatik.
6. Fungsi Lampu Malam

Imej 4: Lampu Malam. Imej ini menunjukkan sisi jam loceng dengan lampu malam bersepadunya memancarkan cahaya lembut.
- Tekan ke Cahaya butang (biasanya ditanda dengan ikon mentol lampu) untuk menghidupkan atau mematikan lampu malam.
- Tekan berulang kali Cahaya butang untuk mengitar mod warna yang berbeza atau untuk menetapkan warna tertentu. Lampu malam boleh memaparkan palet warna yang pelbagai berubah.
- Lampu malam boleh ditetapkan untuk kekal menyala atau diaktifkan secara manual mengikut keperluan.
7. Pelarasan Kecerahan Paparan
Paparan digital menampilkan lampu latar yang boleh dimalapkan untuk keselesaan viewdalam pelbagai keadaan pencahayaan.
- Cari butang kecerahan khusus atau gabungan butang (cth., tekan butang Cahaya atau butang +/- sebentar apabila tidak dalam mod tetapan) untuk melaraskan kecerahan paparan.
- Kitar semula tahap kecerahan yang tersedia (cth., tinggi, sederhana, rendah, mati).
Penyelenggaraan
- Pembersihan: Lap peranti dengan kain lembut, kering atau sedikit keringamp kain. Jangan gunakan pembersih atau pelarut yang melelas.
- Storan: Apabila tidak digunakan untuk tempoh yang lama, cabut plag peranti dan simpan di tempat yang sejuk dan kering.
Menyelesaikan masalah
- Peranti tidak dihidupkan: Pastikan penyesuai kuasa disambungkan dengan selamat pada jam loceng dan soket kuasa yang berfungsi.
- Pengecasan tanpa wayar tidak berfungsi:
- Sahkan peranti anda serasi dengan Qi.
- Pastikan peranti anda berada di tengah-tengah pad pengecas.
- Tanggalkan sebarang sarung telefon tebal atau objek logam di antara telefon dan pad pengecas.
- Pengecasan USB-A tidak berfungsi: Periksa kabel USB untuk kerosakan dan pastikan ia disambungkan dengan betul pada jam loceng dan peranti anda.
- Penggera tidak berbunyi: Pastikan penggera diaktifkan (periksa ikon penggera pada paparan) dan kelantangan tidak ditetapkan kepada sifar (jika boleh dilaraskan).
- Paparan terlalu malap/terang: Laraskan kecerahan paparan menggunakan kawalan khusus.
Spesifikasi
| Ciri | Spesifikasi |
|---|---|
| Nombor Model | WCACQ30WT |
| Jenama | NEDIS |
| Dimensi Produk | 14 x 3.81 x 7 cm |
| Berat Barang | 242 Gram |
| Output Pengecasan Tanpa Wayar | 5W / 7.5W / 10W / 15W (Disahkan Qi) |
| Keluaran USB-A | ya |
| Jenis Paparan | digital |
| Ciri Khas | Penggera, Port Pengecasan, Paparan Boleh Dimalapkan, Lampu Malam (Bertukar Warna) |
| Sumber Kuasa | Elektrik Bertali |
| warna | putih |
Waranti dan Sokongan
Produk Nedis dihasilkan mengikut piawaian kualiti yang tinggi. Sekiranya berlaku kecacatan semasa tempoh jaminan, sila hubungi peruncit anda untuk mendapatkan sokongan. Tempoh jaminan tertakluk kepada terma dan syarat peruncit dan undang-undang pengguna tempatan.
Untuk bantuan lanjut atau sokongan teknikal, sila rujuk Nedis rasmi webtapak atau hubungi perkhidmatan pelanggan mereka secara langsung. Simpan resit pembelian anda sebagai bukti pembelian.


