1. Pengenalan
Thank you for choosing the Smartwares FSM-12601 Wi-Fi Smoke Detector. This device is designed to provide early warning of smoke and fire, enhancing the safety of your home. Featuring a photoelectric sensor, it offers high sensitivity to detect slow-smoldering fires while minimizing false alarms. With Wi-Fi connectivity, you can receive real-time alerts on your smartphone via the Connected at Home or Smartlife app.

Image: The Smartwares FSM-12601 Wi-Fi Smoke Detector in a home setting.
2. Maklumat Keselamatan Penting
- Baca semua arahan dengan teliti sebelum pemasangan dan penggunaan.
- Pengesan asap ini direka bentuk untuk kegunaan kediaman.
- Do not paint the smoke detector. Paint can clog the sensing chambers and prevent the alarm from functioning correctly.
- Do not install in areas with high humidity, excessive dust, or near cooking fumes.
- Regularly test the smoke detector as described in this manual.
- Sekiranya berlaku penggera, segera keluarkan premis dan hubungi perkhidmatan kecemasan.
3. Kandungan Pakej
Pastikan semua item ada dalam pakej:
- Smartwares FSM-12601 Wi-Fi Smoke Detector
- Pendakap pelekap
- Bateri CR123A
- Memasang skru dan palam dinding
- Manual Pengguna
4. Produk Lebihview
The Smartwares FSM-12601 features a compact design with a central test/mute button and an integrated LED indicator.

Imej: Depan view of the smoke detector highlighting the Test/Mute button.
- Test/Mute Button: Press to test the alarm or silence a false alarm.
- Penunjuk LED: Provides visual status of the device (e.g., normal operation, alarm, low battery, pairing mode).
- Penceramah: Emits the 85 dB alarm sound.

Image: Dimensions and key features of the smoke detector.
5. Persediaan dan Pemasangan
5.1 Pemasangan Bateri
- Gently twist the back cover of the smoke detector counter-clockwise to open it.
- Insert the provided CR123A battery, ensuring correct polarity (+/-).
- Close the back cover by twisting it clockwise until it clicks into place.
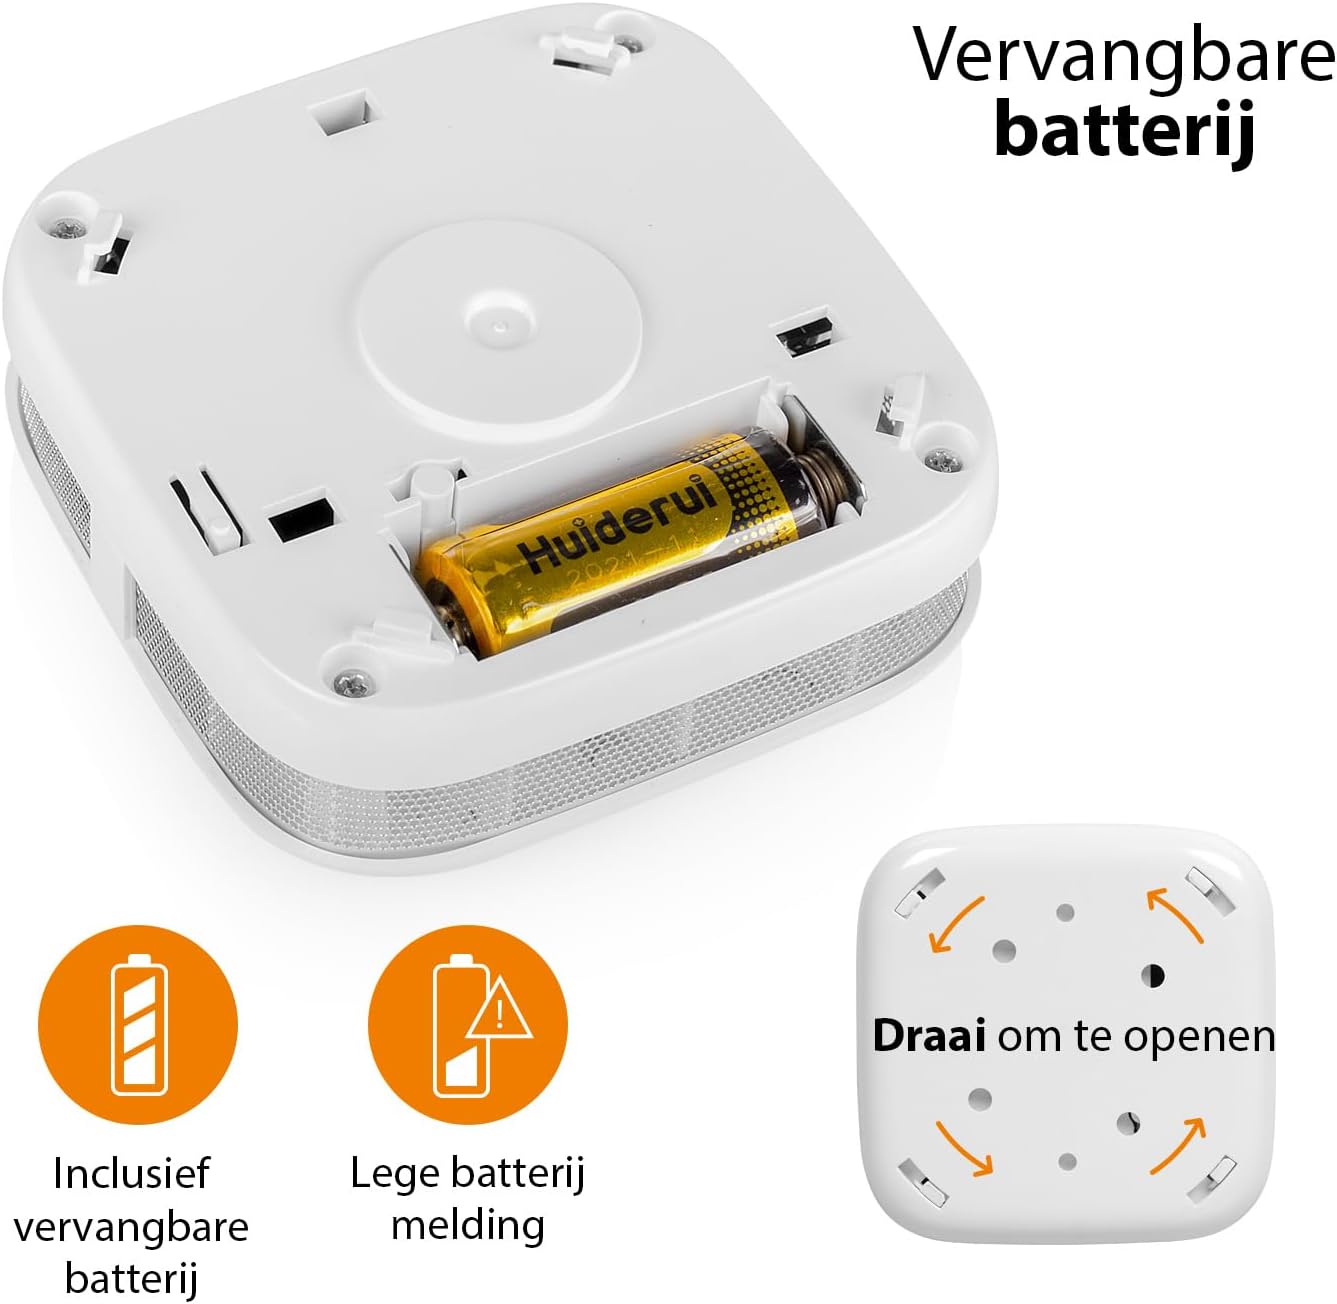
Image: Battery compartment and instructions to open the device.
5.2 Lokasi Pemasangan
For optimal performance, install the smoke detector on the ceiling in the center of a room or hallway. If ceiling mounting is not possible, install it on a wall, at least 10-30 cm (4-12 inches) from the ceiling. Avoid corners. Install at least one smoke detector on each floor of your home, including basements and attics.
- Avoid installing near windows, doors, or ventilation openings where drafts might interfere with smoke detection.
- Keep away from cooking appliances, fireplaces, and areas with high humidity like bathrooms.
5.3 Pemasangan Fizikal
- Pilih lokasi pemasangan yang sesuai.
- Use the mounting bracket as a template to mark the drill holes on the ceiling or wall.
- Tebuk lubang dan masukkan palam dinding.
- Pasang pendakap pelekap menggunakan skru yang disediakan.
- Align the smoke detector with the mounting bracket and twist it clockwise until it locks securely into place.
5.4 App Connection (Wi-Fi Pairing)
To enable Wi-Fi features and receive smartphone notifications, connect your smoke detector to the Smartwares "Connected at Home" or "Smartlife" app.
- Download the "Connected at Home" or "Smartlife" app from your smartphone's app store (available for iOS and Android).
- Daftar atau log masuk ke akaun anda.
- Long press the Test/Mute button on the smoke detector until the red LED indicator starts flashing. This indicates pairing mode.
- Follow the on-screen instructions within the app to add the smoke detector to your Wi-Fi network.
- Once successfully paired, the LED indicator will stop flashing and remain off, or indicate normal operation as per app instructions.

Image: Steps for connecting the smoke detector to the app.

Image: Benefits of connecting the smoke detector to the app.
6. Arahan Operasi
6.1 Operasi Biasa
Once installed and connected, the smoke detector is in normal operating mode. The LED indicator will flash briefly every 40-60 seconds to confirm it is functioning correctly.
6.2 Testing the Smoke Detector
It is recommended to test your smoke detector weekly to ensure proper functionality.
- Press and hold the Test/Mute button for a few seconds.
- The alarm will sound loudly (85 dB), and the LED indicator will flash rapidly.
- Lepaskan butang. Penggera harus berhenti.
- Jika penggera tidak berbunyi, rujuk bahagian Penyelesaian Masalah.
6.3 Mute Function (Hush Mode)
In case of a non-emergency alarm (e.g., cooking fumes), you can temporarily silence the alarm.
- Press the Test/Mute button briefly during an alarm.
- The alarm will silence for approximately 10 minutes. The LED will continue to flash every few seconds to indicate it is in hush mode.
- After 10 minutes, if smoke is still present, the alarm will reactivate.
- If the smoke has cleared, the detector will return to normal operation.
6.4 Status Penunjuk LED
- Flashes every 40-60 seconds: Operasi biasa.
- Flashes rapidly with alarm sound: Asap dikesan.
- Flashes every few seconds (no alarm): Hush mode active.
- Flashes every 32 seconds (with chirp): Low battery warning. Replace battery immediately.
- Flashes rapidly (during setup): Mod berpasangan.
7. Penyelenggaraan
7.1 Penggantian Bateri
The smoke detector operates on a CR123A battery with an approximate lifespan of one year. When the battery is low, the device will chirp every 32 seconds, and the LED will flash.
- Twist the smoke detector counter-clockwise to remove it from its mounting bracket.
- Open the back cover by twisting it counter-clockwise.
- Remove the old CR123A battery and dispose of it according to local regulations.
- Masukkan bateri CR123A baharu, dengan memerhatikan kekutuban yang betul.
- Close the back cover and reattach the detector to its mounting bracket.
- Test the smoke detector immediately after replacing the battery.
7.2 Cleaning the Smoke Detector
Dust and debris can affect the performance of your smoke detector. Clean it at least once a month.
- Remove the smoke detector from its mounting bracket.
- Use a soft brush or a vacuum cleaner with a soft brush attachment to gently clean the exterior casing and the openings around the sensor.
- Do not use water, cleaning solvents, or harsh chemicals.
- Reattach the detector and test it.
8. Penyelesaian masalah
| Masalah | Kemungkinan Punca | Penyelesaian |
|---|---|---|
| Penggera tidak berbunyi semasa ujian. | Dead or low battery; incorrect battery installation; faulty unit. | Replace battery; check battery polarity; if problem persists, contact support. |
| Penggera palsu yang kerap. | Detector is too close to cooking fumes, steam, or high humidity; excessive dust. | Relocate detector further from sources of false alarms; clean the detector. |
| Chirping sound every 32 seconds. | Amaran bateri lemah. | Replace the CR123A battery immediately. |
| Cannot connect to Wi-Fi app. | Incorrect Wi-Fi password; detector too far from router; incorrect pairing procedure; app issues. | Ensure correct Wi-Fi password; move detector closer to router; repeat pairing steps carefully; check app for updates or known issues. |
| No notifications on smartphone. | App notifications disabled; detector disconnected from Wi-Fi; app not running in background. | Check app notification settings; verify detector's Wi-Fi connection; ensure app is allowed to run in background. |
9. Spesifikasi Teknikal
| Nombor Model | FSM-12601 |
| Jenis Sensor | Fotolistrik |
| Kelantangan Penggera | 85 dB pada 3 meter |
| Sumber Kuasa | 1x CR123A Lithium battery (included) |
| Hayat Bateri | Lebih kurang 1 tahun |
| Ketersambungan | Wi-Fi (2.4 GHz) |
| Kelembapan Operasi | Sehingga 95% tidak terkondensasi |
| Dimensi (L x W x H) | 7.6 x 7.6 x 2.8 cm |
| Berat badan | 84 gram |
| bahan | Plastik ABS |
10. Maklumat Pelupusan
Do not dispose of the device or batteries with household waste. Electronic waste and batteries should be collected separately for environmentally sound disposal. Use the return and collection systems available in your country.
11. Waranti dan Sokongan
Smartwares products come with a standard manufacturer's warranty. For detailed warranty terms, technical support, or service inquiries, please refer to the contact information provided on the Smartwares website or the original purchase documentation.


