1. Pengenalan
The SCULPFUN Laser Honeycomb Work Table is an essential accessory designed to enhance the performance and safety of your laser engraving and cutting machine. This manual provides detailed instructions for the setup, operation, and maintenance of your honeycomb work table to ensure optimal results and prolong its lifespan.
It features a 400x400mm working area, a metal desktop protection board, and a unique cut-through observable design, all crafted from high-strength steel for durability and flatness.
2. Ciri-ciri Utama
- Enhanced Cutting Quality: The honeycomb structure allows for efficient smoke exhaust, resulting in cleaner, smoother edges on cut materials and reducing yellowing caused by smoke.

Image: Comparison showing significantly burnt and rough edges without the honeycomb table versus slightly burnt and smooth edges with it.
- Kawasan Kerja Optimum: A generous 400x400mm (15.7x15.7 inch) working area accommodates most popular laser engraving machines, maximizing your cutting and engraving capabilities.

Image: Diagram illustrating the 400mm x 400mm dimensions of the honeycomb work table and its 22mm thickness.
- Cut-Through Observable Design: The metal backing plate beneath the honeycomb emits a bright light when the laser successfully cuts through material, providing immediate visual confirmation of penetration. This feature helps prevent incomplete cuts.

Image: Illustration showing a laser cutting through material on the honeycomb table, with a bright light visible from below, indicating a complete cut.
- Perlindungan Desktop: Includes a dedicated metal desktop protection board to shield your work surface from laser damage, making it ideal for diode lasers.
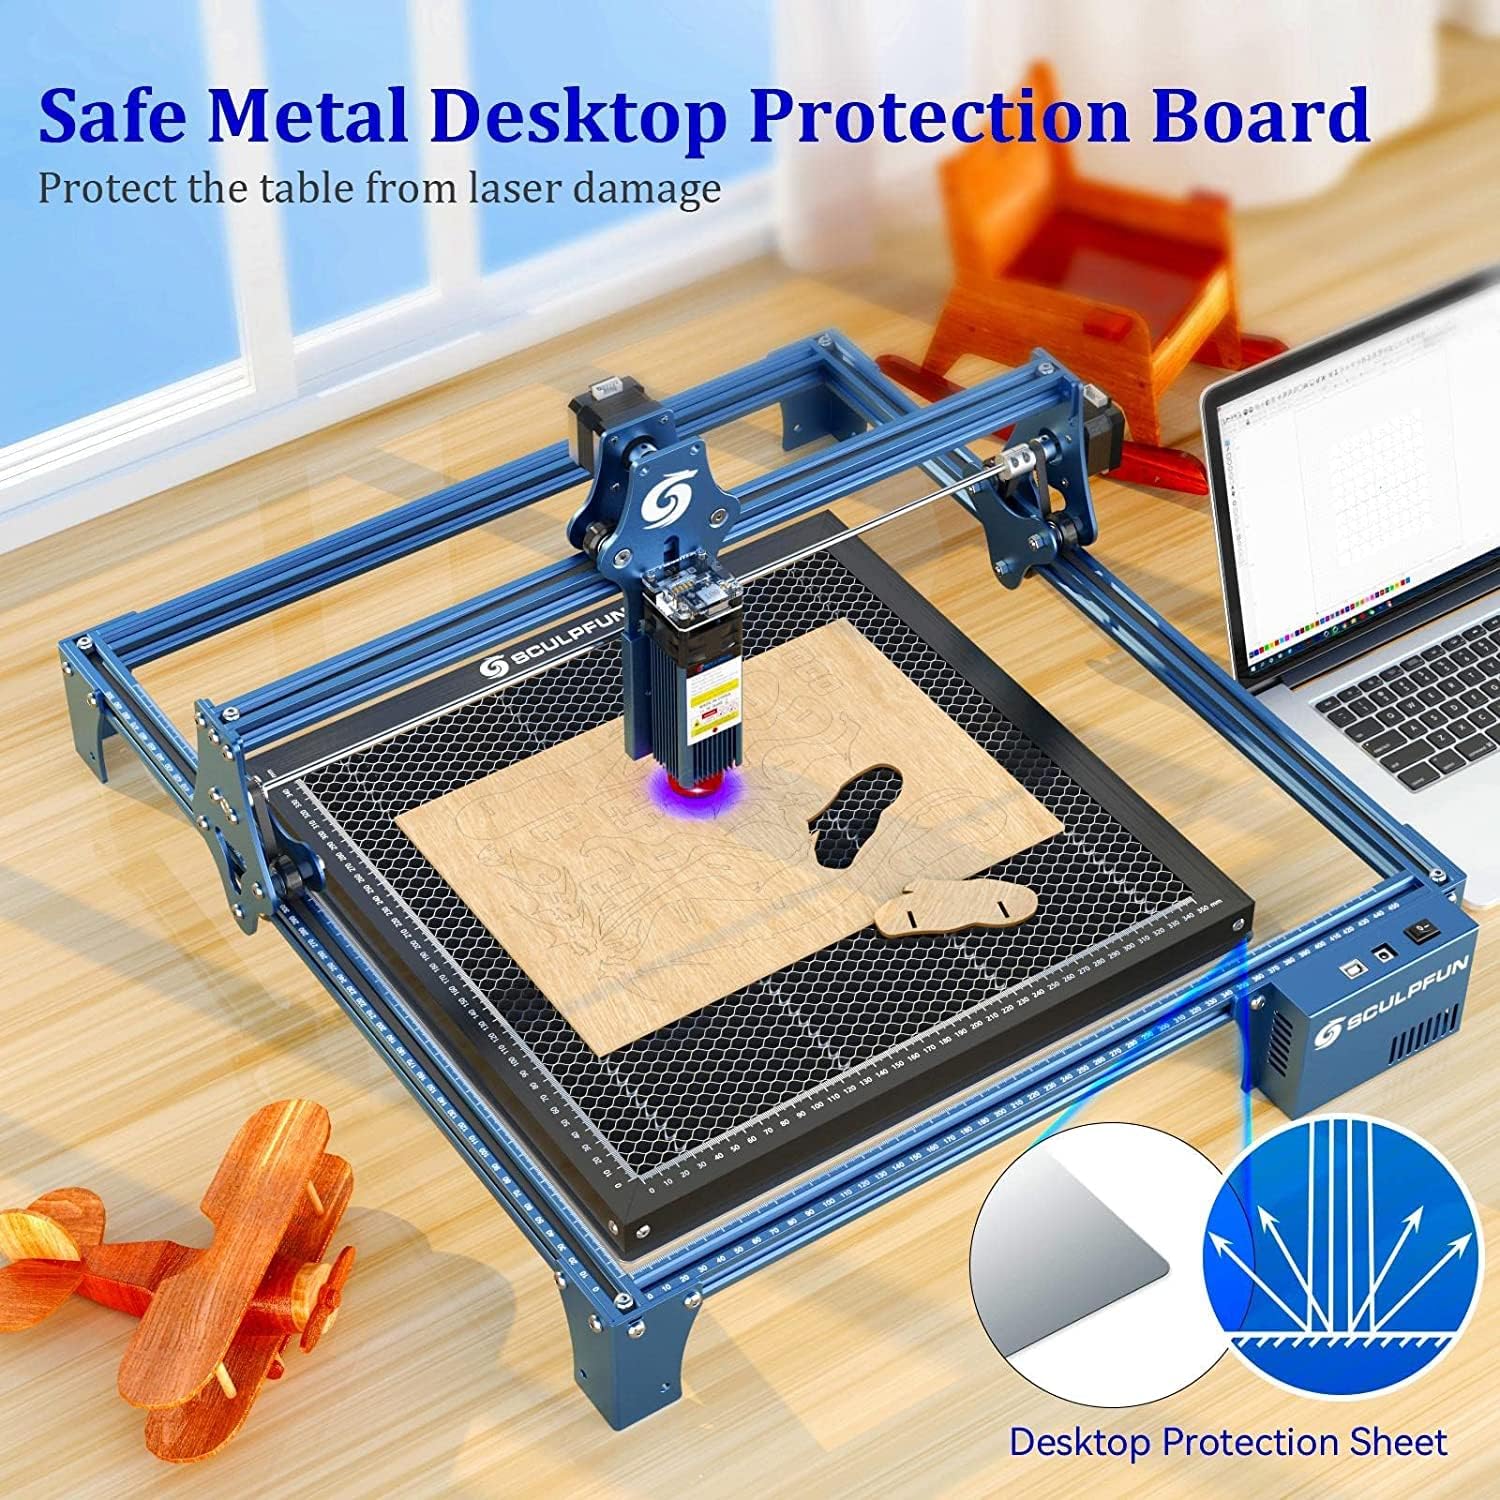
Image: The honeycomb work table placed on a desktop, with the metal protection board underneath, demonstrating its protective function.
- Integrated Measuring Ruler: Precise scale lines on the X and Y axes form a right-angle measuring ruler, facilitating quick and accurate measurement of engraved objects.

Imej: Dari dekat view of the honeycomb work table's frame, highlighting the integrated square measuring ruler with clear scale markings.
- Keserasian Luas: Compatible with various laser engraving machines, including diode DIY laser engravers and CO2 laser engravers.
- Pembinaan Tahan Lama: Made entirely of high-strength steel and processed with high-precision CNC, ensuring a firm structure, resistance to deformation, and high flatness.
3. Arahan Persediaan
- Buka Pembungkusan Komponen: Carefully remove the SCULPFUN Honeycomb Work Table and the metal desktop protection board from their packaging.
- Sediakan Permukaan Kerja: Ensure your work surface is clean, level, and stable.
- Place Protection Board: Position the metal desktop protection board on your work surface. This board acts as a barrier against laser penetration and heat.
- Position Honeycomb Table: Place the SCULPFUN Honeycomb Work Table directly on top of the metal desktop protection board. Ensure it is centered and stable.

Image: The SCULPFUN Honeycomb Work Table shown with its accompanying metal desktop protection board, ready for placement.
- Integrate with Engraver: Place your laser engraving machine over the honeycomb work table. Ensure the laser path is clear and aligned with the desired working area on the honeycomb.

Image: A laser engraving machine set up with the SCULPFUN Honeycomb Work Table, demonstrating the proper integration for operation.
4. Garis Panduan Operasi
- Peletakan Bahan: Place the material to be engraved or cut directly on the honeycomb surface. Ensure it lies flat and is secured if necessary.
- Utilize Measuring Ruler: Use the integrated X and Y axis rulers to precisely position your material and measure the dimensions of your work.
- Monitor Cutting Process: During laser cutting, observe the area beneath the honeycomb. The bright light emitted from the metal backing plate indicates that the laser has successfully cut through the material.
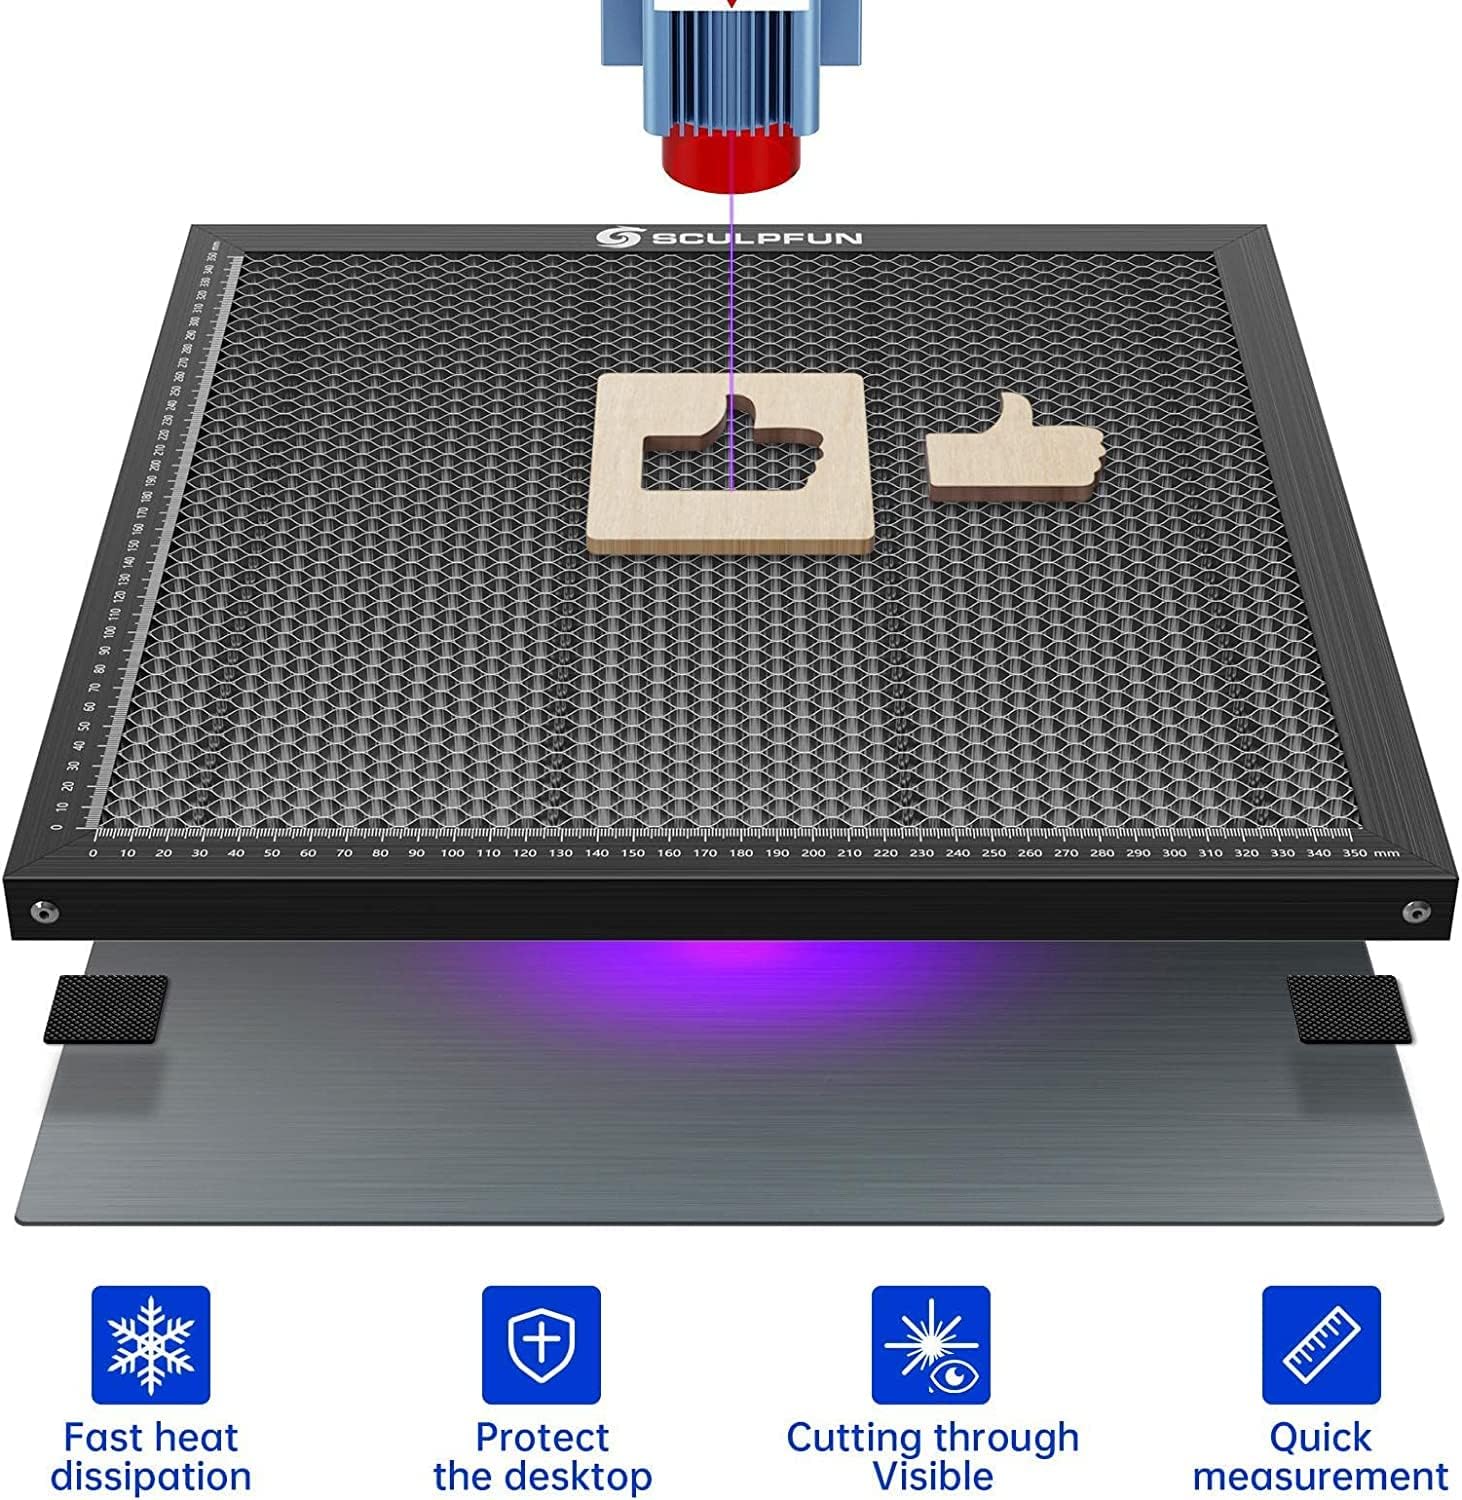
Image: A laser actively cutting material on the honeycomb table, with a purple glow beneath, signifying the laser has passed through the material.
- Smoke Exhaust: The honeycomb design facilitates efficient smoke and debris exhaust downwards, contributing to cleaner cuts and a healthier working environment. Ensure adequate ventilation in your workspace.

Image: An illustration demonstrating how smoke and heat are effectively dissipated downwards through the honeycomb structure during laser operation.
5. Penyelenggaraan
Regular maintenance ensures the longevity and optimal performance of your SCULPFUN Honeycomb Work Table.
- Pembersihan: After each use, or as needed, clean the honeycomb surface to remove any accumulated debris, ash, or small material scraps. A soft brush or compressed air can be used. For stubborn residue, a damp cloth with a mild cleaning solution may be applied, followed by thorough drying.
- Pemeriksaan: Periodically inspect the honeycomb mesh for any signs of damage, deformation, or excessive wear. Ensure the metal desktop protection board is also clean and free from damage.
- Storan: When not in use, store the honeycomb work table and protection board in a clean, dry environment to prevent corrosion or damage.
6. Penyelesaian masalah
| Masalah | Kemungkinan Punca | Penyelesaian |
|---|---|---|
| Material edges are yellowed or burnt. | Insufficient smoke exhaust; material too close to the desktop. | Ensure the honeycomb surface is clean. Verify proper ventilation in the workspace. Adjust laser power/speed settings if necessary. |
| Laser not cutting through completely. | Incorrect laser settings; material too thick; honeycomb cells blocked. | Adjust laser power or reduce cutting speed. Clean honeycomb cells. Ensure the material is within the laser's cutting capacity. |
| Metal protection board shows signs of laser damage. | Laser cutting through material and hitting the board. | This is expected behavior for the protection board. It is designed to absorb stray laser energy. Replace if damage becomes excessive and compromises protection. |
| Honeycomb surface is not flat. | Damage from impact or improper handling. | Inspect for visible damage. If severely warped, replacement may be necessary to ensure consistent cutting results. |
7. Spesifikasi
| Ciri | Perincian |
|---|---|
| Bahan Produk | Keluli berkekuatan tinggi |
| Product Size (L x W) | 400mm x 400mm (15.75 x 15.75 inci) |
| Ketebalan Produk | 22mm (0.87 inci) |
| Honeycomb Mesh Diameter | 9mm |
| Berat Barang | 2.04 kg (4.4 paun) |
| Keserasian | Diode DIY laser engraving machines, CO2 laser engraving machines |
8. Waranti dan Sokongan
For warranty information, technical support, or any inquiries regarding your SCULPFUN Laser Honeycomb Work Table, please refer to the official SCULPFUN webtapak atau hubungi perkhidmatan pelanggan mereka secara langsung. Simpan resit pembelian anda sebagai bukti pembelian.
Pengeluar: SCULPFUN


