1. Pengenalan
The Weber Genesis Smart SX-335 LP SS Liquid Propane Grill is designed to provide a comprehensive outdoor cooking experience. This manual provides essential information for the safe and efficient operation, maintenance, and troubleshooting of your new grill.

Rajah 1: The Weber Genesis Smart SX-335 LP SS Liquid Propane Grill. This image shows the full grill unit with its stainless steel finish and black cabinet.
2. Maklumat Keselamatan Penting
AMARAN: Kegagalan mematuhi arahan ini boleh mengakibatkan kebakaran, letupan atau bahaya terbakar, yang boleh menyebabkan kerosakan harta benda, kecederaan diri atau kematian.
- Sentiasa kendalikan gril di luar rumah di kawasan yang mempunyai pengudaraan yang baik.
- Jangan simpan atau gunakan petrol atau wap dan cecair mudah terbakar lain di sekitar ini atau mana-mana perkakas lain.
- Pastikan kawasan perkakas bersih dan bebas daripada bahan mudah terbakar, petrol, dan wap dan cecair mudah terbakar lain.
- Jangan menghalang aliran udara pembakaran dan pengudaraan.
- Keep any electrical supply cord and fuel supply hose away from heated surfaces.
- Sentiasa periksa kebocoran gas sebelum setiap penggunaan.
- Jangan biarkan panggangan tanpa pengawasan semasa memasak.
- Jauhkan kanak-kanak dan haiwan peliharaan dari pemanggang pada setiap masa.
- Pakai sarung tangan pelindung apabila mengendalikan komponen panas.
3. Apa yang ada di dalam Kotak
awak Weber Genesis Smart SX-335 LP SS grill package includes the following components:
- Weber Genesis Smart SX-335 LP SS Gas Grill Unit
- Cooking Grates (porcelain-enameled cast iron)
- Flavorizer Bars
- Grease Management System (including drip tray and catch pan)
- Side Burner (integrated)
- Weber Connect Smart Grilling Hub (integrated)
- Propane Tank (sold separately, but required for operation)
- Manual Arahan

Rajah 2: The Weber Genesis Smart SX-335 LP SS grill with its lid closed, showcasing the stainless steel finish and control panel.
4. Persediaan
4.1 Perhimpunan
Assembly of your Weber Genesis Smart SX-335 LP SS grill is required. For detailed, step-by-step interactive 3D instructions, download the free BILT app on your mobile device. This app provides visual guidance for each step of the assembly process.
Video 1: BILT App - Step by Step Interactive Assembly Instructions. This video demonstrates the interactive 3D assembly guide available through the BILT app for the Webgril Kejadian.
Ensure all parts are accounted for before beginning assembly. It is recommended to have a second person assist with assembly due to the size and weight of some components.
4.2 Connecting the Liquid Propane Tank
- Pastikan semua tombol kawalan penunu berada dalam kedudukan OFF.
- Open the cabinet doors located beneath the grill.
- Place the liquid propane tank securely in the designated tank holder.
- Connect the regulator hose from the grill to the propane tank valve. Hand-tighten the connection firmly.
- Perlahan-lahan buka injap tangki propana sepenuhnya.
- Check for any gas leaks using a soapy water solution on all connections. Bubbles indicate a leak. If a leak is detected, close the tank valve, tighten connections, and re-test. If the leak persists, do not use the grill and contact customer service.

Figure 3: A hand connecting the liquid propane tank to the grill's regulator hose inside the cabinet.
The grill cabinet features a hook that indicates the propane level by weight, helping you monitor remaining fuel.
4.3 Permulaan Awal
Before first use, operate the grill on high heat for 15 minutes with the lid closed to burn off any manufacturing residues. This process is called "seasoning" the grill.
5. Arahan Operasi
5.1 Menyalakan Pembakar Utama
- Buka penutup gril.
- Pastikan injap tangki propana terbuka sepenuhnya.
- Turn the leftmost main burner control knob to the START/HIGH position.
- Segera tekan dan tahan butang penyalaan elektronik sehingga penunu menyala.
- Once the first burner is lit, turn on adjacent burners to the desired heat setting.
- If ignition does not occur within 5 seconds, turn the burner control(s) OFF, wait 5 minutes, and repeat the lighting procedure.

Figure 4: Close-up of the Weber Genesis grill's control knobs, showing the ignition button and burner controls.
5.2 Temperature Control and Smart Features
The Weber Genesis Smart SX-335 LP SS features integrated Weber Connect smart technology for precise temperature monitoring. The digital display on the side table shows real-time food temperatures from connected probes.
- Weber Connect App: Muat turun Weber Connect app to your smartphone for remote monitoring, temperature alerts, and flip & serve notifications.
- Kapasiti Probe: The grill supports up to 2 temperature probes for monitoring different food items simultaneously.
- Menguasakan Paparan: The grill display can be powered by plugging it into an electrical outlet or by using a USB-certified, 10,000mAh rechargeable power bank (sold separately) clipped under the side table.

Rajah 5: The Weber Connect smart display on the grill's side table, showing temperature readings, alongside a smartphone displaying the Weber Connect app with temperature alerts.
5.3 Using the Sear Zone
The extra-large sear zone is designed for high-heat searing to achieve perfect grill marks and lock in juices. To activate the sear zone, turn the dedicated sear zone burner knob to the HIGH position. Allow it to preheat for 5-10 minutes before placing food directly over it.
5.4 Using the Side Burner
The integrated side burner allows you to sauté vegetables, boil corn, or heat up sauces while grilling. To light the side burner, open its cover, turn the control knob to the START/HIGH position, and press the electronic ignition button until it ignites.

Rajah 6: The Weber Genesis grill with the side burner cover open, revealing the burner grate.
5.5 Weber Crafted Outdoor Kitchen Collection
Expand your culinary possibilities with the Weber Crafted Outdoor Kitchen Collection. By replacing a cooking grate with custom-fit grillware (sold separately), you can sear, roast, bake, steam, and stir-fry. The grill locker provides convenient storage for these accessories.

Rajah 7: The Weber Crafted grillware frame installed in the grill, ready to accommodate various inserts.

Figure 8: A person stir-frying vegetables and rice in a wok insert on the Webgril Kejadian.
5.6 Cooking Techniques
- Haba Langsung: Use direct heat for searing, grilling smaller items, or cooking foods that require quick cooking.
- Haba Tidak Langsung: For larger cuts of meat, poultry, or delicate items, use indirect heat. Turn off the burners directly beneath the food and use adjacent burners to maintain the desired temperature. The expandable top cooking grate provides additional space for indirect cooking.

Figure 9: Two whole chickens cooking on the main grates, with temperature probes inserted, demonstrating indirect cooking.

Figure 10: Grilled shrimp, mixed vegetables in a basket, and toasted bread on the upper warming rack, illustrating diverse cooking options.
6. Penyelenggaraan
6.1 Cleaning the Cooking Grates
After each use, while the grates are still warm, use a grill brush to scrape off any food residue. For a deeper clean, remove the grates and wash them with warm, soapy water.
6.2 Sistem Pengurusan Gris
The improved grease management system simplifies cleaning. Simply pull the grease tray out from the front of the grill and scrape away accumulated grease and debris. Replace the disposable catch pan as needed.
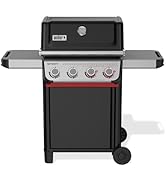
Figure 11: A hand demonstrating the removal and cleaning of the grease management system's pull-out tray.
6.3 Penutup Panggangan
Protect your grill from the elements by using a weather-resistant grill cover when not in use. This helps prolong the life and appearance of your grill.
7. Penyelesaian masalah
| Masalah | Kemungkinan Punca | Penyelesaian |
|---|---|---|
| Pembakar gagal menyala | Tiada aliran gas, penunu tersumbat, penyalaan rosak. | Check propane tank connection and fuel level. Clean burner ports. Check igniter electrode. |
| Pemanasan tidak sekata | Clogged burner ports, low fuel, wind. | Clean burner ports. Ensure adequate fuel. Position grill away from strong winds. |
| Nyalaan rendah atau tiada nyalaan | Low fuel, regulator bypass, gas leak. | Check fuel level. Reset regulator by turning off all gas, disconnecting, waiting 1 minute, and reconnecting. Check for leaks. |
| Weber Connect display not working | No power, battery low (if using power bank). | Ensure plugged into outlet or power bank is charged and connected. |
For further assistance, refer to the full troubleshooting guide in your printed manual or contact Weber Perkhidmatan Pelanggan.
8. Spesifikasi
| Ciri | Perincian |
|---|---|
| Jenama | Weber |
| Nama Model | Genesis Smart SX-335 LP SS |
| Nombor Model Item | 35600001 |
| Dimensi Produk | 35.5"D x 31"W x 30.75"H |
| Berat Barang | 209 paun |
| warna | Keluli Tahan Karat |
| Jenis Bahan Api | Propana Cecair (LP) |
| Kiraan Pembakar Utama | 3 |
| Kuasa Pemanasan | 13000 Unit Terma British (BTU) |
| Kawasan Permukaan Memasak | 787 Inci Persegi |
| Ciri Khas | Grease Management System, Weber Connect Smart Technology, Sear Zone, Side Burner, Expandable Top Cooking Grate, Grill Locker |
| bahan | Keluli Tahan Karat |
| Perhimpunan Diperlukan | ya |
9. Waranti dan Sokongan
The Weber Genesis Smart SX-335 LP SS Liquid Propane Grill comes with a Waranti terhad 12 tahun. For detailed warranty information, please refer to the warranty card included with your product or visit the official Weber webtapak.
For customer support, technical assistance, or to order replacement parts, please visit the WebKedai er di Amazon atau hubungi Weber directly through their official channels.