1. Pengenalan
This manual provides essential information for the safe and efficient operation of your Reloop RP-7000 MK2 Direct Drive High Torque Turntable. Please read these instructions thoroughly before using the product to ensure proper setup, optimal performance, and longevity of your equipment. Keep this manual for future reference.
2. Arahan Keselamatan
- Bekalan Kuasa: Sambungkan unit hanya ke soket AC dengan volum yang dinyatakantage. Pastikan kord kuasa tidak rosak atau tersepit.
- Kelembapan: Do not expose the unit to rain, moisture, or excessive humidity. Avoid placing liquid-filled objects on the turntable.
- Pengudaraan: Pastikan pengudaraan yang mencukupi di sekeliling unit. Jangan sekat bukaan pengudaraan.
- penempatan: Place the turntable on a stable, level surface away from direct sunlight, heat sources, and strong magnetic fields.
- Pembersihan: Putuskan sambungan kuasa sebelum membersihkan. Gunakan kain yang lembut dan kering. Elakkan pembersih cecair atau pelarut.
- Servis: Jangan cuba menservis unit ini sendiri. Rujuk semua servis kepada kakitangan yang berkelayakan.
3. Kandungan Pakej
Sahkan bahawa semua item yang disenaraikan di bawah disertakan dalam pakej anda. Jika ada barang yang hilang atau rosak, hubungi pengedar anda dengan segera.
- Reloop RP-7000 MK2 Direct Drive High Torque Turntable (x2)
- Penutup Habuk (x2)
- Digital Turntable Stylus Scale
- Record Care Solution
- Kabel Kuasa
- RCA kabel
- Wayar bawah tanah
- Slipmat
- Kaunter berat badan
- Headshell with Cartridge (pre-mounted or separate, depending on region/bundle)

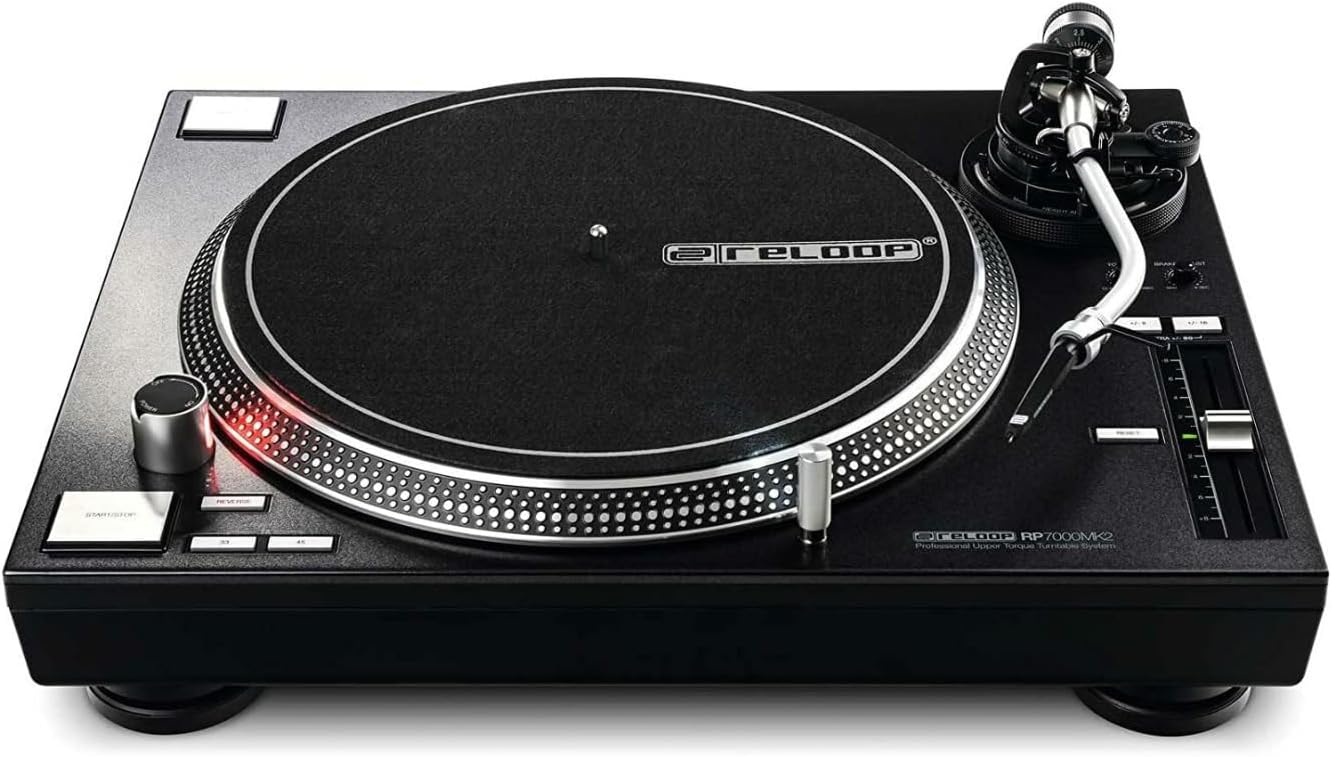
Rajah 1: Berakhirview of the Reloop RP-7000 MK2 turntable bundle components.
4. Persediaan
4.1 Membongkar dan Meletakkan
- Keluarkan semua komponen daripada pembungkusan dengan berhati-hati. Simpan pembungkusan untuk pengangkutan pada masa hadapan.
- Place the turntable on a flat, stable, and vibration-free surface. Ensure there is enough space for the dust cover to open fully.
- Attach the dust cover by aligning its hinges with the slots on the turntable's rear.

Rajah 2: Turntable with the dust cover in place.
4.2 Platter and Slipmat Installation
- Carefully place the platter onto the center spindle. Ensure it sits flush.
- Letakkan slipmat di atas pinggan.
4.3 Tonearm and Cartridge Setup
- If not pre-mounted, attach the headshell with the cartridge to the tonearm. Secure it by turning the locking ring.
- Screw the counterweight onto the rear of the tonearm.
- Seimbangkan Tonearm: Lepaskan tonearm clamp. Adjust the counterweight until the tonearm is perfectly balanced and floats horizontally.
- Tetapkan Pasukan Penjejakan: Return the tonearm to its rest and clamp it. Rotate the numbered ring on the counterweight to '0' without moving the counterweight itself. Then, rotate the entire counterweight to the recommended tracking force for your cartridge (typically 2-4 grams for DJ cartridges).
- Tetapkan Anti-Luncur: Laraskan dail anti-luncur agar sepadan dengan tetapan daya penjejakan.
4.4 Using the Digital Stylus Scale
The included digital stylus scale allows for precise measurement of your cartridge's tracking force, ensuring optimal sound quality and minimizing record wear.
- Place the stylus scale on the platter.
- Hidupkan penimbang menggunakan butang kuasa.
- Carefully lower the stylus onto the designated measuring point on the scale.
- Read the tracking force displayed. Adjust the tonearm's counterweight as needed until the desired force is achieved.

Rajah 3: Digital Stylus Scale for precise tracking force measurement.
4.5 Sambungan
- Output Audio: Connect the RCA cables from the turntable's audio output to the PHONO input of your mixer or amplifier. If your mixer/amplifier does not have a PHONO input, you will need an external phono preamplebih hidup.
- Wayar bawah tanah: Connect the ground wire from the turntable to the ground terminal on your mixer or amppengudaraan untuk mengurangkan dengungan.
- Kuasa: Connect the power cable to the turntable and then to a suitable AC power outlet.
5. Arahan Operasi
5.1 Main Semula Asas
- Place a record on the slipmat.
- Select the appropriate speed (33, 45, or 78 RPM) using the speed selector buttons.
- Tekan ke MULA/BERHENTI button to begin platter rotation.
- Carefully lift the tonearm using the cueing lever and position the stylus over the desired groove on the record.
- Lower the cueing lever to gently place the stylus onto the record.
- To stop playback, lift the tonearm using the cueing lever, return it to the tonearm rest, and press the MULA/BERHENTI butang.
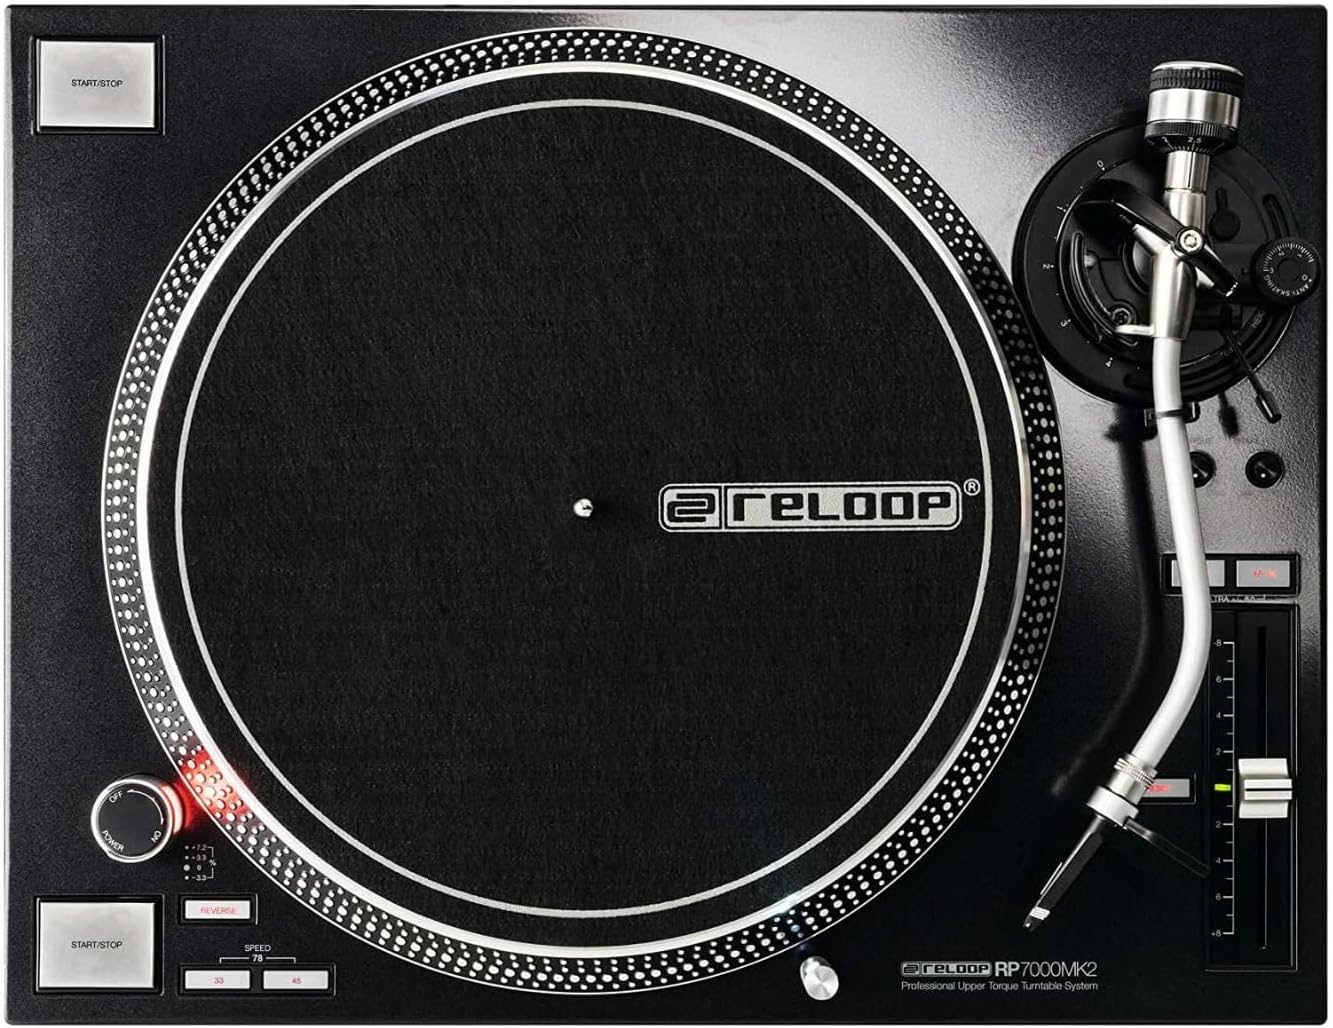
Rajah 4: Turntable platter and control layout.
5.2 Kawalan Pitch
The pitch fader allows you to adjust the playback speed (BPM) of the record. Move the fader up or down to increase or decrease the pitch. The pitch range can be selected using the range buttons (e.g., +/- 8%, 16%, 50%).
5.3 Reverse Function
The RP-7000 MK2 features a reverse playback function. Press the TERBALIK button to change the direction of platter rotation. Press it again to return to normal playback.
6. Penyelenggaraan
6.1 Membersihkan Meja Putar
- Sentiasa putuskan sambungan kuasa sebelum membersihkan.
- Use a soft, dry, lint-free cloth to wipe the surface of the turntable and dust cover.
- Elakkan menggunakan pembersih, pelarut atau semburan kimia yang kasar, kerana ini boleh merosakkan kemasan.
6.2 Penjagaan Stilus
- Gently brush the stylus from back to front using a soft stylus brush to remove dust and debris.
- Elakkan daripada menyentuh stylus dengan jari anda.
6.3 Penjagaan Rekod
The included record care solution helps maintain the quality of your vinyl records and prolong their lifespan.
- Apply a small amount of record care solution to a clean, soft, lint-free cloth or a dedicated record cleaning brush.
- Gently wipe the record surface in a circular motion, following the grooves.
- Allow the record to dry completely before playing.
Rajah 5: Record Care Solution for maintaining vinyl quality.
7. Penyelesaian masalah
| Masalah | Kemungkinan Punca | Penyelesaian |
|---|---|---|
| Tiada kuasa | Kabel kuasa tidak disambungkan; soket tidak aktif | Periksa sambungan kabel kuasa; alur keluar uji dengan peranti lain |
| Tiada suara atau kelantangan rendah | RCA cables incorrect; no PHONO input; amplifier/mixer settings | Ensure RCA cables are connected to PHONO input; check amplifier/mixer input selection and volume |
| Bunyi bising | Wayar pembumian tidak disambungkan; gangguan | Connect ground wire; move turntable away from other electronic devices |
| Melangkau atau bunyi herot | Incorrect tracking force; dirty stylus/record; damaged stylus | Adjust tracking force using stylus scale; clean stylus and record; replace stylus if damaged |
| Pinggan tidak berputar | START/STOP button not pressed; motor issue | Press START/STOP; if problem persists, contact support |
8. Spesifikasi
| Ciri | Perincian |
|---|---|
| Nama Model | RP-7000 MK2 |
| Jenama | Gelung semula |
| Jenis Motor | Direct Drive DC Motor |
| Ciri Khas | Tork Tinggi |
| Dimensi Produk | 27.9 x 20 x 18.6 inci |
| bahan | logam |
| warna | Hitam |
| Peranti Serasi | Speaker, Headphone, Personal Computer, MP3 Player, Laptop |
| Format Isyarat | digital |
9. Waranti dan Sokongan
Reloop products are designed for reliability and performance. For warranty information, please refer to the warranty card included with your product or visit the official Reloop website. For technical support or service inquiries, please contact your authorized Reloop dealer or distributor.
Pengeluar: Gelung semula
Tarikh Mula-mula Tersedia: 8 Julai 2022


