1. Pengenalan
This manual provides detailed instructions for the installation, operation, and maintenance of the Vivotek ND9425P 16-Channel 4K UHD Network Video Recorder (NVR). This NVR is designed to manage and record video streams from up to 16 IP cameras, offering 4K UHD resolution support for high-quality surveillance. It is an integral component of a comprehensive security system, suitable for various applications requiring reliable video monitoring and recording.
Key features of the Vivotek ND9425P NVR include:
- Multimedia SoC CPU for efficient processing.
- Support for H.265, H.264, and MJPEG video codecs for flexible compression.
- Seamless recording capabilities.
- Smart Stream III optimization for bandwidth efficiency.
- Integrated PoE technology for simplified camera connectivity (when used with compatible PoE cameras).
2. Maklumat Keselamatan
Please read all safety instructions carefully before operating the device. Failure to follow these instructions may result in injury or damage to the product.
- Sumber Kuasa: Use only the power adapter supplied with the NVR. Ensure the power outlet provides the correct voltage.
- Pengudaraan: Do not block any ventilation openings. Install the NVR in a well-ventilated area to prevent overheating.
- Persekitaran: Elakkan mendedahkan NVR kepada air, kelembapan, suhu ekstrem atau cahaya matahari langsung.
- Pembersihan: Disconnect power before cleaning. Use a dry, soft cloth. Do not use liquid or aerosol cleaners.
- Servis: Jangan cuba servis produk ini sendiri. Rujuk semua perkhidmatan kepada pegawai perkhidmatan yang berkelayakan.
- Kabel: Ensure all cables are properly connected and secured to prevent tripping hazards or accidental disconnections.
3. Kandungan Pakej
Sahkan bahawa semua item terdapat dalam pakej sebelum meneruskan pemasangan:
- Vivotek ND9425P 16-Channel 4K UHD NVR Unit
- Penyesuai Kuasa
- Tetikus USB
- Panduan Pemasangan Pantas
- Resource CD (containing full manual and software)
- Skru untuk pemasangan HDD (jika berkenaan)
- Kabel Ethernet
Note: The package contents may vary slightly depending on the specific kit purchased. For example, some kits may include 8 x 2 MP Night Vision Dome Cameras and 8 x Ethernet Patch Cables.
4. Produk Lebihview
Bahagian ini memberikan overview of the Vivotek ND9425P NVR's physical components and interfaces.
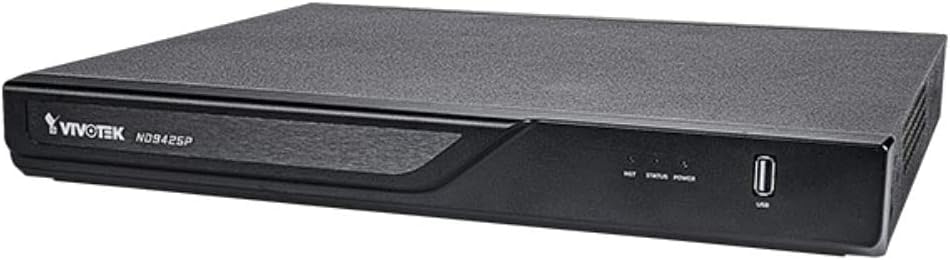
Rajah 4.1: Vivotek ND9425P NVR Front Panel
The image displays the Vivotek ND9425P NVR unit, a compact black rectangular device. The front panel features the "VIVOTEK ND9425P" logo on the left, followed by three small indicator lights labeled "NET", "STATUS", and "POWER". On the far right of the front panel, there is a USB port, labeled "USB" below it. The top surface of the NVR has a textured finish.
4.1 Front Panel Indicators and Ports
- LED BERSIH: Menunjukkan aktiviti rangkaian.
- LED STATUS: Indicates system status (e.g., recording, error).
- LED KUASA: Menunjukkan status kuasa.
- Port USB: For connecting a USB mouse, keyboard, or external storage devices for backup.
4.2 Pelabuhan Panel Belakang
The rear panel typically includes ports for power input, Ethernet (LAN), HDMI/VGA video output, audio input/output, and additional USB ports for peripheral connections.
5. Persediaan
5.1 Pemasangan Perkakasan
- Pemasangan Pemacu Keras (jika belum dipasang terlebih dahulu):
Unscrew the NVR cover. Carefully slide the hard drive into the bay and secure it with the provided screws. Reattach the cover.
- Sambungkan Kamera:
Connect your IP cameras to the NVR's PoE ports (if available) or to your network switch. Ensure all cameras are powered on and accessible on the network.
- Sambungkan ke Rangkaian:
Sambungkan kabel Ethernet daripada port LAN NVR ke penghala atau suis rangkaian anda.
- Paparan Sambungkan:
Sambungkan monitor ke port output HDMI atau VGA NVR.
- Sambung Peranti:
Sambungkan tetikus USB ke port USB pada NVR.
- Hidupkan kuasa:
Sambungkan penyesuai kuasa ke input kuasa NVR dan kemudian pasangkannya ke soket kuasa. NVR akan dihidupkan secara automatik.
5.2 Initial Configuration Wizard
Upon the first boot, the NVR will typically launch an initial configuration wizard. Follow the on-screen prompts to:
- Sediakan kata laluan pentadbir.
- Configure network settings (DHCP or Static IP).
- Cari untuk dan tambah kamera IP yang disambungkan.
- Tetapkan tarikh dan masa.
- Mulakan cakera keras untuk rakaman.
6. Mengendalikan NVR
6.1 Langsung View
Selepas persediaan awal, NVR akan memaparkan siaran langsung view kamera yang disambungkan. Anda boleh bertukar antara kamera tunggal view dan grid berbilang kamera views.
6.2 Konfigurasi Rakaman
Access the recording settings through the main menu to configure recording schedules and modes:
- Rakaman Berterusan: Rekod 24/7.
- Rakaman Pengesanan Gerak: Records only when motion is detected by the camera.
- Rakaman Berjadual: Rekod pada waktu tertentu dalam sehari atau seminggu.
- Rakaman Acara: Records based on specific events (e.g., alarm input).
6.3 Playback and Backup
Untuk kembaliview dirakam footage:
- Navigate to the "Playback" section from the main menu.
- Pilih kamera dan julat tarikh/masa yang dikehendaki.
- Gunakan garis masa untuk menavigasi rakaman.
- To back up footage, insert a USB drive into the NVR's USB port and follow the on-screen instructions for export.
6.4 Akses Jauh
The Vivotek ND9425P NVR supports remote access via a web browser or dedicated mobile applications (e.g., VIVOCloud). Refer to the full user manual on the Resource CD for detailed instructions on setting up remote access, including port forwarding or P2P cloud services.
7. Penyelenggaraan
7.1 Kemas Kini Perisian Tegar
Regularly check for and install firmware updates to ensure optimal performance, security, and access to new features. Firmware updates can typically be performed via the NVR's web interface or through a USB drive.
7.2 Pengurusan Cakera Keras
The NVR will automatically overwrite the oldest recordings when the hard drive is full. You can configure storage settings, check HDD health, and format the drive through the system settings.
7.3 Pembersihan
Keep the NVR unit clean by gently wiping its exterior with a dry, soft cloth. Ensure ventilation openings are free from dust and obstructions.
8. Penyelesaian masalah
| Masalah | Kemungkinan Punca | Penyelesaian |
|---|---|---|
| Tiada Kuasa | Power cable disconnected; faulty power adapter; power outlet issue. | Check power cable connection; try a different power outlet; contact support if adapter is faulty. |
| Tiada Hasil Video | HDMI/VGA cable loose; incorrect display input selected; NVR not booted. | Ensure display cable is secure; select correct input on monitor; wait for NVR to boot up. |
| Kamera Tidak Dipaparkan | Network issue; camera not powered; incorrect camera IP address; camera not added to NVR. | Check network cables; ensure cameras are powered; verify camera IP settings; add cameras via NVR interface. |
| Tiada Rakaman | Hard drive not initialized; recording schedule not set; HDD full. | Initialize HDD in settings; configure recording schedule; check HDD status. |
| Remote Access Fails | Network configuration issue; port forwarding not set up; firewall blocking. | Verify network settings; configure port forwarding on router; check firewall rules. |
For more detailed troubleshooting, refer to the comprehensive user manual provided on the Resource CD or visit the VIVOTEK support webtapak.
9. Spesifikasi
| Ciri | Perincian |
|---|---|
| Nombor Model | ND9425P |
| Pengeluar | Vivotek USA |
| Dimensi Produk | 19.69 x 19.69 x 11.02 inci |
| Berat Barang | 8.62 paun |
| Teknologi Ketersambungan | Ethernet |
| Peranti Serasi | Kamera |
| Kapasiti Penyimpanan Memori | 64 GB (referring to internal flash/RAM, not HDD capacity) |
| Bilangan Saluran | 16 |
| Video codec | H.265, H.264, MJPEG |
| Sokongan Resolusi Maks | 4K UHD (as per product title) |
10. Waranti dan Sokongan
For warranty information, please refer to the warranty card included with your product or visit the official VIVOTEK website. VIVOTEK provides technical support for its products. If you encounter issues that cannot be resolved using this manual or the troubleshooting section, please contact VIVOTEK customer support through their official webtapak atau saluran sokongan yang ditetapkan.
Official VIVOTEK Webtapak: www.vivotek.com