1. Pengenalan
Thank you for choosing the ORSKEY S950 Dash Cam. This manual provides detailed instructions for the proper installation, operation, and maintenance of your new dash camera system. Please read this manual thoroughly before use to ensure optimal performance and longevity of the device.

Image: The ORSKEY S950 Dash Cam, showing the main front unit with a 3-inch IPS screen and the separate rear camera.
2. Produk Lebihview
2.1 Kandungan Pakej
The ORSKEY S950 Dash Cam package includes the following items:
- ORSKEY S950 Front Dash Camera
- Kamera Belakang
- Pengecas Kereta
- Mounting Bracket (Dashboard Mount)
- Kabel Kamera Belakang
- Manual Pengguna
- Memory Card (Included components: Memory Card)
2.2 Ciri-ciri Utama
The ORSKEY S950 Dash Cam is equipped with advanced features for comprehensive vehicle surveillance:
- 4K Ultra HD Front Recording: Captures clear, detailed footage.
- 1080P Rear Recording: Menyediakan luas view of the vehicle's rear.
- Sony Starvis Sensor: Enhances low-light performance for superior night vision.
- Skrin IPS 3 inci: Offers a clear and wide viewing angle for playback and settings.
- 170-Degree Wide Field of View: Both front and rear cameras cover multiple lanes.
- Rakaman Gelung: Menulis ganti foo tertua secara automatiktage apabila kad memori penuh.
- G-Sensor (Emergency Accident Lock): Detects sudden impacts and locks the current video to prevent overwriting.
- Pemantauan Tempat Letak Kereta: Provides surveillance when the vehicle is parked (requires continuous power supply).
- Support for up to 128GB MicroSD Card: Allows for extended recording times.

Image: Visual representation of the ORSKEY S950's powerful functions, including 4K+1080P recording, Sony Sensor, 3" IPS screen, dual 170° FOV, G-Sensor, Loop Recording, Parking Monitoring, Emergency Recording, and Max 128GB support.
3. Persediaan dan Pemasangan
3.1 Memasukkan Kad MicroSD
- Pastikan cam dash dimatikan.
- Locate the MicroSD card slot on the side of the main unit.
- Insert the MicroSD card (Class 10 or higher, up to 128GB) into the slot until it clicks into place.
- Penting: Format the MicroSD card within the dash cam's settings menu before first use and periodically thereafter to ensure stable recording.
3.2 Memasang Kamera Hadapan
- Bersihkan kawasan cermin depan tempat anda ingin memasang kamera.
- Attach the suction cup mount or adhesive mount to the windshield, ensuring it does not obstruct your view.
- Slide the main dash cam unit onto the mounting bracket until it locks securely.
- Laraskan sudut kanta kamera untuk memastikan ia merakam jalan di hadapan dengan jelas.
3.3 Memasang Kamera Belakang
- Determine the optimal mounting location for the rear camera, typically on the rear windshield or near the license plate.
- Bersihkan permukaan pelekap dengan teliti.
- Secure the rear camera using the provided adhesive or screws.
- Route the rear camera cable from the rear of the vehicle to the front dash cam unit. Ensure the cable is tucked away neatly to avoid interference with driving.
- Sambungkan kabel kamera belakang ke port yang ditetapkan pada unit cam dash utama.

Image: Illustration of the dual lens dash camera's wide 170° viewing angles for both front and rear, providing comprehensive coverage.
3.4 Sambungan Kuasa
- Sambungkan pengecas kereta ke port input kuasa cam dash.
- Palamkan hujung pengecas kereta yang satu lagi ke dalam soket pemetik api kenderaan anda.
- Kamera papan pemuka akan dihidupkan secara automatik dan mula merakam apabila penyalaan kenderaan dihidupkan.
4. Arahan Operasi
4.1 Operasi Asas
- Hidupkan/Mati Kuasa: The camera powers on/off automatically with the vehicle's ignition. You can also manually power on/off by pressing and holding the power button.
- Rakaman: Once powered on and with a formatted MicroSD card, the camera will automatically start loop recording. A flashing indicator light usually signifies active recording.
- Skrin Hidup/Mati: The screen can be set to turn off automatically after a set period to avoid distraction while driving. Recording continues in the background.
4.2 Rakaman Gelung
Loop recording ensures continuous recording by overwriting the oldest unlocked video files when the MicroSD card reaches its capacity. This feature prevents the card from filling up and stopping recording.
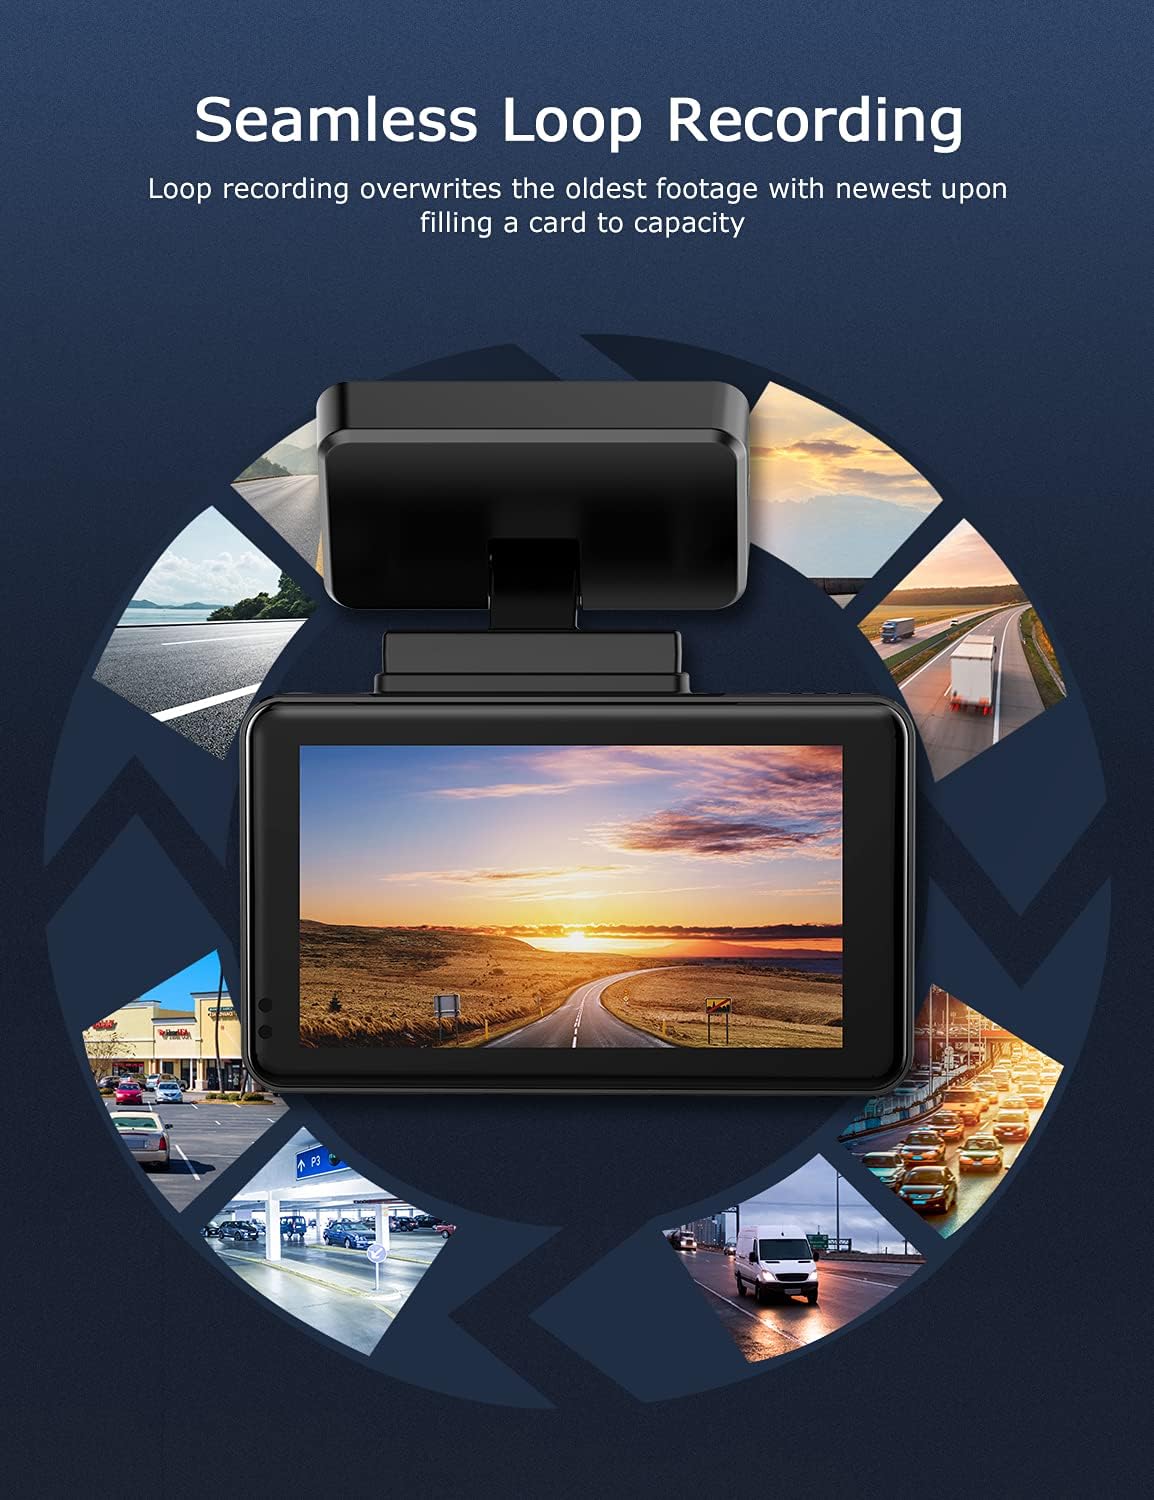
Image: Visual explanation of seamless loop recording, where the dash cam continuously records and overwrites the oldest footage once the memory card is full.
4.3 G-Sensor and Emergency Lock
The built-in G-sensor detects sudden acceleration, braking, or collisions. When triggered, it automatically locks the current video segment, protecting it from being overwritten by loop recording. These locked files disimpan dalam folder berasingan pada kad MicroSD.

Image: Depiction of the Emergency Accident Lock feature, where the G-sensor detects an impact and automatically locks the video footage as important evidence.
4.4 Pemantauan Tempat Letak Kereta
When enabled, parking monitoring allows the dash cam to automatically record if it detects a collision or vibration while the vehicle is parked. This feature typically requires a hardwire kit (sold separately) for continuous power supply.
4.5 Penglihatan Malam
Equipped with a Sony Starvis Sensor, the ORSKEY S950 provides enhanced night vision capabilities, capturing clear video footage walaupun dalam keadaan cahaya malap.
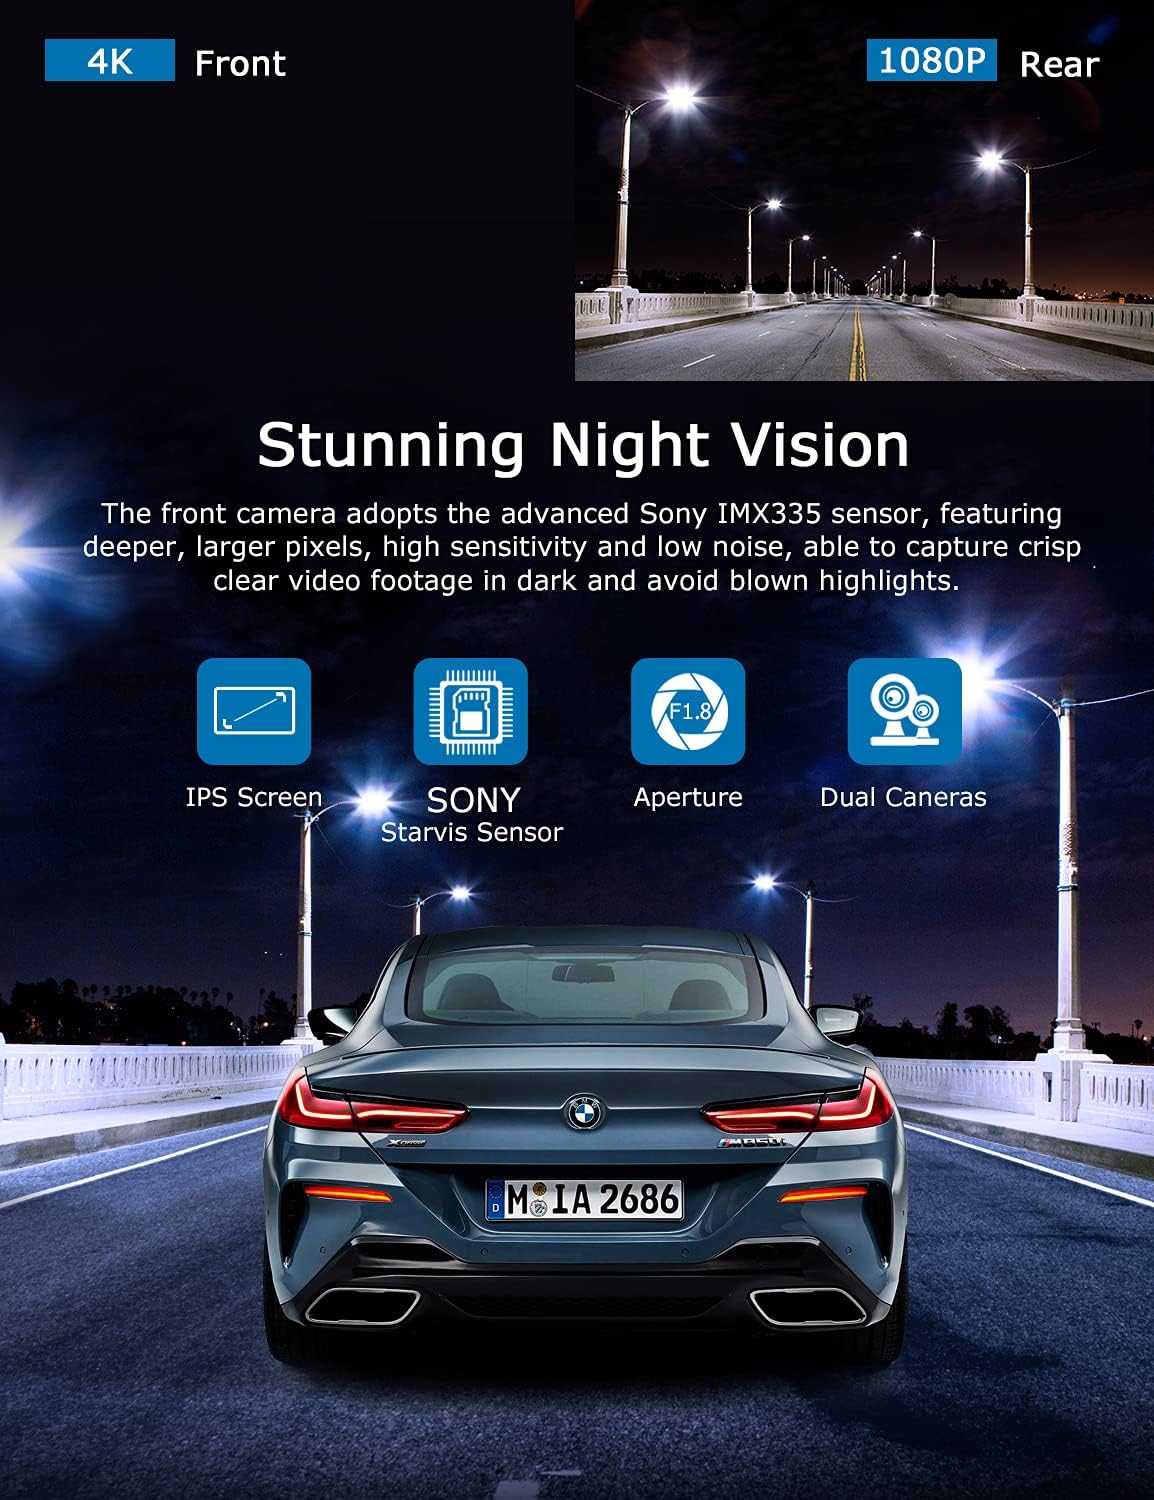
Image: Illustration highlighting the stunning night vision capability of the ORSKEY S950, showing clear footage in dark environments.
4.6 Main semula
Untuk kembaliview dirakam footage:
- Stop recording by pressing the OK button (if currently recording).
- Enter playback mode via the menu options.
- Navigate through video files using the up/down buttons.
- Pilih a file dan tekan OK untuk bermain.
- You can also remove the MicroSD card and view files on a computer using a compatible media player.
5. Penyelenggaraan
- Pemformatan Kad MicroSD: Regularly format the MicroSD card (at least once a month) to prevent data corruption and ensure optimal performance. Back up important files sebelum memformat.
- Pembersihan: Gunakan kain lembut dan kering untuk membersihkan kanta kamera dan skrin. Elakkan menggunakan pembersih atau pelarut yang kasar.
- Suhu: Elakkan daripada mendedahkan cam pemuka kepada suhu yang melampau untuk tempoh yang lama, kerana ini boleh menjejaskan hayat bateri dan integriti komponen.
6. Penyelesaian masalah
| Masalah | Kemungkinan Punca | Penyelesaian |
|---|---|---|
| Kamera tidak dihidupkan. | No power supply; faulty charger; dead battery. | Check car charger connection and vehicle's cigarette lighter. Ensure the camera's internal battery is charged. |
| "Card Error" or recording stops. | MicroSD card not formatted, incompatible, or corrupted. | Format the MicroSD card in the camera. Use a high-quality Class 10 (U3 recommended) MicroSD card from a reputable brand. Try a different card. |
| Video playback is laggy or corrupted. | Slow MicroSD card; file system issues; incompatible player. | Ensure you are using a high-speed MicroSD card (V30/U3). Format the card. Try playing videos with a different media player on your computer. |
| Rear camera image is reversed. | Default setting for mirror view. | Check camera settings for a 'Mirror Image' or 'Flip' option for the rear camera. If not available, this may be intended for reverse assistance rather than recording. |
| G-Sensor is too sensitive/not sensitive enough. | G-Sensor sensitivity setting. | Adjust the G-Sensor sensitivity level in the camera's settings menu. |
7. Spesifikasi
| Ciri | Spesifikasi |
|---|---|
| Nombor Model | S950 |
| Resolusi Tangkapan Video | 4K (Depan), 1080P (Belakang) |
| Saiz Skrin | Skrin IPS 3 inci |
| Bidang View | 170 Degrees (Front & Rear) |
| Ciri Khas | Loop Recording, Night Vision, G-Sensor, Parking Monitoring |
| Sokongan Storan | Up to 128GB MicroSD Card (Class 10/U3 recommended) |
| Kaedah Kawalan | Sentuh |
| Sumber Kuasa | Car Charger (1 Lithium Polymer battery included) |
| Dimensi Produk | 21 x 15.5 x 4.5cm; 505g |
8. Waranti dan Sokongan
ORSKEY products are designed for reliability and performance. For warranty information, technical support, or any inquiries regarding your ORSKEY S950 Dash Cam, please refer to the contact details provided on the official ORSKEY webtapak atau pembungkusan produk. Simpan resit pembelian anda sebagai bukti pembelian untuk tuntutan waranti.
For further assistance, you may visit the ORSKEY Store on Amazon: ORSKEY Store


