1. Pengenalan
The CONCEPT VP5241 Radical Home&Car Cyclonic Vacuum Cleaner is designed for efficient cleaning of various surfaces, both in your home and vehicle. This appliance features high suction power, low energy consumption, and quiet operation. It incorporates a cyclonic system and a HEPA 13 filter for effective dust and allergen capture.
Ciri-ciri utama termasuk:
- High performance with environmental protection.
- Bagless design eliminates the need for replacement bags.
- Washable HEPA 13 filter for allergen-free air.
- 2.5 L dust bin capacity.
- 800 W power with a 10 m operating radius.
- Tahap hingar rendah sebanyak 72 dB.
- AAAA efficiency rating.
2. Produk Lebihview dan Komponen
The VP5241 vacuum cleaner comes with several components and accessories designed for various cleaning tasks.

Figure 1: The CONCEPT VP5241 cyclonic vacuum cleaner shown with its main body and a selection of included cleaning attachments.
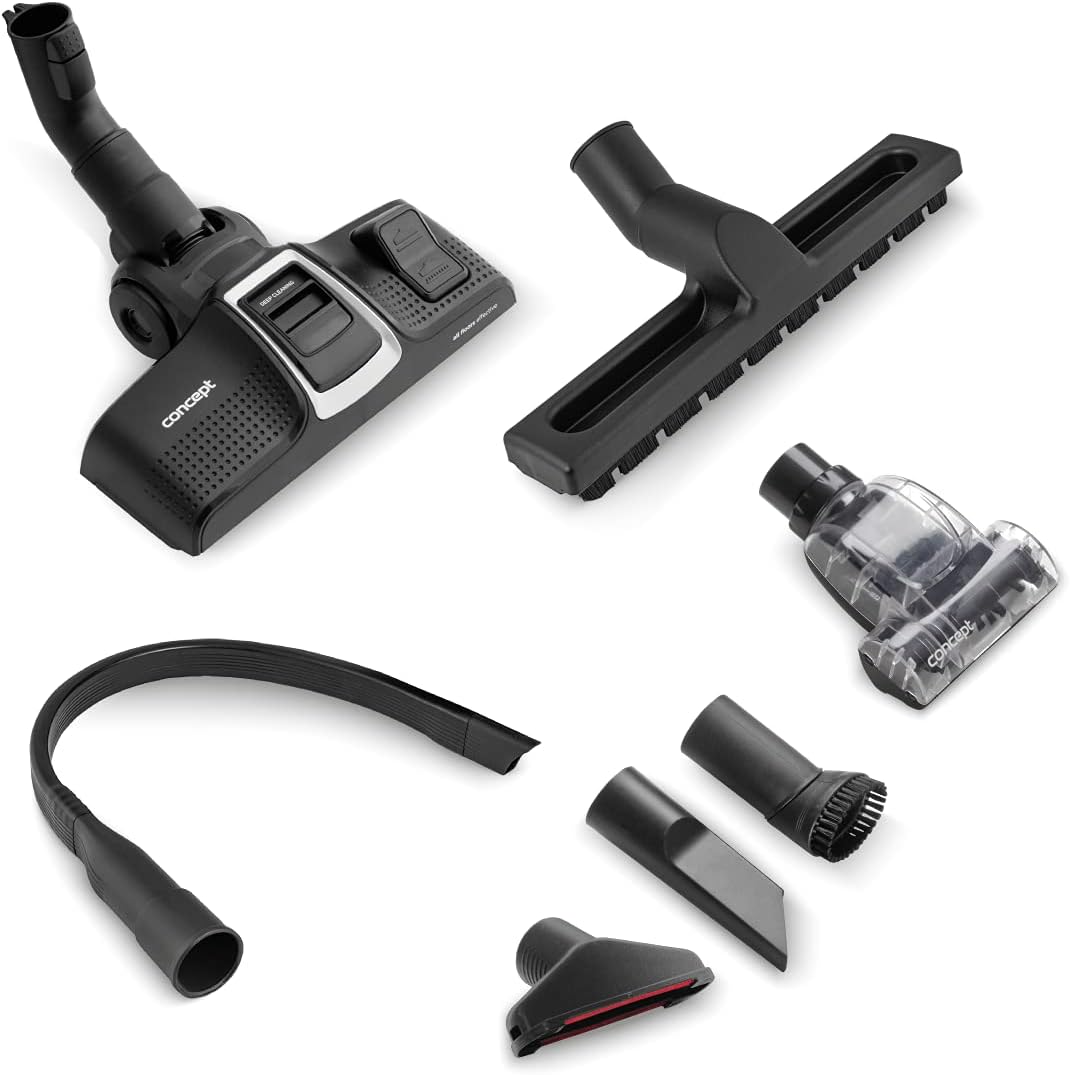
Rajah 2: Satu komprehensif view of all accessories included with the VP5241 vacuum cleaner, laid out for identification.
Komponen Utama:
- Vacuum Cleaner Body: Contains the motor, dust bin, and filter system.
- hos: Flexible connection between the body and the telescopic tube/attachments.
- Tiub Teleskopik: Adjustable length tube for extended reach.
- Kord Kuasa: Retractable cord for electrical connection.
Aksesori yang disertakan:
- AAAA Floor Brush: Designed for optimal performance on both hard floors and carpets. Features a flap to switch between surfaces.
- Small Turbo Brush: Ideal for removing pet hair from upholstery and hard-to-reach areas.
- Extra-long Slit Car Nozzle: Flexible tool for cleaning narrow spaces in vehicles, such as between seats.
- Berus Parket: Soft brush specifically for gentle cleaning of delicate hard floors without scratching.
- Muncung Crevice: For cleaning tight spaces like radiators, drawers, and mattress gaps.
- Nozzle with Brush: For dusting furniture, blinds, window sills, books, and keyboards.
- muncung upholsteri: For vacuuming sofas, armchairs, mattresses, and other upholstered surfaces.
3. Persediaan
Ikuti langkah-langkah ini untuk memasang pembersih vakum anda sebelum penggunaan pertama.
- Pasangkan Hos: Insert the flexible hose into the suction inlet on the main body of the vacuum cleaner until it clicks securely into place.
- Sambungkan Tiub Teleskopik: Attach the telescopic tube to the handle end of the hose. Adjust the length of the telescopic tube by pressing the release button and sliding it to your desired height.
- Select and Attach an Accessory: Choose the appropriate cleaning accessory (e.g., AAAA floor brush, parquet brush) for your cleaning task and attach it to the end of the telescopic tube.
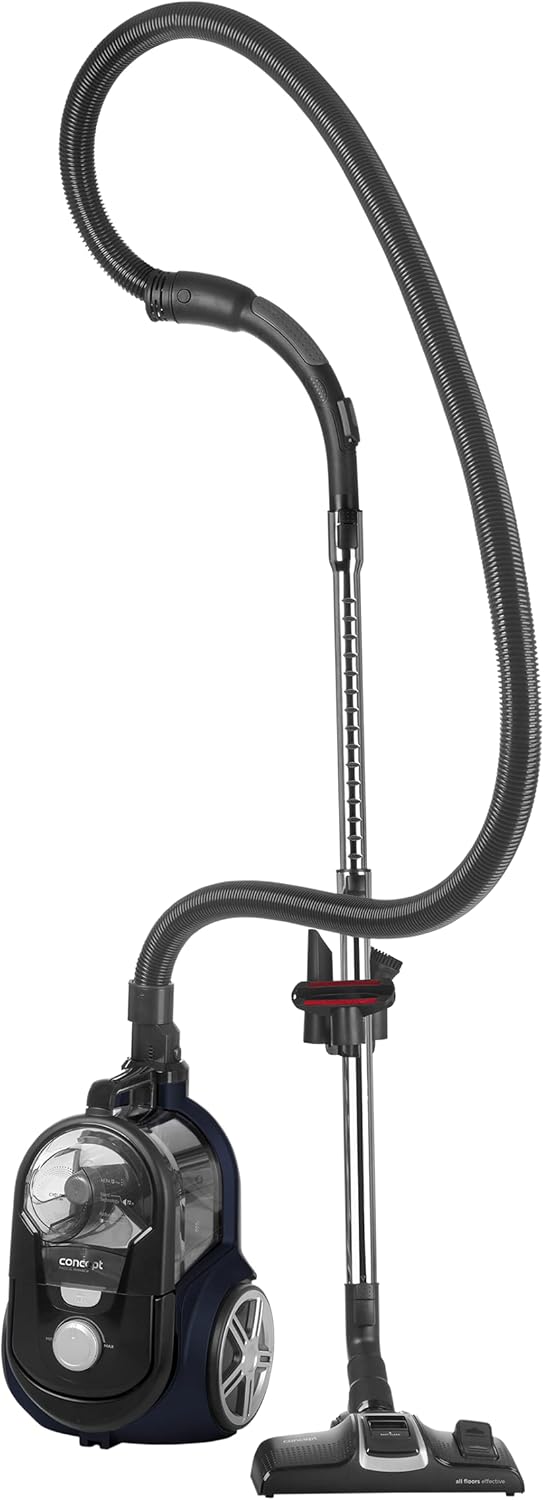
Figure 3: The vacuum cleaner fully assembled with the hose, telescopic tube, and main floor brush attached, ready for use.
4. Arahan Operasi
Operating your VP5241 vacuum cleaner is straightforward.
- Sambungan Kuasa: Panjangkan kord kuasa dan pasangkannya ke salur keluar elektrik yang sesuai.
- Hidupkan/Mati Kuasa: Tekan butang kuasa yang terletak pada badan pembersih vakum untuk menghidupkan atau mematikan perkakas.
- Laraskan Kuasa Sedutan: Use the electronic control dial on the vacuum cleaner body to adjust the suction power according to the cleaning task and surface type. Turn towards 'MIN' for delicate surfaces and 'MAX' for heavy-duty cleaning.
- Using the AAAA Floor Brush: For carpets, ensure the brush bristles are retracted. For hard floors, extend the bristles by pressing the flap on the brush head.
- Menggunakan Muncung Khusus: Attach the small turbo brush for pet hair, the extra-long slit car nozzle for car interiors, or the parquet brush for delicate hard floors as needed. Small accessories can be stored on the telescopic tube for easy access.
- Parking Positions: The vacuum cleaner offers two parking positions to store the floor brush and tube when not in use or during breaks.
- Putar Balik Kord: After use, unplug the vacuum cleaner. Press the handle (which doubles as the cord rewind button) to automatically retract the power cord.

Figure 4: The AAAA floor brush demonstrating its versatility by cleaning both carpeted and hard floor surfaces.

Figure 5: The small turbo brush in action, designed to efficiently remove pet hair from fabric surfaces.
5. Penyelenggaraan
Penyelenggaraan tetap memastikan prestasi optimum dan memanjangkan jangka hayat pembersih vakum anda.
Mengosongkan Tong Debu:
The VP5241 features a 2.5 L bagless dust bin. Empty it regularly, especially when the 'MAX' indicator is reached, to maintain suction power.
- Pastikan pembersih vakum dicabut.
- Press the release button to detach the dust bin from the main body.
- Carefully empty the contents of the dust bin into a waste receptacle.
- Reattach the dust bin securely to the vacuum cleaner body.

Figure 6: The transparent dust collection bin, showing its detachable design for easy emptying.
Membersihkan Penapis:
The HEPA 13 filter is washable. Clean it regularly to ensure efficient filtration and prevent loss of suction.
- Cabut plag pembersih vakum.
- Keluarkan tong habuk seperti yang diterangkan di atas.
- Locate and carefully remove the HEPA filter and any pre-filters.
- Bilas penapis di bawah air sejuk yang mengalir sehingga airnya jernih. Jangan gunakan detergen.
- Allow the filters to air dry completely for at least 24 hours before reinserting them. Do not use heat to dry.
- Reinsert the dry filters and reattach the dust bin.

Figure 7: Illustration of the HEPA filter and pre-filter components being removed from the vacuum cleaner for cleaning.
Cleaning Brushes and Nozzles:
Periodically check brushes and nozzles for tangled hair, threads, or debris. Remove any obstructions to ensure effective cleaning.
6. Penyelesaian masalah
Jika anda menghadapi masalah dengan pembersih vakum anda, rujuk masalah dan penyelesaian biasa berikut.
- Tiada Kuasa:
- Periksa sama ada kord kuasa dipasang dengan selamat ke dalam salur keluar.
- Pastikan butang kuasa ditekan.
- Verify that the electrical outlet is functional by testing it with another appliance.
- Kehilangan Sedutan:
- Periksa sama ada tong habuk penuh dan perlu dikosongkan.
- Inspect the filters (HEPA and pre-filters) for clogging and clean them as described in the Maintenance section.
- Check the hose, telescopic tube, and attachments for any blockages. Remove any obstructions carefully.
- Ensure all connections (hose to body, tube to hose, attachment to tube) are secure.
- Bunyi Luar Biasa:
- Matikan dan cabut plag pembersih vakum.
- Check for any foreign objects caught in the brush head or hose.
- If the noise persists after checking for obstructions, contact customer support.
If these steps do not resolve the issue, please contact Concept customer support for further assistance.
7. Spesifikasi
| Ciri | Spesifikasi |
|---|---|
| Jenama | Konsep |
| Nombor Model | VP5241 |
| warna | Hitam |
| Dimensi Produk (L x W x H) | 26.5 x 41 x 24 cm |
| Berat Barang | 4.5 Kilogram (4500 Gram) |
| Kapasiti (Tong Habuk) | 2.5 Liter |
| kuasa | 800 Watt |
| Voltage | 240 Volt |
| Tahap Kebisingan | 72 dB |
| Jejari Operasi | 10 meter |
| Jenis Penapis | HEPA 13 Filter (Washable) |
| Ciri Khas | HEPA |
| Syor Permukaan | Permaidani, Lantai Keras |
| Sumber Kuasa | Elektrik Bertali |
| Tanpa wayar | Tidak |
| Keserasian Produk | VPP5000 |
8. Waranti dan Sokongan
For information regarding warranty coverage, terms, and conditions, please refer to the documentation provided with your purchase or visit the official Concept website. For technical support, spare parts, or service inquiries, please contact Concept customer service.
Spare parts availability information is currently unavailable through this document. Please consult the manufacturer's official channels for the most up-to-date information.