pengenalan
This manual provides detailed instructions for the safe and efficient operation, maintenance, and care of your new AIRMSEN CM1705BATE Drip Coffee Maker. Please read all instructions carefully before first use and retain this manual for future reference.

Figure 1: The AIRMSEN CM1705BATE Drip Coffee Maker.
Arahan Keselamatan Penting
- Read all instructions before operating the coffee maker.
- Jangan sentuh permukaan panas. Gunakan pemegang atau tombol.
- Untuk melindungi daripada kebakaran, renjatan elektrik dan kecederaan kepada orang lain, jangan rendamkan kord, palam, atau perkakas dalam air atau cecair lain.
- Pengawasan rapi diperlukan apabila sebarang perkakas digunakan oleh atau berhampiran kanak-kanak.
- Cabut plag dari soket apabila tidak digunakan dan sebelum membersihkan. Biarkan sejuk sebelum memakai atau menanggalkan bahagian, dan sebelum membersihkan perkakas.
- Jangan kendalikan sebarang perkakas dengan kord atau palam yang rosak, atau selepas perkakas tidak berfungsi atau rosak dalam apa jua cara.
- Penggunaan lampiran aksesori yang tidak disyorkan oleh pengilang perkakas boleh mengakibatkan kebakaran, renjatan elektrik atau kecederaan kepada orang.
- Jangan gunakan di luar rumah.
- Jangan biarkan kord tergantung di tepi meja atau kaunter, atau menyentuh permukaan panas.
- Jangan letakkan pada atau berhampiran gas panas atau penunu elektrik, atau dalam ketuhar yang dipanaskan.
- Sentiasa pasangkan plag pada perkakas dahulu, kemudian palamkan kord ke dalam salur keluar dinding. Untuk memutuskan sambungan, matikan mana-mana kawalan kepada "mati", kemudian tanggalkan palam dari alur keluar dinding.
- Jangan gunakan perkakas untuk kegunaan selain daripada yang dimaksudkan.
- Melecur mungkin berlaku jika penutup ditanggalkan semasa kitaran membancuh.
Komponen Lebihview
Familiarize yourself with the parts of your coffee maker:
- Takungan Air: Holds water for brewing. Features an easy-to-view water window.
- Panel Kawalan: Digital display with buttons for programming, setting time, brew strength, and auto-off.
- Bakul Penapis: Holds the reusable coffee filter.
- Penapis boleh guna semula: Menghilangkan keperluan penapis kertas.
- Teko Kaca: Kapasiti 10 cawan untuk kopi yang dibancuh.
- Plat Pemanas: Membuat kopi yang dibancuh tetap hangat.
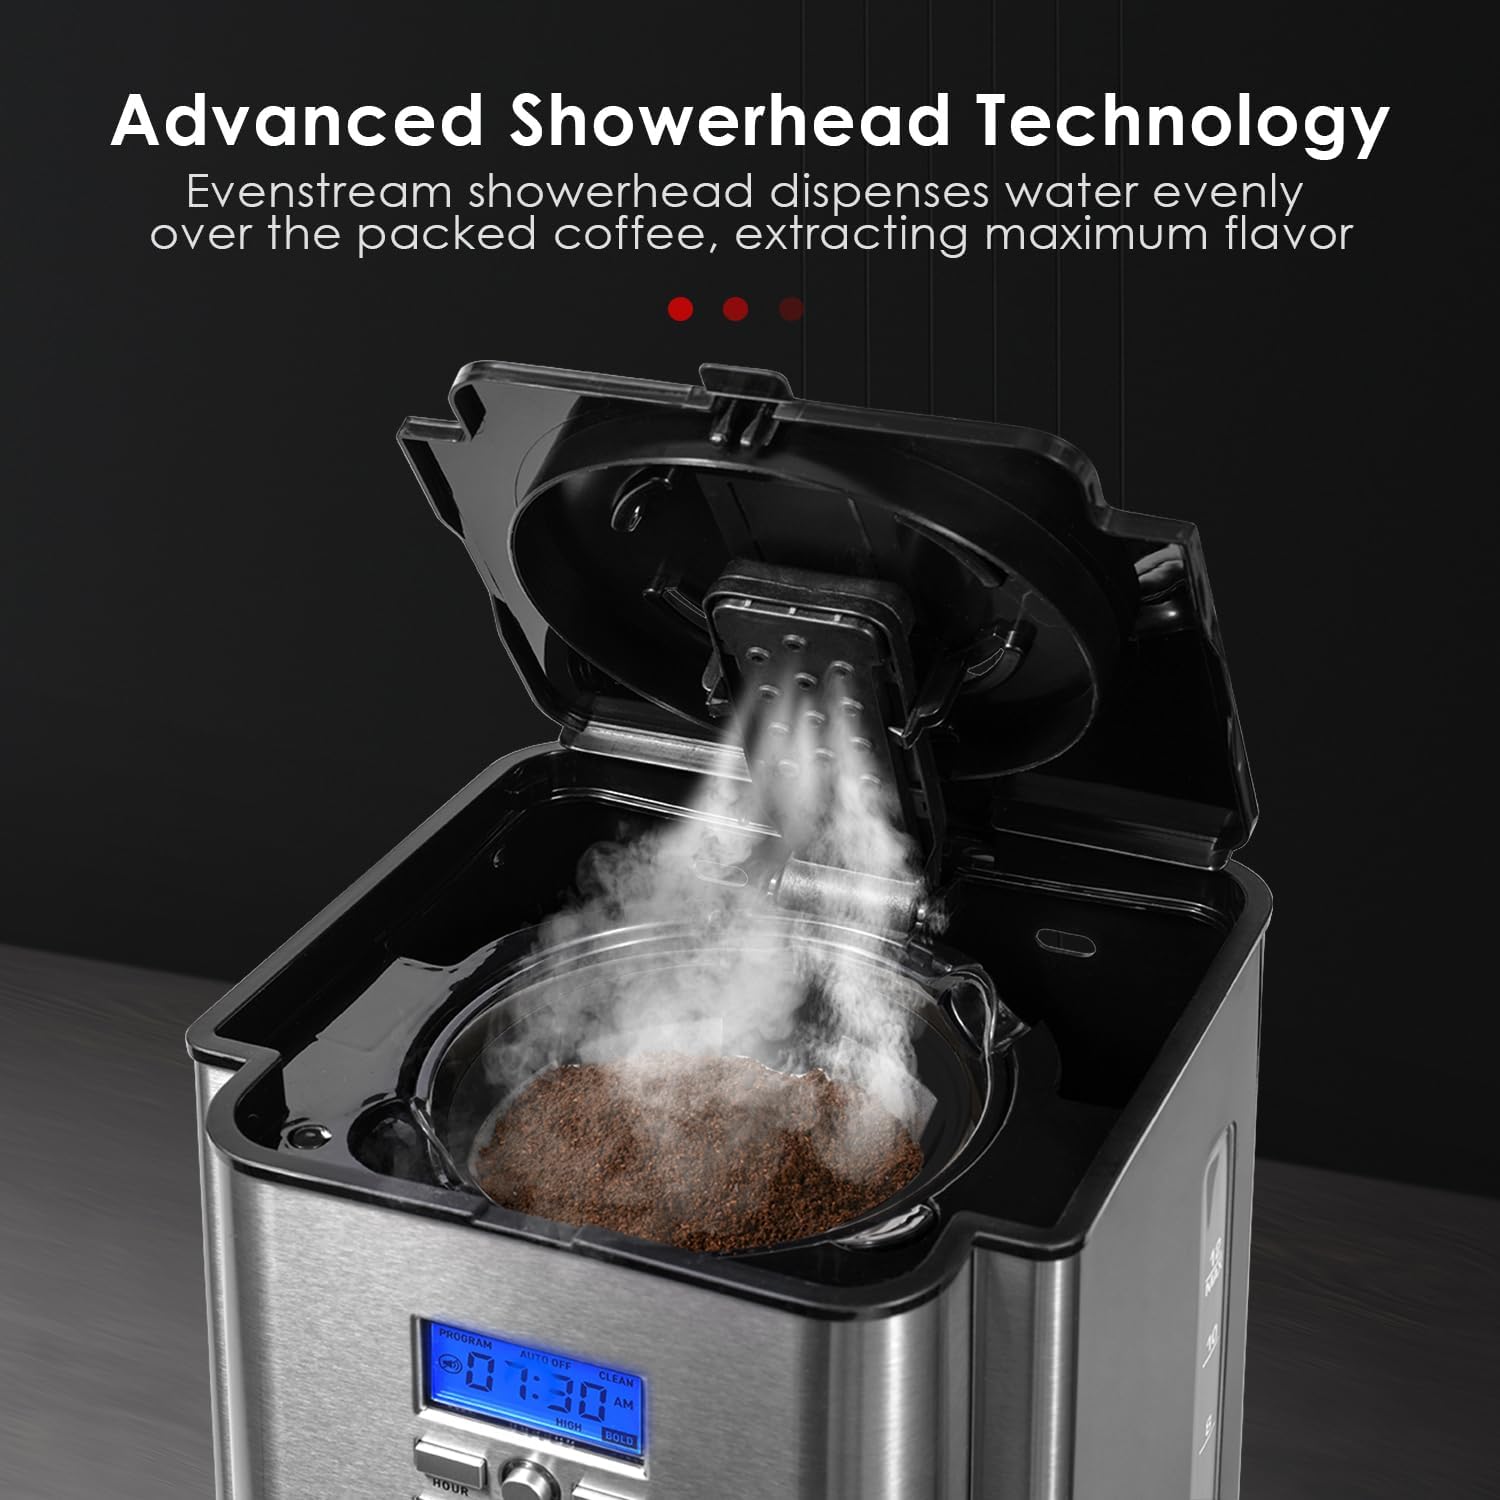
- Kepala pancuran mandian: Dispenses water evenly over coffee grounds for optimal extraction.

Gambar 2: Lebihview of the coffee maker's features and design.
Persediaan
- Membongkar: Carefully remove all packaging materials and labels from your coffee maker.
- Pembersihan Awal: Before first use, wash the glass carafe, carafe lid, and reusable filter in warm, soapy water. Rinse thoroughly and dry. Wipe the exterior of the coffee maker with a soft, damp kain.
- Kitaran Brew Pertama (tanpa kopi):
- Fill the water reservoir to the MAX (10-cup) level with fresh, cold water.
- Place the empty reusable filter into the filter basket, and ensure the carafe is correctly positioned on the heating plate.
- Press the 'BREW/OFF' button to start a brewing cycle. This will clean the internal components.
- Setelah kitaran selesai, buang air dari botol. Pembuat kopi anda kini sedia untuk digunakan.
Rajah 3: Mengisi takungan air.
Arahan Operasi
- Isi takungan air: Open the top lid and fill the water reservoir with fresh, cold water to your desired level, indicated by the water level markings. Do not exceed the MAX fill line.
- Tambah serbuk kopi: Place the reusable filter into the filter basket. Add your desired amount of ground coffee into the filter. For best results, use 1 tablespoon of ground coffee per cup. Close the top lid securely.
- Kedudukan Botol: Ensure the empty glass carafe with its lid is correctly placed on the heating plate.
- Tetapkan Masa Semasa: When plugged in, the LCD display will show '12:00'. Press the 'HOUR' and 'MINUTE' buttons to set the current time. The time will automatically set after 5 seconds of inactivity.
- Bancuh Kopi:
- Immediate Brew: Press the 'BREW/OFF' button. The indicator light will illuminate, and brewing will begin.
- Programmed Brew (Delay Brew): Press the 'PROGRAM' button. The display will flash 'PROGRAM'. Use the 'HOUR' and 'MINUTE' buttons to set your desired brew time. Press 'PROGRAM' again to confirm. The 'PROGRAM' indicator light will illuminate. The coffee maker will automatically start brewing at the set time.
- Brew Strength Selection: Press the 'BOLD/CLEAN' button once before brewing to select 'BOLD' for a stronger coffee. The 'BOLD' indicator light will illuminate. Press again to return to regular strength.
- Fungsi Kekal Panas: After brewing, the heating plate will automatically activate to keep coffee warm. You can adjust the keep warm temperature (Low, Medium, High) and duration (0-4 hours) using the 'CARAFE TEMP+/-' button. The coffee maker will automatically shut off after the set keep warm duration.

Figure 4: Adding coffee grounds to the reusable filter.

Figure 5: The control panel for setting time and programming brew cycles.
Video 1: Demonstrating the features and operation of the AIRMSEN CM1705BATE Coffee Maker.
Penyelenggaraan dan Pembersihan
Pembersihan tetap memastikan prestasi optimum dan memanjangkan hayat pembuat kopi anda.
- Pembersihan Harian:
- Sentiasa cabut plag pembancuh kopi sebelum membersihkan.
- Wash the glass carafe, carafe lid, and reusable filter after each use in warm, soapy water. These parts are also top-rack dishwasher safe.
- Lap bahagian luar pembuat kopi dengan lembut, damp kain. Jangan gunakan pembersih yang melelas atau pad penyental.
- Jangan rendam tapak pembuat kopi di dalam air atau sebarang cecair lain.
- Descaling (Self-Cleaning Function): Mineral deposits (calcium) can build up in your coffee maker over time, affecting performance. The coffee maker features a self-cleaning reminder and function.
- When the 'CLEAN' indicator light illuminates, it's time to descale.
- Isi takungan air dengan campuran 1 bahagian cuka putih dan 2 bahagian air.
- Place the empty reusable filter in the filter basket and the empty carafe on the heating plate.
- Press and hold the 'BOLD/CLEAN' button for 3 seconds to activate the self-cleaning cycle. The 'CLEAN' light will flash.
- The cleaning cycle will run for approximately 45 minutes. Once complete, the coffee maker will automatically shut off.
- Jalankan dua kitaran penuh dengan air segar dan sejuk untuk membilas sebarang larutan cuka yang tinggal.

Figure 6: The 'BOLD/CLEAN' button used for descaling.
Menyelesaikan masalah
| Masalah | Kemungkinan Punca | Penyelesaian |
|---|---|---|
| Pembuat kopi tidak dihidupkan. | Tidak dipasang; kuasa outage; pemutus litar tersandung. | Pastikan unit dipasang dengan kukuh pada soket yang berfungsi. Periksa pemutus litar rumah anda. |
| Kopi tidak dibancuh. | Water reservoir empty; carafe not properly placed; brew cycle not initiated. | Fill water reservoir. Ensure carafe is correctly positioned. Press 'BREW/OFF' button. |
| Kopi terlalu lemah atau terlalu kuat. | Incorrect coffee-to-water ratio; 'BOLD' setting not selected (or selected when not desired). | Adjust the amount of coffee grounds. Use the 'BOLD' setting for stronger coffee. |
| Water or coffee leaks. | Carafe not properly seated; overfilled water reservoir; filter basket overflowing. | Ensure carafe is correctly positioned. Do not overfill the water reservoir. Ensure the filter basket is not clogged and coffee grounds are not overflowing. |
| 'CLEAN' indicator light is on. | Time to descale the coffee maker. | Perform the self-cleaning cycle as described in the Maintenance section. |
Spesifikasi
- Jenama: AIRMSEN
- Nombor Model: CM1705BATE
- Jenis pembuat kopi: Mesin Kopi Titis
- kapasiti: 10 Cups (1800ML water tank)
- warna: Keluli Tahan Karat
- Mod Operasi: Automatik Sepenuhnya
- Dimensi Produk: 7.8 x 8 x 13.4 inci
- Berat Barang: 6.49 paun
- UPC: 191892944821
- ciri-ciri: Programmable, 4-Hour Warming, Reusable Filter, Self-Cleaning Function, Brew Strength Selector.

Rajah 7: Dimensi produk.
Waranti dan Sokongan
Your AIRMSEN Drip Coffee Maker is covered by a manufacturer's warranty. For specific warranty details, product registration, or technical support, please refer to the warranty card included with your purchase or contact AIRMSEN customer service directly. Keep your purchase receipt as proof of purchase.


