1. Arahan Keselamatan Penting
Always observe basic safety precautions to reduce the risk of fire, electric shock, and personal injury when operating power tools. Read all instructions carefully before use.
- Keselamatan Kawasan Kerja: Pastikan kawasan kerja anda bersih dan terang. Kawasan bersepah atau gelap mengundang kemalangan. Jangan kendalikan alatan kuasa dalam atmosfera yang mudah meletup, seperti di hadapan cecair mudah terbakar, gas atau habuk.
- Keselamatan Elektrik: Palam alat kuasa mesti sepadan dengan alur keluar. Jangan sekali-kali mengubah suai palam dalam apa jua cara. Elakkan sentuhan badan dengan permukaan yang dibumikan atau dibumikan seperti paip, radiator, julat dan peti sejuk.
- Keselamatan Diri: Sentiasa pakai pelindung mata. Gunakan perlindungan pendengaran apabila beroperasi untuk tempoh yang lama. Berpakaian dengan betul; jangan memakai pakaian atau barang kemas yang longgar. Jauhkan rambut, pakaian dan sarung tangan daripada bahagian yang bergerak.
- Penggunaan dan Penjagaan Alat: Jangan paksa alat kuasa. Gunakan alat kuasa yang betul untuk aplikasi anda. Putuskan sambungan palam daripada sumber kuasa sebelum membuat sebarang pelarasan, menukar aksesori atau menyimpan alatan kuasa.
- Penyelenggaraan: Mengekalkan alat kuasa. Periksa ketidaksejajaran atau pengikatan bahagian yang bergerak, kerosakan bahagian, dan keadaan lain yang mungkin mempengaruhi operasi alat kuasa. Sekiranya rosak, pastikan alat elektrik diperbaiki sebelum digunakan.
2. Produk Lebihview dan Komponen
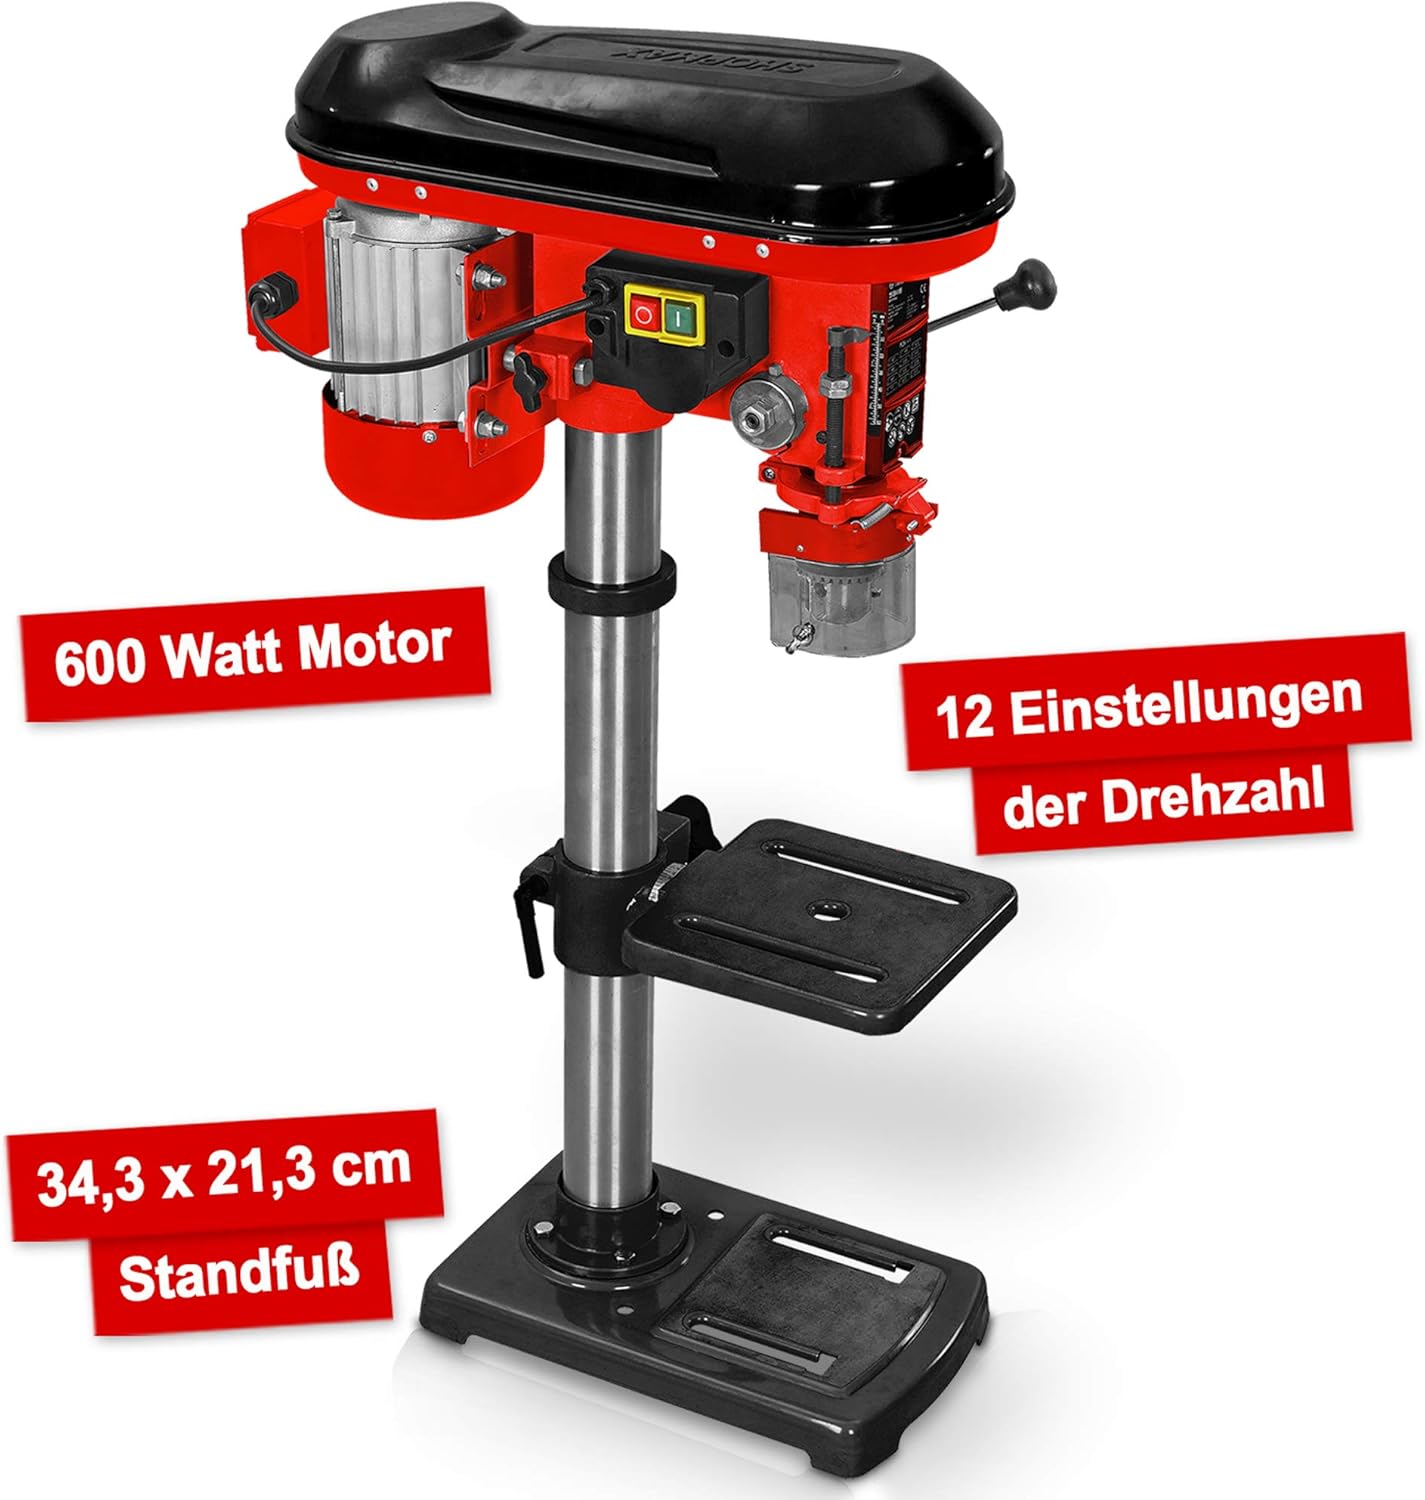
The Hecht Professional Pillar Drill is designed for precise drilling operations. Familiarize yourself with its main components for safe and effective use.

- Perumahan Motor: Contains the 600W motor and belt drive system.
- Ketua Perhimpunan: Includes the chuck, spindle, and depth stop.
- Lajur: The main support structure for the head assembly and drilling table.
- Drilling Table: Adjustable in height and angle for versatile drilling.
- Plat asas: Provides stability and features mounting slots for securing to a workbench.
- chuck: Holds the drill bits securely (3-16 mm capacity).
- Speed Adjustment Lever: Used to change the drilling speed.
- Pemegang suapan: Used to lower the chuck and drill bit into the workpiece.
- Suis Hidup/Mati: Power control for the drill.
- Chip Protection Guard: Transparent guard for safety during operation.
3. Persediaan dan Pemasangan
Follow these steps to assemble and set up your pillar drill before initial use.
- Membongkar: Keluarkan semua komponen daripada pembungkusan dengan berhati-hati. Periksa sebarang kerosakan atau bahagian yang hilang.
- Pemasangan Plat Asas: Place the base plate on a stable, level workbench. Secure it using appropriate bolts through the elongated slots on the base.
- Perhimpunan Lajur: Mount the column securely onto the base plate according to the provided hardware.
- Drilling Table Attachment: Slide the drilling table assembly onto the column. Adjust its height and secure it with the locking handle.
- Pemasangan Perhimpunan Kepala: Carefully place the head assembly onto the top of the column and secure it.
- Pemasangan Chuck: Insert the chuck onto the spindle taper. Use a rubber mallet to gently tap it into place, ensuring a firm fit.
- Chip Guard: Attach the transparent chip protection guard around the chuck area.

4. Arahan Operasi
Understand how to properly operate your pillar drill for optimal performance and safety.
4.1 Selecting Drill Bits
Choose the appropriate drill bit for the material and desired hole size. The chuck accommodates bits from 3 mm to 16 mm. Ensure the drill bit is sharp and free from damage.
4.2 Installing Drill Bits
- Ensure the drill is unplugged.
- Open the chuck jaws using the chuck key.
- Insert the drill bit into the chuck, ensuring it is centered and seated firmly.
- Tighten the chuck jaws securely with the chuck key. Remove the chuck key immediately after tightening.
4.3 Melaraskan Kelajuan
The drill features 12 speed settings, adjustable via a belt drive system. Select the speed appropriate for your material and drill bit size. Lower speeds are generally for larger bits and harder materials, while higher speeds are for smaller bits and softer materials.


4.4 Adjusting Drilling Table
The drilling table can be adjusted in height and tilted up to +/- 45 degrees. Loosen the locking handle, position the table as required, and then securely tighten the handle.

4.5 Menetapkan Kedalaman Penggerudian
Use the depth stop mechanism to set the desired drilling depth. This ensures consistent hole depths for repetitive tasks.
4.6 Prosedur Penggerudian
- Secure the workpiece firmly to the drilling table using clamps or a vise. Never hold the workpiece by hand.
- Adjust the table height and angle, and set the drilling depth.
- Pilih kelajuan yang sesuai.
- Turn on the drill using the On/Off switch.
- Turunkan mata gerudi secara perlahan ke dalam bahan kerja menggunakan pemegang suapan, gunakan tekanan yang stabil dan sekata.
- Setelah mencapai kedalaman yang dikehendaki, tarik balik mata gerudi dari benda kerja.
- Turn off the drill.
5. Penyelenggaraan
Regular maintenance ensures the longevity and safe operation of your pillar drill.
- Pembersihan: After each use, clean the drill of dust and chips. Use a brush or compressed air. Do not use solvents that may damage plastic parts.
- Pelinciran: Periodically lubricate moving parts such as the column, spindle, and depth stop mechanism with light machine oil.
- Ketegangan Tali Pinggang: Check the tension of the drive belt regularly. Adjust if necessary to prevent slippage and ensure proper power transmission. Refer to the belt diagram inside the motor housing cover.
- Penyelenggaraan Chuck: Keep the chuck jaws clean and free of debris. If the chuck becomes stiff, clean and lightly lubricate it.
- Kabel Elektrik: Inspect the power cord for any damage. Replace if frayed or cut.
6. Penyelesaian masalah
This section addresses common issues you might encounter with your pillar drill.
| Masalah | Kemungkinan Punca | Penyelesaian |
|---|---|---|
| Gerudi tidak bermula | Tiada bekalan kuasa; Suis rosak; Isu motor | Check power connection and circuit breaker; Inspect switch for damage; Consult qualified service personnel. |
| Getaran yang berlebihan | Loose mounting; Unbalanced drill bit; Worn bearings | Tighten mounting bolts; Replace or re-center drill bit; Consult service personnel for bearing replacement. |
| Mata gerudi tergelincir dalam chuck | Chuck not tightened sufficiently; Oily chuck jaws; Damaged chuck jaws | Tighten chuck firmly with key; Clean chuck jaws; Replace chuck if damaged. |
| Motor terlebih panas | Overloading; Insufficient ventilation; Prolonged use | Reduce load; Ensure clear ventilation; Allow motor to cool down. |
| Penggerudian yang tidak tepat | Loose workpiece; Worn drill bit; Misaligned table | Secure workpiece firmly; Replace drill bit; Check and adjust table alignment. |
7. Spesifikasi
Technical data for the Hecht Professional Pillar Drill.
| Ciri | Spesifikasi |
|---|---|
| Pengeluar | Hecht |
| Nombor Model Item | Standbohrmaschine Hecht |
| Sumber Kuasa | Elektrik Bertali |
| Voltage | 230 Volt |
| Kuasa Maks | 600 Watt |
| Kelajuan Putaran Maks | 2700 RPM |
| Bilangan Kelajuan | 12 |
| Saiz Chuck Maks | 16 mm |
| bahan | logam |
| warna | Red Pillar Drill |
| Dimensi Pakej | 71 x 45 x 27 cm |
| Berat badan | 23 kilograms (approx.) |
| Persekitaran Penggunaan | Dalaman |
| Nombor Rujukan | 8595614925655 |
8. Waranti dan Sokongan
For warranty information, please refer to the documentation provided with your purchase or contact the retailer. For technical support or spare parts inquiries, please contact Hecht customer service or your authorized dealer.
Please have your model number (Standbohrmaschine Hecht) and reference number (8595614925655) available when contacting support.


