1. Pengenalan
Thank you for choosing the Rebel RB-0005 Weather Station. This device provides accurate indoor and outdoor temperature readings, indoor humidity, and features a clock, calendar, and alarm function. This manual will guide you through the setup, operation, and maintenance of your new weather station to ensure optimal performance.
2. Maklumat Keselamatan
- Jangan dedahkan peranti kepada suhu yang melampau, cahaya matahari langsung atau kelembapan yang tinggi.
- Elakkan daripada menjatuhkan atau meletakkan peranti kepada kesan yang kuat.
- Jauhkan peranti daripada air dan cecair lain.
- Buang bateri terpakai secara bertanggungjawab mengikut peraturan tempatan.
- Jangan cuba membuka atau membaiki peranti sendiri. Hubungi kakitangan yang berkelayakan untuk perkhidmatan.
- The outdoor sensor cable should be handled with care to prevent damage.
3. Kandungan Pakej
Sila semak kandungan pakej semasa membongkar:
- 1x Rebel RB-0005 Weather Station Main Unit
- 1x Wired Outdoor Temperature Sensor
- 1x Manual Pengguna (dokumen ini)
Note: 1x AAA battery is required for operation and is not included in the package.
4. Ciri-ciri Produk
- Indoor and Outdoor Temperature Measurement
- Indoor Humidity Measurement
- Fungsi Kalendar
- Fungsi Penggera
- Paparan Jam 12/24 Jam
- Memory Function for Highest and Lowest Temperature Readings
- Clear and Easy-to-Read LCD Display
- Bateri Dikendalikan untuk Kemudahalihan
5. Produk Lebihview
Familiarize yourself with the main components of your Rebel RB-0005 Weather Station.
5.1 Paparan Depan
The large LCD screen displays various information simultaneously:
- IN Temperature: Suhu dalaman semasa.
- OUT Temperature: Current outdoor temperature from the wired sensor.
- Masa: Current time in 12-hour (AM/PM) or 24-hour format.
- RH%: Current indoor relative humidity.
- Kalendar: Date display (day, month).
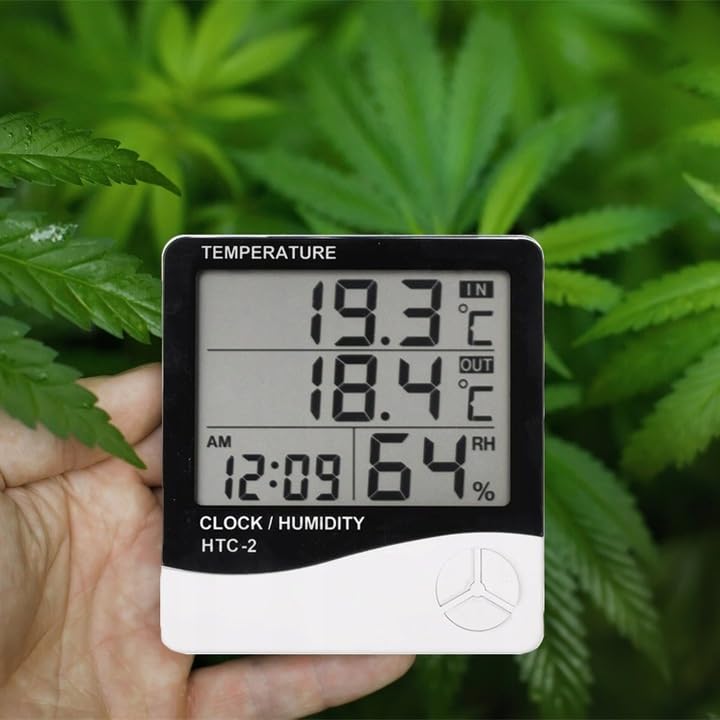
Figure 1: Front display of the weather station showing temperature, time, and humidity readings.

Rajah 2: Terperinci view of the display and control buttons.
5.2 Butang Kawalan
The device features three control buttons located on the front, below the display:
- ARAHAN: Used to switch between display modes (e.g., time, alarm, calendar) and to enter/exit setting modes.
- ADJ (Adjust): Used to adjust values (e.g., hours, minutes, date) when in setting mode.
- MEMORI: Biasalah view the highest and lowest recorded temperature and humidity values.
5.3 Belakang View dan Sensor
The back of the unit houses the battery compartment, a foldable stand, and the input for the wired outdoor temperature sensor.

Rajah 3: Belakang view of the weather station with battery compartment and wired sensor.
6. Persediaan
6.1 Pemasangan Bateri
- Buka penutup petak bateri di belakang unit utama.
- Insert one (1) AAA battery, ensuring the correct polarity (+/-).
- Close the battery compartment cover securely. The device should power on automatically.
6.2 Penempatan Sensor Luar
- Connect the wired outdoor temperature sensor to the designated port on the back of the main unit.
- Carefully route the sensor cable to the desired outdoor location. Ensure the cable is not pinched or damaged.
- Place the sensor in a shaded area, protected from direct sunlight and precipitation, to ensure accurate readings. Avoid placing it near heat sources or vents.

Gambar 4: Cthample placement of the weather station for indoor temperature monitoring.
7. Arahan Operasi
7.1 Menetapkan Masa dan Tarikh
- Tekan dan tahan butang MODE button for approximately 3 seconds until the time display starts flashing.
- Gunakan ADJ button to adjust the flashing value (e.g., hours, minutes).
- Tekan ke MODE button again to confirm the setting and move to the next value (e.g., minutes, 12/24 hour format, year, month, day).
- Repeat step 2 and 3 until all time and date settings are configured.
- Tekan MODE sekali lagi untuk keluar dari mod tetapan.
7.2 Menetapkan Penggera
- Daripada paparan masa biasa, tekan butang MODE button once to enter alarm display mode (usually indicated by an alarm icon).
- Tekan dan tahan butang MODE button for approximately 3 seconds until the alarm time starts flashing.
- Gunakan ADJ butang untuk menetapkan jam penggera yang diingini.
- Tekan ke MODE button to confirm the hour and move to set the minutes.
- Gunakan ADJ butang untuk menetapkan minit penggera yang dikehendaki.
- Tekan ke MODE butang untuk mengesahkan dan keluar dari mod tetapan penggera.
- Untuk mengaktifkan/menyahaktifkan penggera, tekan butang ADJ button once while in alarm display mode. An alarm icon will appear/disappear on the display.
7.3 Viewing Min/Max Temperature and Humidity
- From the normal display, press the MEMORI button once to show the maximum recorded indoor/outdoor temperature and indoor humidity.
- Tekan ke MEMORI button again to show the minimum recorded indoor/outdoor temperature and indoor humidity.
- Tekan ke MEMORI button a third time to return to the current readings.
- To clear the min/max memory, press and hold the MEMORI butang selama lebih kurang 3 saat sementara viewing the min/max values.
7.4 Menukar Unit Suhu (°C/°F)
Semasa dalam mod paparan biasa, tekan butang ADJ button once to toggle between Celsius (°C) and Fahrenheit (°F) temperature units.
8. Penyelenggaraan
- Pembersihan: Lap peranti dengan kain lembut dan kering. Jangan gunakan pembersih atau pelarut yang melelas.
- Penggantian Bateri: Replace the AAA battery when the display becomes dim or the device stops functioning. Follow the battery installation steps in Section 6.1.
- Penjagaan Sensor: Ensure the outdoor sensor cable is not damaged. Periodically check the sensor's placement to ensure it remains protected from elements for accurate readings.
9. Penyelesaian masalah
| Masalah | Kemungkinan Punca | Penyelesaian |
|---|---|---|
| Tiada paparan atau paparan malap. | Low or depleted battery. Incorrect battery polarity. | Replace the AAA battery with a new one, ensuring correct polarity. |
| Outdoor temperature reading is incorrect or "---". | Outdoor sensor cable is disconnected or damaged. Sensor is exposed to direct sunlight or heat source. | Check if the sensor cable is securely connected. Ensure the sensor is placed in a shaded, protected area. Inspect the cable for damage. |
| Masa/Tarikh tidak betul. | Time/Date not set correctly after battery installation. | Refer to Section 7.1 "Setting Time and Date" to adjust. |
| Penggera tidak berbunyi. | Alarm is not activated. Alarm volume is too low (if adjustable, though this model likely isn't). | Ensure the alarm icon is displayed, indicating it is active (refer to Section 7.2). |
10. Spesifikasi
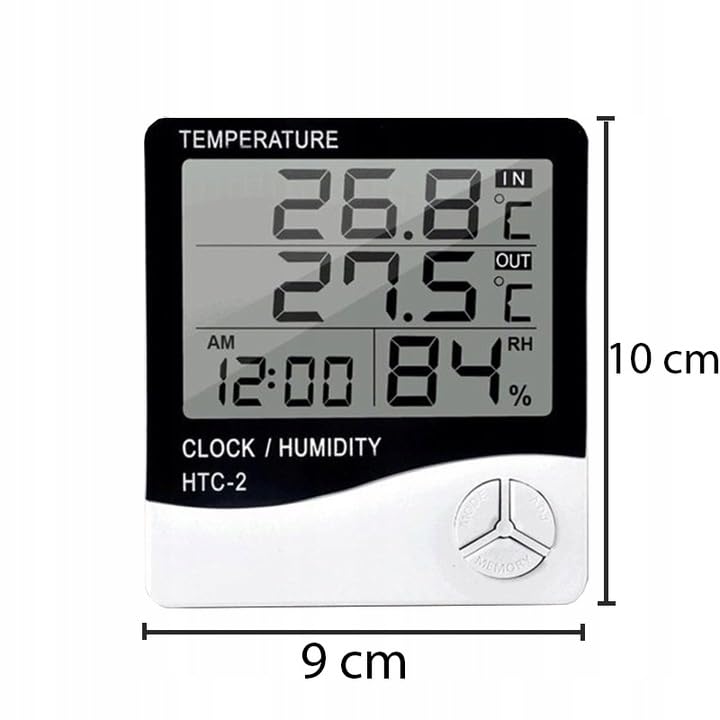
Figure 5: Approximate dimensions of the weather station.
- model: RB-0005
- Jenama: Pemberontak
- Sumber Kuasa: 1x Bateri AAA (tidak termasuk)
- Bahan: plastik
- Ciri Khas: Alarm, Calendar, Min/Max Memory
- Dimensi Pakej: 18 x 12 x 10 cm
- Dimensi Produk (lebih kurang): 9 cm (Lebar) x 10 cm (Tinggi)
- Tarikh Pertama Tersedia: 23 November 2020
11. Waranti dan Sokongan
This product is covered by a standard manufacturer's warranty. For specific warranty terms and conditions, please refer to the documentation provided at the time of purchase or contact your retailer.
For technical support or inquiries, please contact the Rebel customer service department through their official weblaman web atau maklumat hubungan yang diberikan oleh peruncit anda.


