1. Pengenalan
This manual provides comprehensive instructions for the SHARKOON Elite Shark CA300T Extended ATX PC Case. It covers the product's features, setup procedures, operational guidelines, maintenance tips, troubleshooting solutions, and detailed technical specifications. Please read this manual thoroughly before installation and use to ensure optimal performance and longevity of your PC case.
2. Ciri-ciri Utama
- Reka Bentuk Futuristik: The CA300T features an expressive front panel with a geometric pattern, framed by brushed aluminum, giving it a distinctive and modern aesthetic.
- Advanced Airflow: Equipped with three pre-installed 120mm RGB LED fans at the front and one at the rear, ensuring consistent airflow. The front panel includes a mesh grille for optimal ventilation, and the top panel offers a perforated cover for additional fan/radiator mounting.
- Illuminated I/O Panel: The side-mounted I/O panel includes standard audio ports, USB 3.0 ports, and a USB-C port, all featuring their own RGB illumination.
- Panel Kaca Tempered: Two tempered glass side panels provide a clear view of internal components. The right-side panel is partially tinted to conceal the power supply tunnel while highlighting SSDs or HDDs.
- Dalaman yang luas: Designed to accommodate large components, including graphics cards up to 42.5 cm, power supplies up to 24 cm, and CPU coolers up to 16.5 cm.
- Pengurusan Kabel yang Cekap: Features a spacious, foldable cable compartment and a sliding cable cover to keep wiring organized and out of sight.
- Pilihan Storan: Supports up to seven 2.5-inch drives or four 3.5-inch drives.
3. Kandungan Pakej
The SHARKOON Elite Shark CA300T PC Case package typically includes:
- SHARKOON Elite Shark CA300T PC Case (White)
- Pre-installed 120mm RGB LED Fans (3x Front, 1x Rear)
- Kotak Aksesori (skru, pengikat kabel, kebuntuan, dsb.)
- Manual Pengguna (dokumen ini)
Note: Specific contents may vary slightly. Please check the packaging for a complete list.
4. Arahan Persediaan
Follow these steps to set up your SHARKOON Elite Shark CA300T PC case and install your components.
4.1. Menyediakan Kes
- Buka bungkusan kes itu: Carefully remove the PC case from its packaging.
- Keluarkan Panel Sisi: Unscrew the thumbscrews on the rear of the case for both tempered glass side panels. Gently slide and lift the panels to remove them. Place them on a soft, flat surface to prevent scratches.
- Kotak Aksesori: Locate the accessory box inside the case, which contains all necessary screws and mounting hardware.
4.2. Pemasangan Papan Induk
- Pasang Kebuntuan: Ensure the correct standoffs are installed for your motherboard form factor (ATX, SSI EEB). The case typically has pre-installed standoffs for standard ATX.
- Pasang I/O Shield: If your motherboard requires an external I/O shield, install it into the rear opening of the case before mounting the motherboard.
- Pasang Papan Induk: Carefully place your motherboard onto the standoffs, aligning the screw holes. Secure the motherboard with the provided screws.
4.3. Pemasangan Unit Bekalan Kuasa (PSU).
- Kedudukan PSU: The PSU mounts at the rear bottom of the case. Slide your PSU into the designated compartment from the rear.
- PSU selamat: Align the PSU with the screw holes and secure it with the provided screws from the rear of the case.
- Pengurusan Kabel: Route PSU cables through the cutouts to the back of the motherboard tray for organized cable management.
4.4. Pemasangan Pemacu Storan
The CA300T supports various drive configurations:
- 2.5-inch Drives (SSDs): Mount SSDs to the dedicated brackets behind the motherboard tray or within the PSU shroud.
- 3.5-inch Drives (HDDs): Install HDDs into the drive cages located under the PSU shroud.
4.5. Graphics Card and Expansion Card Installation
- Tanggalkan Penutup Slot: Tanggalkan penutup slot pengembangan yang diperlukan dari bahagian belakang bekas.
- Install Card: Insert your graphics card or other expansion cards into the appropriate PCIe slots on the motherboard.
- Kad Selamat: Secure the card with the provided screws.
4.6. Menyambungkan Kabel Panel Hadapan
Connect the front panel cables (USB 3.0, USB-C, HD Audio, Power Switch, Reset Switch, Power LED, HDD LED) to their corresponding headers on your motherboard. Refer to your motherboard manual for exact pin layouts.
4.7. Perhimpunan Akhir
- Pengurusan Kabel: Use the cable ties and routing channels to organize all internal cables behind the motherboard tray.
- Pasang semula Panel Sisi: Carefully reattach both tempered glass side panels and secure them with the thumbscrews.
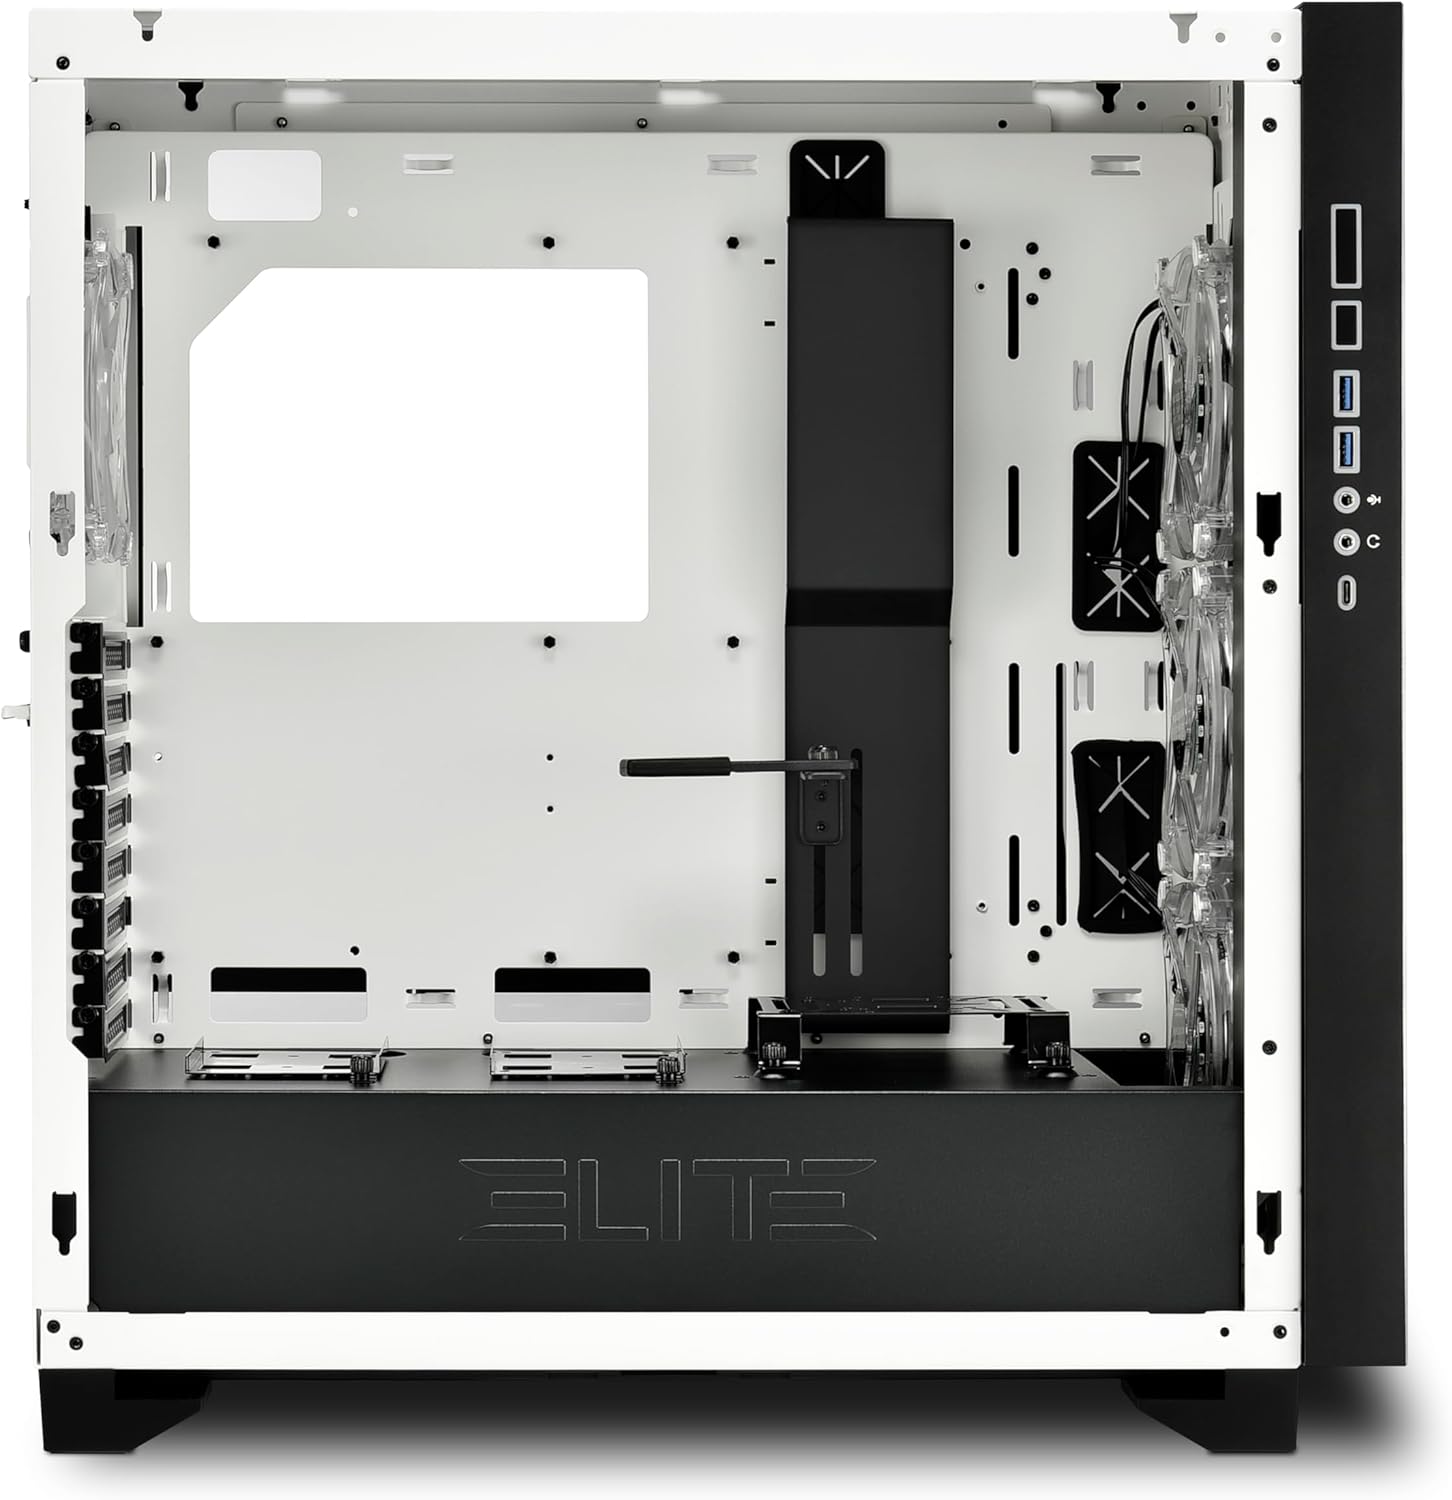
Rajah 1: Dalaman view of the CA300T, highlighting component space.
5. Arahan Operasi
5.1. Powering On Your System
After all components are installed and cables are connected, plug your power supply into a wall outlet and flip the PSU's power switch to the 'ON' position. Press the power button on the case's front I/O panel to start your computer.
5.2. Kawalan Pencahayaan RGB
The pre-installed RGB fans and illuminated I/O panel can be controlled via your motherboard's RGB software (if compatible) or a dedicated RGB controller if included with your motherboard or purchased separately. Refer to your motherboard manual for specific RGB header locations and software instructions.
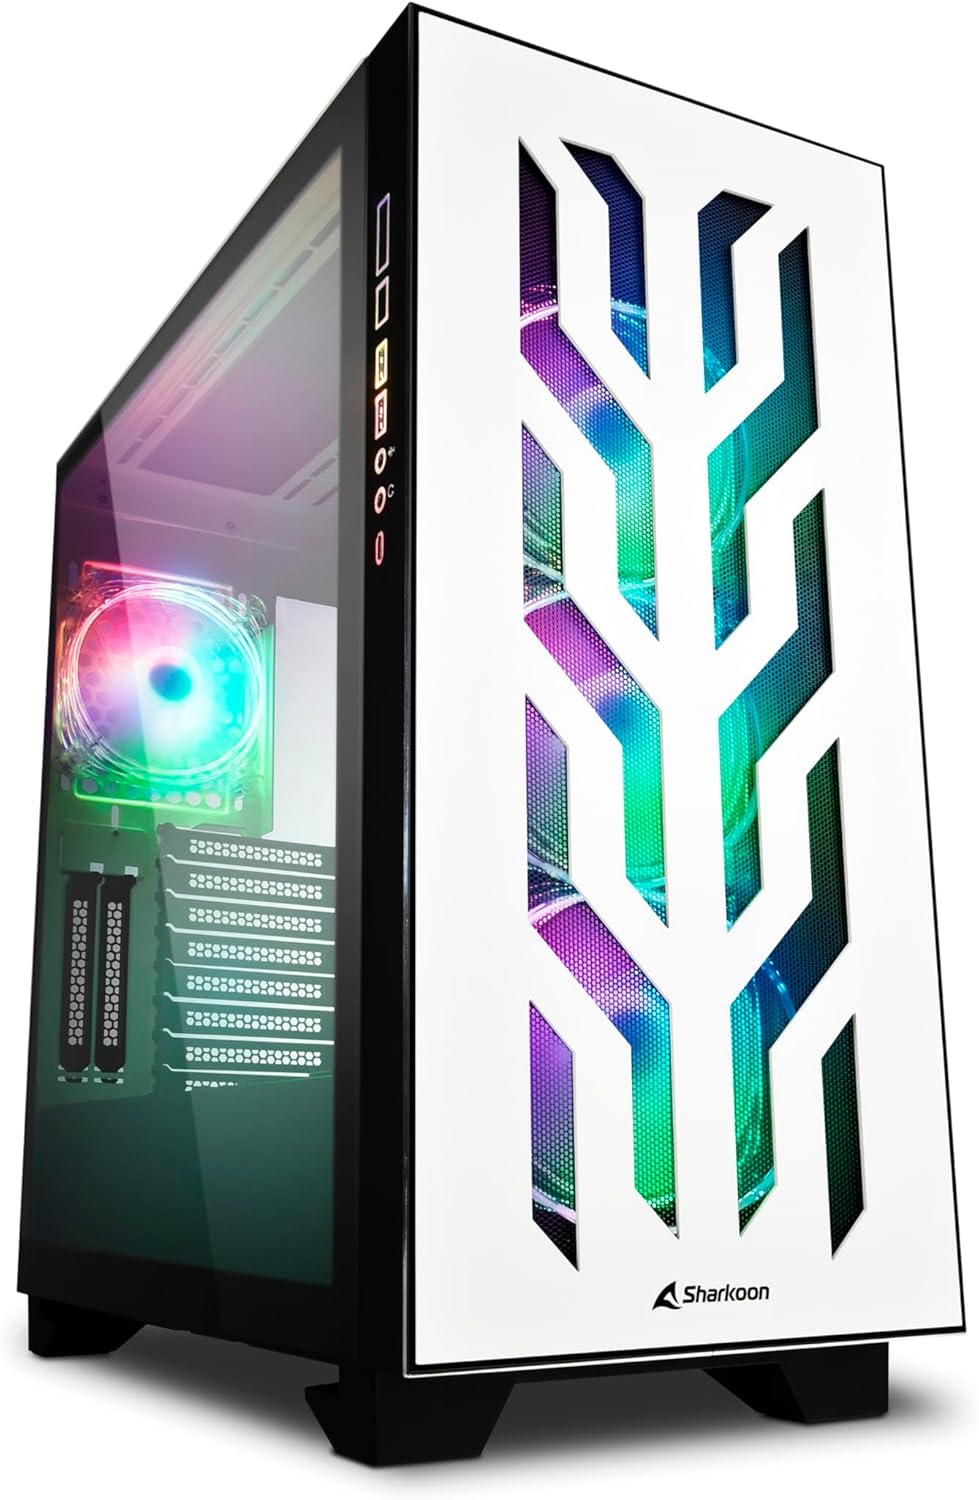
Figure 2: The CA300T with its illuminated RGB fans and distinctive front panel.
6. Penyelenggaraan
Penyelenggaraan tetap membantu memastikan prestasi optimum dan memanjangkan jangka hayat komponen PC anda.
6.1. Pembersihan Penapis Habuk
The CA300T includes magnetic dust filters. It is recommended to clean these filters every 1-3 months, depending on your environment, to maintain optimal airflow and prevent dust buildup inside the case.
- Cari Penapis: Identify the dust filters on the top, front, and bottom of the case.
- Alih Keluar Penapis: Gently pull or slide out the magnetic dust filters.
- Penapis Bersih: Use a soft brush, vacuum cleaner, or rinse with water (ensure completely dry before reinstallation) to remove accumulated dust.
- Reinstall Filters: Place the clean filters back into their respective positions.
6.2. Pembersihan Am
For external surfaces, use a soft, damp cloth to wipe down the case. Avoid abrasive cleaners or solvents that could damage the finish or tempered glass.

Rajah 3: Atas view of the CA300T, showing the perforated top panel.
7. Penyelesaian masalah
Bahagian ini membincangkan isu-isu biasa yang mungkin anda hadapi semasa persediaan atau pengendalian.
7.1. System Does Not Power On
- Semak PSU: Ensure the power supply unit is properly connected to the wall outlet and the PSU's power switch is in the 'ON' position.
- Sambungan Panel Depan: Verify that the power switch cable from the case's front panel is correctly connected to the motherboard's power header.
- Internal Power Cables: Confirm that all necessary power cables (24-pin ATX, CPU 8-pin, GPU PCIe) are securely connected to the motherboard and components.
7.2. Fans Not Spinning / RGB Not Lighting Up
- Sambungan Kipas: Ensure all fan power cables are securely connected to the motherboard's fan headers or a fan controller.
- RGB Connections: Verify that RGB cables are correctly connected to the motherboard's RGB headers or a dedicated RGB controller.
- Perisian/Pengawal: Check your motherboard's BIOS/UEFI settings or RGB software to ensure fans and RGB lighting are enabled and configured correctly.
7.3. Port USB Tidak Berfungsi
- Internal USB Headers: Confirm that the internal USB 3.0 and USB-C cables from the case's front panel are securely connected to the corresponding headers on your motherboard.
- Pemacu Papan Induk: Ensure all necessary motherboard chipset and USB drivers are installed.
8. Spesifikasi Teknikal
| Jenama | Sharkoon |
| Nama Model | CA300T |
| warna | putih |
| Jenis Kes | Extended ATX Tower |
| bahan | Logam, Kaca Tempered |
| Keserasian Papan Induk | ATX, SSI EEB |
| Pemasangan PSU | Pemasangan Belakang |
| Kaedah Penyejukan | Udara |
| Peminat prapasang | 4x 120mm RGB LED Fans (3x Front, 1x Rear) |
| Pelabuhan I / O Depan | USB 3.0 (x2), USB-C (x1), Audio In/Out |
| Max. GPU Length | 42.5 sm |
| Maks. Ketinggian Penyejuk CPU | 16.5 sm |
| Maks. Panjang PSU | 24 sm |
| Drive Bays | Up to 7x 2.5" or 4x 3.5" |
| Penggunaan yang Disyorkan | Permainan |
9. Waranti dan Sokongan
9.1. Jaminan Produk
The SHARKOON Elite Shark CA300T PC Case comes with a Waranti 2 tahun on spare parts. This warranty covers defects in materials and workmanship under normal use. Please retain your proof of purchase for warranty claims.
9.2. Kemas Kini Perisian
Software updates, if applicable for any integrated components or controllers, are guaranteed until 13 April 2030.
9.3. Sokongan Pelanggan
For technical assistance, warranty claims, or further inquiries, please contact Sharkoon customer support through their official website or the retailer where the product was purchased. Have your product model and proof of purchase ready when contacting support.


