1. Pengenalan
This manual provides comprehensive instructions for the Teltonika RUT240, a compact industrial 4G LTE cellular router. The RUT240 is designed for professional Machine-to-Machine (M2M) and Internet of Things (IoT) applications, offering reliable cellular communication in demanding environments. It features 2 Ethernet ports, Wi-Fi connectivity, and operates on the RutOS software platform. This specific model is configured for Verizon networks.
Ciri-ciri utama termasuk:
- High performance for mission-critical cellular communication.
- WAN failover for automatic switching to an alternative backup connection.
- Wi-Fi functionality supporting both Access Point and Station modes simultaneously.
2. Kandungan Pakej
Sebelum meneruskan pemasangan, sila sahkan bahawa semua item ada di dalam pakej anda:
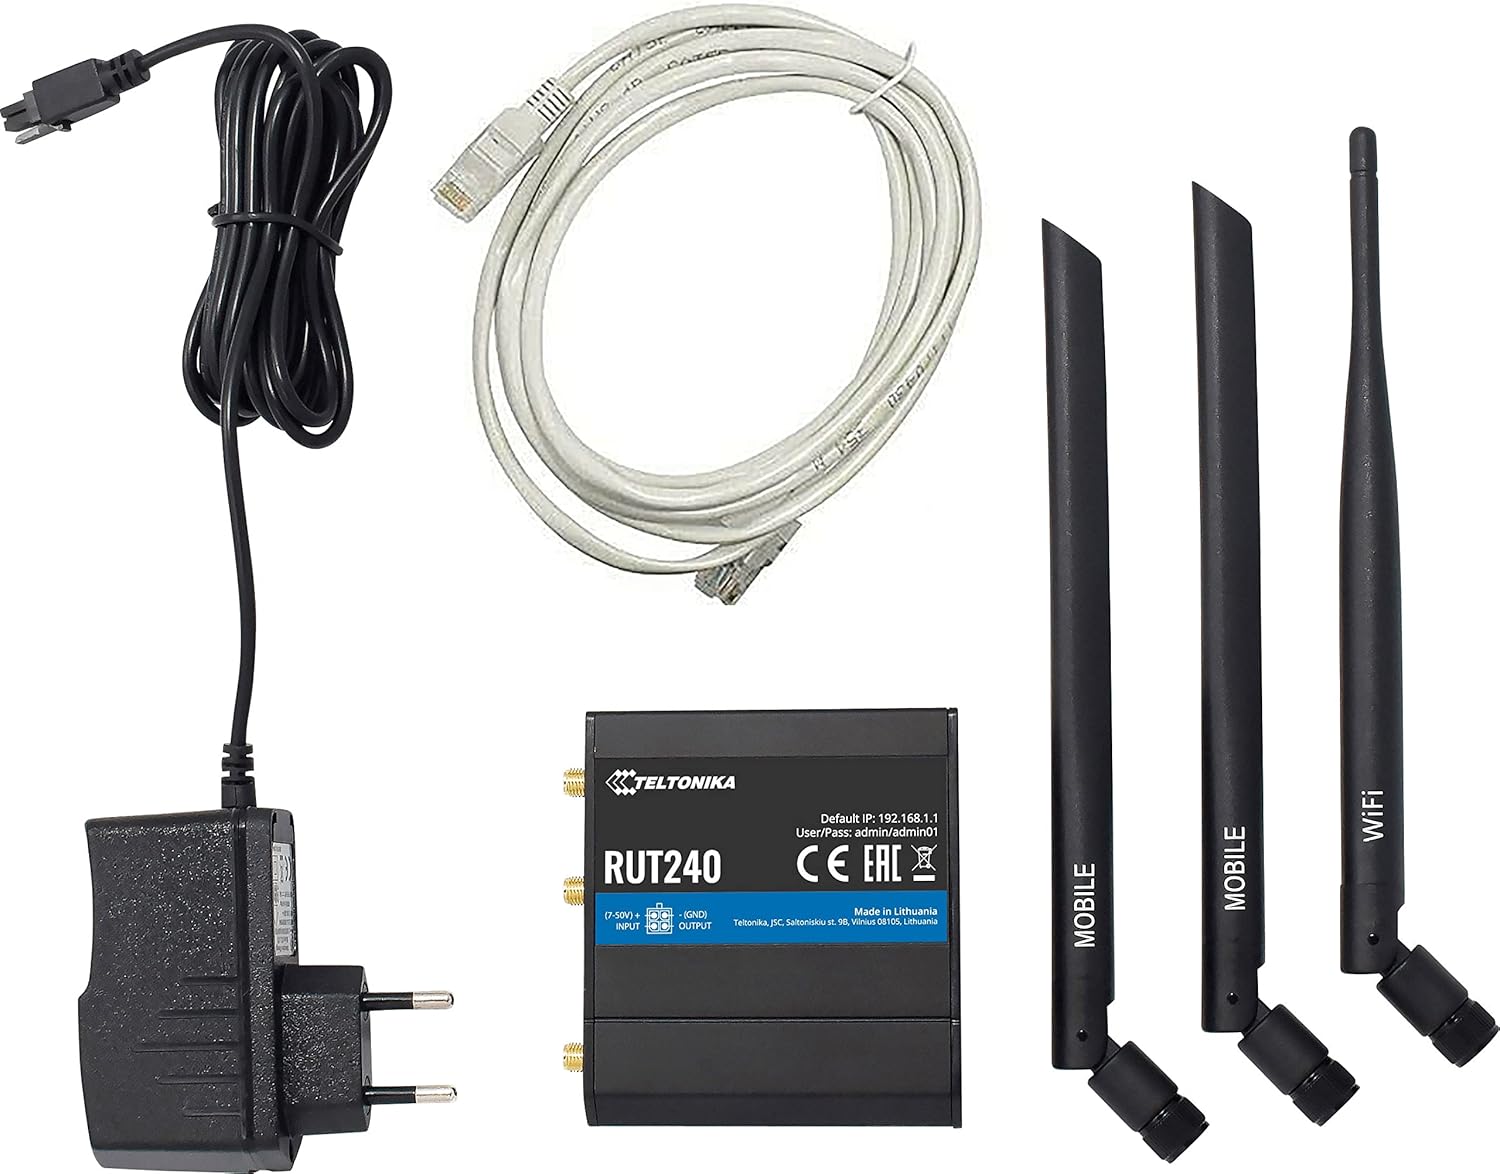
Image: Teltonika RUT240 router, power adapter, Ethernet cable, and three antennas (two mobile, one WiFi).
- Teltonika RUT240 Penghala Selular
- Power Adapter (9-30V DC)
- Kabel Ethernet
- Two Mobile Antennas
- One WiFi Antenna
3. Produk Lebihview
The Teltonika RUT240 is a compact device designed for easy integration into various setups. Understanding its physical layout is crucial for proper installation and operation.

Imej: Atas view of the RUT240 router, highlighting the antenna connectors, power input, and I/O ports.

Imej: Bersudut view of the RUT240 router, illustrating the Ethernet ports and power input.
Depan View
- Soket kuasa: Untuk menyambungkan penyesuai kuasa DC.
- Slot Kad SIM: For inserting your cellular SIM card.
- Port Ethernet LAN: For connecting local network devices.
- WAN Ethernet Port: For connecting to an external network (e.g., DSL/Fiber modem).
belakang View
- Butang Tetapkan Semula: Digunakan untuk memulihkan tetapan lalai kilang.
- Penyambung Antena LTE: For attaching mobile antennas.
- WiFi Antenna Connector: For attaching the WiFi antenna.
4. Panduan Persediaan
Follow these steps to set up your Teltonika RUT240 router for initial operation.
4.1. Memasukkan Kad SIM
- Pastikan penghala dimatikan.
- Locate the SIM card slot(s) on the front of the device.
- Insert your activated Verizon SIM card into the slot until it clicks into place.
4.2. Sambungan Antena
- Attach the two mobile antennas to the LTE antenna connectors on the back of the router.
- Attach the WiFi antenna to the WiFi antenna connector on the back of the router.
- Ensure all antennas are securely tightened.
4.3. Sambungan Kuasa
- Connect the power adapter to the power socket on the front of the router.
- Palamkan hujung satu lagi penyesuai kuasa ke dalam salur keluar kuasa.
- The router will power on automatically. Wait for the status LEDs to indicate readiness.
4.4. Akses dan Konfigurasi Awal
- Connect your computer to the router using an Ethernet cable (to the LAN port) or via Wi-Fi (default SSID and password can be found on the device label).
- Buka a web pelayar dan navigasi ke alamat IP lalai: http://192.168.1.1.
- Log masuk menggunakan nama pengguna dan kata laluan lalai: admin / pentadbir01. It is highly recommended to change these credentials immediately after the first login for security purposes.
- Ikuti wizard persediaan pada skrin untuk mengkonfigurasi sambungan internet dan tetapan Wi-Fi anda.
5. Arahan Operasi
The Teltonika RUT240 operates on RutOS, a Linux-based operating system, providing a robust and flexible platform for network management.
5.1. WAN Failover
The RUT240 supports WAN failover, ensuring continuous connectivity. If the primary internet connection (e.g., cellular) fails, the router will automatically switch to a pre-configured backup connection (e.g., Ethernet WAN). This feature is critical for applications requiring uninterrupted network access.
5.2. Wi-Fi Modes
The router's Wi-Fi module can function simultaneously in two modes:
- Mod Titik Akses (AP): Allows other Wi-Fi devices to connect to the RUT240, providing them with network access.
- Station (STA) Mode: Enables the RUT240 to connect to an existing Wi-Fi network as a client.
These modes can be configured via the RutOS web antara muka.
6. Penyelenggaraan
Regular maintenance ensures optimal performance and longevity of your RUT240 router.
- Kemas kini Firmware: Periodically check the Teltonika Networks website for the latest firmware versions. Updating the firmware can provide new features, security enhancements, and bug fixes.
- Pembersihan: Pastikan penghala bersih dan bebas daripada habuk. Gunakan kain lembut dan kering untuk membersihkan. Jangan gunakan pembersih cecair.
- Keadaan Persekitaran: Ensure the router is operated within its specified temperature and humidity ranges to prevent damage.
- Pengurusan Kata Laluan: Regularly change your router's login credentials and Wi-Fi passwords to maintain network security.
7. Penyelesaian masalah
This section provides solutions to common issues you might encounter with your RUT240 router.
7.1. Tiada Sambungan Internet
- Semak Kad SIM: Pastikan kad SIM dimasukkan dengan betul dan diaktifkan dengan pelan data.
- Sambungan Antena: Verify that the mobile antennas are securely attached.
- Kekuatan Isyarat: Check the cellular signal strength via the router's web interface. If the signal is weak, try repositioning the router or using external antennas.
- Tetapan APN: Confirm that the Access Point Name (APN) settings in the router's web interface match those provided by your mobile operator (Verizon).
- Kegagalan WAN: If using WAN failover, ensure both primary and backup connections are configured correctly.
7.2. Tidak Boleh Diakses Web Antara muka
- Alamat IP: Pastikan anda menggunakan alamat IP lalai yang betul (http://192.168.1.1).
- Sambungan Rangkaian: Verify your computer is connected to the router via Ethernet or Wi-Fi.
- Konflik Alamat IP: Check if your computer's IP address is in the same subnet as the router.
- Firewall: Temporarily disable any firewall on your computer to rule out interference.
7.3. Router Not Powering On
- Penyesuai Kuasa: Ensure the power adapter is correctly connected to both the router and a working power outlet.
- Sumber Kuasa: Uji soket kuasa dengan peranti lain untuk mengesahkan ia berfungsi.
7.4. Tetapan Semula Kilang
If other troubleshooting steps fail, you can perform a factory reset. This will revert all settings to their default values. To perform a factory reset:
- With the router powered on, locate the reset button on the back of the device.
- Gunakan objek nipis (cth., klip kertas) untuk menekan dan menahan butang set semula selama lebih kurang 10 saat.
- Release the button when the status LEDs indicate a reset (e.g., all LEDs flash).
- The router will restart with factory default settings.
8. Spesifikasi
Detailed technical specifications for the Teltonika RUT240 router:
| kategori | Spesifikasi |
|---|---|
| Nama Model | RUT240 |
| Nombor Model Item | RUT24002U000 |
| Jenama | Teltonica |
| Pengeluar | Teltonica |
| Teknologi Ketersambungan | Wi-Fi, 4G LTE |
| Standard Komunikasi Tanpa Wayar | 802.11b/g/n |
| Kelas Band Kekerapan | Jalur Tunggal (2.4 GHz) |
| Sistem Operasi | RutOS (OS Linux berasaskan OpenWrt) |
| Pelabuhan Ethernet | 2 (1x WAN configurable as LAN, 1x LAN) |
| SIM | 1 x External SIM Holder (2FF) |
| Penyambung Antena | 2 x SMA for mobile, 1 x RP-SMA for WiFi |
| Input/Output | On 4 pin socket: 1 x Digital input, 1 x Digital open collector output |
| Powering Option | 4 pin power socket, 9-30 VDC |
| Dimensi (W x H x D) | 83 x 25 x 74 mm |
| Berat Barang | 14.4 ounces (approximately 135 g) |
| Suhu Operasi | -40 °C hingga 75 °C |
| Protokol Keselamatan | WPS, WPA2-Enterprise, WPA2-PSK, WPA-PSK, WEP |
| Ciri Khas | Mod Titik Akses, WPS |
| Peranti Serasi | Komputer Peribadi |
| Kegunaan Disyorkan Untuk Produk | Pemantauan |
9. Waranti dan Sokongan
The Teltonika RUT240 is manufactured by Teltonika. For specific warranty information, please refer to the documentation included with your purchase or visit the official Teltonika Networks website. For technical support, firmware downloads, and additional resources, please visit the Teltonika Networks support portal.


