1. Produk Lebihview
The Kolink KLM-003 is a compact Micro-Tower computer case designed to house Micro ATX motherboards and essential PC components. It features a durable alloy steel construction and is optimized for air cooling. This manual provides detailed instructions for assembly, operation, and maintenance.

Rajah 1: Depan-kiri view of the Kolink KLM-003 Micro-Tower Case, showcasing its minimalist design and front panel ventilation.

Rajah 2: Berbilang views of the Kolink KLM-003 case, illustrating the front panel, rear panel with I/O cutouts, and top panel layout.
2. Kandungan Pakej
Sahkan bahawa semua item terdapat dalam pakej sebelum meneruskan pemasangan.
- Kolink KLM-003 Micro-Tower Case (1 unit)
- Kit aksesori (skru, pengikat, pengikat kabel)
- Manual Pengguna (Dokumen ini)
3. Persediaan dan Pemasangan
This section guides you through the process of installing your computer components into the Kolink KLM-003 case. Ensure your workspace is clean and static-free. It is recommended to wear an anti-static wrist strap during installation.
3.1 Membuka Kes
- Letakkan bekas di atas permukaan yang rata dan stabil.
- Locate the thumbscrews on the rear panel of the case.
- Unscrew the thumbscrews and carefully slide off the side panel(s).

Rajah 3: Dalaman view of the case with the side panel removed, showing the motherboard tray and internal layout.
3.2 Pemasangan Motherboard
The KLM-003 supports Micro ATX motherboards.
- Install the I/O shield provided with your motherboard into the cutout on the rear of the case.
- Align your Micro ATX motherboard with the pre-installed standoffs inside the case.
- Secure the motherboard using the appropriate screws from the accessory kit.
3.3 Pemasangan Bekalan Kuasa
The power supply mounts at the rear of the case.
- Position your ATX power supply in the designated area at the rear of the case.
- Secure it with screws from the accessory kit, ensuring the fan faces the correct direction for optimal airflow (usually downwards or outwards).
3.4 Pemasangan Pemacu (HDD/SSD)
The case provides bays for storage drives.
- Identify the 3.5-inch and 2.5-inch drive bays.
- Slide your hard drives (HDDs) or solid-state drives (SSDs) into the appropriate bays.
- Secure the drives using screws.

Figure 4: Close-up of the interior, highlighting the drive mounting areas and cable routing options.
3.5 Sambungan Panel Hadapan
Connect the front panel cables to your motherboard. Refer to your motherboard manual for exact pin layouts.
- Butang Kuasa: Connect the "POWER SW" cable.
- Butang Tetapkan Semula: Connect the "RESET SW" cable.
- LED kuasa: Connect the "POWER LED" cables (+/-).
- LED HDD: Connect the "HDD LED" cable.
- USB 2.0: Connect the USB 2.0 header cable.
- USB 3.0: Connect the USB 3.0 header cable (if available on case and motherboard).
- Audio: Connect the "HD AUDIO" cable.
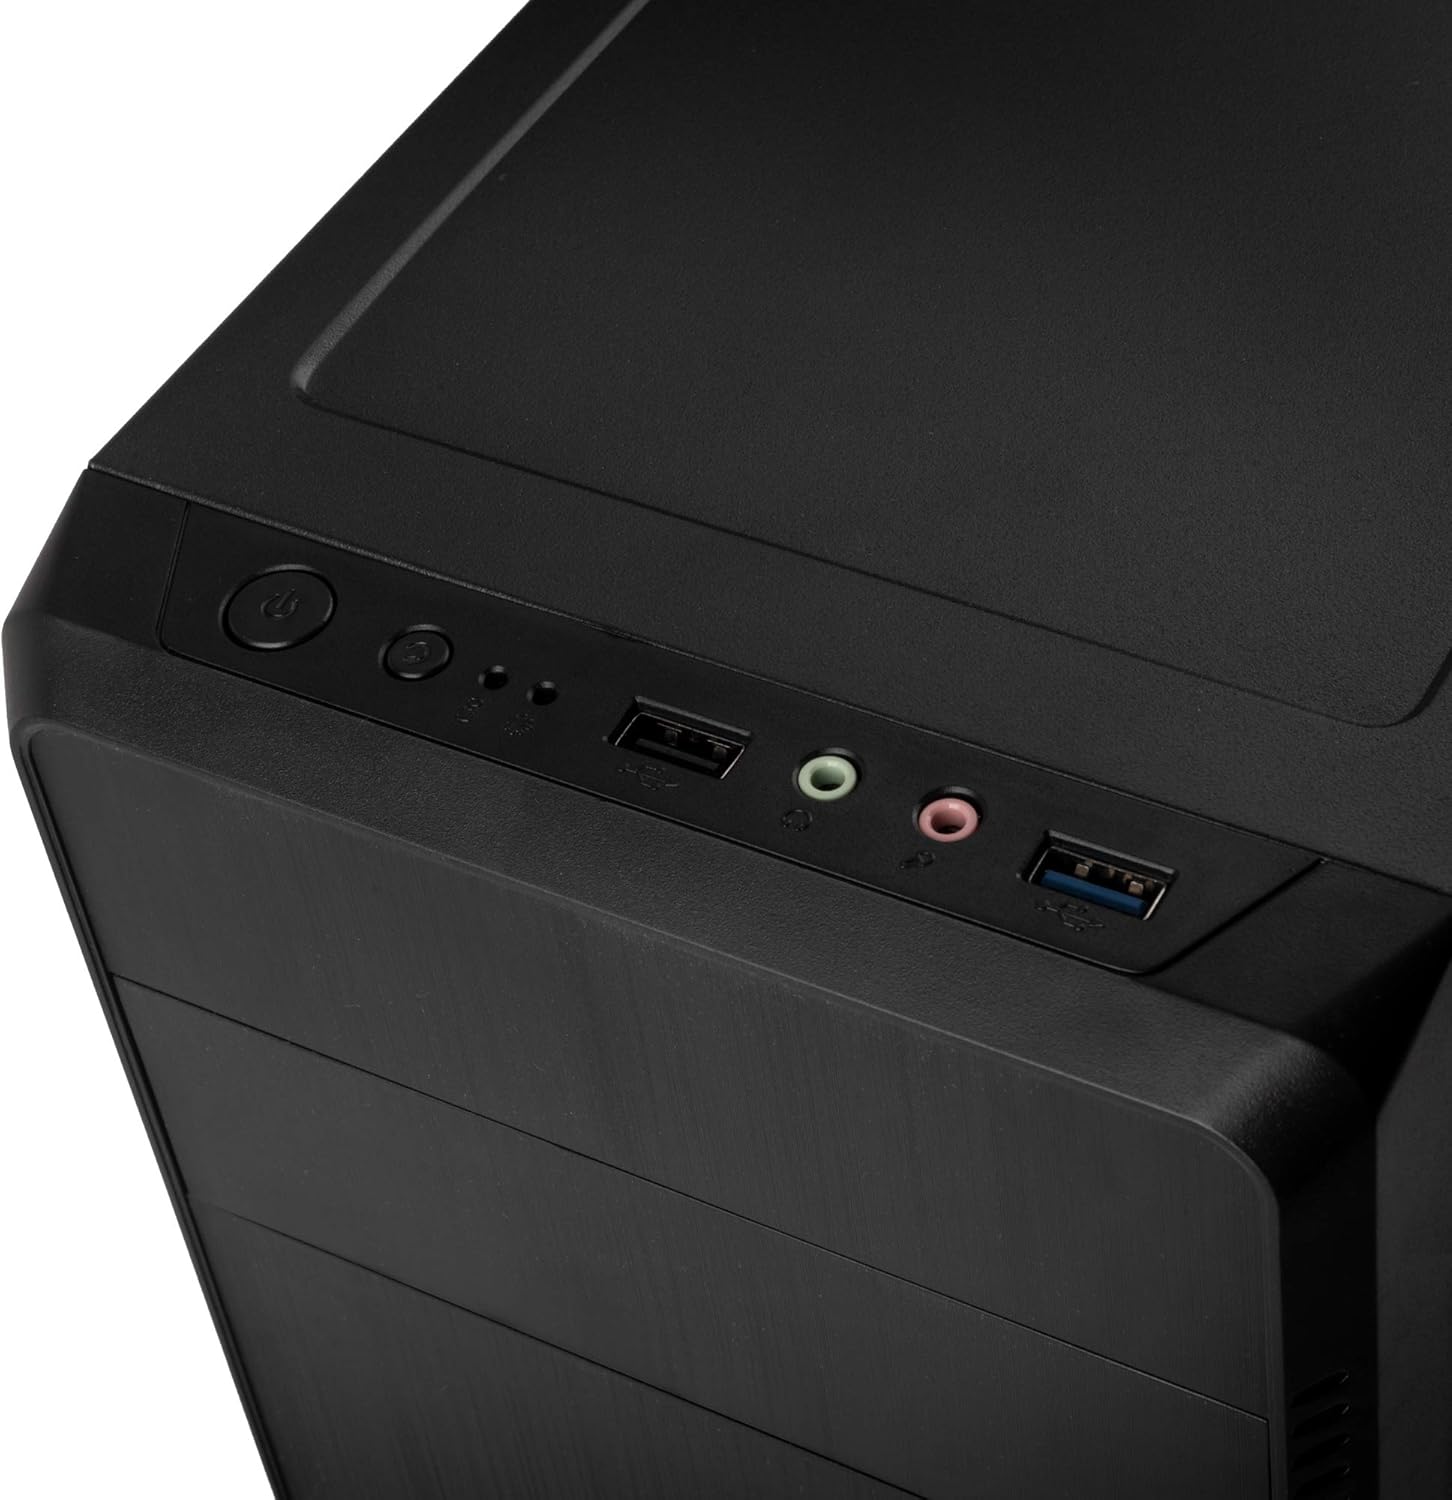
Figure 5: Top front panel with power button, reset button, USB 2.0, USB 3.0, and audio ports for easy access.
4. Arahan Operasi
Sebaik sahaja semua komponen dipasang dan disambungkan, anda boleh menghidupkan sistem anda.
- Ensure all cables are securely connected, both internally and externally (monitor, keyboard, mouse, power cord).
- Connect the power cord to the power supply unit and a wall outlet.
- Tekan butang kuasa yang terletak di panel hadapan casing.
- The power LED should illuminate, and your system should begin to boot.
5. Penyelenggaraan
Penyelenggaraan yang kerap membantu memastikan prestasi optimum dan jangka hayat komponen komputer anda.
- Pembersihan Habuk: Periodically clean dust from inside the case, especially from fans and heatsinks, using compressed air or a soft brush. Ensure the system is powered off and unplugged before cleaning.
- Pembersihan Luaran: Lap bahagian luar bekas dengan lembut, damp kain. Elakkan bahan kimia yang keras atau pembersih yang kasar.
- Aliran udara: Pastikan aliran udara mencukupi di sekeliling bekas. Jangan halang bukaan pengudaraan.
6. Penyelesaian masalah
Jika anda menghadapi masalah, pertimbangkan langkah penyelesaian masalah biasa berikut:
- Sistem Tidak Dihidupkan:
- Check if the power cord is securely connected to both the power supply and the wall outlet.
- Ensure the power switch on the power supply unit is in the "ON" position.
- Sahkan bahawa kabel butang kuasa panel hadapan disambungkan dengan betul ke papan induk.
- Tiada Output Paparan:
- Ensure your monitor is connected to the correct video output port on your graphics card or motherboard.
- Check that the graphics card is properly seated in its PCIe slot and has all necessary power cables connected.
- Terlalu panas:
- Ensure all case fans and CPU cooler fans are spinning correctly.
- Clean any dust buildup from fans and heatsinks.
- Verify that the case has sufficient ventilation.
7. Spesifikasi
| Nama Model | KLM-003 |
| Jenama | KOLEKSI |
| Jenis Kes | Micro-Tower |
| Keserasian Papan Induk | ATX mikro |
| bahan | Keluli Aloi |
| warna | Hitam |
| Dimensi (LxWxH) | 14.37 x 7.24 x 13.58 inci (36.5 x 18.4 x 34.5 cm) |
| Berat Barang | 5.7 paun (2.59 kg) |
| Kaedah Penyejukan | Udara |
| Fan Size (Rear) | 80 Millimeters (if included/supported) |
| Pelabuhan I / O Depan | 1x USB 2.0, Audio In/Out, 1x USB 3.0 |
| Pemasangan Bekalan Kuasa | Pemasangan Belakang |
Nota: Spesifikasi tertakluk kepada perubahan tanpa notis terlebih dahulu.
8. Maklumat Keselamatan
- Always disconnect the power cord from the wall outlet before opening the case or performing any maintenance.
- Avoid exposing the case to extreme temperatures, humidity, or direct sunlight.
- Keep the case away from liquids and sources of heat.
- Handle internal components with care to prevent damage from electrostatic discharge. Use an anti-static wrist strap if possible.
- Do not attempt to modify the case in ways not described in this manual.
9. Waranti dan Sokongan
For warranty information and technical support, please refer to the official KOLINK webtapak atau hubungi peruncit anda. Simpan bukti pembelian anda untuk tuntutan waranti.
KOLINK Official Webtapak: www.kolink.eu


