pengenalan
The Stanley FatMax SFMCH900B SDS-Plus Cordless Combination Hammer is a versatile and powerful tool designed for various drilling and chiseling applications. Its brushless motor technology ensures high performance, extended runtime, and maximum service life. This manual provides essential information for the safe and effective operation, setup, and maintenance of your tool.

Figure 1: Stanley FatMax SFMCH900B SDS-Plus Cordless Combination Hammer, showing its main body, auxiliary handle, and chuck.
Maklumat Keselamatan
Always observe basic safety precautions to reduce the risk of fire, electric shock, and personal injury when using power tools. Keep this manual for future reference.
- Keselamatan Kawasan Kerja: Pastikan kawasan kerja bersih dan terang. Jangan kendalikan alatan kuasa dalam atmosfera yang mudah meletup, seperti di hadapan cecair mudah terbakar, gas atau habuk.
- Keselamatan Elektrik: Elakkan sentuhan badan dengan permukaan yang dibumikan atau dibumikan. Jangan dedahkan alatan kuasa kepada hujan atau keadaan basah.
- Keselamatan Diri: Always wear eye protection, hearing protection, and suitable work gloves. Dress properly; avoid loose clothing or jewelry.
- Penggunaan dan Penjagaan Alat: Jangan paksa alat kuasa. Gunakan alat kuasa yang betul untuk aplikasi anda. Putuskan sambungan pek bateri daripada alat kuasa sebelum membuat sebarang pelarasan, menukar aksesori atau menyimpan alatan kuasa.
- Penggunaan dan Penjagaan Alat Bateri: Isi semula hanya dengan pengecas yang ditentukan oleh pengilang. Gunakan alatan kuasa hanya dengan pek bateri yang ditetapkan secara khusus.
Produk Selesaiview dan Komponen
Familiarize yourself with the key components of your Stanley FatMax SFMCH900B combination hammer.
- SDS-Plus Chuck
- Mode Selector Switch (Drill, Hammer Drill, Chisel)
- Pemegang Bantu
- Hentian Kedalaman
- Suis Trigger
- Butang Pelepas Bateri
- Port Bateri
- Penunjuk Bateri LED

Rajah 2: Sisi view of the combination hammer, highlighting the ergonomic design and main operational areas.
Persediaan
1. Pemasangan dan Pembuangan Bateri
The tool operates on an 18V Stanley FatMax V20 Lithium-Ion battery (not included with the basic version).
- Pemasangan: Align the battery pack with the battery port on the tool. Slide the battery pack into the tool until it clicks securely into place.
- Pembuangan: Tekan butang pelepas bateri (6) dan tarik pek bateri keluar dari alat.

Figure 3: Proper method for inserting the battery pack into the tool's base.

Figure 4: The 3-level LED indicator on the battery shows the remaining charge level.
2. Auxiliary Handle Attachment
The auxiliary handle provides additional control and stability during operation.
- Longgarkan pemegang tambahan dengan memusingnya melawan arah jam.
- Slide the handle onto the front of the tool body.
- Rotate the handle to the desired position for comfortable and secure grip.
- Tighten the handle by twisting it clockwise until it is firmly secured.

Rajah 5: Melaraskan pemegang tambahan untuk cengkaman dan kawalan yang optimum.
3. SDS-Plus Bit/Chisel Installation
This tool uses SDS-Plus bits for quick and secure accessory changes.
- Bersihkan batang mata gerudi atau pahat.
- Pull back the chuck collar (1) and insert the SDS-Plus bit into the chuck.
- Release the chuck collar. The bit should click into place. Pull on the bit to ensure it is securely locked. A slight axial play is normal for SDS-Plus systems.
- Untuk mengeluarkan, tarik kembali kolar chuck dan tarik bit keluar.

Figure 6: Inserting an SDS-Plus drill bit into the tool's chuck.
4. Depth Stop Adjustment
The depth stop allows for precise control over drilling depth.
- Insert the depth stop rod into the hole on the auxiliary handle.
- Adjust the rod to the desired drilling depth by sliding it in or out.
- Secure the depth stop by tightening the knob on the auxiliary handle.

Figure 7: Adjusting the depth stop for controlled drilling depth.
Mod Pengendalian
The SFMCH900B features a mode selector switch (2) to choose between different operating functions:

Figure 8: The mode selector switch allows selection of drilling, hammer drilling, or chiseling functions.
1. Hammer Drilling Mode (Hammer and Drill Bit Icon)
This mode is for drilling in concrete, masonry, and brick. It combines rotary action with powerful hammer blows for fast drilling progress.

Figure 9: Demonstrating hammer drilling into a wall.
2. Drilling Mode (Ikon Mata Gerudi)
This mode provides rotary action only, suitable for drilling in wood, metal, plastics, and ceramics. The impact mechanism is disengaged.
3. Chiseling Mode (Chisel Icon)
This mode provides hammer action only with a rotary stop, ideal for light chiseling work in plaster, tiles, or for removing small amounts of material. Ensure a chisel bit is installed.
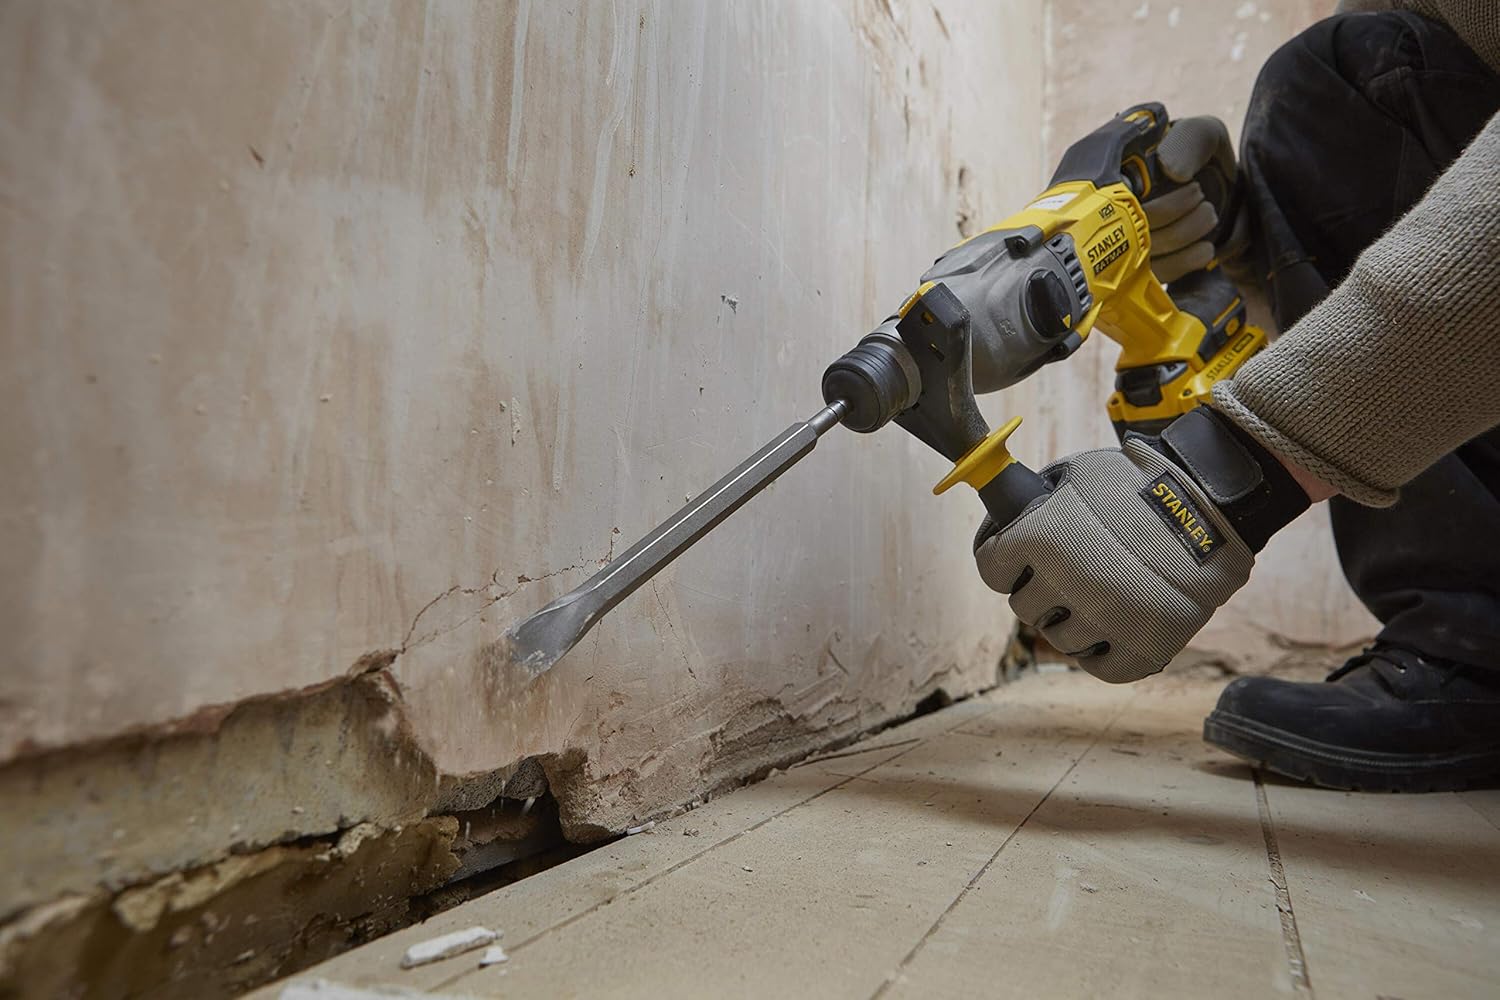
Figure 10: Performing light chiseling work with the tool.
To change modes, rotate the mode selector switch to the desired icon. Ensure the tool is off before changing modes.
Operasi
Before starting any operation, ensure the work area is clear and you are wearing appropriate personal protective equipment.
- Memulakan Alat: Squeeze the trigger switch (5) to start the tool. The speed is variable depending on the pressure applied to the trigger.
- Menghentikan Alat: Lepaskan suis pencetus untuk menghentikan alat.
- Menerapkan Tekanan: Apply steady, firm pressure to the tool. Do not lean into the tool excessively; let the hammer mechanism do the work.
- Terlalu panas: If the tool becomes excessively hot, run it without load for a few minutes to cool the motor.
Penyelenggaraan
Penyelenggaraan tetap memastikan jangka hayat dan prestasi optimum alat anda.
- Pembersihan: Keep the ventilation slots clean and free from dust. Use a soft brush or dry cloth to clean the tool. Do not use water or chemical cleaners.
- Motor tanpa berus: The brushless motor design significantly reduces maintenance requirements compared to traditional brushed motors, as there are no carbon brushes to replace.
- Storan: Store the tool and battery in a cool, dry place, away from direct sunlight and moisture. Ensure the battery is removed from the tool before storage.
- Penjagaan Aksesori: Keep drill bits and chisels clean and sharp for best performance.

Figure 11: Storing the tool and accessories in a compatible TSTAK case for protection and organization.
Menyelesaikan masalah
| Masalah | Kemungkinan Punca | Penyelesaian |
|---|---|---|
| Alat tidak bermula. | Bateri tidak dicas atau tidak dimasukkan dengan betul. | Pastikan bateri dicas sepenuhnya dan dimasukkan dengan selamat. |
| Mengurangkan prestasi penggerudian. | Mata gerudi kusam atau salah; mod yang dipilih salah. | Replace with a sharp, appropriate bit. Verify mode selector is in the correct position. |
| Alat menjadi terlalu panas. | Penggunaan berat berterusan; pengudaraan tersekat. | Allow tool to cool down. Clear ventilation slots. Reduce load. |
| Sedikit tidak terkunci ke dalam chuck. | Chuck collar not pulled back sufficiently; debris in chuck. | Pull chuck collar fully back. Clean chuck and bit shank. |
Spesifikasi
| Ciri | Spesifikasi |
|---|---|
| Jenama | STANLEY FATMAX |
| Nombor Model | SFMCH900B-XJ |
| Sumber Kuasa | Dikuasakan Bateri |
| Voltage | 18 Volt |
| Tenaga Kesan | 2.0 Joule |
| Jenis Motor | Motor tanpa berus |
| Maks. Kapasiti Penggerudian (Logam) | 22 Milimeter |
| Kelajuan | 2200 RPM |
| Berat Barang | 2.84 Kilogram (6.25 paun) |
| Dimensi Produk | 15.75"L x 6.3"W x 10.04"H |
| bahan | Rubber (Handle and Grip), Metal (Body, Chuck, Key Components) |
| Komponen yang Disertakan | Cordless combination hammer (Battery and Charger Not Included in basic version) |
Waranti dan Sokongan
For warranty information, technical support, or service inquiries, please refer to the official STANLEY FATMAX webtapak atau hubungi bahagian perkhidmatan pelanggan mereka. Simpan bukti pembelian anda untuk tuntutan waranti.
Pengeluar: Stanley


