1. Pengenalan
This manual provides detailed instructions for the installation, operation, and maintenance of your RecPro RV Air Conditioner 15K. Please read this manual thoroughly before installation and use to ensure proper function and longevity of the unit. This unit is designed for use in RVs, campers, fifth wheels, and food trucks, offering both cooling and heating capabilities.
2. Ciri-ciri Utama
- Energy-Efficient Low Amp Lukis: Designed to allow multiple RV appliances to operate simultaneously without overloading the system, ideal for various power setups.
- Rugged, Durable Design: Constructed from UV-resistant plastic for durability and an aerodynamic profile to reduce drag.
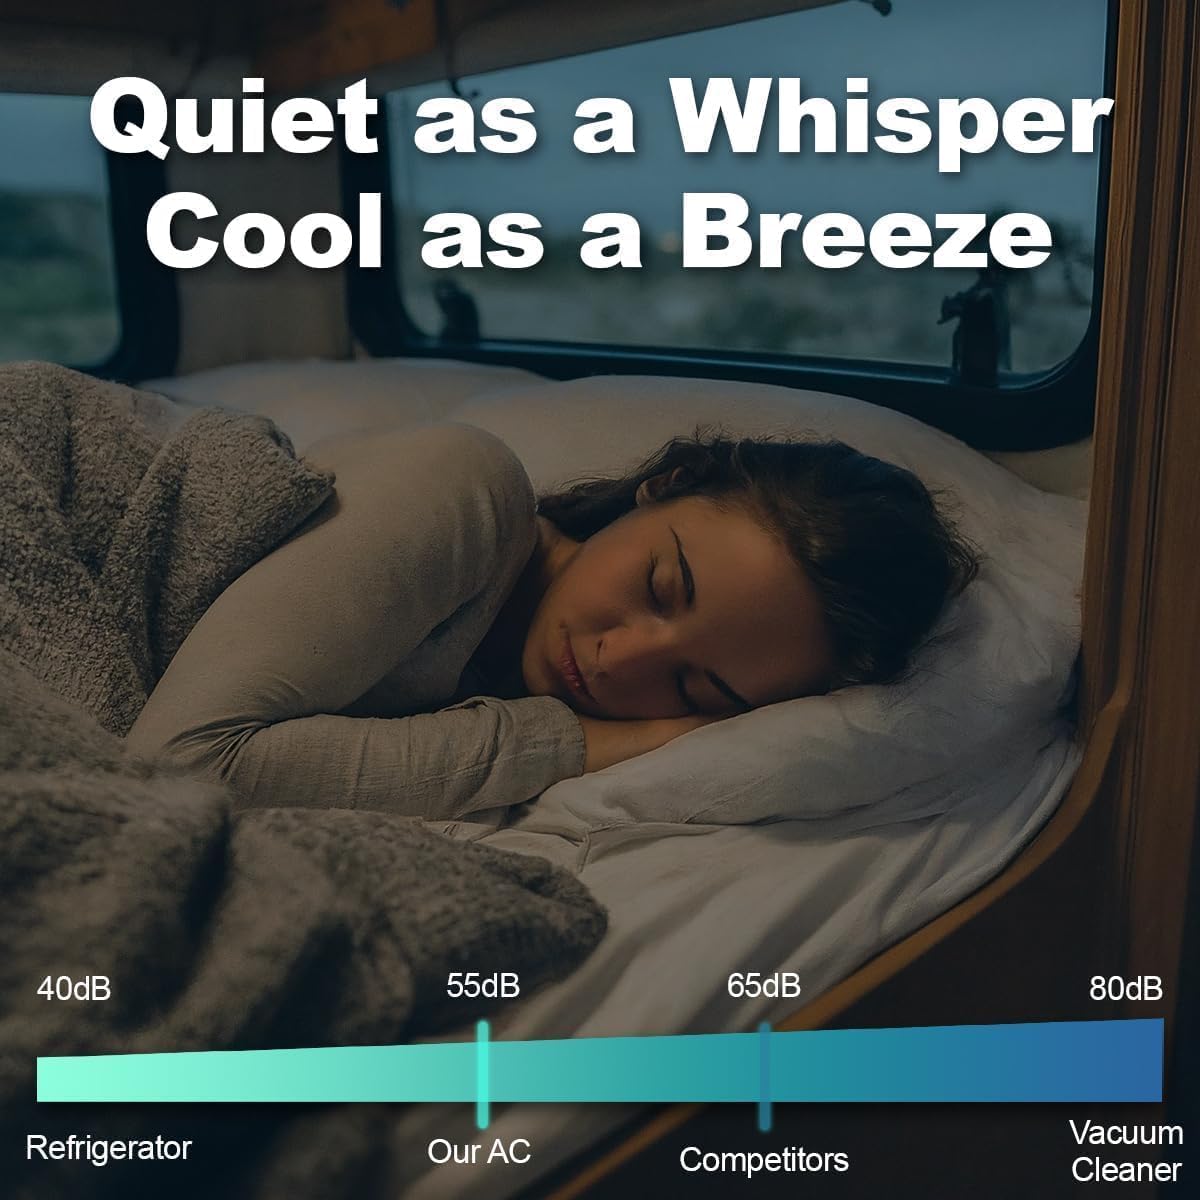
- Operasi Ultra-Senyap: Operates at approximately 55.4 dB, providing a peaceful environment.
- Multi-Function Remote + LED Touch Display: Offers full control with a wireless remote and an intuitive LED panel for various modes (cool, dry, fan, sleep, timer). No thermostat wiring required.
- Built-In Heat Pump: Provides 4-season comfort by offering supplemental warmth in addition to powerful cooling.
- Ducted and Non-Ducted Compatibility: Versatile design compatible with both ducted and non-ducted RV airflow systems.
3. Persediaan dan Pemasangan
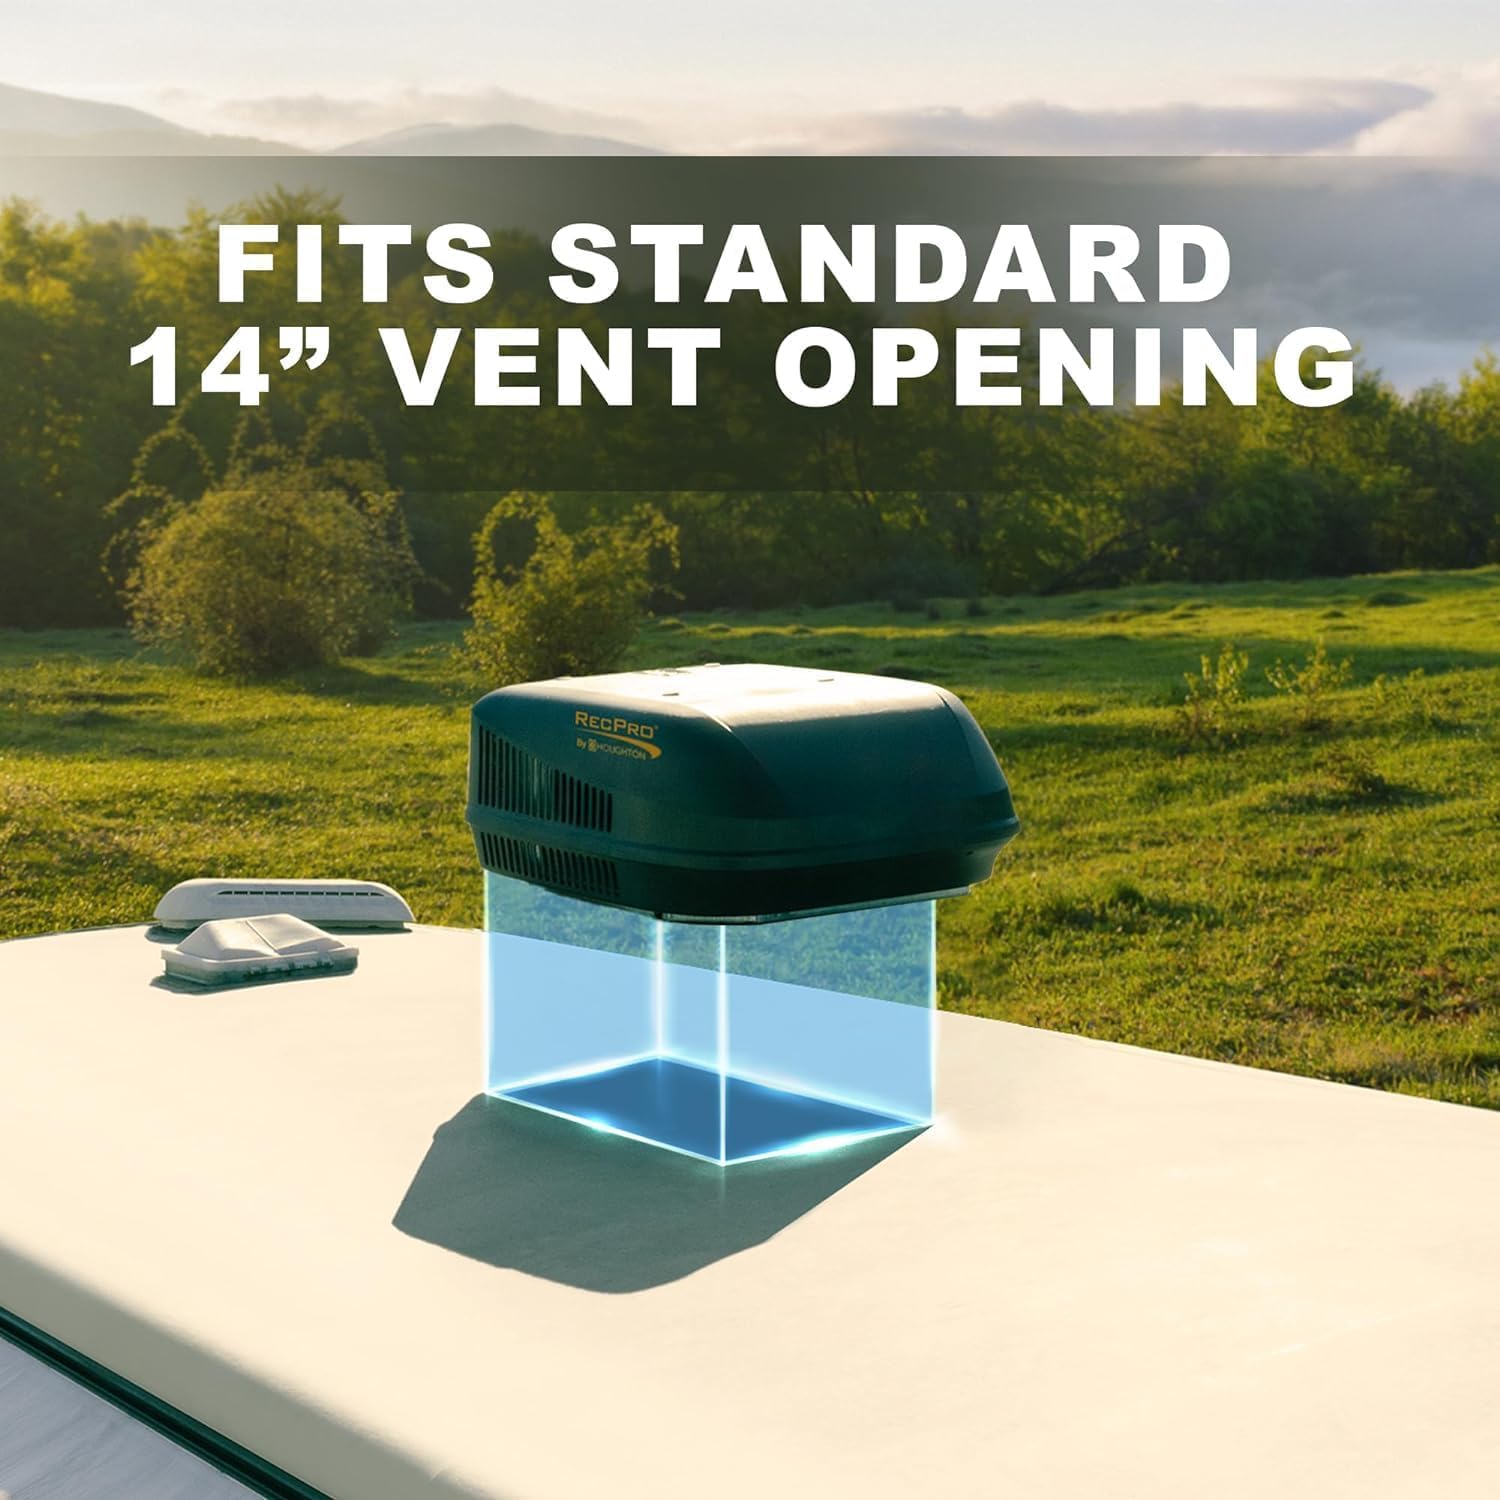
The RecPro RV Air Conditioner is designed for straightforward installation. It fits standard 14" x 14" vent openings.

Langkah Pemasangan:
- Pasangkan Unit AC ke Bumbung: Position and secure the exterior air conditioner unit onto the RV rooftop, aligning it with the 14" x 14" vent opening.
- Connect Power to AC Unit: Connect the necessary electrical wiring to the AC unit. Ensure all connections are secure and follow local electrical codes.
- Connect & Install Plenum: From inside the RV, connect the interior plenum to the exterior unit. Secure the plenum in place, ensuring a tight seal for optimal airflow.

Note: Professional installation is recommended if you are unfamiliar with RV electrical systems or rooftop installations.
4. Arahan Operasi
Your RecPro RV Air Conditioner can be controlled using the included wireless remote or the integrated LED touch display on the interior plenum.

Fungsi Kawalan Jauh:
- Hidupkan/Mati Kuasa: Mengaktifkan atau menyahaktifkan unit.
- Pemilihan Mod: Cycle through Cool, Dry, Fan, Sleep, and Heat Pump modes.
- Pelarasan Suhu: Increase or decrease the desired temperature setting.
- Kelajuan Kipas: Adjust fan speed (Low, Medium, High, Auto).
- Fungsi Pemasa: Set a timer for automatic power on or off.
- Mod tidur: Optimizes settings for quiet and comfortable overnight operation.
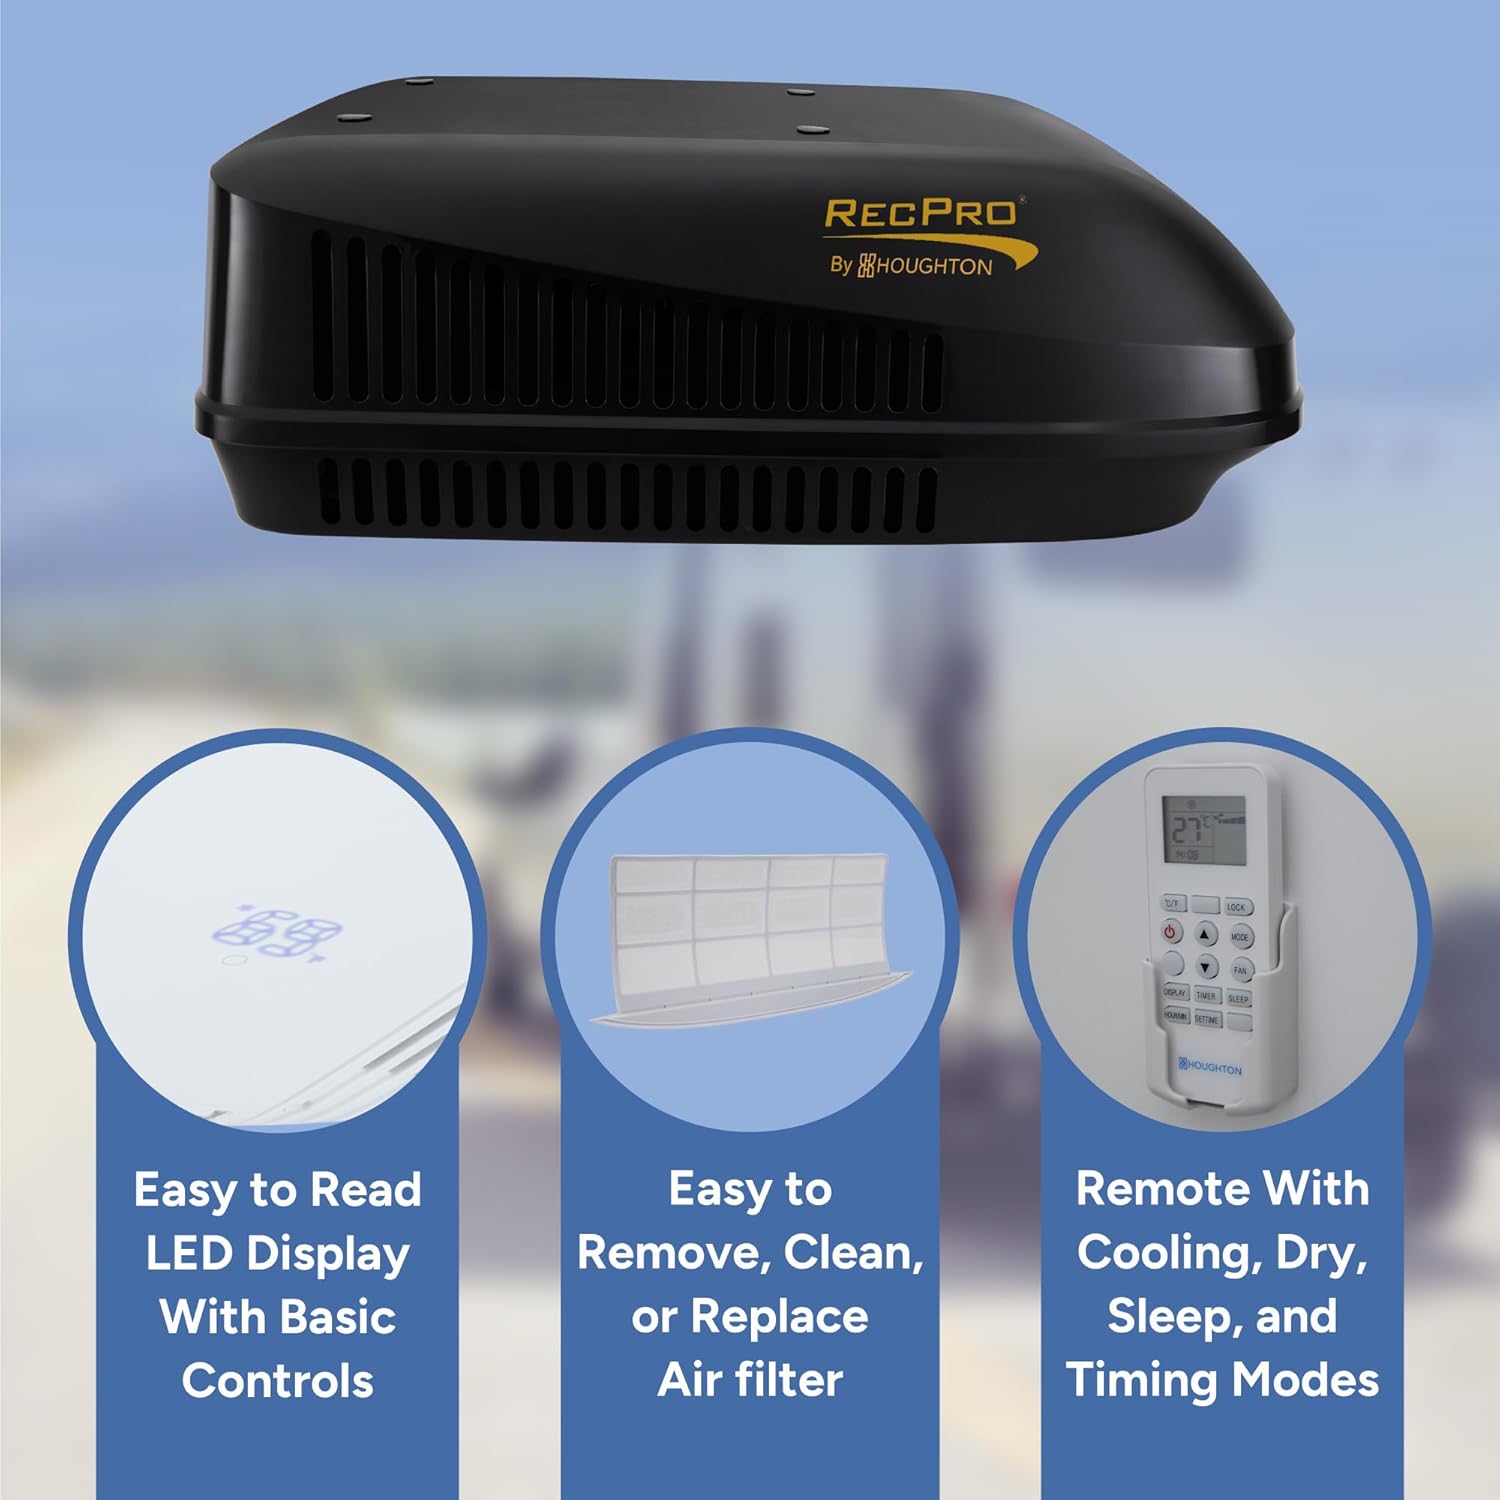
The LED display on the interior plenum provides real-time feedback on the current settings and status of the unit.
5. Penyelenggaraan
Regular maintenance ensures optimal performance and extends the lifespan of your RV air conditioner.
Pembersihan Penapis Udara:
The air filter should be regularly inspected and cleaned to maintain efficient airflow and cooling performance. The filter is designed for easy removal and cleaning.
- Locate the air filter access on the interior plenum.
- Keluarkan penapis perlahan-lahan.
- Clean the filter using mild soap and water, or vacuum off dust and debris.
- Benarkan penuras kering sepenuhnya sebelum memasukkannya semula.
Note: The manufacturer recommends checking the air filter monthly during periods of frequent use.
6. Penyelesaian masalah
If you encounter issues with your RecPro RV Air Conditioner, refer to the following common troubleshooting steps:
| Masalah | Kemungkinan Punca | Penyelesaian |
|---|---|---|
| Unit tidak dihidupkan. | No power supply; remote control battery low. | Check power connection and circuit breaker. Replace remote control batteries. |
| Penyejukan/pemanasan yang tidak mencukupi. | Dirty air filter; blocked air vents; incorrect mode selection. | Clean air filter. Ensure vents are unobstructed. Verify correct mode (Cool/Heat) is selected. |
| Bunyi luar biasa semasa operasi. | Loose components; debris in fan. | Inspect for loose parts. Turn off unit and check for debris in fan area. If noise persists, contact support. |
| Alat kawalan jauh tidak bertindak balas. | Low or dead batteries; obstruction between remote and unit. | Gantikan bateri. Pastikan garis penglihatan yang jelas ke penerima unit. |
For issues not listed here, please contact RecPro customer support.
7. Spesifikasi
| Atribut | Perincian |
|---|---|
| Nama Jenama | RecPro |
| Maklumat Model | RP-AC3800 |
| Berat Barang | 112 paun |
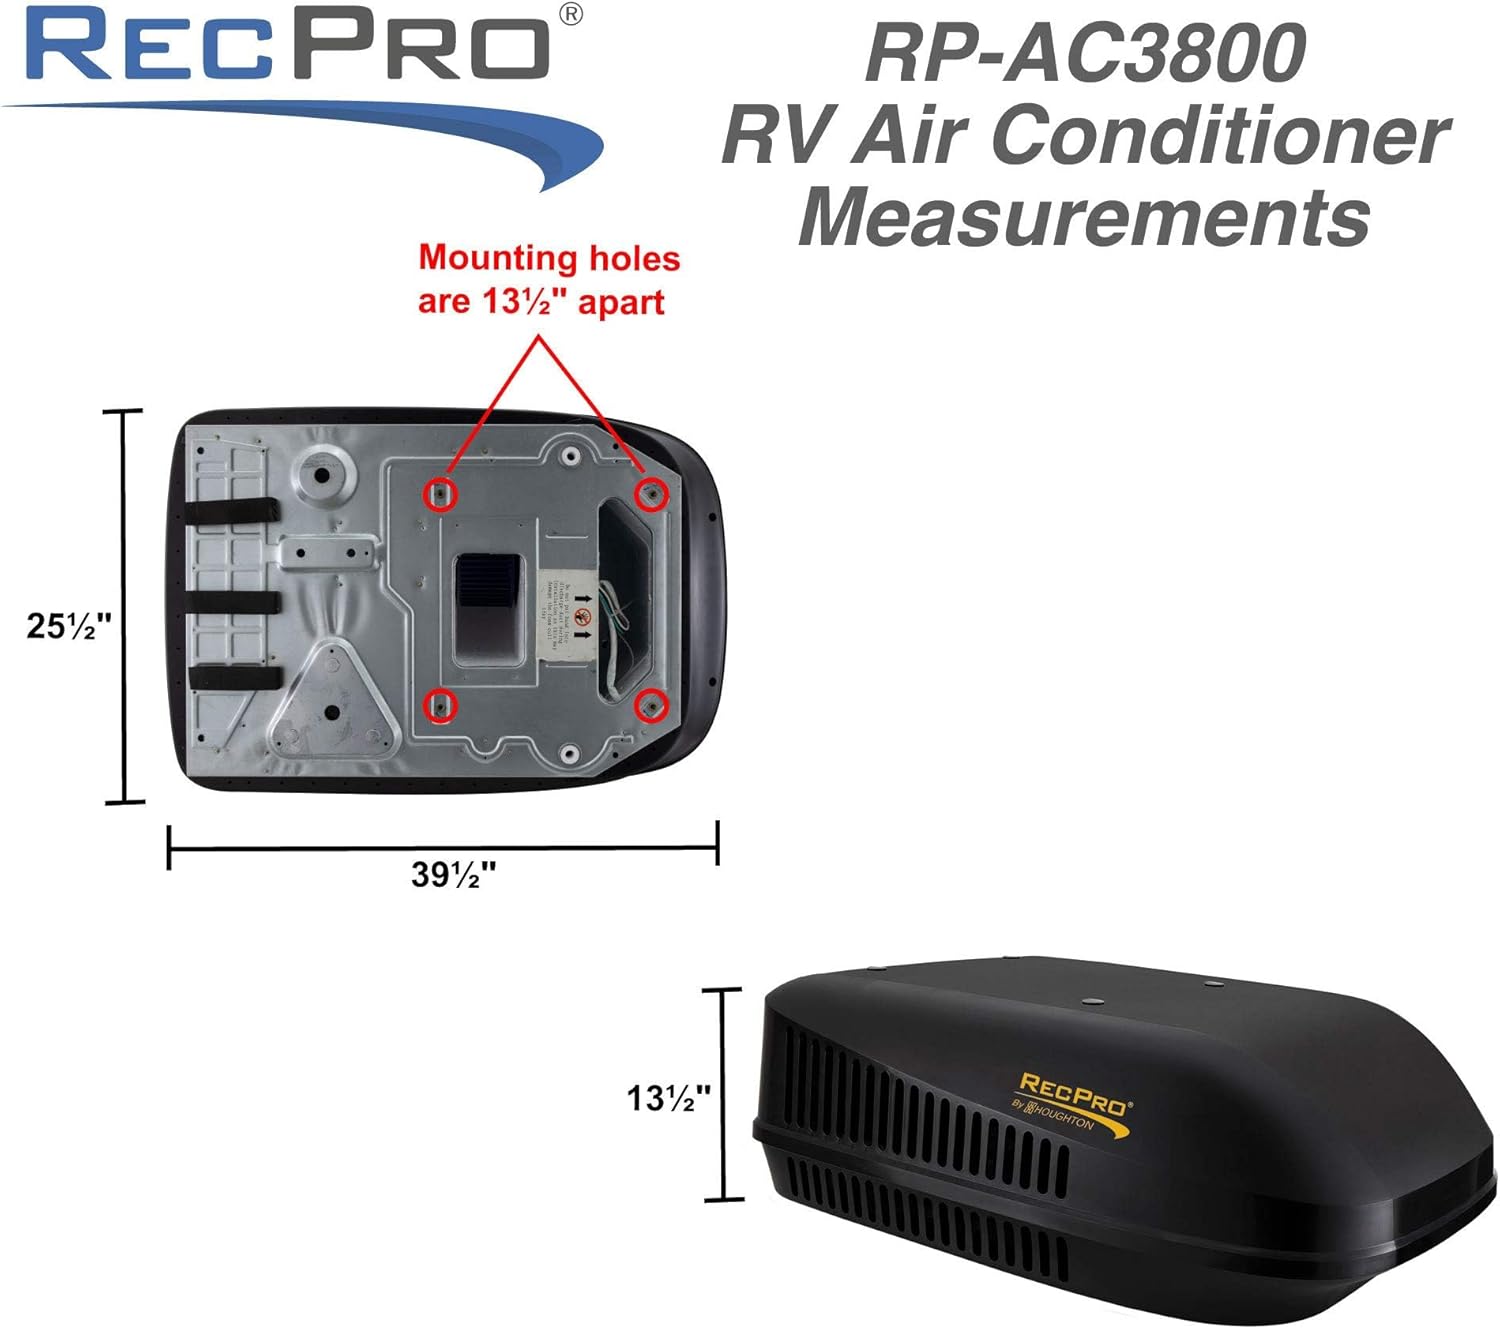
| Dimensi Produk | 39.5 x 25.5 x 13.5 inci |
| Kecekapan | Cekap |
| Kapasiti | 351 Kaki Kubik |
| Penggunaan Tenaga Tahunan | 5694 Kilowatt Jam Setahun |
| Tahap Kebisingan | 59.1 dB |
| Jenis Pemasangan | Berbungkus |
| Faktor Bentuk | RV Rooftop |
| Ciri Khas | Kawalan Jauh, Penyahlembap |
| Elemen Pemanas | 1 |
| warna | putih |
| Voltage | 115 Volt |
| Wattage | 1500 watt |
| Jenis Bahan | Tidak Bersalur |
| Komponen yang Disertakan | Kain Kafan Luar, Pleno Dalaman |
| Luas Lantai | 835 Kaki Persegi |
| Kuasa Penyejukan | 15000 Unit Terma British |
| Bahan penyejuk | R 410A |
8. Waranti dan Sokongan
For warranty information and customer support, please refer to the official RecPro webtapak atau hubungi perkhidmatan pelanggan mereka secara langsung. Simpan resit pembelian anda untuk tuntutan waranti.
RecPro Customer Service: Visit RecPro Contact Page


