1. Pengenalan
Welcome to the user manual for your Nokia 216 Dual SIM mobile phone. This guide provides essential information to help you set up, operate, and maintain your device. The Nokia 216 (RM-1187) is a classic feature phone designed for reliable communication, featuring dual SIM capability, a 2.4-inch display, and a VGA camera.
Please read this manual carefully to ensure proper use and to get the most out of your phone.
2. Kandungan Pakej
Pastikan semua item terdapat dalam pakej produk anda:
- Nokia 216 Dual SIM Mobile Phone (RM-1187)
- Bateri
- Penyesuai Kuasa
- Kabel USB
3. Peranti Lebihview
Familiarize yourself with the key components of your Nokia 216 phone.
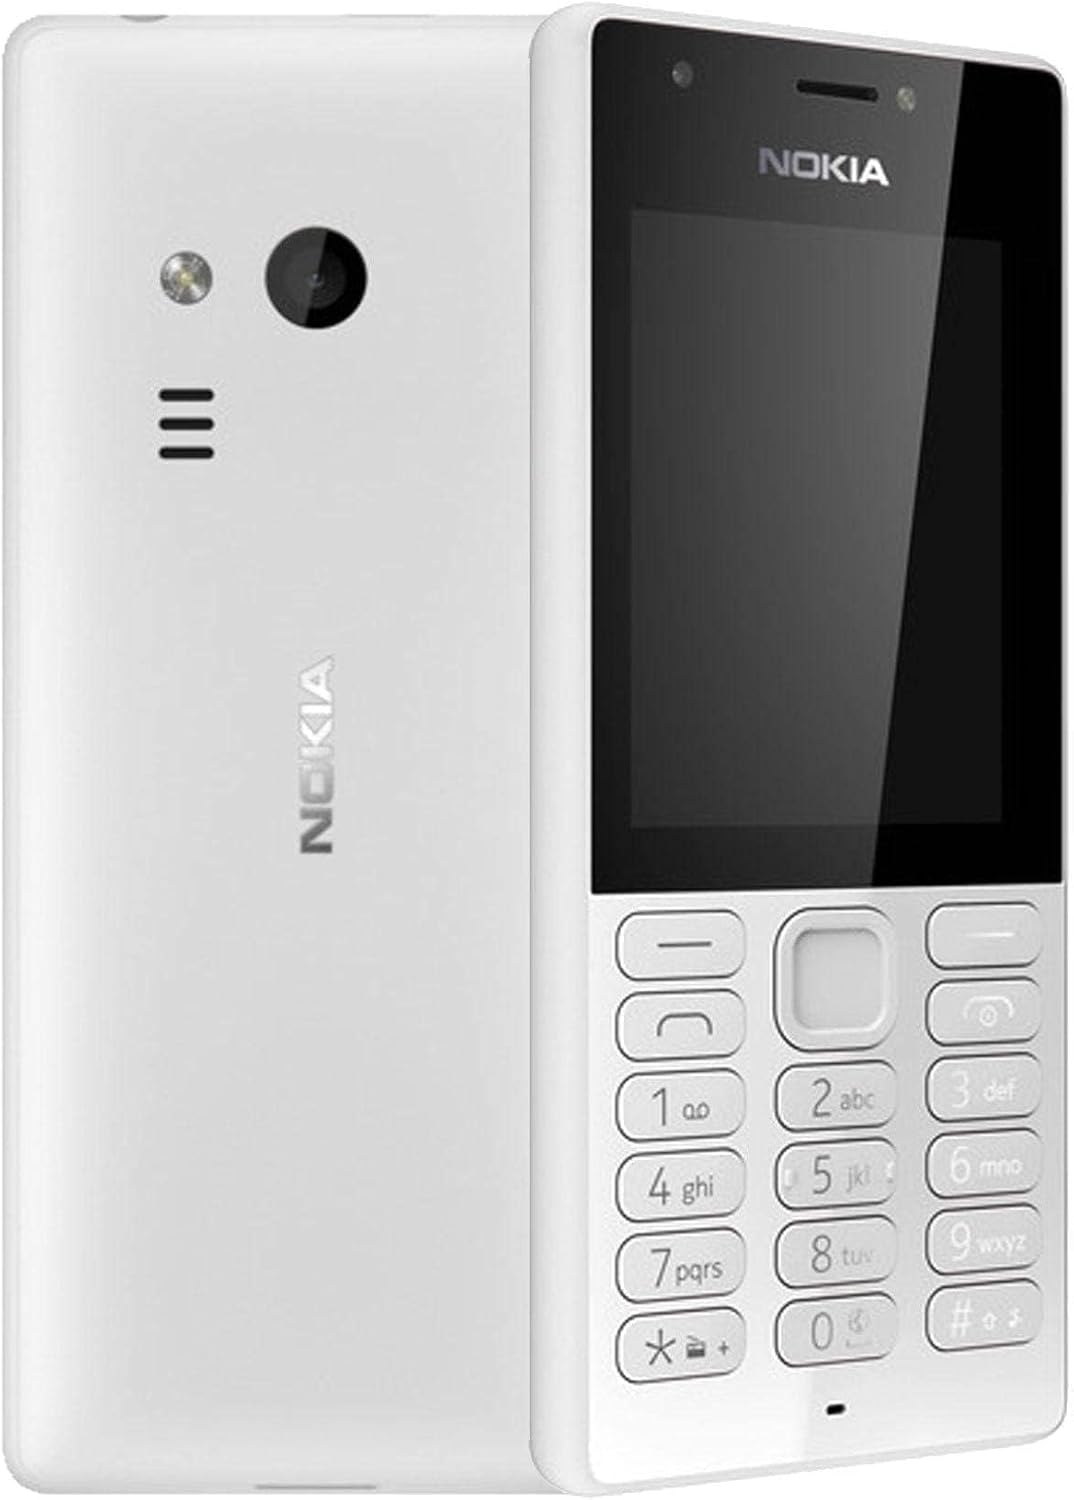
Rajah 3.1: Depan dan belakang view of the Nokia 216 Dual SIM mobile phone. The front shows the display, earpiece, and numeric keypad. The back features the rear camera, LED flash, and loudspeaker grille.

Rajah 3.2: Depan view of the Nokia 216 Dual SIM mobile phone. This image highlights the 2.4-inch display, the navigation keys, and the alphanumeric keypad for dialing and text input.

Rajah 3.3: belakang view of the Nokia 216 Dual SIM mobile phone. This view shows the rear VGA camera lens, the LED flash, and the Nokia branding.
Komponen Utama:
- paparan: 2.4-inch QVGA screen.
- Pad kekunci: Alphanumeric keypad for dialing and text entry, with navigation keys.
- Kamera Belakang: VGA camera with LED flash.
- Pembesar suara: For audio playback and hands-free calls.
- mikrofon: Untuk input suara semasa panggilan dan rakaman.
- Bicu Audio 3.5mm: Untuk fon kepala atau pembesar suara luaran.
- Port Pengecasan: Micro-USB port for charging and data transfer.
4. Persediaan
4.1. Insert SIM Card(s)
- Turn off the phone and disconnect any charger.
- Carefully remove the back cover by prying it open from the notch.
- Jika bateri sudah masuk, angkat ia keluar.
- Insert the SIM card(s) into the designated slot(s) with the gold contacts facing down. For dual SIM models, ensure both SIMs are correctly seated.
- If applicable, insert a microSD card into its slot for additional storage.
- Gantikan bateri.
- Align the back cover and press it firmly until it clicks into place.
4.2. Cas bateri
- Sambungkan penyesuai kuasa ke salur keluar dinding.
- Plug the micro-USB end of the cable into the phone's charging port.
- Penunjuk bateri pada skrin akan menunjukkan status pengecasan.
- Once fully charged, disconnect the charger from the phone and then from the wall outlet.
5. Arahan Operasi
5.1. Hidupkan/Mati Kuasa
- Untuk Menghidupkan: Tekan dan tahan kekunci kuasa (biasanya kekunci 'Tamatkan Panggilan' berwarna merah) sehingga telefon bergetar dan logo Nokia muncul.
- Untuk Mematikan: Press and hold the power key until the 'Power off' option appears on the screen, then select it.
5.2. Membuat Panggilan
- Dari skrin utama, masukkan nombor telefon menggunakan pad kekunci berangka.
- Press the green 'Call' key to initiate the call.
- To end a call, press the red 'End Call' key.
5.3. Sending Text Messages (SMS)
- Pergi ke Menu > Mesej > Buat mesej.
- Taip mesej anda menggunakan pad kekunci.
- Masukkan nombor telefon penerima atau pilih daripada kenalan.
- Pilih Hantar.
5.4. Menggunakan Kamera
- Pergi ke Menu > Kamera.
- Bingkaikan tangkapan anda menggunakan paparan.
- Press the center navigation key to take a photo.
6. Penyelenggaraan dan Penjagaan
To ensure the longevity and optimal performance of your Nokia 216, follow these care guidelines:
- Pastikan peranti kering: Kelembapan boleh merosakkan litar elektronik.
- Use original accessories: Only use batteries, chargers, and accessories approved by Nokia.
- Bersihkan dengan lembut: Use a soft, clean, dry cloth to clean the surface of the device.
- Elakkan suhu yang melampau: Do not expose your device to very high or low temperatures.
- Tangani dengan berhati-hati: Elakkan daripada menjatuhkan atau meletakkan peranti kepada kesan yang kuat.
7. Penyelesaian masalah
If you encounter issues with your Nokia 216, try these common troubleshooting steps:
| Masalah | Penyelesaian |
|---|---|
| Telefon tidak dihidupkan | Pastikan bateri telah dicas. Sambungkan pengecas dan cuba lagi. Periksa sama ada bateri telah dimasukkan dengan betul. |
| Tiada isyarat rangkaian | Periksa sama ada kad SIM telah dimasukkan dengan betul. Beralih ke kawasan yang mempunyai liputan rangkaian yang lebih baik. Mulakan semula telefon. |
| Bateri tidak dicas | Pastikan pengecas disambungkan dengan betul ke telefon dan soket kuasa. Cuba soket kuasa atau pengecas yang berbeza. Periksa sebarang kerosakan pada port pengecasan. |
| Tidak boleh membuat atau menerima panggilan | Check network signal. Ensure your SIM card is active and has sufficient credit/plan. Verify that call barring is not enabled. |
8. Spesifikasi
| Ciri | Perincian |
|---|---|
| Jenama | Nokia |
| Nama Model | RM-1187 |
| Sistem Operasi | Symbian 9.1 (Series 30) |
| Saiz Skrin | 2.4 inci |
| Resolusi Skrin | 240 x 320 piksel |
| Kadar Segar Semula | 90 Hz |
| Saiz RAM yang Dipasang | 256 MB |
| Kapasiti Penyimpanan Memori | 3.9 GB (Internal, likely for system/apps, expandable via microSD) |
| Model CPU | A10 |
| Teknologi Selular | 2G |
| Teknologi Komunikasi Tanpa Wayar | Selular |
| Teknologi Ketersambungan | USB, Bluetooth, Wi-Fi |
| GPS | A-GPS |
| Primary Device User Interface | Buttons, Numeric Keypad, Microphone |
| Ciri Kamera Lain | Rear Camera (VGA) |
| Bicu Audio | 3.5 mm |
| Faktor Bentuk | Klasik |
| warna | Kelabu |
| Masa Berbual | Sehingga 18 jam |
| Berat Barang | 339 gram |
| Dimensi Pakej | 13.4 x 12.6 x 3.6 cm |
| Apa yang ada dalam Kotak | Penyesuai kuasa, kabel USB |
9. Waranti dan Sokongan
For warranty information, please refer to the warranty card included in your product package or visit the official Nokia website. If you require further assistance or technical support, please contact Nokia customer service through their official channels.
Simpan resit pembelian anda sebagai bukti pembelian untuk tuntutan waranti.


