1. Pengenalan
This manual provides detailed instructions for the installation, operation, and maintenance of your Nilight ZH409 20-Inch 420W Triple Row LED Light Bar. Please read this manual thoroughly before installation and use to ensure proper function and safety.
2. Maklumat Keselamatan
- Sentiasa putuskan sambungan bateri kenderaan sebelum melakukan sebarang kerja elektrik.
- Pastikan semua sambungan pendawaian selamat dan terlindung dengan betul untuk mengelakkan litar pintas.
- Mount the light bar securely to prevent it from dislodging during vehicle operation.
- Do not look directly into the light bar when it is illuminated, as it can cause eye strain or damage.
- Verify local regulations regarding auxiliary lighting before use on public roads.
3. Kandungan Pakej
Sila semak bungkusan untuk memastikan semua barang ada dan tidak rosak:
- 1 x Nilight ZH409 20-Inch LED Light Bar
- 1 x Heavy Duty Off-Road Wiring Harness
- Pemasangan Pendakap dan Perkakasan

Image: Contents of the Nilight ZH409 package, including the LED light bar, wiring harness, and mounting accessories.
4. Spesifikasi
| Ciri | Spesifikasi |
|---|---|
| Model | ZH409 |
| Dimensi (L x W x H) | 20"L x 3"W x 3"H |
| Wattage | 420 Watt |
| Kecerahan | 42000 Lumen |
| Voltage | 30 Volt |
| Kadar Kalis Air | IP67 |
| bahan | Aluminum Alloy Housing, PC Lens |
| Corak Rasuk | Triple Row Flood Spot Combo |
| Jangka hayat | Lebih 30,000 jam |
Dimensi

Image: Detailed dimensions of the 20-inch LED light bar and its mounting components.
5. Persediaan dan Pemasangan
The Nilight ZH409 LED Light Bar comes with an adjustable mounting bracket and a heavy-duty wiring harness for straightforward installation.
5.1 Memasang Bar Lampu
- Identify a suitable mounting location on your vehicle that provides clear light projection and secure attachment points.
- Attach the adjustable mounting brackets to the light bar using the provided screws, washers, and nuts.
- Position the light bar in the desired location and mark the drilling points for the brackets.
- Drill pilot holes and securely fasten the light bar to the vehicle using appropriate hardware. The brackets allow for flexible adjustment of the light bar's angle.
Image: Illustration of the adjustable mounting bracket for flexible positioning.
5.2 Wiring the Light Bar
The included wiring harness simplifies the electrical connection. It typically includes a relay, an in-line fuse, and a toggle switch.
- Connect the light bar's power connector to the corresponding connector on the wiring harness.
- Connect the positive (+) wire from the harness to the positive terminal of your vehicle's battery.
- Connect the negative (-) wire from the harness to the negative terminal of your vehicle's battery or a suitable ground point on the chassis.
- Route the toggle switch to a convenient location within the vehicle's cabin. Ensure the wiring is secured and protected from heat, sharp edges, and moving parts.
- The in-line blade fuse provides overcurrent protection. Ensure it is correctly installed in its water-resistant holder.
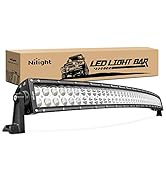
Image: General wiring diagram for the light bar and harness.

Image: The included toggle switch for controlling the light bar.
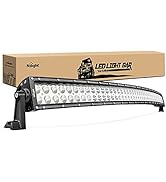
Image: The in-line blade fuse for circuit protection.
5.3 Panduan Video Pemasangan
Video: An official Nilight video demonstrating the installation process for the 20-inch LED light bar with wiring harness.
6. Arahan Operasi
Once properly installed, operate the Nilight ZH409 LED Light Bar using the installed toggle switch. Press the switch to turn the light bar ON or OFF.
6.1 Beam Pattern
The light bar features a triple row flood spot combo beam pattern, providing both wide area illumination (flood) and focused long-distance light (spot) for comprehensive visibility.
Image: Representation of the light bar's wide and focused beam pattern.
6.2 Brightness Demonstration
Video: An official Nilight video demonstrating the brightness and beam pattern of the LED light bar in various scenarios.
7. Penyelenggaraan
- Pembersihan: Regularly clean the lens with a soft cloth and mild soap to maintain optimal light output. Avoid abrasive cleaners that could scratch the lens.
- Pemeriksaan: Periodically check all mounting hardware and electrical connections for tightness and corrosion. Tighten any loose fasteners.
- Pendawaian: Inspect the wiring harness for any signs of wear, fraying, or damage. Replace damaged components immediately.
- Kalis air: The light bar has an IP67 waterproof rating. While designed for harsh conditions, avoid directing high-pressure water jets directly at the seals for extended periods.
8. Penyelesaian masalah
| Masalah | Kemungkinan Punca | Penyelesaian |
|---|---|---|
| Bar lampu tidak menyala | No power, blown fuse, loose connection, faulty switch. | Check battery connections, inspect the in-line fuse and replace if blown, ensure all wiring connections are secure, test the switch for functionality. |
| Light output is dim or flickers | Volum rendahtage, poor ground connection, damaged wiring. | Sahkan kenderaan voltage, ensure a clean and secure ground connection, inspect wiring for damage. |
| Kelembapan di dalam kanta | Meterai kompromi. | Hubungi sokongan pelanggan untuk mendapatkan bantuan. |
9. Waranti dan Sokongan
Bar Lampu LED Nilight ZH409 dilengkapi dengan a Waranti 2 tahun, as indicated in the product description. For warranty claims, technical support, or any inquiries, please contact Nilight customer service through their official channels or visit the Nilight Store on Amazon.