1. Arahan Keselamatan Penting
Before beginning any exercise program, consult with your physician. This is especially important for individuals over the age of 35 or those with pre-existing health conditions. Read all instructions carefully before using the exercise bike.
- Jauhkan kanak-kanak dan haiwan peliharaan dari peralatan.
- Place the exercise bike on a flat, stable surface. Use a protective mat if necessary.
- Pastikan semua bolt dan nat diketatkan dengan selamat sebelum setiap penggunaan.
- Pakai pakaian dan kasut senaman yang sesuai. Elakkan pakaian longgar yang boleh tersekat pada bahagian yang bergerak.
- Jangan melebihi berat pengguna maksimum 120 kg.
- Jika anda mengalami pening, loya, sakit dada, atau sebarang gejala abnormal lain, hentikan senaman anda dengan segera dan dapatkan nasihat doktor.
- Perform regular maintenance as described in this manual.
2. Kandungan Pakej
Carefully unpack all components and verify that you have received all parts listed below. If any parts are missing or damaged, contact customer support.
- Kerangka Utama
- Penstabil Depan dan Belakang
- Pedal (Kiri dan Kanan)
- Pos Tempat Duduk dan Tempat Duduk
- Tiang Hendal dan Bar Hendal
- Monitor/Display Console
- Water Bottle Holder and Water Bottle
- Assembly Hardware (bolts, washers, nuts, tools)
- Manual Pengguna
3. Arahan Perhimpunan
Follow these steps to assemble your Physionics Indoor Exercise Bike. It is recommended to have two people for assembly.
- Pasang Penstabil: Lekatkan penstabil hadapan dan belakang pada rangka utama menggunakan bolt dan pencuci yang disediakan. Pastikan ia dilekatkan dengan kukuh untuk kestabilan.
- Pasang Pedal: Identify the left (L) and right (R) pedals. The left pedal screws counter-clockwise, and the right pedal screws clockwise. Ensure they are fully tightened to prevent stripping.
- Mount Seat and Handlebars: Insert the seat post into the main frame and secure it at your desired height. Attach the seat to the seat post. Similarly, insert the handlebar post and attach the handlebars.
- Sambung Monitor: Connect the sensor wires from the main frame to the monitor console. Mount the monitor onto the handlebar post. Insert batteries (not included) into the monitor.
- Lampirkan Aksesori: Install the water bottle holder and any other accessories.

Figure 3.1: Fully assembled Physionics Indoor Exercise Bike. This image shows the complete structure including the frame, seat, handlebars, pedals, and display console.
4. Arahan Operasi
4.1. Using the Display Console
The display console tracks your workout data. Insert two AAA batteries (not supplied) into the battery compartment on the back of the monitor.

Figure 4.1: Close-up of the display console showing various metrics. The display shows Time, Speed, Calories, Distance, Odometer, and Pulse.
- Butang MOD: Press to cycle through different display functions (Time, Speed, Distance, Calories, Odometer, Pulse). Press and hold to reset values.
- IMBAS: Mengitar semua fungsi secara automatik setiap beberapa saat.
- MASA: Memaparkan tempoh senaman anda.
- LAJU: Menunjukkan kelajuan semasa anda.
- JARAK: Displays the distance covered during your current workout.
- KALORI: Anggarkan kalori yang dibakar semasa senaman anda.
- ODOMETER: Memaparkan jumlah jarak terkumpul.
- nadi: Shows your heart rate when holding the pulse sensors on the handlebars.
4.2. Melaraskan Rintangan
The exercise bike features an adjustable resistance system to vary your workout intensity.

Figure 4.2: Diagram illustrating the resistance and brake system. Turning the red knob controls the resistance level, while pressing it activates the emergency brake.
- Meningkatkan Rintangan: Turn the resistance knob clockwise to increase the workout intensity.
- Kurangkan Rintangan: Turn the resistance knob counter-clockwise to decrease the workout intensity.
- Brek Kecemasan: Tekan tombol rintangan dengan kuat untuk mengaktifkan brek kecemasan dan hentikan roda tenaga dengan segera.
4.3. Ciri-ciri Khas

Gambar 4.3: Lebihview of additional features including the phone holder, water bottle, and foot straps. These features enhance user convenience during workouts.
- Pemegang Telefon: A convenient holder is integrated into the handlebars to secure your smartphone or tablet during your workout.
- Pemegang Botol Air: A dedicated holder keeps your water bottle within easy reach for hydration.
- Tali Kaki: Adjustable foot straps on the pedals ensure your feet remain securely in place during intense cycling.
5. Pelarasan
Pelarasan tempat duduk dan hendal yang betul adalah penting untuk keselesaan dan senaman yang berkesan.

Figure 5.1: Illustration showing the adjustable seat and handlebars. The seat can be adjusted horizontally and vertically, and the handlebars vertically.
- Ketinggian tempat duduk: Longgarkan tombol pelaras pada tiang tempat duduk. Naikkan atau turunkan tempat duduk sehingga kaki anda sedikit bengkok pada lutut apabila pedal berada pada titik terendah. Ketatkan tombol dengan kukuh.
- Seat Horizontal Position: Loosen the adjustment knob under the seat. Slide the seat forward or backward to find a comfortable position relative to the handlebars. Tighten the knob securely.
- Ketinggian Hendal: Loosen the adjustment knob on the handlebar post. Raise or lower the handlebars to a comfortable height that allows for a relaxed upper body posture. Tighten the knob securely.
6. Penyelenggaraan
Penyelenggaraan berkala memastikan ketahanan dan operasi basikal senaman anda yang selamat.
- Pembersihan: Lap basikal dengan iklanamp kain selepas setiap penggunaan untuk mengeluarkan peluh dan habuk. Elakkan pembersih yang kasar.
- Semak Sambungan: Periodically check all bolts, nuts, and screws to ensure they are tight. Tighten any loose connections.
- Pelinciran: Apply a small amount of silicone-based lubricant to moving parts (e.g., pedal axles, resistance mechanism) if you notice squeaking or stiffness.
- Storan: Simpan basikal di tempat yang kering dan sejuk jauh dari cahaya matahari langsung dan suhu yang melampau.

Figure 6.1: Image showing the transport wheels located at the front stabilizer. These wheels allow for easy relocation of the exercise bike.
To move the bike, tilt it forward onto the transport wheels and roll it to the desired location. Ensure the area is clear before moving.
7. Penyelesaian masalah
| Masalah | Kemungkinan Punca | Penyelesaian |
|---|---|---|
| Paparan tidak berfungsi | Bateri mati, sambungan longgar | Replace batteries, check monitor cable connection. |
| Bunyi berdecit semasa digunakan | Loose parts, lack of lubrication | Check and tighten all bolts. Apply lubricant to moving parts. |
| Rintangan tidak berubah | Resistance knob mechanism issue | Ensure the resistance knob is properly engaged. Contact customer support if the issue persists. |
| Bike feels unstable | Uneven surface, loose stabilizers | Place on a flat surface. Check and tighten stabilizer bolts. |
8. Spesifikasi
- Jenama: fizik
- Nama Model: Vélo d'Appartement
- Dimensi (L x W x H): Kira-kira 105 cm x 46 cm x 100 cm
- Berat Barang: 27.65 Kilogram
- Berat Pengguna Maksimum: 120 Kilogram
- Berat roda tenaga: 10 kg
- Bahan: Steel frame; Other: ABS plastic, PU leather, and foam
- Mekanisme Rintangan: Udara
- Sumber Kuasa (Paparan): Battery powered (batteries not included)
- warna: Hitam, Merah

Figure 8.1: Diagram showing the dimensions of the exercise bike (105cm length, 47cm width, 100cm height) and highlighting the steel frame construction.
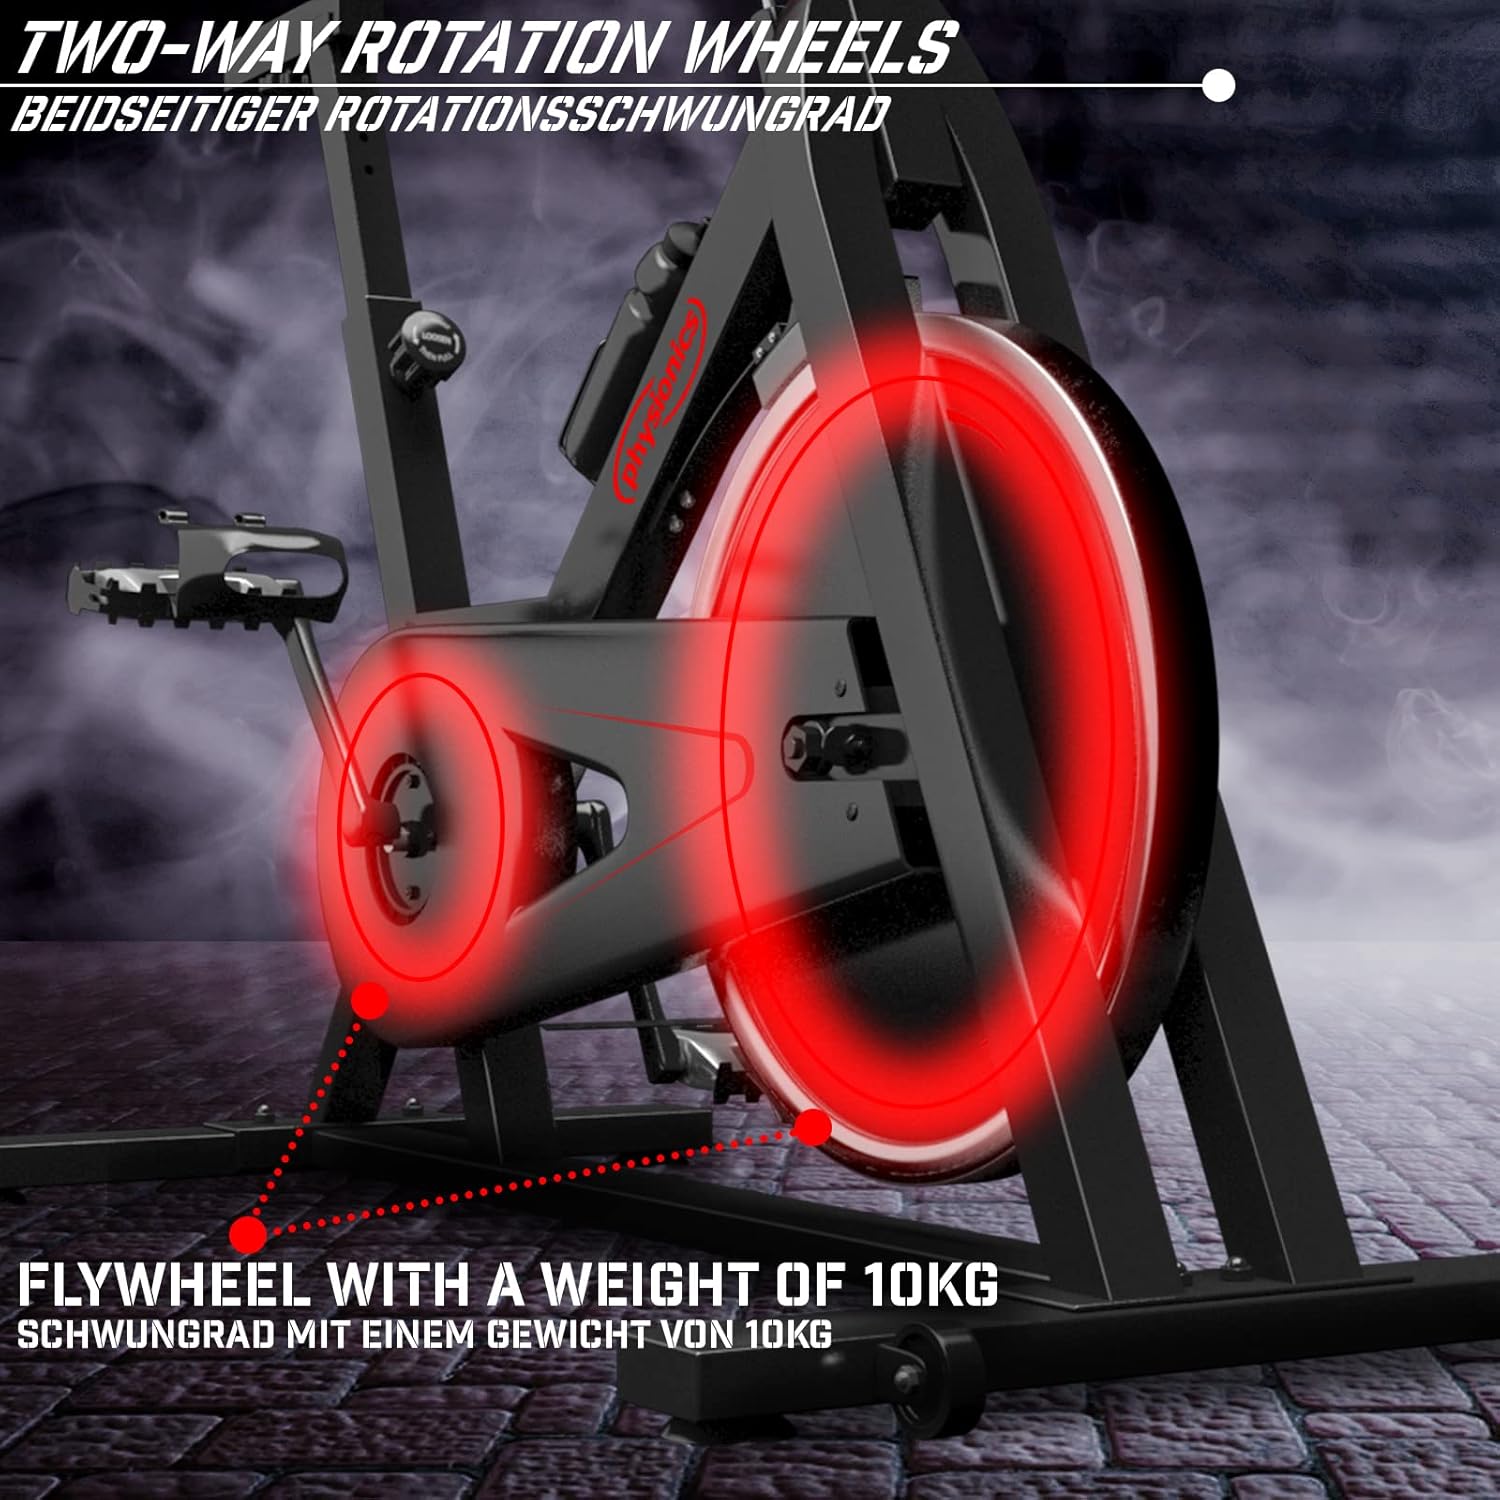
Figure 8.2: Close-up of the 10kg flywheel, indicating its two-way rotation capability.
9. Waranti dan Sokongan
For warranty information or technical support, please refer to the documentation included with your purchase or contact Physionics customer service. Keep your proof of purchase for warranty claims.
For further assistance, please visit the official Physionics webtapak atau hubungi saluran sokongan pelanggan mereka.


