pengenalan
This manual provides detailed instructions for the proper installation and care of your Puig Rim Strips. These rim strips are designed to enhance the aesthetic appeal of your BMW R1200GS Adventure (2014-2018) or R1250GS Adventure (2018-2020) motorcycle wheels. Please read all instructions carefully before beginning the installation process to ensure a successful application and long-lasting results.
Maklumat Keselamatan
Always prioritize safety when working on your motorcycle.
- Pastikan motosikal stabil dan disokong dengan selamat sebelum memulakan sebarang kerja.
- Bekerja dalam persekitaran yang terang dan bersih.
- Keep all tools and materials organized to prevent accidents.
- If you are unsure about any step, consult a professional motorcycle mechanic.
- Jauhkan produk daripada kanak-kanak.
Apa yang ada dalam Kotak
Your Puig Rim Strips package should contain the following components:
- Puig Rim Strips (sufficient quantity for both wheels)
- Application instructions (this manual)
Note: Additional tools required for installation (not included) are listed in the "Preparation" section.
Pemasangan
1. Persediaan
Proper preparation is crucial for successful adhesion and a clean finish.
- Bersihkan Roda: Thoroughly clean the rim surface where the strips will be applied. Use a degreaser or isopropyl alcohol to remove all dirt, grease, wax, and any other contaminants. Ensure the surface is completely dry before proceeding.
- Alat Kumpul: You will need a clean cloth, a spray bottle with water (optional, for wet application), and a squeegee or soft card (e.g., credit card) for smoothing.
- Persekitaran Kerja: Perform the installation in a dust-free environment with a temperature between 15°C and 25°C (59°F and 77°F).
2. Langkah Permohonan
Follow these steps carefully for optimal results. It is recommended to apply the strips one section at a time.
- Kedudukan: Carefully peel a small section of the backing paper from one end of a rim strip. Align the strip with the desired position on the rim.
- Initial Adhesion: Press the initial section firmly onto the rim.
- Gradual Application: Slowly peel off more of the backing paper while simultaneously pressing the strip onto the rim. Use your thumb or a squeegee to smooth out the strip, working from the center outwards to avoid air bubbles.
- Keluarkan Buih Udara: If air bubbles appear, gently lift the strip back to the bubble and reapply, smoothing it down. For stubborn bubbles, a small pin can be used to prick the bubble, then press the air out.
- Repeat for all sections: Continue this process around the entire rim until all strips are applied. Ensure there are no overlaps or gaps between sections.
- Final Press: Once all strips are in place, firmly press along the entire length of each strip to ensure maximum adhesion. Pay special attention to the edges.

Imej 1: Cthample of Puig Rim Strips correctly applied to a motorcycle wheel. Note the clean alignment and smooth finish.
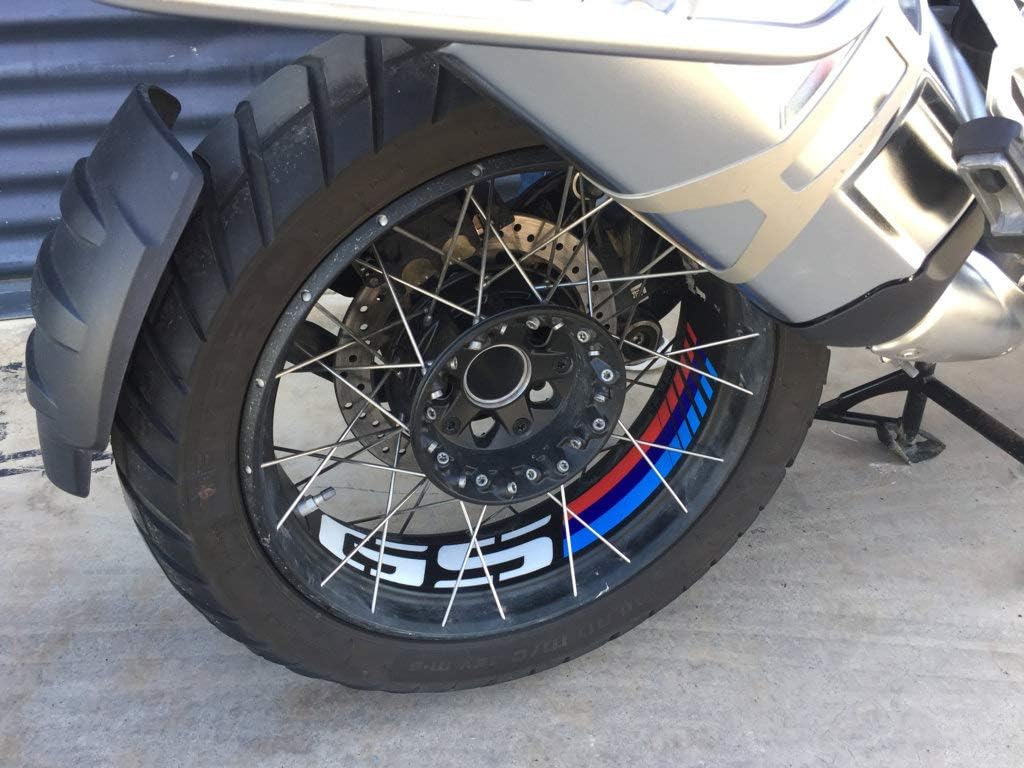
Imej 2: Terperinci view of the Puig Rim Strips on a motorcycle wheel, demonstrating the product's appearance after installation.
Penjagaan Selepas Pemasangan
After installation, allow the adhesive to cure properly before exposing the motorcycle to harsh conditions or washing.
- Masa Pengawetan: Avoid washing the wheels or exposing them to heavy rain for at least 24-48 hours after application to allow the adhesive to fully bond.
- Pemeriksaan Awal: Periodically check the rim strips for any signs of lifting or damage, especially after the first few rides.
Penyelenggaraan dan Pembersihan
To maintain the appearance and longevity of your Puig Rim Strips, follow these cleaning guidelines:
- Pembersihan Lembut: Clean the rim strips with mild soap and water using a soft cloth or sponge.
- Elakkan Bahan Kimia Keras: Do not use abrasive cleaners, solvents, or high-pressure washers directly on the rim strips, as this can damage the material or adhesive.
- Pengeringan: Pat dry with a clean, soft cloth to prevent water spots.
Menyelesaikan masalah
Here are solutions to common issues encountered during or after application:
- Gelembung Udara: If small air bubbles are present after application, they may dissipate over a few days, especially in warm weather. For larger or persistent bubbles, gently prick them with a fine needle and smooth the area with your finger or a squeegee.
- Edges Lifting: If edges begin to lift, ensure the surface was thoroughly cleaned and dry before application. Re-press the lifting edge firmly. If the issue persists, the strip may need to be replaced.
- Lekatan yang lemah: This is usually due to inadequate surface preparation (e.g., grease, dirt, or moisture). Ensure the rim is perfectly clean and dry before applying.
Spesifikasi
| Jenama | puig |
| Nombor Model | 20151N |
| Compatible Motorcycles | BMW R1200GS ADV. (2014-2018), BMW R1250GS ADV. (2018-2020) |
| Berat Barang | 2.82 auns |
| Ciri Khas | Waterproof (Wasserdicht) |
| Nombor Bahagian Pengilang | 20151N |
Maklumat Waranti
For detailed warranty information regarding your Puig Rim Strips, please refer to the official Puig weblaman web atau hubungi khidmat pelanggan mereka secara langsung. Terma dan syarat jaminan mungkin berbeza-beza.
Sokongan Pelanggan
If you have any questions, require assistance with installation, or need to report a product issue, please contact Puig customer support through their official webtapak atau pengedar sah.


