1. Pengenalan
This manual provides essential instructions for the safe and effective use of your Benson Amps PREAMP Praamp Pedal. Please read this manual thoroughly before operating the device and retain it for future reference.
The Benson Amps PREAMP pedal is a versatile FET-based preamp, overdrive, boost, and fuzz pedal designed to deliver a wide range of tones, from clean enhancement to saturated drive. It features a 2-band EQ for tone shaping.
2. Maklumat Keselamatan
- Bekalan Kuasa: Use only a 9-volt DC power supply with a center-negative polarity. Incorrect power supplies can damage the unit and void the warranty.
- Persekitaran: Do not expose the pedal to extreme temperatures, humidity, water, or direct sunlight.
- Pembersihan: Bersihkan hanya dengan kain kering dan lembut. Jangan gunakan pembersih cecair.
- Servis: Jangan cuba servis unit sendiri. Rujuk semua servis kepada kakitangan perkhidmatan yang berkelayakan.
- penempatan: Place the pedal on a stable surface to prevent accidental falls.
3. Kandungan Pakej
Sahkan bahawa pakej anda mengandungi item berikut:
- Benson Amps PREAMP Praamp Mengayuh
- Manual Pengguna (dokumen ini)
- (Power supply not typically included, sold separately)
4. Kawalan dan Ciri
The Benson Amps PREAMP pedal features several controls to shape your tone:
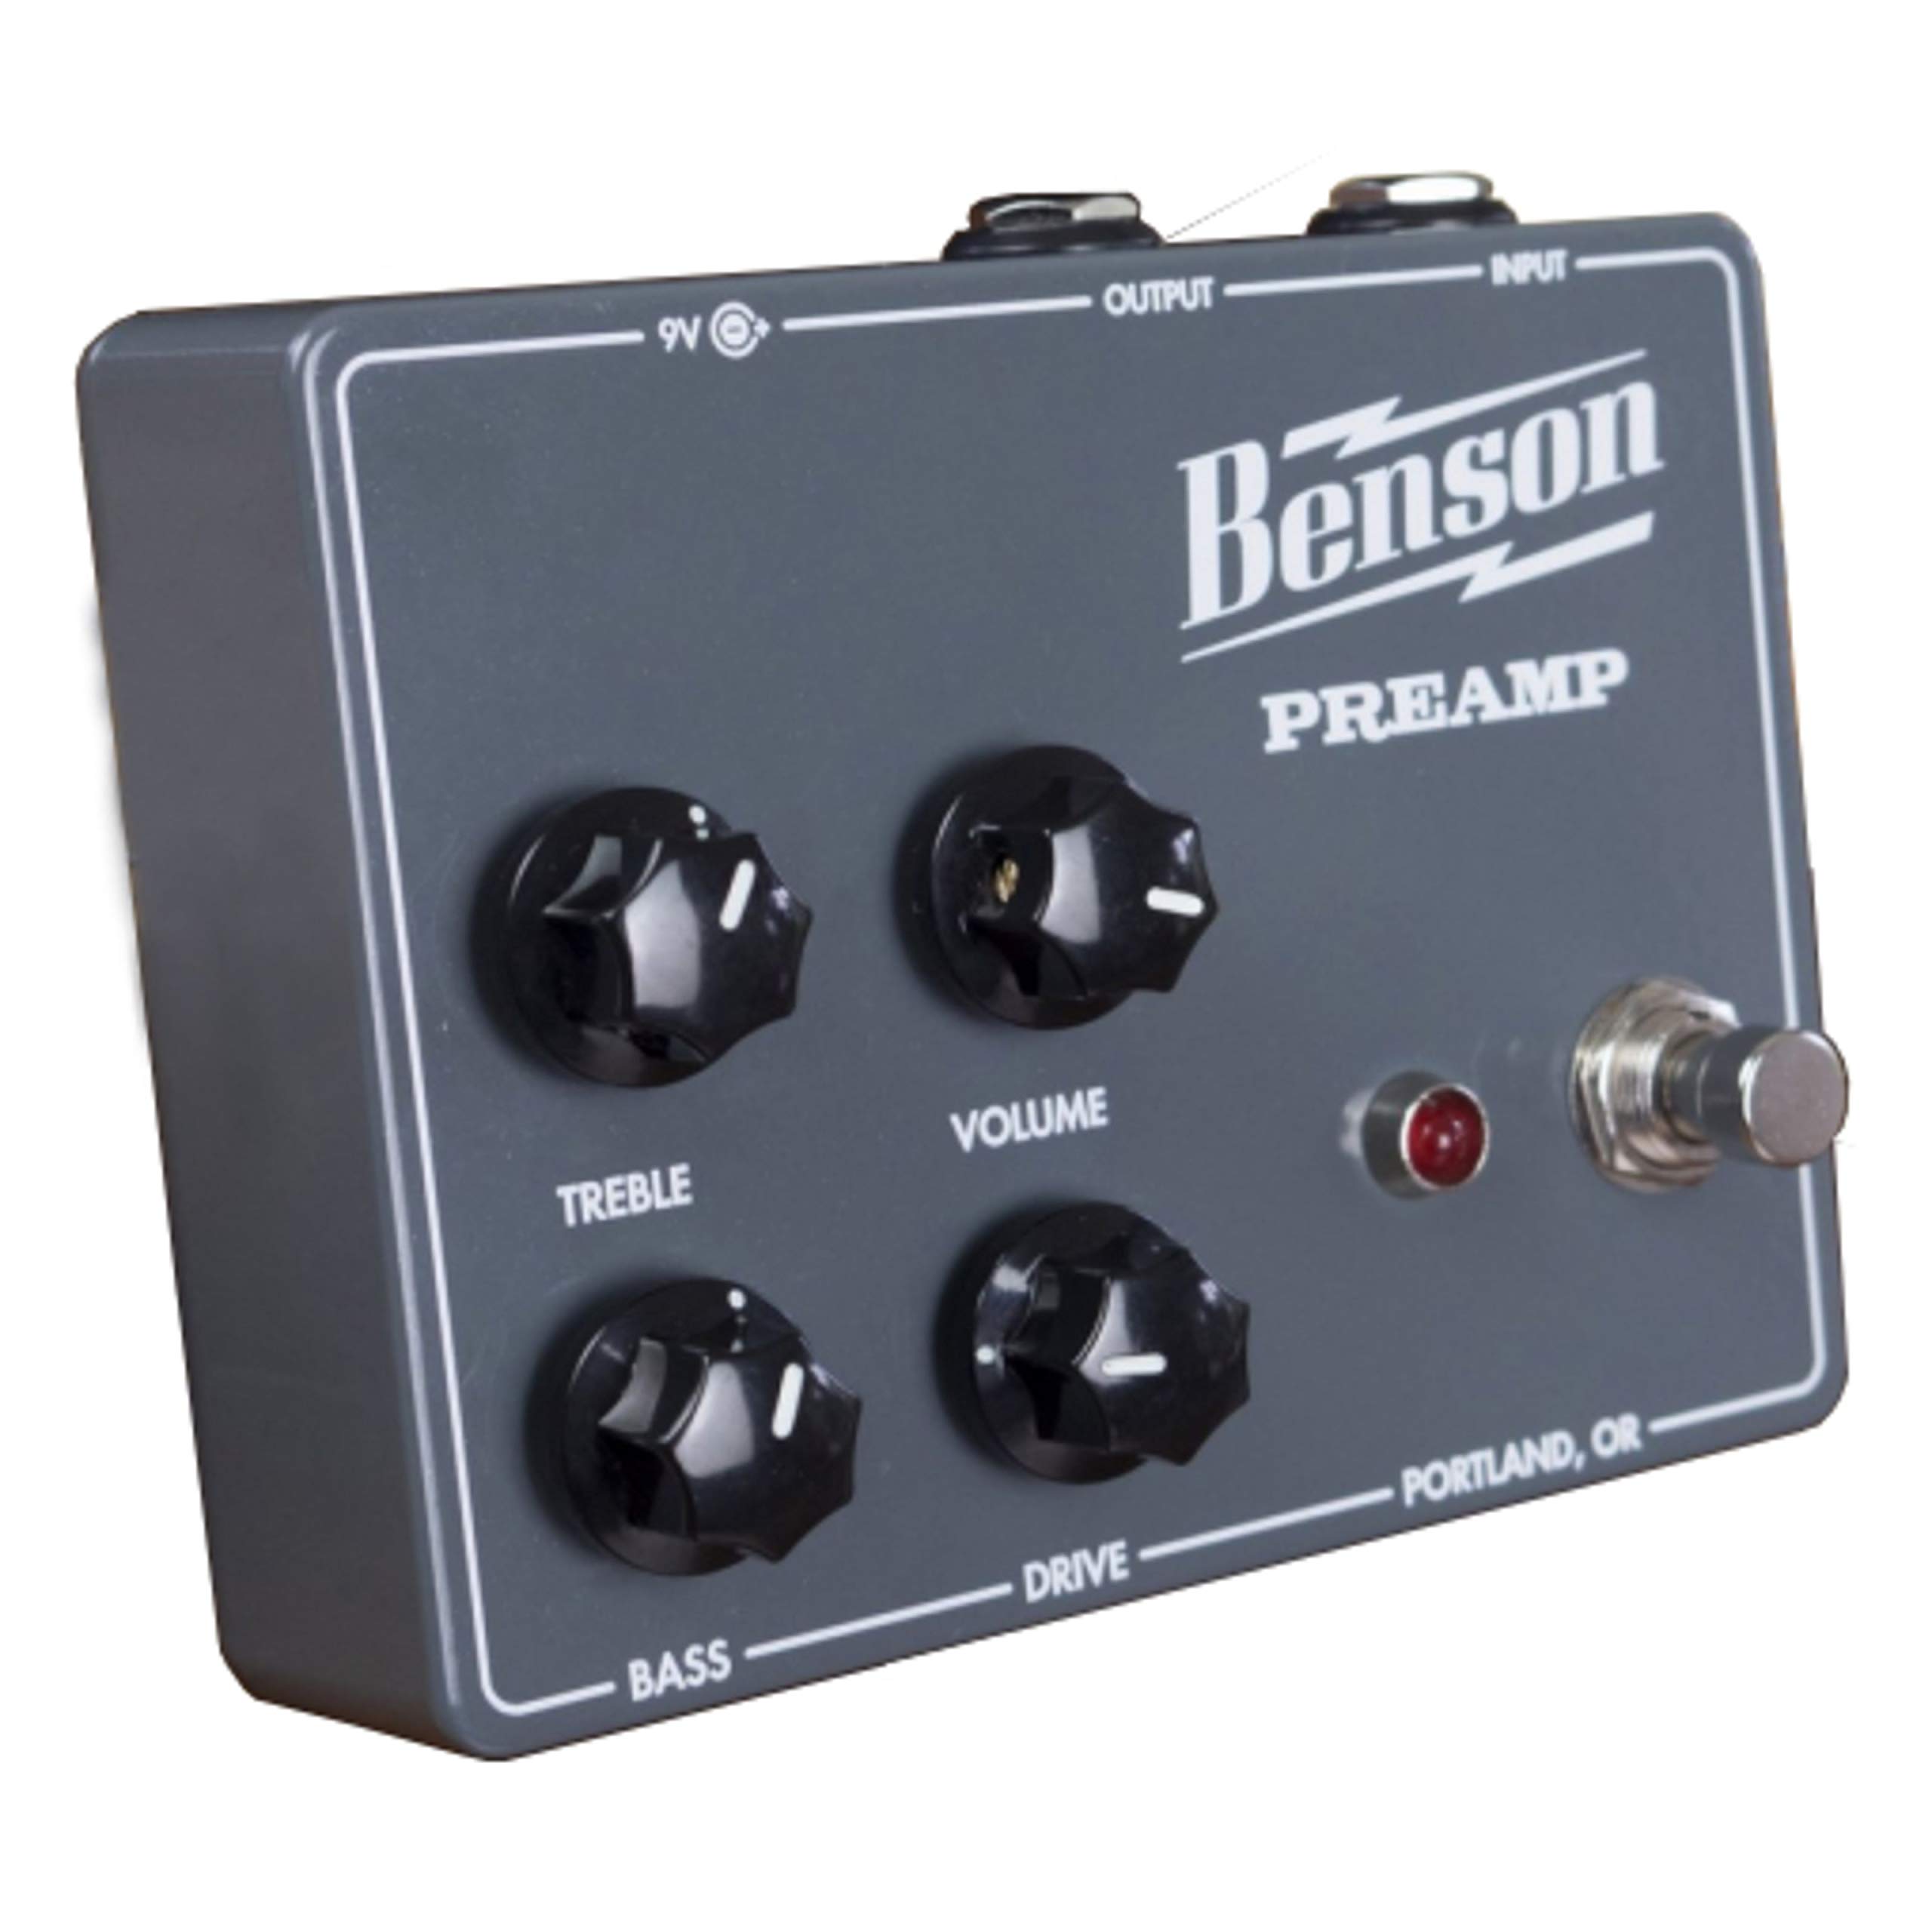
Rajah 1: Depan view of the Benson Amps PREAMP Praamp Pedal, showing the control layout.
- Dapatkan Tombol: Mengawal jumlah praamp gain, ranging from clean boost to saturated overdrive and fuzz.
- Tombol Kelantangan: Melaraskan tahap output keseluruhan pedal.
- Tombol Treble: A 2-band EQ control for adjusting high frequencies.
- Tombol Bes: A 2-band EQ control for adjusting low frequencies.
- Suis kaki: Melibatkan atau memintas kesan.
- Jack Input: Connect your instrument (guitar, bass, etc.) here.
- Jack Output: Sambung ke anda amppenunjuk atau pedal seterusnya dalam rantai isyarat.
- Input DC: For connecting a 9V DC center-negative power supply.
5. Persediaan
- Sambungan Kuasa: Connect a 9V DC center-negative power supply (not included) to the DC Input jack on the pedal.
- Sambungan Instrumen: Connect your instrument to the Input Jack of the pedal using a standard 1/4-inch instrument cable.
- AmpSambungan penguat: Connect the Output Jack of the pedal to your amplifier's input or the next pedal in your signal chain using a standard 1/4-inch instrument cable.
- Tetapan Awal: Before powering on, set all knobs (Gain, Volume, Treble, Bass) to their middle positions (12 o'clock) for a neutral starting point.
- Hidupkan kuasa: Pastikan anda amplifier is on and at a low volume. Then, power on the pedal.

Rajah 2: Sisi view of the Benson Amps PREAMP Praamp Pedal, illustrating input and output connections.
6. Mengendalikan Pedal
6.1 Operasi Asas
- Engaging/Bypassing: Press the footswitch to toggle the effect on or off. When the effect is on, the LED indicator will illuminate.
- Pelarasan Kelantangan: Use the Volume knob to match the output level of the pedal to your amplifier's input, or to boost your signal.
6.2 Pembentukan Nada
- Kawalan Keuntungan:
- Low Gain (7-10 o'clock): Provides a clean boost or subtle tube-like enhancement. Ideal for pushing an already overdriven amp or adding clarity.
- Mid Gain (10-2 o'clock): Introduces breakup, offering mild to moderate overdrive tones. Suitable for classic rock and blues.
- High Gain (2-5 o'clock): Delivers saturated distortion and fuzz-like textures. Experiment for heavier tones.
- EQ Controls (Treble & Bass): Adjust these knobs to fine-tune the frequency response.
- Tiga kali ganda: Increase for brighter tones, decrease for warmer, darker sounds.
- Bes: Increase for fuller, thicker tones, decrease to tighten up the low end.
6.3 Using with Different Amppenghidup
PREAMP pedal is designed to interact dynamically with your amplifier. For best results, experiment with its placement in your signal chain and how it drives your amp's input. It can be used as a standalone overdrive/fuzz or as a preamp to drive the power section of an amplifier, potentially bypassing the amp's own preamp via an effects loop return.
7. Penyelenggaraan
- Pembersihan: Wipe the pedal with a soft, dry cloth to remove dust and fingerprints. Do not use abrasive cleaners or solvents.
- Storan: When not in use for extended periods, store the pedal in a cool, dry place away from direct sunlight.
- Pemeriksaan Kabel: Periodically check all cables for signs of wear or damage. Replace faulty cables immediately.
8. Penyelesaian masalah
| Masalah | Kemungkinan Punca | Penyelesaian |
|---|---|---|
| Tiada bunyi apabila pedal ditekan. |
|
|
| Bunyi lemah atau herot. |
|
|
| Bunyi bising atau dengungan yang berlebihan. |
|
|
9. Spesifikasi
| Ciri | Perincian |
|---|---|
| Model | PRAAMP |
| Jenama | Nada penuh |
| Berat Barang | 12.6 auns |
| Dimensi Produk | 4.5 x 3.5 x 2 inci |
| Sumber Kuasa | Battery Powered (9V DC, center-negative adapter recommended) |
| Voltage | 9 Volt |
| Output Wattage | 30 Watts (referring to the amp it emulates, not the pedal's output) |
| Jenis Bahan | Logam, Plastik |
| Format Isyarat | Analog |
| Jenis Penyambung | Bicu 6.35mm |
| Peranti Serasi | Gitar |
10. Waranti dan Sokongan
Untuk maklumat waranti dan sokongan teknikal, sila rujuk kepada pegawai pengilang webtapak atau hubungi bahagian perkhidmatan pelanggan mereka. Simpan resit pembelian anda sebagai bukti pembelian.
Manufacturer: Fulltone
Model: PREAMP


