pengenalan
This manual provides detailed instructions for the installation, operation, and maintenance of your Weiser Powerbolt 1 Electronic Deadbolt. Please read these instructions thoroughly before installation and use to ensure proper function and security.

Imej: Bahagian Luar view of the Weiser Powerbolt 1 Electronic Deadbolt, showcasing the keypad and satin chrome finish.
Kandungan Pakej
Sahkan bahawa semua komponen hadir sebelum memulakan pemasangan:
- Deadbolt Exterior Assembly
- Deadbolt Interior Assembly
- Penutup Dalaman
- selak
- Pukulan Pukulan
- Plat Pemasangan
- Screws (various sizes for installation)
- Bahagian ekor
- Kekunci (2)
- Alat Belajar SmartKey
Spesifikasi
| Ciri | Perincian |
|---|---|
| Nombor Model | 9GED13000-002 |
| Selesai | Satin Chrome |
| bahan | logam |
| Sumber Kuasa | 4 Bateri AA (tidak termasuk) |
| Kuasa Sandaran | Terminal 9V |
| Kod Akses | Up to 4 user codes (4-8 digits each) |
| Ketebalan Pintu | 1 3/8" - 1 3/4" (35mm - 44mm) |
| Lubang Bor | 2 1/8" (54mm) |
| Mekanisme Mengunci | Deadbolt Bermotor |
| Ciri Khas | Keyless Entry, One-Touch Locking, 1-Minute Lockout, Low Battery Notification |
Pemasangan
The Weiser Powerbolt 1 is designed for easy installation with basic tools. A screwdriver is typically the only tool required.
- Sediakan Pintu: Ensure your door meets the specifications for bore hole (2 1/8") and thickness (1 3/8" - 1 3/4").
- Pasang Selak: Insert the latch into the door edge. Ensure the correct backset is selected (2-3/8" or 2-3/4"). Secure with screws.
- Pasang Perhimpunan Luaran: Route the cable from the exterior keypad through the door. Position the exterior assembly flush against the door.
- Pasang Plat Pemasangan: Secure the mounting plate to the door using the provided screws, ensuring it aligns with the exterior assembly.
- Sambungkan Kabel dan Pasang Pemasangan Dalaman: Connect the cable from the exterior assembly to the interior assembly. Mount the interior assembly onto the mounting plate.
- Pasang Bateri: Insert 4 AA batteries into the interior assembly's battery compartment.
- Lakukan Proses Penyerahan Pintu: This step is crucial for the lock to learn the orientation of your door. Follow the specific instructions in the included quick start guide for your model.
- Install Interior Cover: Pasang penutup dalaman untuk melengkapkan pemasangan.

Image: The Weiser Powerbolt 1 Electronic Deadbolt exterior unit installed on a white door, demonstrating its appearance.
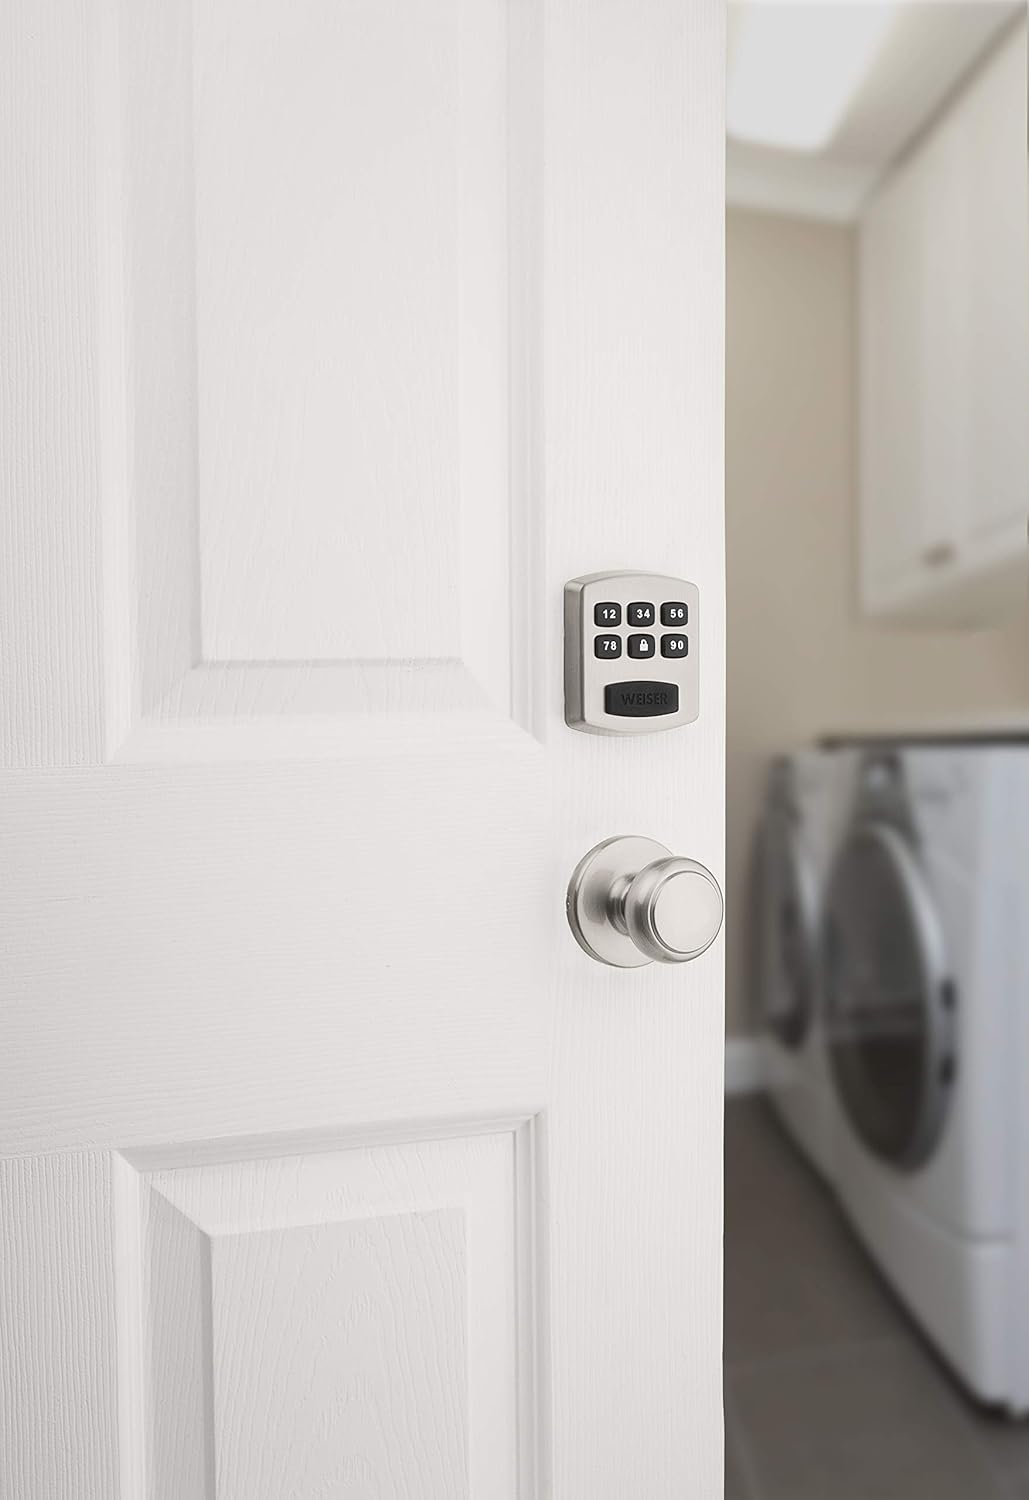
Image: The interior view of a door with the Weiser Powerbolt 1 Electronic Deadbolt's interior unit and a standard door knob.
Arahan Operasi
Pad Kekunci Lebihview
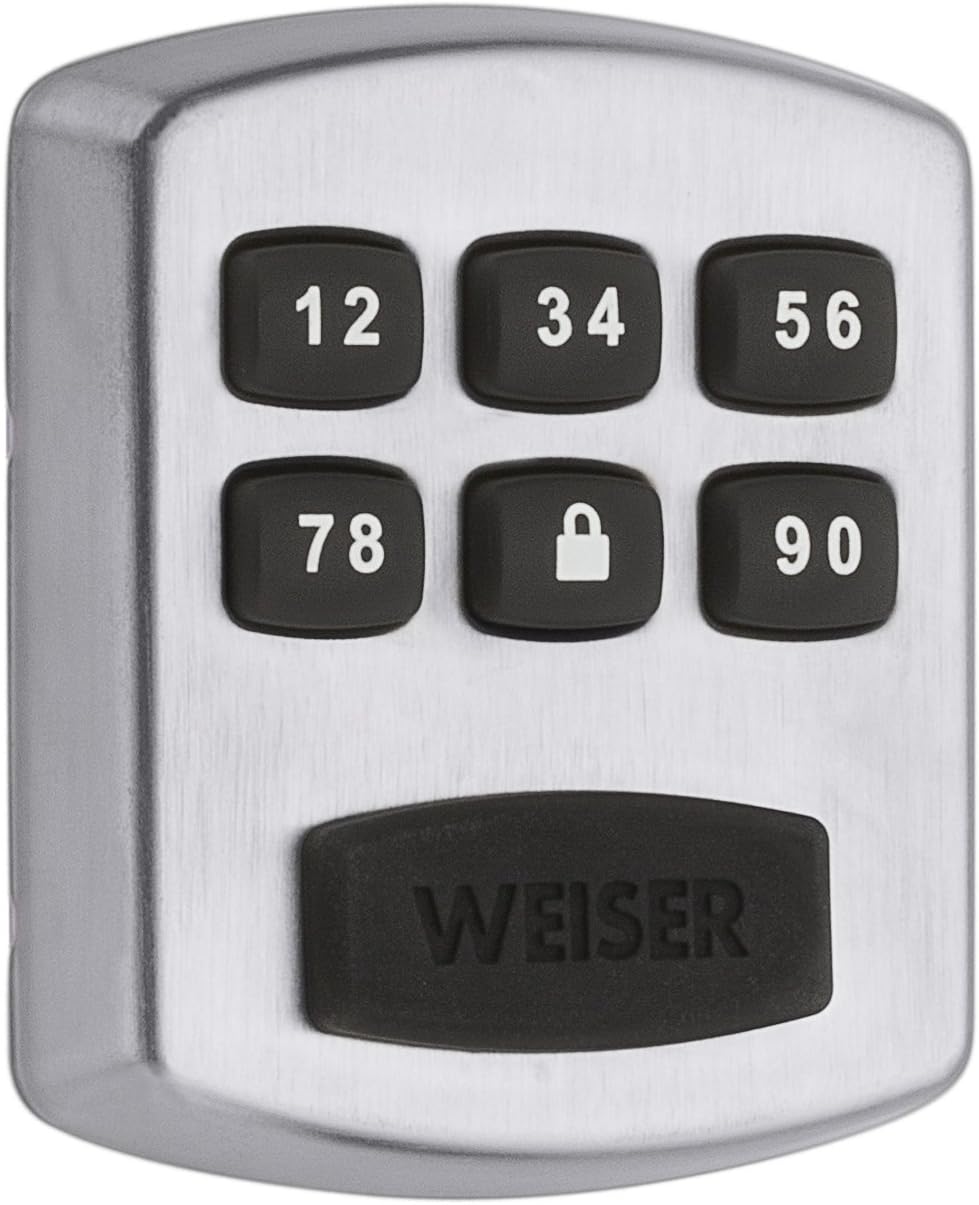
Imej: Dari dekat view of the Weiser Powerbolt 1 keypad, showing the numbered buttons and the lock icon button.
Kod Pengaturcaraan
The lock supports a Master Code and up to 4 User Codes. The Master Code is essential for programming other features, while User Codes are for daily entry.

Image: A graphic representation of the key features: One Touch Locking, Master Code functionality, and User Code management.
- Menetapkan Kod Induk: The Master Code is essential for programming other features. Refer to your quick start guide for the specific sequence to set or change the Master Code.
- Adding User Codes: Up to 4 user codes, each 4-8 digits long, can be programmed. Use the Master Code to initiate the programming sequence for adding new user codes.
- Deleting User Codes: Individual user codes can be deleted using the Master Code programming sequence.
Membuka Kunci Pintu
- Menggunakan Kod Pengguna: Enter your 4-8 digit user code on the keypad. The deadbolt will retract, allowing you to open the door.
- Menggunakan Kunci: Insert the physical key into the cylinder and turn to unlock.
- Dari dalam: Turn the thumb-turn on the interior assembly to unlock the deadbolt.
Mengunci Pintu
- Penguncian Satu Sentuhan: Press the "Lock" button (padlock icon) on the keypad. The motorized deadbolt will extend to lock the door.
- Penguncian automatik: The lock can be configured to automatically lock after 30 seconds. Refer to your quick start guide for instructions on enabling/disabling this feature.
- Dari dalam: Turn the thumb-turn on the interior assembly to lock the deadbolt.
Ciri Keselamatan
- 1-Minute Lockout: After 3 consecutive incorrect code entries, the keypad will disable for 60 seconds to prevent tampering.
Penyelenggaraan
Penggantian Bateri
The Powerbolt 1 operates on 4 AA batteries. An audible low battery indicator will alert you when batteries need replacement, typically 6 weeks in advance.
- Tanggalkan penutup dalaman.
- Cari petak bateri.
- Remove the old batteries and insert 4 new AA alkaline batteries, ensuring correct polarity.
- Replace the interior cover.
9V Terminal Backup
In case of complete battery drain, a 9V terminal is located behind the silicone Weiser logo on the exterior keypad. Touch a 9V battery to this terminal to temporarily power the lock and enter your code.
Pembersihan
Bersihkan bahagian luar kunci dengan lembut, damp cloth. Avoid abrasive cleaners or solvents, which can damage the finish and electronic components.
Menyelesaikan masalah
- Lock does not respond:
- Check batteries. Replace if low or dead.
- Ensure the cable connection between exterior and interior assemblies is secure.
- Use the 9V terminal backup if batteries are completely drained.
- Keypad is locked out:
- Wait 60 seconds after 3 incorrect code entries.
- Codes are not working:
- Verify the correct Master Code and User Codes are being entered.
- Ensure the door handing process was completed correctly during installation.
- If a Master Code was changed, ensure user codes are programmed using the new Master Code.
- Reprogram user codes if necessary.
- Deadbolt does not extend/retract fully:
- Check for obstructions in the door frame or strike plate.
- Ensure the latch and strike plate are properly aligned.
- Verify the door handing process was successful.
Waranti dan Sokongan
Penerangan Waranti: The Weiser Powerbolt 1 comes with a 1-Year Limited Warranty on Electronic Components, a Lifetime Mechanical Warranty, and a Lifetime Finish Warranty.
For further assistance, please contact Weiser customer support. Refer to the official Weiser website or the packaging for current contact information.


