1. Arahan Keselamatan Penting
Sila baca semua arahan dengan teliti sebelum menggunakan perkakas ini. Simpan manual ini untuk rujukan pada masa hadapan.
- Jangan sentuh permukaan panas. Gunakan pemegang atau tombol.
- Untuk melindungi daripada kebakaran, renjatan elektrik dan kecederaan kepada orang lain, jangan rendamkan kord, palam, atau perkakas dalam air atau cecair lain.
- Pengawasan rapi diperlukan apabila sebarang perkakas digunakan oleh atau berhampiran kanak-kanak.
- Cabut plag dari soket apabila tidak digunakan dan sebelum membersihkan. Biarkan sejuk sebelum memakai atau menanggalkan bahagian, dan sebelum membersihkan perkakas.
- Jangan kendalikan sebarang perkakas dengan kord atau palam yang rosak, atau selepas perkakas tidak berfungsi atau rosak dalam apa jua cara. Hubungi perkhidmatan pelanggan untuk pemeriksaan, pembaikan atau pelarasan.
- Penggunaan lampiran aksesori yang tidak disyorkan oleh pengilang perkakas boleh mengakibatkan kebakaran, renjatan elektrik atau kecederaan kepada orang.
- Jangan gunakan di luar rumah.
- Jangan biarkan kord tergantung di tepi meja atau kaunter, atau menyentuh permukaan panas.
- Jangan letakkan pada atau berhampiran gas panas atau penunu elektrik, atau dalam ketuhar yang dipanaskan.
- Sentiasa pasangkan plag pada perkakas terlebih dahulu, kemudian pasangkan kord ke dalam salur keluar dinding. Untuk memutuskan sambungan, matikan mana-mana kawalan kepada "mati", kemudian tanggalkan palam dari alur keluar dinding.
- Jangan gunakan perkakas untuk kegunaan rumah selain daripada yang dimaksudkan.
- Melecur mungkin berlaku jika penutup ditanggalkan semasa kitaran membancuh.
- Karafe kaca direka untuk kegunaan dengan perkakas ini sahaja. Ia tidak boleh sekali-kali digunakan pada permukaan dapur.
- Jangan letakkan botol panas di atas permukaan yang sejuk atau basah.
- Jangan gunakan bekas retak atau bekas yang mempunyai pemegang longgar atau lemah.
- Jangan bersihkan botol dengan pembersih, pad bulu keluli atau bahan pelelas lain.
2. Produk Lebihview dan Komponen
Familiarize yourself with the parts of your SOGO Drip Coffee Maker.
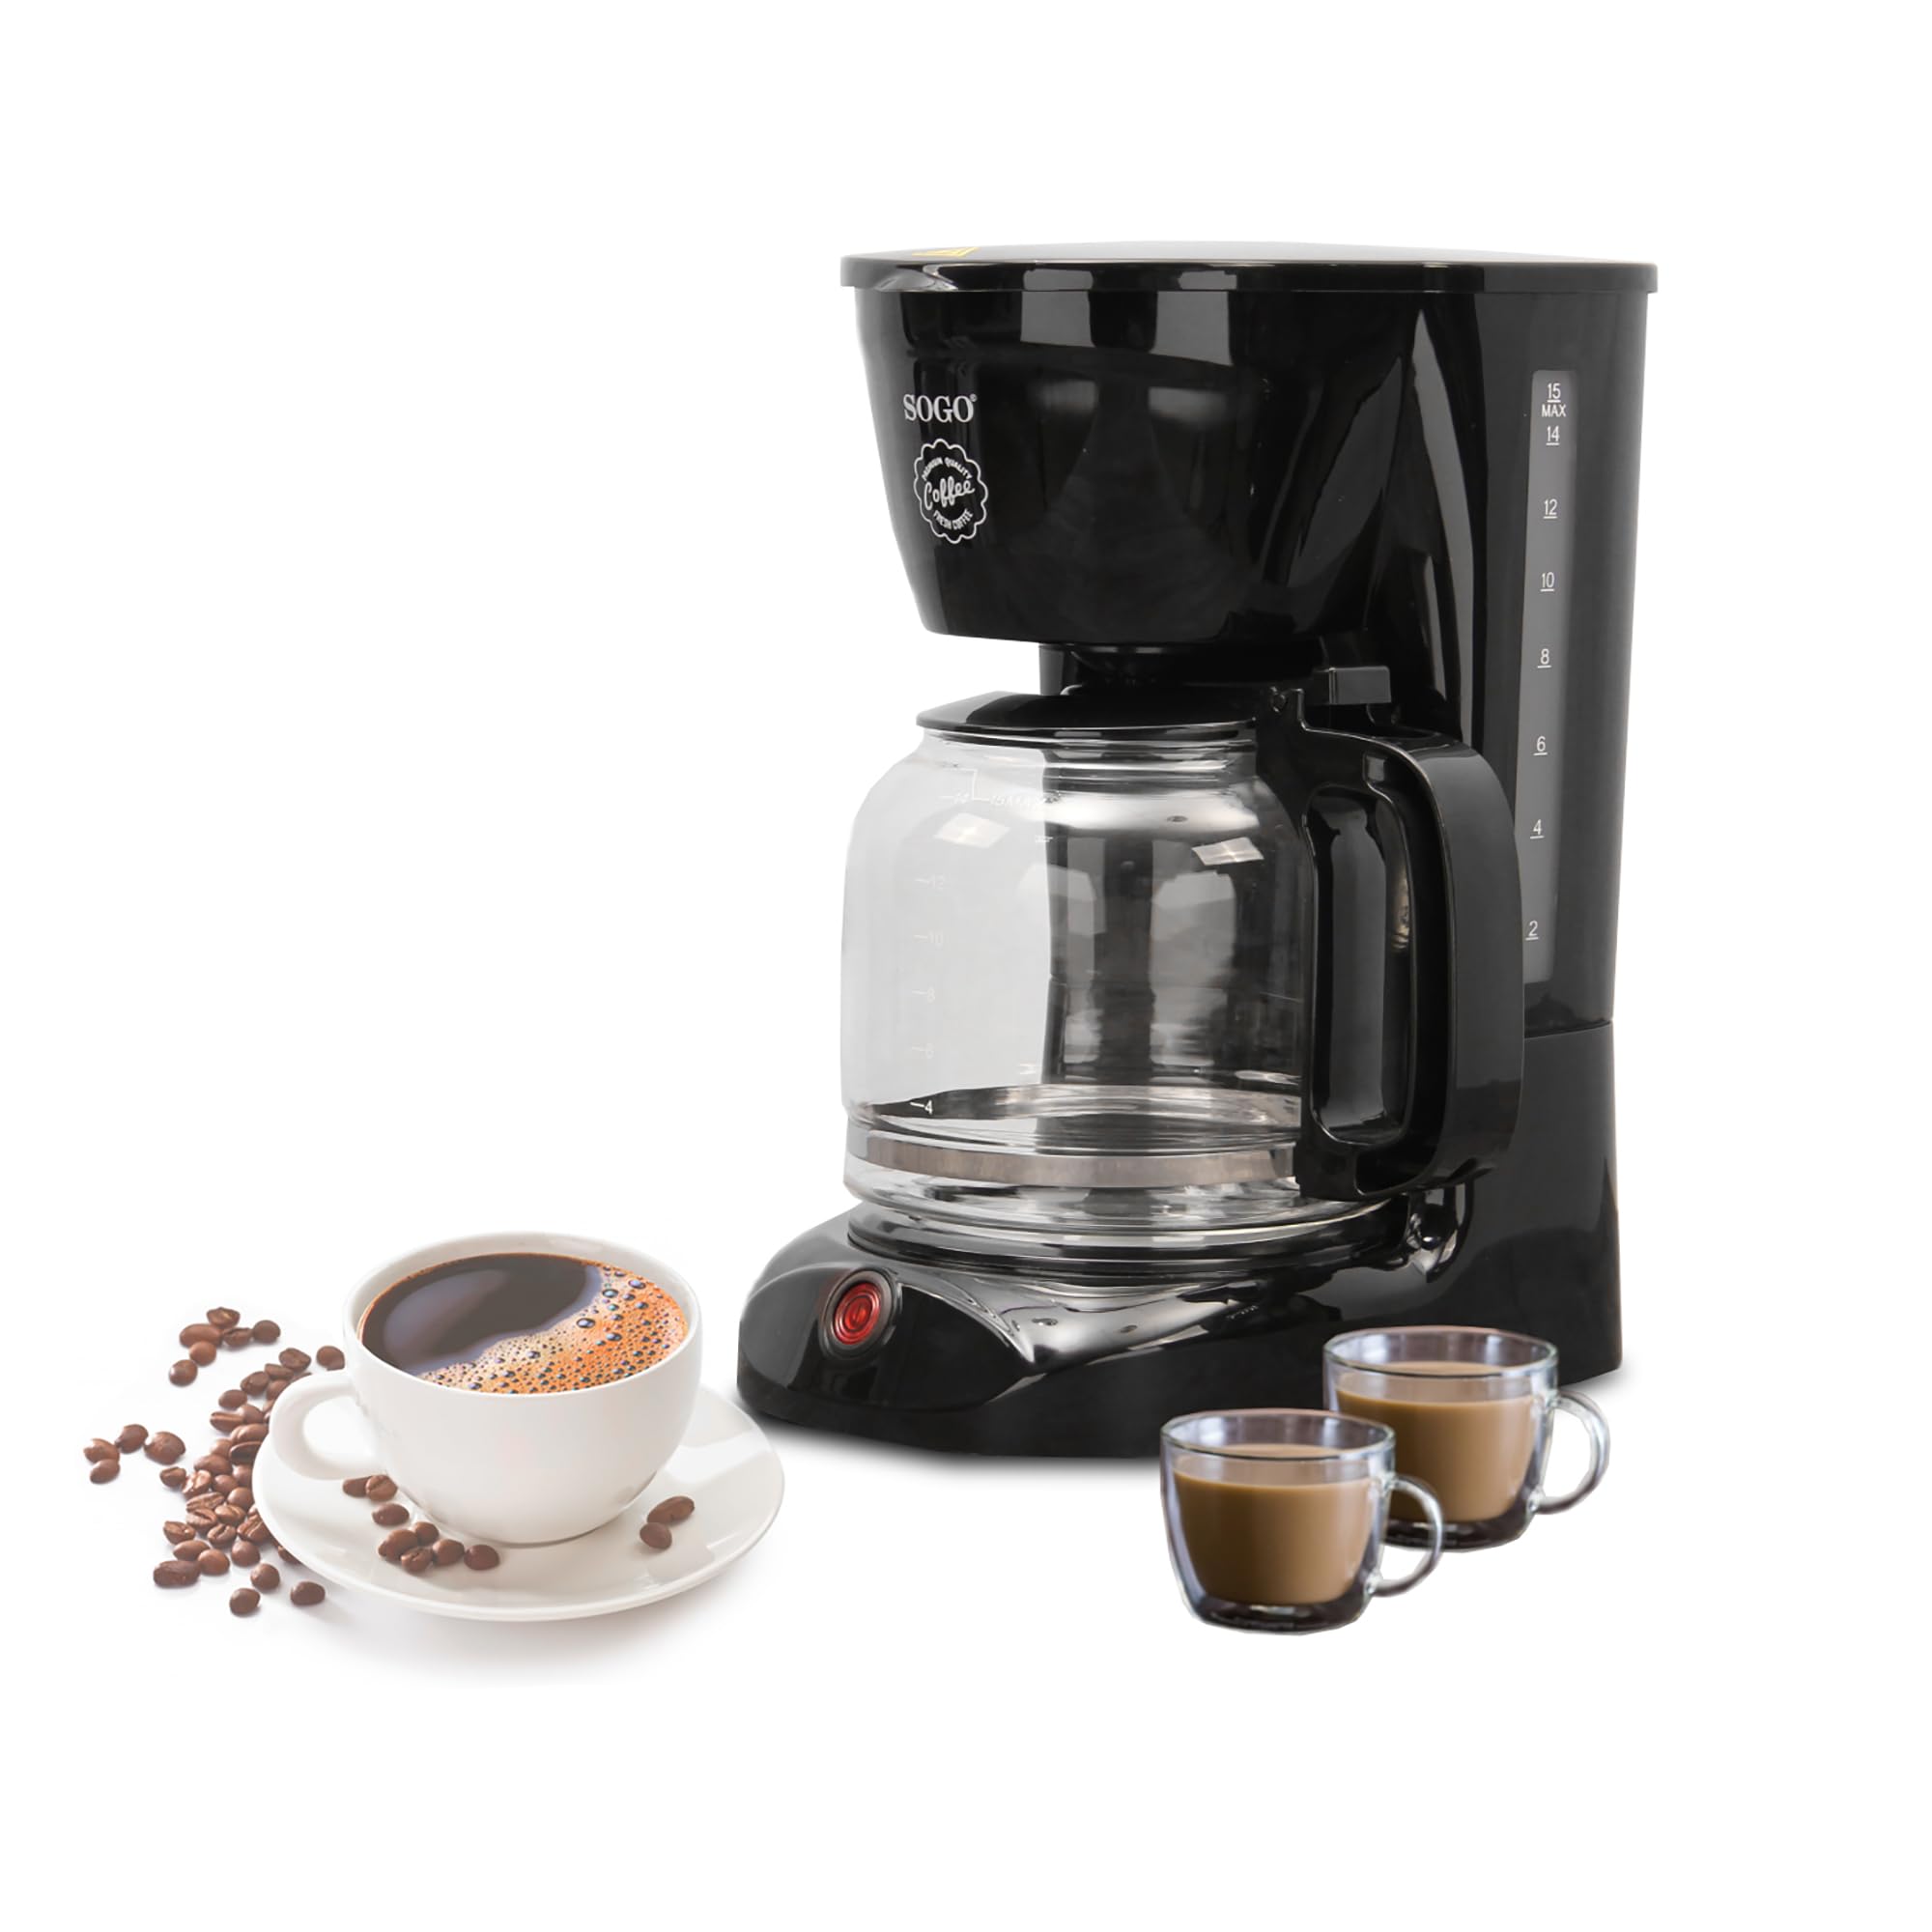
Imej: Meletup view of the SOGO Drip Coffee Maker, displaying the main unit, glass carafe, filter basket, permanent filter, and coffee scoop.
- Unit Utama: Meletakkan elemen pemanasan, takungan air dan panel kawalan.
- Tudung: Meliputi takungan air dan kawasan bakul penapis.
- Takungan Air: Menampung air untuk dibancuh.
- Bakul Penapis: Memegang penapis kekal dan kopi kisar.
- Penapis Kekal: Penapis boleh guna semula untuk kopi yang dikisar.
- Teko Kaca: Mengumpul kopi yang dibancuh. Mempunyai pemegang dan tanda ukuran.
- Plat Pemanasan: Membuat kopi yang dibancuh tetap hangat.
- Suis kuasa: On/Off button with indicator light.
- Senduk Kopi: For measuring ground coffee.
Imej: Dari dekat view of the reusable permanent filter, designed to hold ground coffee during the brewing process.
3. Sebelum Penggunaan Pertama
Before using your coffee maker for the first time, it is recommended to clean all removable parts and run a brewing cycle with water only.
- Wash the glass carafe, lid, filter basket, and permanent filter in warm, soapy water. Rinse thoroughly and dry.
- Place the filter basket into its housing in the main unit. Insert the permanent filter into the filter basket.
- Fill the water reservoir with fresh cold water up to the 1.8L (15 cup) mark. Do not add coffee grounds.
- Place the glass carafe with its lid on the warming plate.
- Palamkan kord kuasa ke soket elektrik standard.
- Press the power switch to turn on the appliance. The indicator light will illuminate.
- Allow the full cycle to complete. Discard the hot water from the carafe.
- Unplug the appliance and let it cool down. Your coffee maker is now ready for use.
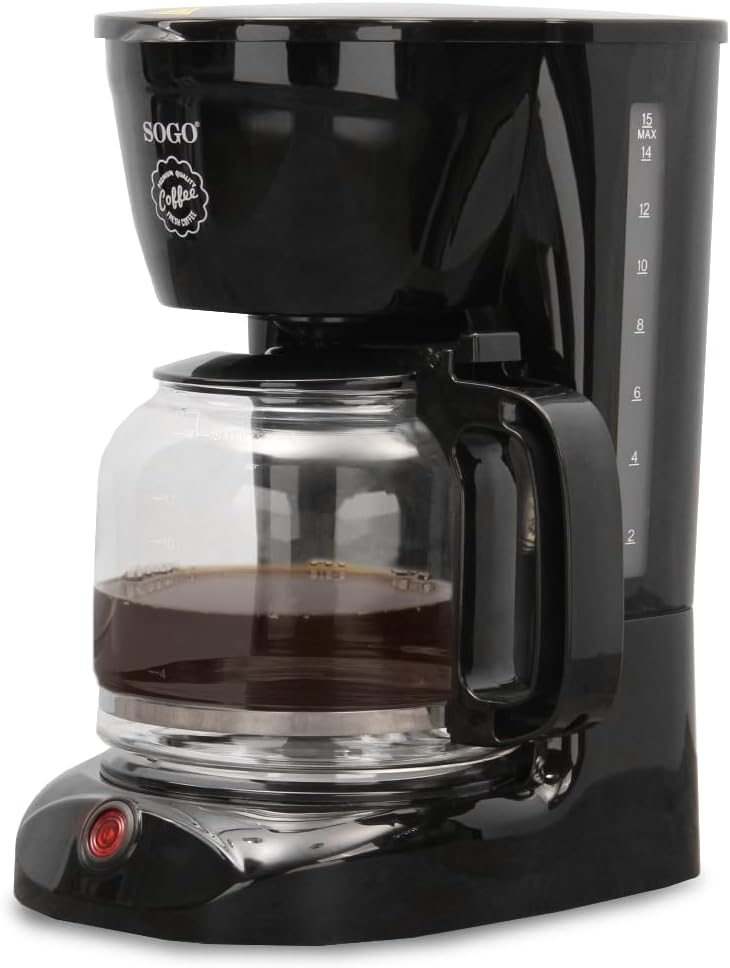
4. Operation: Making Coffee
Follow these steps to brew a fresh pot of coffee.

Image: The SOGO Drip Coffee Maker fully assembled with the glass carafe in place, ready to brew coffee.
- Ensure the coffee maker is unplugged and cool.
- Fill the water reservoir with fresh, cold water to the desired level, using the markings on the reservoir or carafe as a guide. Do not exceed the “MAX” line.
- Letakkan penapis kekal ke dalam bakul penapis.
- Add the desired amount of ground coffee to the permanent filter. A general guideline is one level scoop (approximately 7g) of ground coffee per cup (150ml) of water. Adjust to your taste.
- Tutup penutup dengan selamat.
- Place the empty glass carafe with its lid onto the warming plate. Ensure it is properly seated to activate the drip-stop mechanism.
- Palamkan kord kuasa ke soket elektrik standard.
- Press the power switch. The indicator light will turn on, and brewing will begin.
- The brewing process will take several minutes. Do not open the lid during brewing as scalding may occur.
- Once brewing is complete, the coffee maker will automatically switch to a “keep warm” function. The warming plate will keep the coffee hot.
- To serve, carefully remove the carafe from the warming plate.
- After serving, return the carafe to the warming plate to keep the remaining coffee warm.
- To turn off the appliance, press the power switch again. The indicator light will turn off.
- Unplug the coffee maker from the outlet when not in use or when the warming function is no longer needed.
5. Pembersihan dan Penyelenggaraan
Pembersihan tetap memastikan prestasi optimum dan memanjangkan hayat pembuat kopi anda.
- Sentiasa cabut plag pembuat kopi dan biarkan ia sejuk sepenuhnya sebelum dibersihkan.
- Remove the glass carafe, filter basket, and permanent filter. Discard used coffee grounds.
- Wash the carafe, lid, filter basket, and permanent filter in warm, soapy water. These parts can also be rinsed under running water.
- Lap bahagian luar pembuat kopi dengan lembut, damp kain. Jangan gunakan pembersih yang melelas atau pad penyental.
- Jangan sekali-kali merendam unit utama, kord kuasa atau palam ke dalam air atau sebarang cecair lain.
- To clean the warming plate, wipe it with a damp kain. Jangan gunakan bahan yang melelas.
- For descaling (mineral deposit removal), fill the water reservoir with a mixture of white vinegar and water (1:2 ratio). Run a brewing cycle without coffee grounds. Repeat if necessary. Then, run two cycles with fresh water to rinse thoroughly. Descale every 2-4 weeks depending on water hardness.
- Pastikan semua bahagian kering sepenuhnya sebelum memasang semula dan menyimpan perkakas.
6. Penyelesaian masalah
Jika anda menghadapi masalah dengan pembuat kopi anda, rujuk masalah dan penyelesaian biasa berikut.
| Masalah | Kemungkinan Punca | Penyelesaian |
|---|---|---|
| Kopi tidak dibancuh. | Appliance not plugged in; Power switch not turned on; No water in reservoir. | Ensure plug is securely in outlet; Press power switch; Fill water reservoir. |
| Kopi terlalu lemah. | Not enough coffee grounds; Water-to-coffee ratio incorrect; Coarse grind. | Add more coffee grounds; Adjust ratio; Use a finer grind. |
| Kopi melimpah dari bakul penapis. | Too many coffee grounds; Filter basket not seated correctly; Clogged filter. | Reduce coffee grounds; Ensure filter basket is properly in place; Clean permanent filter or descale appliance. |
| Pembuatan bir adalah perlahan. | Mineral deposits (scale) in the appliance. | Descale the coffee maker as described in the Cleaning and Maintenance section. |
| Kopi tidak cukup panas. | Warming plate not functioning; Appliance needs descaling. | Ensure warming plate is on; Descale the coffee maker. |
7. Spesifikasi
Technical details for the SOGO Drip Coffee Maker Model CAF-SS-5640.
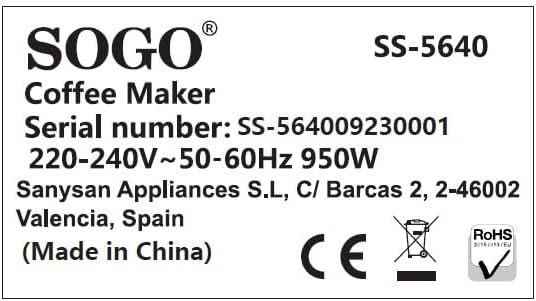
Image: Product label showing model number SS-5640, serial number, power requirements (220-240V~ 50-60Hz 950W), and manufacturer details.
| Ciri | Perincian |
|---|---|
| Jenama | SOGO |
| Nombor Model | CAF-SS-5640 |
| warna | Hitam |
| Dimensi (L x W x H) | 23.5 x 17.5 x 30.5 cm |
| Kapasiti | 1.8 Liter (lebih kurang 15 cawan) |
| kuasa | 950 Watt |
| bahan | Glass (carafe) |
| Ciri Khas | Penapis kekal |
| Berat Barang | 1.39 Kilogram |
| Komponen Termasuk | Teko |
8. Waranti dan Sokongan
Information regarding spare parts availability is not provided in the product details. For warranty claims or further support, please refer to the retailer or manufacturer's official webtapak di mana produk itu dibeli.


