pengenalan
This manual provides essential information for setting up, operating, maintaining, and troubleshooting your PlayStation 3 Super Slim console. Please read this manual thoroughly before using your system to ensure proper operation and to maximize your gaming experience.
Kandungan Pakej
Sahkan bahawa semua item yang disenaraikan di bawah disertakan dalam pakej anda:
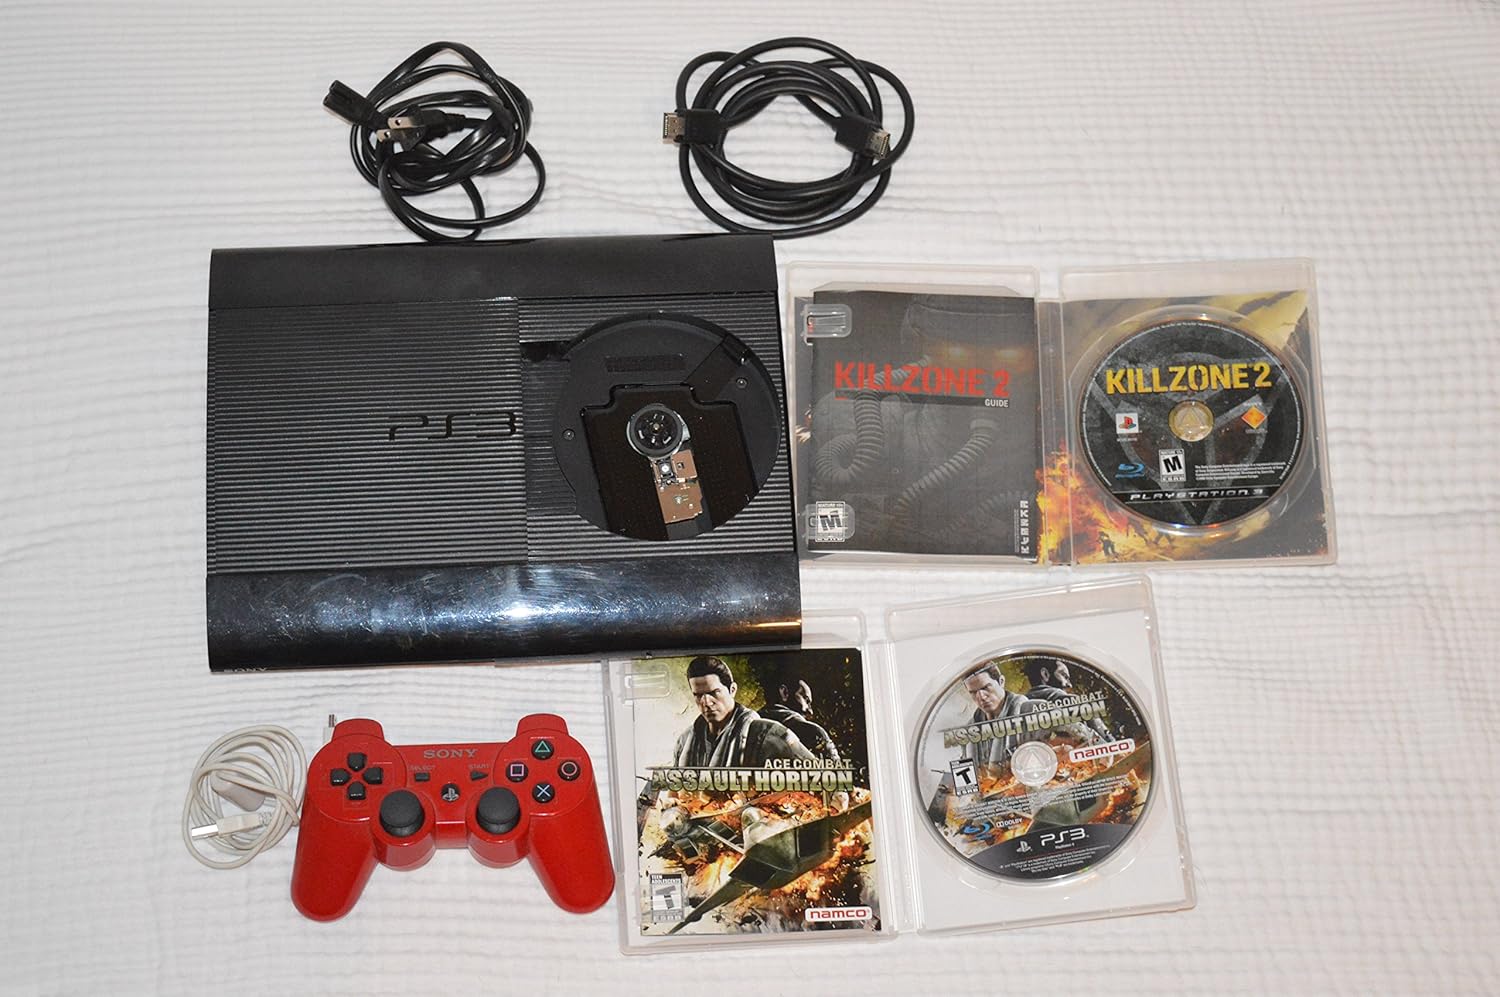
- PlayStation 3 Super Slim 500GB Console
- Pengawal Tanpa Wayar
- Kord Kuasa
- Kabel HDMI
- USB Charging Cable for Controller
- Four Assorted Game Titles (titles may vary)

Panduan Persediaan
1. Menyambungkan Konsol
- Sambungan Kuasa: Insert the power cord into the AC IN port on the back of the PS3 console, then plug the other end into a wall outlet.
- Video/Audio Connection (HDMI): Connect one end of the HDMI cable to the HDMI OUT port on the PS3 console and the other end to an HDMI input on your TV or display. This provides both high-definition video and audio.
- Sambungan Pengawal: Connect the wireless controller to one of the USB ports on the front of the PS3 console using the supplied USB charging cable. This will pair the controller and charge its battery.

2. Persediaan Sistem Permulaan
After connecting all cables, turn on your TV and select the correct HDMI input. Press the power button on the PS3 console. Follow the on-screen instructions to complete the initial setup, which includes setting the date and time, and configuring network settings if desired.
Arahan Operasi
Menghidupkan/Mematikan
- Untuk Menghidupkan: Press the power button on the front of the console or the PS button on the connected controller.
- Untuk Mematikan: Hold the PS button on the controller, select "Turn Off System" from the XMB (XrossMediaBar) menu, or press and hold the power button on the console until it powers down.
Memasukkan dan Mengeluar Cakera
The PlayStation 3 Super Slim features a sliding disc cover. To insert a disc, slide the cover to the right to reveal the disc tray. Place the disc with the label side facing up onto the spindle, ensuring it clicks into place. Slide the cover back to the left to close. To eject, slide the cover to the right and lift the disc out.
Menggunakan Pengawal Wayarles
The included wireless controller connects via Bluetooth. Ensure it is charged by connecting it to the console via the USB cable. Once charged and paired, it can be used wirelessly. The PS button in the center of the controller provides quick access to the XMB menu and power options.
Penyelenggaraan
- Pembersihan: Use a soft, dry cloth to clean the console and controller. Do not use liquid cleaners or abrasive materials.
- Pengudaraan: Ensure the console is placed in a well-ventilated area, away from direct sunlight or heat sources, to prevent overheating. Do not block the ventilation openings.
- Kemas Kini Perisian: Periodically check for system software updates via the internet connection. Updates improve system performance and add new features.
Menyelesaikan masalah
| Masalah | Kemungkinan Punca | Penyelesaian |
|---|---|---|
| Tiada kuasa | Kord kuasa tidak disambung dengan betul; masalah soket kuasa. | Ensure power cord is securely connected to console and outlet. Try a different outlet. |
| No video/audio output | HDMI cable loose; incorrect TV input selected. | Periksa sambungan kabel HDMI. Pilih input HDMI yang betul pada TV anda. |
| Pengawal tidak bertindak balas | Controller not paired or battery low. | Connect controller to console with USB cable to pair and charge. Reset controller by pressing the small button on the back with a pin. |
| Cakera tidak membaca | Disc dirty or scratched; disc inserted incorrectly. | Clean disc with a soft cloth. Ensure disc is inserted correctly, label side up. |
Spesifikasi
- Nombor Model: CECH-2501A
- Storan: Pemacu Cakera Keras 500GB
- Dimensi (Lebih kurang): 17.5 x 14.2 x 8.9 inci (Saiz Pakej)
- Berat (Lebih kurang): 8.73 paun (Berat Item)
- Ketersambungan: HDMI, USB, Ethernet, Wi-Fi, Bluetooth
- Pemacu Cakera: Blu-ray Disc / DVD / CD
Maklumat Sokongan dan Waranti
For detailed warranty information, technical support, and service inquiries, please refer to the official PlayStation support weblaman web atau hubungi khidmat pelanggan PlayStation. Simpan bukti pembelian anda untuk tuntutan jaminan.
Sokongan PlayStation Rasmi: www.playstation.com/support