1. Pengenalan
Thank you for choosing the Pro-Ject Debut Carbon DC Turntable. This manual provides essential information for the proper setup, operation, and maintenance of your turntable. Please read these instructions carefully before using the device to ensure optimal performance and longevity.
The Pro-Ject Debut Carbon DC is a high-fidelity turntable designed for exceptional audio reproduction, featuring an 8.6-inch carbon fiber tonearm and a pre-mounted Ortofon 2M Red cartridge.
2. Arahan Keselamatan
- Sentiasa putuskan sambungan meja putar daripada bekalan kuasa sebelum membersihkan atau melakukan sebarang penyelenggaraan.
- Jauhkan meja putar daripada air, kelembapan dan cahaya matahari langsung.
- Place the turntable on a stable, level surface to prevent vibrations and ensure proper operation.
- Jangan cuba membaiki unit sendiri. Rujuk semua servis kepada kakitangan yang berkelayakan.
- Avoid touching the stylus with your fingers to prevent damage.
3. Kandungan Pakej
Sahkan bahawa semua item yang disenaraikan di bawah terdapat dalam pakej anda:
- Pro-Ject Debut Carbon DC Turntable with pre-mounted Ortofon 2M Red Cartridge
- Connect-It E RCA Cable
- Removable Power Supply
- Felt Platter Mat
- Penutup Habuk
- Kaunter berat badan
- Berat anti-skate
4. Persediaan
4.1 Membongkar dan Meletakkan
Carefully remove all components from the packaging. Place the turntable on a firm, level surface, away from direct heat sources or strong vibrations. Ensure adequate ventilation around the unit.
4.2 Pemasangan Plat dan Tali Pinggang
- Place the main platter onto the turntable spindle.
- Locate the drive belt. Carefully stretch the belt around the inner rim of the platter and around the motor pulley. Ensure the belt is not twisted.
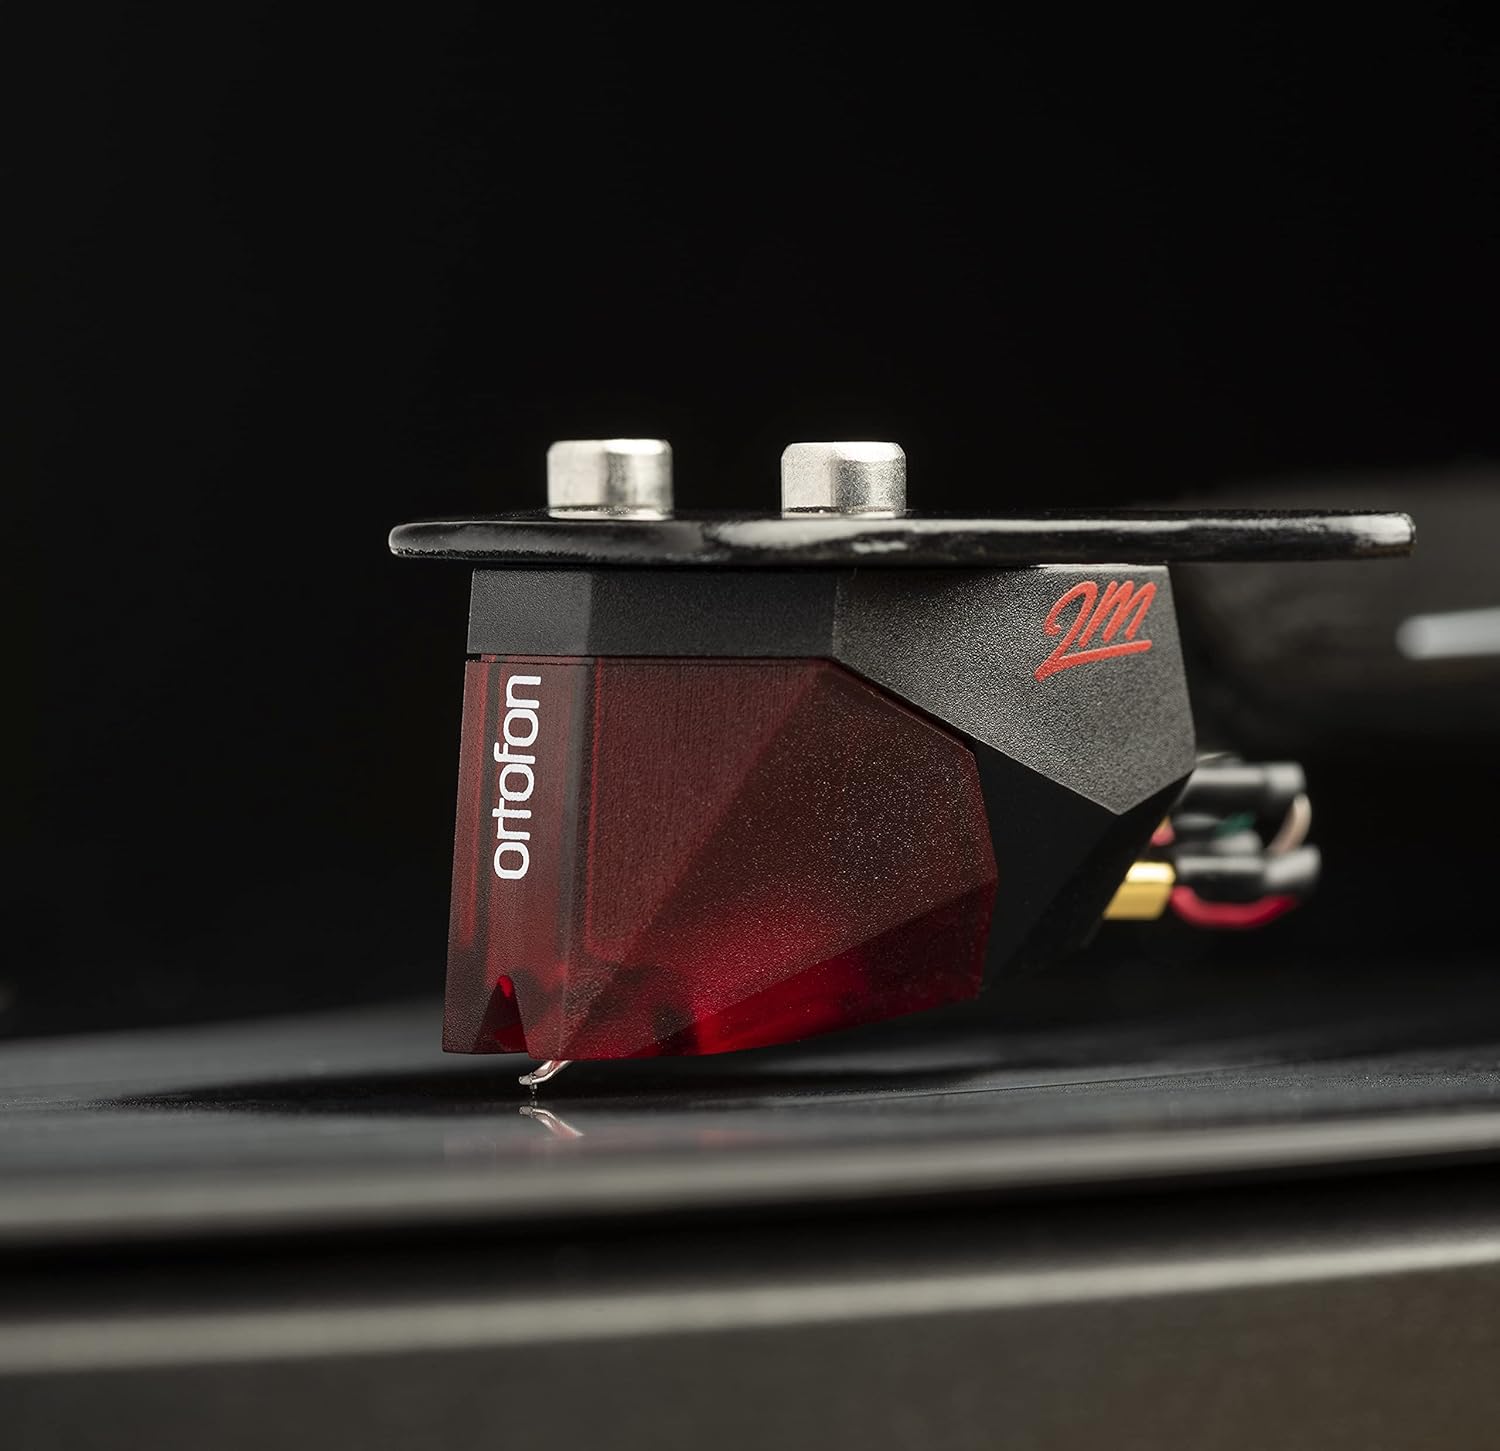
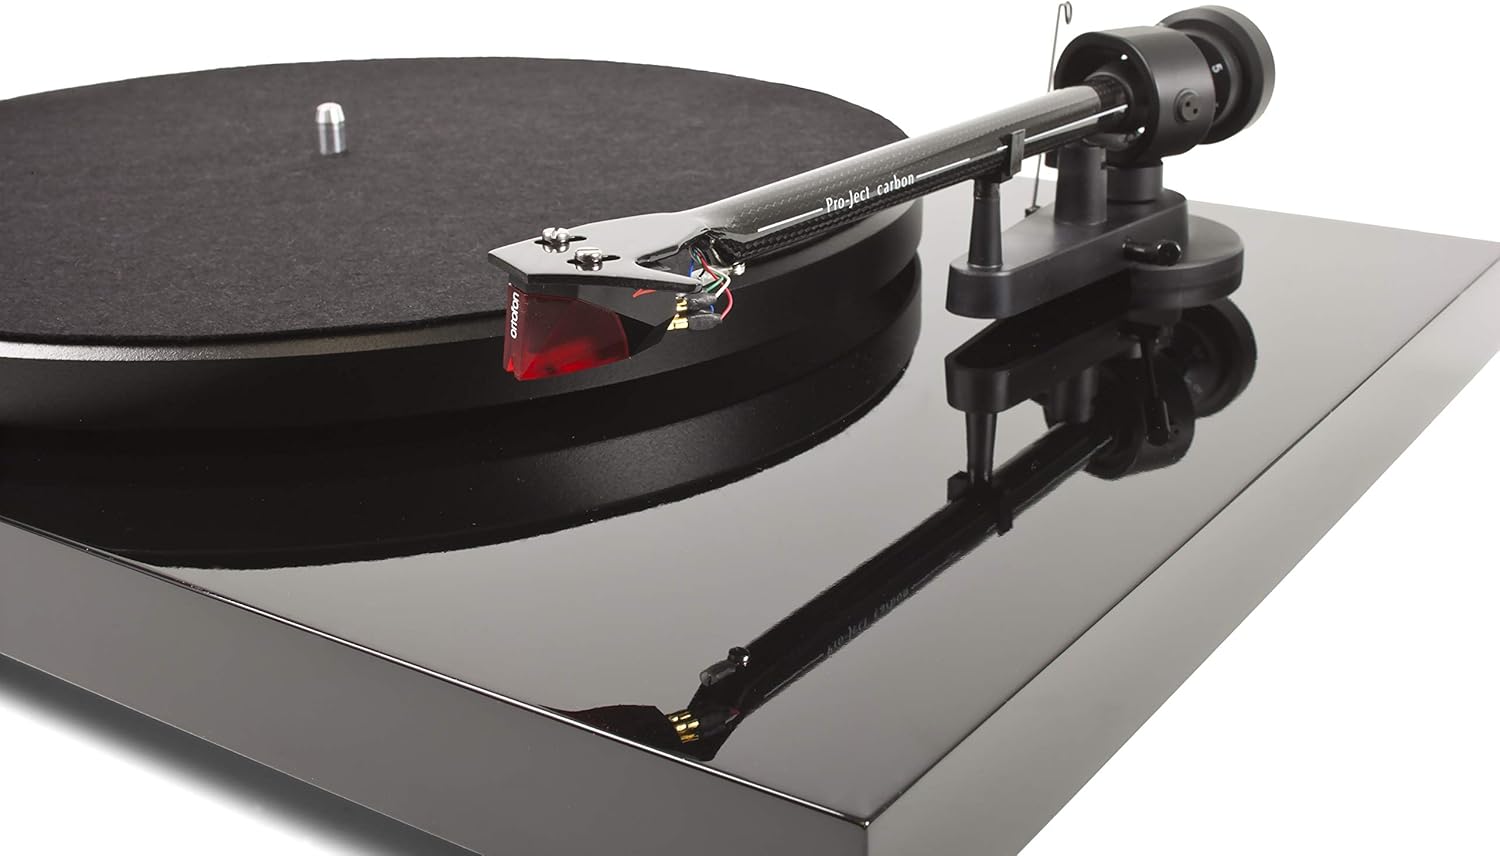
Image: The Pro-Ject Debut Carbon DC Turntable fully assembled, showing the platter, tonearm, and Ortofon 2M Red cartridge. This image illustrates the overall appearance of the turntable after initial setup.
4.3 Imbangan Tonearm dan Daya Penjejakan
The Ortofon 2M Red cartridge is pre-mounted. However, proper tonearm balance and tracking force adjustment are crucial for optimal sound and record preservation.
- With the anti-skate weight removed, carefully unclip the tonearm and move it away from the tonearm rest.
- Rotate the counterweight on the rear of the tonearm until the tonearm floats freely and is perfectly balanced horizontally.
- Once balanced, return the tonearm to its rest. Hold the counterweight steady and rotate the numbered ring until '0' aligns with the line on the tonearm.
- Rotate the entire counterweight counter-clockwise until the desired tracking force is set. For the Ortofon 2M Red, the recommended tracking force is typically 1.8 grams.
Imej: Dari dekat view of the Ortofon 2M Red cartridge mounted on the carbon fiber tonearm of the Pro-Ject Debut Carbon DC turntable. This highlights the stylus and cartridge assembly.
4.4 Anti-Skate Adjustment
The anti-skate mechanism prevents the tonearm from being pulled inwards towards the center of the record. Attach the small loop of the anti-skate weight's thread to the second groove of the anti-skate stub on the tonearm support.
4.5 Menyambung ke an Amplebih hidup
Connect the supplied RCA cable from the turntable's output jacks to the 'Phono' input on your amplifier or a dedicated phono pre-amppengikat. Jika anda amplifier does not have a 'Phono' input, you will need an external phono pre-amplifier. Connect the ground wire from the turntable to the ground terminal on your amplifier or phono pre-amppenggalak untuk meminimumkan dengungan.

Imej: Sebelah view of the Pro-Ject Debut Carbon DC Turntable, illustrating the rear panel with RCA output jacks and the power input. This shows where to connect audio cables and the power supply.
4.6 Sambungan Kuasa
Connect the power supply to the turntable's power input and then plug it into a suitable wall outlet.
4.7 Penutup Habuk
Carefully attach the dust cover to the hinges on the rear of the turntable. The dust cover protects the turntable from dust when not in use.
5. Arahan Operasi
5.1 Menghidupkan/Mematikan
The power switch is located on the underside of the turntable, near the front left corner. Flip the switch to the 'ON' position to start the platter rotation. Flip it to 'OFF' to stop.
5.2 Memainkan Rakaman
- Letakkan rekod di atas pinggan, pastikan ia berada di tengah.
- Hidupkan meja putar menggunakan suis kuasa.
- Angkat tonearm dengan berhati-hati menggunakan tuil isyarat.
- Letakkan lengan nada di atas alur permulaan rekod yang diingini.
- Gently lower the tonearm using the cueing lever. The stylus will make contact with the record and playback will begin.
- At the end of the record, lift the tonearm using the cueing lever and return it to the tonearm rest.
5.3 Changing Playback Speed (33/45 RPM)
The Pro-Ject Debut Carbon DC requires manual adjustment to change playback speed between 33 and 45 RPM.
- Matikan meja putar.
- Carefully remove the felt mat and lift the platter off the spindle.
- Locate the motor pulley. It has two different diameter steps.
- For 33 RPM, place the drive belt around the smaller diameter step of the motor pulley.
- For 45 RPM, place the drive belt around the larger diameter step of the motor pulley.
- Replace the platter and felt mat.
6. Penyelenggaraan
6.1 Membersihkan Meja Putar
Use a soft, lint-free cloth to gently wipe the turntable chassis and dust cover. Avoid using abrasive cleaners or solvents. For the platter, use a slightly damp cloth if necessary, ensuring it is dry before use.
6.2 Penjagaan Stilus
The stylus is delicate. Use a soft stylus brush, brushing gently from back to front, to remove dust and debris. Never use your fingers to clean the stylus. A dirty stylus can damage your records and degrade sound quality.
6.3 Drive Belt Inspection
Periodically inspect the drive belt for signs of wear or stretching. A worn belt can lead to inconsistent playback speed. Replace the belt if it appears damaged or loose.
7. Penyelesaian masalah
| Masalah | Kemungkinan Punca | Penyelesaian |
|---|---|---|
| Tiada kuasa | Power cable not connected; power outlet faulty; power switch off. | Check power connections; try a different outlet; ensure power switch is ON. |
| Tiada bunyi dari satu atau kedua-dua saluran | RCA cables not connected correctly; phono input not selected; damaged stylus; ampisu penguat. | Check RCA connections; select correct input on amplifier; inspect stylus; test amplifier with another source. |
| Bunyi bising | Ground wire not connected; proximity to other electronic devices; faulty cables. | Connect ground wire; move turntable away from other electronics; try different RCA cables. |
| Kelajuan main balik yang salah | Drive belt incorrectly positioned; worn drive belt. | Adjust drive belt to correct motor pulley step; replace drive belt if worn. |
| Bunyi herot | Dirty or damaged stylus; incorrect tracking force; worn record. | Clean or replace stylus; re-adjust tracking force; try a different record. |
If you encounter problems not listed here or if the suggested solutions do not resolve the issue, please contact your dealer or Pro-Ject customer support for assistance.
8. Spesifikasi
| Ciri | Perincian |
|---|---|
| Nama Model | Debut Carbon DC |
| Nombor Model Item | 9120050435933 |
| Dimensi Produk | 12.6 x 16.34 x 4.65 inci |
| Berat Barang | 12.35 paun (5600 Gram) |
| Jenama | Pro-Ject |
| Kelajuan Putaran Maksimum | 45 RPM (also supports 33 RPM) |
| Komponen yang Disertakan | Turntable with pre-mounted Ortofon 2M Red Cartridge, Connect-It E RCA Cable, removable Power Supply, felt platter mat, and dust cover |
| Ciri Khas | Carbon Tube Tone-Arm, Balanced Steel Platter, Decoupled Motor, Pre-Mounted Ortofon 2M Red Cartridge |
| bahan | Kayu Kejuruteraan, Plastik |
| warna | Piano Hitam |
| Peranti Serasi | Speaker, Personal Computer, Desktop, Smartphone, Tablet, Laptop (via appropriate audio interfaces/pre-amps) |
9. Waranti dan Sokongan
Specific warranty information for the Pro-Ject Debut Carbon DC Turntable is typically provided with the product packaging or available from your authorized dealer. Please retain your proof of purchase for warranty claims.
For technical support, service, or further inquiries, please contact your local Pro-Ject dealer or visit the official Pro-Ject Audio Systems webtapak.


