1. Pengenalan
This manual provides essential information for the safe and efficient operation, maintenance, and troubleshooting of your Einhell Electric Chainsaw GH-EC 1835. Please read these instructions carefully before using the chainsaw for the first time. Keep this manual in a safe place for future reference.

Figure 1: Einhell Electric Chainsaw GH-EC 1835. This image shows the complete chainsaw with its red and black housing, guide bar, and chain.
2. Arahan Keselamatan
Sentiasa mengutamakan keselamatan semasa mengendalikan alatan kuasa. Kegagalan mematuhi arahan keselamatan boleh mengakibatkan kecederaan serius atau kematian.
2.1 Keselamatan Am
- Always wear appropriate Personal Protective Equipment (PPE), including safety glasses, hearing protection, gloves, and sturdy footwear.
- Pastikan kawasan kerja bersih daripada orang ramai, terutamanya kanak-kanak dan haiwan peliharaan.
- Jangan kendalikan gergaji dalam keadaan basah atau dengan kehadiran cecair atau gas yang mudah terbakar.
- Periksa gergaji rantai sebelum setiap penggunaan untuk sebarang kerosakan atau bahagian yang longgar.
2.2 Keselamatan Elektrik
- Pastikan bekalan kuasa sepadan dengan voltage specified on the chainsaw's rating plate.
- Use only extension cords suitable for outdoor use and rated for the chainsaw's power consumption.
- Keep the power cord clear of the cutting area and away from sharp objects.
- Never carry the chainsaw by its power cord.
2.3 Pencegahan Sogokan
Kickback can occur when the moving chain contacts an object at the upper tip of the guide bar or when the wood closes in and pinches the chain in the cut. To avoid kickback:
- Kekalkan cengkaman yang kukuh dengan kedua-dua tangan pada pemegang gergaji.
- Jangan menjangkau atau memotong melebihi paras bahu.
- Be aware of the guide bar tip position.
- Pastikan brek rantai berfungsi dan terpasang semasa tidak memotong.

Figure 2: Chain Brake / Hand Guard. This image highlights the chain brake mechanism and the hand guard, crucial safety features designed to protect the user from kickback and accidental contact with the chain.
3. Produk Lebihview
Familiarize yourself with the main components of your Einhell Electric Chainsaw GH-EC 1835.
- Bar Panduan: The metal bar that supports and guides the saw chain.
- Rantai Gergaji: The cutting element with sharp teeth.
- Chain Brake / Hand Guard: A safety device that stops the chain rapidly and protects the hand.
- Penutup Tangki Minyak: Untuk mengisi pelincir rantai.
- Oil Level Window: Allows visual inspection of the oil level.
- Pemegang hadapan: Untuk operasi dua tangan yang stabil.
- Pemegang Belakang: With integrated power switch.
- Chain Tensioning Knob: For tool-free chain adjustment.
- Metal Claw: Provides grip against the wood for stable cutting.

Figure 3: Ergonomic Handle. This image shows the ergonomic design of the chainsaw's handle, providing comfortable and secure grip during operation.

Figure 4: Metal Claw. This image illustrates the metal claw (bumper spike) located at the base of the guide bar, which helps to anchor the chainsaw against the wood for more controlled cutting.
4. Persediaan
4.1 Membongkar
Carefully remove all components from the packaging. Ensure all parts listed in the packing contents are present and undamaged. Dispose of packaging materials responsibly.
4.2 Guide Bar and Chain Assembly
- Letakkan gergaji pada permukaan yang stabil.
- Remove the chain cover by loosening the tensioning knob.
- Fit the chain onto the guide bar, ensuring the cutting edges face the correct direction (refer to the arrow on the guide bar).
- Place the guide bar and chain onto the chainsaw, ensuring the chain engages with the drive sprocket.
- Replace the chain cover and lightly tighten the tensioning knob.
- Adjust the chain tension using the tool-free tensioning knob until the chain is snug but can still be pulled freely around the guide bar. The chain should not sag on the underside of the guide bar.
- Fully tighten the tensioning knob.

Figure 5: Oregon Guide Bar and Chain. This image highlights the high-quality Oregon guide bar and chain, known for their durability and cutting performance.

Figure 6: Tool-free Chain Tensioning. This image demonstrates the convenient tool-free mechanism for adjusting chain tension, simplifying maintenance and setup.
4.3 Oil Filling
The chainsaw features an automatic chain lubrication system. It is crucial to fill the oil tank before each use.
- Ensure the chainsaw is unplugged from the power supply.
- Tanggalkan penutup tangki minyak.
- Fill the tank with suitable chainsaw chain oil (not included) up to the maximum level.
- Replace the oil tank cap securely.
- Regularly check the oil level during operation using the oil level window.

Figure 7: Automatic Chain Lubrication. This image illustrates the automatic oiling system, which ensures continuous lubrication of the chain and guide bar during operation.
5. Arahan Operasi
5.1 Bermula dan Berhenti
- Pastikan brek rantai telah dilepaskan (ditarik ke belakang ke arah pemegang hadapan).
- Sambungkan gergaji rantai ke salur keluar kuasa yang sesuai.
- Press the safety lock-off button and then squeeze the trigger switch to start the chainsaw.
- Lepaskan suis pencetus untuk menghentikan gergaji rantai.
- Engage the chain brake immediately after stopping the chainsaw or when moving between cuts.
5.2 Teknik Memotong
- Sentiasa pegang gergaji rantai dengan kuat dengan kedua-dua tangan.
- Mula memotong dengan rantai berjalan pada kelajuan penuh.
- Allow the chainsaw to do the work; do not force it through the wood.
- Be aware of falling branches and logs. Plan your cuts to avoid pinching the guide bar.
- For larger logs, make an undercut first to prevent splintering.
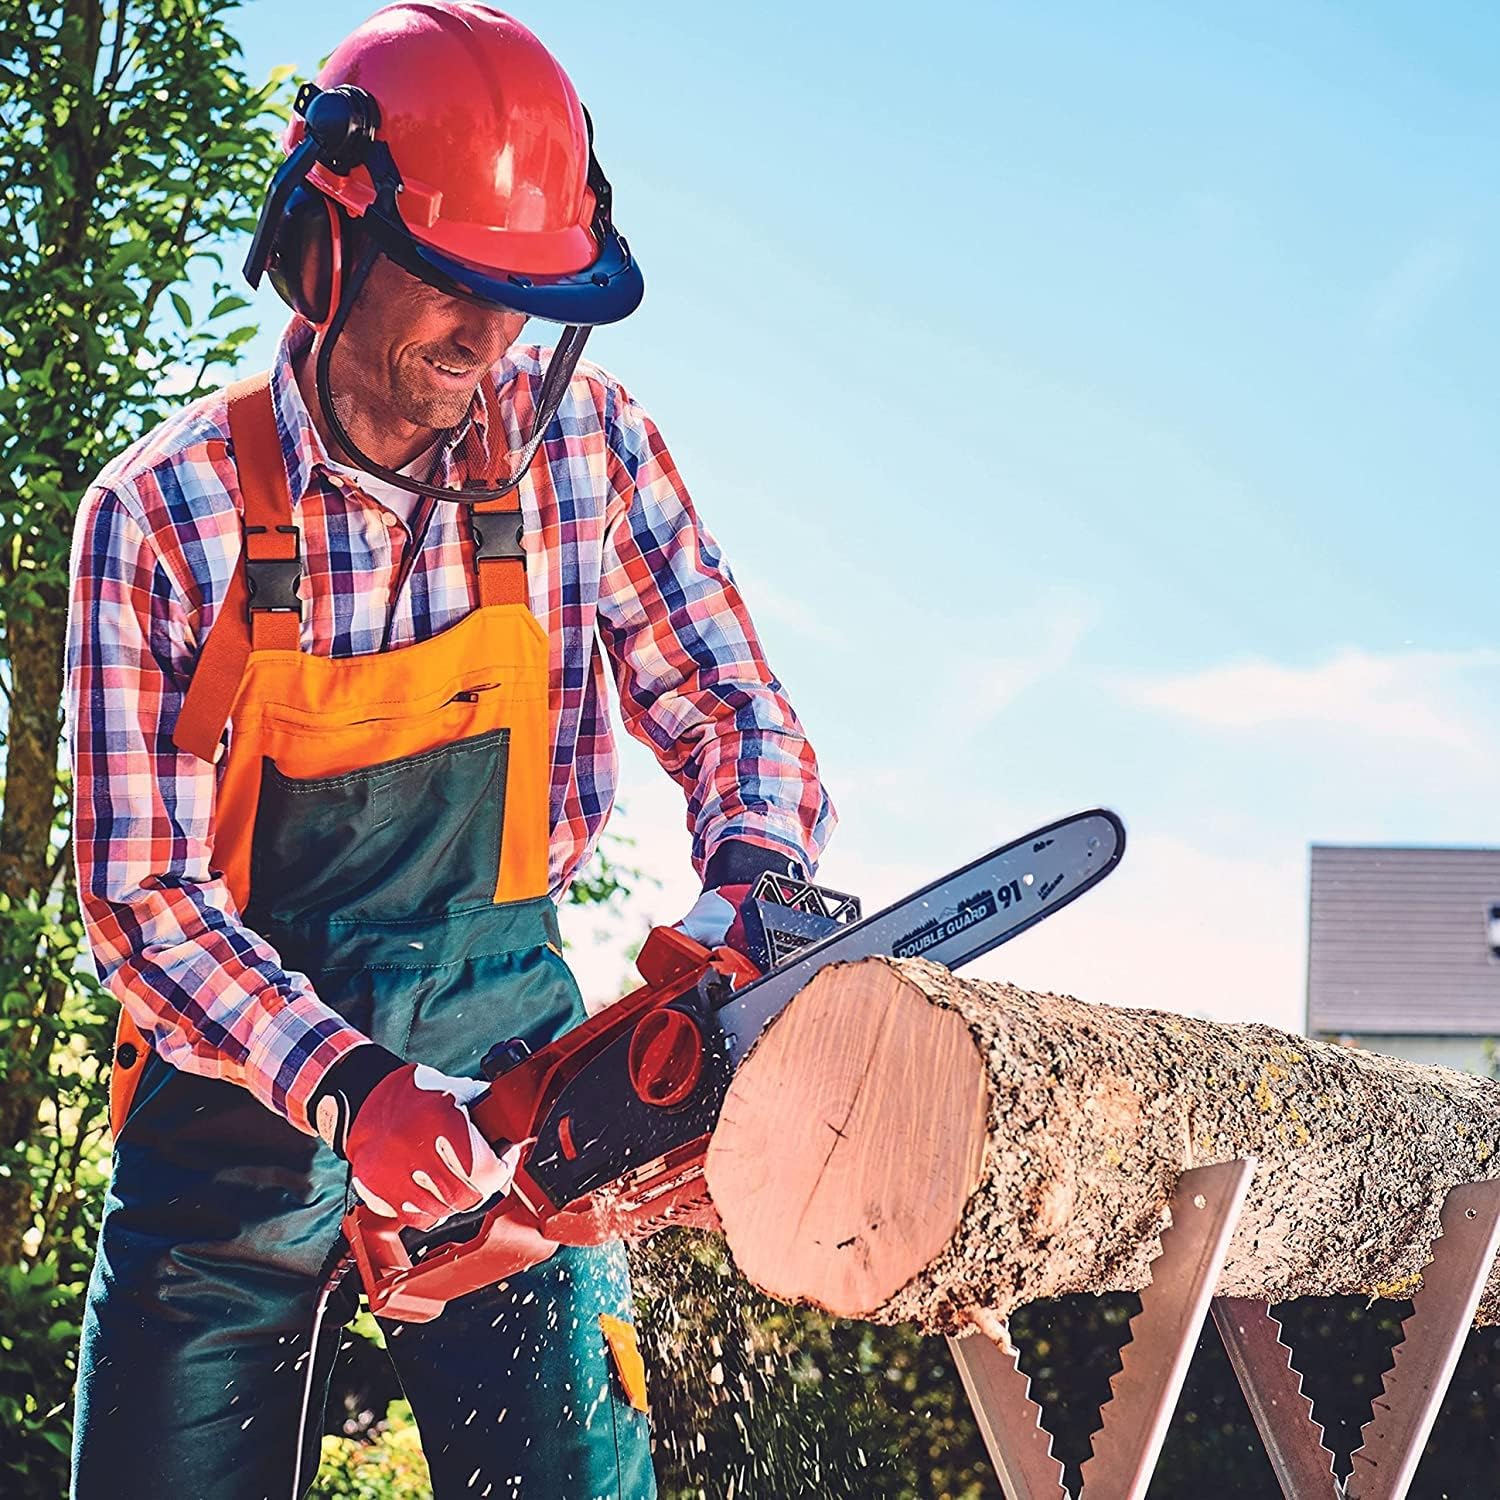
Figure 8: Chainsaw in Use. This image shows a user safely operating the Einhell electric chainsaw to cut a log, demonstrating proper posture and safety gear.
Video 1: Einhell Electric Chainsaw GH-EC 1835 Product Demonstration. This video provides a visual guide on the assembly, operation, and key features of the Einhell GH-EC 1835 electric chainsaw, including safety precautions and maintenance tips.
6. Penyelenggaraan
Penyelenggaraan tetap memastikan jangka hayat dan operasi yang selamat gergaji anda.
6.1 Pembersihan
- Always unplug the chainsaw before cleaning.
- Remove sawdust and debris from the guide bar, chain, and motor housing using a brush or compressed air.
- Clean the oil inlet and outlet to ensure proper lubrication.
6.2 Pelinciran Rantai
The automatic lubrication system requires regular monitoring of the oil level. Refill the oil tank as described in Section 4.3.
6.3 Mengasah Rantai
A sharp chain is essential for efficient and safe cutting. If the chain becomes dull, it should be sharpened or replaced. Refer to a qualified service technician or consult specific chain sharpening guides for your Oregon chain type.
6.4 Penyimpanan
- Clean the chainsaw thoroughly before storing.
- Drain any remaining chain oil from the tank.
- Apply a thin layer of oil to the guide bar and chain to prevent rust.
- Simpan gergaji di tempat yang kering dan selamat, dari jangkauan kanak-kanak.
7. Penyelesaian masalah
| Masalah | Kemungkinan Punca | Penyelesaian |
|---|---|---|
| Gergaji tidak bermula | No power supply; Safety lock-off not pressed; Damaged power cord | Check power connection; Press safety lock-off and trigger simultaneously; Inspect and replace damaged cord |
| Rantai tidak bergerak | Chain brake engaged; Chain too tight; Chain jammed by debris | Disengage chain brake; Adjust chain tension; Clean guide bar and chain area |
| Prestasi pemotongan yang lemah | Dull chain; Incorrect chain tension; Insufficient chain lubrication | Sharpen or replace chain; Adjust chain tension; Refill oil tank and check lubrication system |
| Getaran yang berlebihan | Loose chain; Damaged chain or guide bar | Adjust chain tension; Inspect and replace damaged components |
8. Spesifikasi
| Ciri | Spesifikasi |
|---|---|
| Model | GH-EC 1835 |
| Input Kuasa | 1800 W |
| Panjang Bar Panduan | 35 sm |
| Panjang Memotong | 32.5 sm |
| Kelajuan Rantaian | 13.5 m/s |
| Kapasiti Tangki Minyak | 160 ml |
| Bahan Gear | logam |
| Chain/Guide Bar | Oregon |
| Berat badan | 5.38 kg |
| Tahap Bunyi | 104 dB |
| Rujukan Pengeluar | 4501710 |
| UPC | 012345678912 |
9. Waranti dan Sokongan
The Einhell Electric Chainsaw GH-EC 1835 comes with a manufacturer's warranty of 2 years. For warranty claims, technical support, or spare parts, please contact your retailer or the official Einhell customer service. Keep your proof of purchase for warranty validation.
Ketersediaan alat ganti dijamin selama 2 tahun dari tarikh pembelian.


