1. Pengenalan
This manual provides detailed instructions for the installation, operation, and maintenance of your SpeaKa Professional DL-1117 In-Wall/Ceiling Speaker. Please read this manual thoroughly before installation and use to ensure proper function and safety. Keep this manual for future reference.
2. Produk Lebihview
The SpeaKa Professional DL-1117 is a high-quality in-wall/ceiling speaker designed for various audio applications in both residential and industrial environments. Its robust metallic construction ensures durability and reliable performance.

Rajah 2.1: Depan view of the SpeaKa Professional DL-1117 In-Wall/Ceiling Speaker. This image shows the speaker's front grille and mounting frame.
Ciri-ciri Utama:
- Ideal for wall and ceiling mounting.
- Suitable for industrial and residential spaces.
- Solid metallic construction for enhanced durability.
3. Spesifikasi
| Spesifikasi | Nilai |
|---|---|
| Jenama | SpeaKa Professional |
| Nama Model | DL-1117 |
| Nombor Model Item | SP-1207908 |
| Jenis Pembesar Suara | In-Wall/Ceiling Speaker |
| Saiz Pembesar Suara | 8 Inches (77mm INWALL SPEAKER as per label) |
| Impedans | 8 ohm |
| Power (Nominal) | 15 Watt |
| Kuasa Output Pembesar Suara Maksimum | 25 Watt |
| Respons Kekerapan | 90Hz - 17,000Hz (as per label) |
| Jenis Pemasangan | Ceiling Mount (also suitable for wall mount) |
| Dimensi Produk (L x W x H) | 11 x 11 x 7 cm |
| Berat Barang | 520 Gram |
| warna | Hitam |
| Bilangan Unit | 1 unit |
| Penggunaan yang Disyorkan | For computer (audio output), general audio systems |
| Peranti Serasi | Desktop computer, Laptop (via amp(pembolehubah/penerima) |

Rajah 3.1: Dimensional drawing of the SpeaKa Professional DL-1117 speaker. This diagram illustrates the speaker's diameter (Ø100mm), depth (49mm), and cutout dimensions (Ø74mm, Ø81mm).
Rajah 3.2: belakang view of the SpeaKa Professional DL-1117 speaker, showing the product label with model number DL-1117BK8, frequency response, power rating, and impedance.
4. Arahan Keselamatan
Sila patuhi langkah keselamatan berikut untuk mengelakkan kecederaan atau kerosakan pada produk:
- Keselamatan Elektrik: Ensure all power to the audio system is disconnected before making any connections or performing installation. Incorrect wiring can cause damage to the speaker or amplebih hidup.
- Pemasangan: Installation should be performed by a qualified professional if you are unsure about electrical wiring or structural integrity. Ensure the mounting surface (wall or ceiling) can safely support the weight of the speaker.
- Persekitaran: Do not expose the speaker to excessive moisture, extreme temperatures, or direct sunlight.
- Pembersihan: Gunakan kain lembut dan kering untuk pembersihan. Jangan gunakan pembersih cecair atau aerosol.
- Pembongkaran: Do not attempt to disassemble or modify the speaker. This will void the warranty and may cause damage or injury.
5. Persediaan dan Pemasangan
Follow these steps for proper installation of your in-wall/ceiling speaker:
5.1 Alat Diperlukan
- latih tubi
- Hole saw (matching cutout diameter, approx. Ø74-81mm)
- Pemutar skru
- Strippers wayar
- Speaker wire (appropriate gauge for your amplifier and cable length)
5.2 Lokasi Pemasangan
Choose a suitable location in your wall or ceiling. Ensure there are no electrical wires, plumbing, or structural elements behind the chosen area. Use a stud finder if necessary.
5.3 Memotong Pembukaan
- Carefully mark the desired cutout diameter on the wall or ceiling. Refer to the dimensions in Figure 3.1.
- Using a hole saw, carefully cut the opening.
5.4 Pendawaian
- Run speaker wire from your amplifier/receiver to the cutout opening.
- Strip approximately 1/2 inch (12mm) of insulation from the ends of the speaker wire.
- Connect the speaker wires to the terminals on the back of the DL-1117 speaker. Ensure correct polarity (+ to + and - to -) from the amplifier to the speaker. The terminals are typically screw-type or spring-loaded.
5.5 Installing the Speaker
- Carefully insert the speaker into the cutout opening.
- Secure the speaker using the integrated mounting clips or screws, if applicable. For this model, the design suggests it is inserted and then secured from the front.

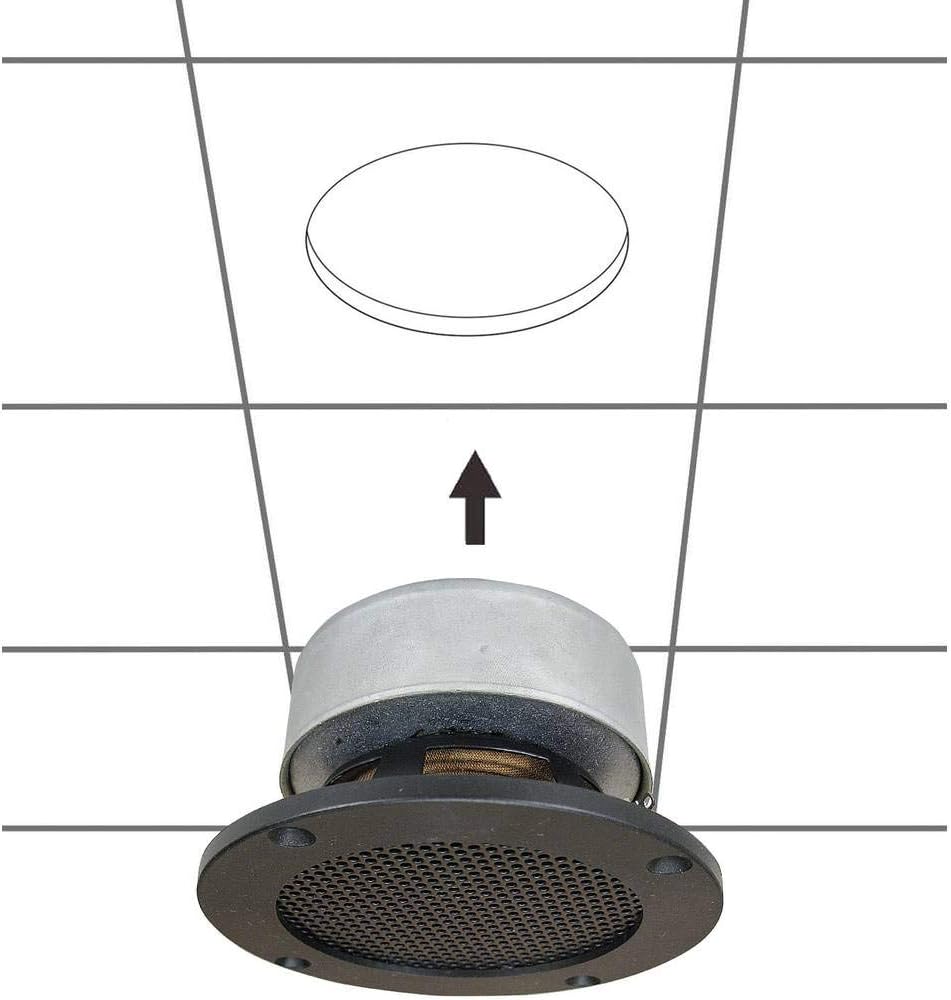
Rajah 5.1: Diagram illustrating the installation process of the SpeaKa Professional DL-1117 speaker into a ceiling opening. The speaker is inserted from below into the pre-cut hole.
6. Arahan Operasi
Once the speaker is correctly installed and wired to your amppengalir atau penerima:
- Pastikan semua sambungan selamat.
- Hidupkan anda amppenguat/penerima.
- Start playing audio through your connected source.
- Laraskan kelantangan pada anda amplifier/receiver to a comfortable listening level. Avoid excessively high volumes that could distort the sound or damage the speaker.
7. Penyelenggaraan
The SpeaKa Professional DL-1117 speaker requires minimal maintenance:
- Pembersihan: Periodically wipe the speaker grille and frame with a soft, dry cloth to remove dust. Do not use abrasive cleaners or solvents.
- Pemeriksaan: Occasionally check the speaker for any visible damage or loose connections.
8. Penyelesaian masalah
Jika anda menghadapi masalah dengan pembesar suara anda, rujuk masalah dan penyelesaian biasa berikut:
| Masalah | Kemungkinan Punca | Penyelesaian |
|---|---|---|
| Tiada bunyi dari pembesar suara | Pendawaian longgar atau tidak betul Amplifier/receiver off or muted Peranti sumber tidak memainkan audio | Periksa semua sambungan wayar pembesar suara untuk kekutuban dan keketatan yang betul. pastikan amplifier/receiver is on and not muted, and volume is up. Verify audio is playing from the source device. |
| Bunyi herot | Jumlah dagangan terlalu tinggi Sumber audio berkualiti rendah wayar speaker rosak | Kurangkan kelantangan pada anda amppenguat/penerima. Cuba sumber audio yang berbeza untuk menolak isu sumber. Inspect speaker wires for fraying or damage and replace if necessary. |
| Bunyi terputus-putus | Sambungan longgar rosak ampsaluran penguat | Periksa dan pastikan semua sambungan wayar pembesar suara. Test the speaker with a different amplifier channel or a known working amplebih hidup. |
If the problem persists after trying these solutions, please contact SpeaKa Professional customer support.
9. Waranti dan Sokongan
For warranty information and customer support, please refer to the documentation provided with your purchase or visit the official SpeaKa Professional webtapak. Simpan bukti pembelian anda untuk tuntutan waranti.
Pengeluar: SpeaKa Professional
ASIN: B00CS2V1AQ


