1. Pengenalan dan Lebihview
This manual provides comprehensive instructions for the setup, operation, maintenance, and troubleshooting of your InFocus IN3124 Projector. Designed for clarity and ease of use, this guide will help you maximize your projector's performance and longevity.
The InFocus IN3124 is a high-performance projector featuring XGA (1024 x 868) native resolution, 4800 lumens of brightness, and a 3000:1 contrast ratio, making it suitable for various presentation environments. Its portable design allows for flexible placement and usage.
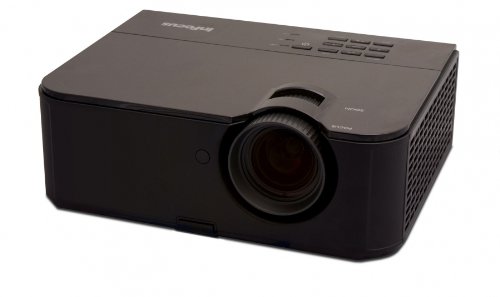
Rajah 1: Bahagian depan view of the InFocus IN3124 Projector, highlighting the main lens and the top-mounted control panel.
2. Persediaan
2.1 Membongkar
Carefully remove the projector and all accessories from the packaging. Verify that all components listed in the packing list are present. Retain the original packaging for future transport or storage.
2.2 Penempatan
Position the projector on a stable, level surface. Ensure adequate ventilation around the unit to prevent overheating. Maintain a clear path between the projector lens and the projection screen or surface. The optimal projection distance will vary based on the desired screen size.
2.3 Kuasa Penyambung
- Sambungkan kord kuasa ke input kuasa projektor.
- Palamkan hujung kord kuasa yang lain ke dalam salur keluar elektrik yang dibumikan.
2.4 Menyambungkan Sumber Input
The IN3124 projector supports various input sources. Connect your video source (e.g., computer, DVD player) to the appropriate input port on the projector. Common ports include VGA and HDMI (if available on your specific model).
- VGA: Use a VGA cable to connect to a computer's video output.
- HDMI: Use an HDMI cable for digital video and audio (check projector for HDMI port availability).
3. Arahan Operasi
3.1 Menghidupkan/Mematikan
- Untuk Menghidupkan: Press the power button on the projector's control panel or the remote control. The power indicator light will illuminate.
- Untuk Mematikan: Press the power button twice. The projector will enter a cooling cycle before shutting down completely. Do not unplug the projector during the cooling cycle.
3.2 Adjusting Focus and Zoom
Rotate the focus ring on the projector lens until the image appears sharp and clear. Use the zoom ring (if present) to adjust the image size to fit your screen.
3.3 Selecting Input Sources
Press the "Source" or "Input" button on the projector's control panel or remote control to cycle through available input sources (e.g., VGA, HDMI). Select the input corresponding to your connected device.
3.4 Menu Navigation and Keystone Correction
Use the menu buttons on the projector or remote to access the On-Screen Display (OSD). Navigate through the menu options to adjust settings such as brightness, contrast, color, and keystone correction. Keystone correction helps to square the image if the projector is not perfectly perpendicular to the screen.
4. Penyelenggaraan
4.1 Membersihkan Lensa
Gently wipe the projector lens with a soft, lint-free cloth specifically designed for optical surfaces. Do not use abrasive cleaners or excessive force, as this can scratch the lens.
4.2 Pembersihan Penapis Udara
Regularly check and clean the projector's air filters to ensure proper airflow and prevent overheating. Refer to the projector's specific filter access instructions. Use a soft brush or vacuum cleaner to remove dust accumulation.
4.3 Lamp Penggantian
Projektor lamp mempunyai jangka hayat yang terhad. Apabila lamp life indicator appears or the image becomes dim, the lamp may need replacement. Consult the full service manual or manufacturer's website for detailed lamp prosedur penggantian dan l yang serasiamp models. Always allow the projector to cool down completely before attempting lamp penggantian.
4.4 Penyimpanan
Apabila tidak digunakan untuk tempoh yang lama, simpan projektor di tempat yang sejuk dan kering, jauh daripada cahaya matahari langsung dan suhu yang melampau. Gunakan pembungkusan asal atau bekas pelindung untuk mengelakkan habuk dan kerosakan.
5. Penyelesaian masalah
This section addresses common issues you might encounter with your InFocus IN3124 Projector. For more complex problems, contact customer support.
- Tiada Imej Dipaparkan:
- Pastikan projektor dihidupkan dan penunjuk kuasa kukuh.
- Verify that the input source cable (VGA, HDMI) is securely connected to both the projector and the source device.
- Pilih sumber input yang betul menggunakan butang "Sumber".
- Check if the source device is outputting a signal.
- Dim or Faded Image:
- Laraskan tetapan kecerahan dan kontras dalam menu OSD.
- Pastikan lamp is not nearing the end of its lifespan.
- Clean the projector lens and air filters.
- Check the projection mode (e.g., Eco mode might reduce brightness).
- Imej Kabur:
- Laraskan gelang fokus pada lensa projektor.
- Pastikan permukaan projektor rata dan projektor stabil.
- Check the resolution settings of your source device to match the projector's native resolution.
- Alat Kawalan Jauh Tidak Berfungsi:
- Gantikan bateri dalam alat kawalan jauh.
- Pastikan tiada halangan antara alat kawalan jauh dan penerima IR projektor.
- Halakan alat kawalan jauh terus ke arah projektor.
6. Spesifikasi
The following table outlines the key technical specifications for the InFocus IN3124 Projector:
| Ciri | Spesifikasi |
|---|---|
| Nombor Model | IN3124 |
| Resolusi Paparan (Natif) | XGA (1024 x 868) |
| Kecerahan | 4800 lumen |
| Nisbah Kontras | 3000:1 |
| Jenis Paparan | LCD, LCoS |
| Berat Barang | 8.16 paun (3.7 kg) |
| Dimensi Produk (L x W x H) | 12.83 x 10.43 x 4.8 inci (32.59 x 26.49 x 12.19 cm) |
| Ciri Khas | Mudah alih |
7. Waranti dan Sokongan
For detailed warranty information, please refer to the warranty card included with your product packaging or visit the official InFocus webtapak. Waranti biasanya meliputi kecacatan pembuatan untuk tempoh tertentu dari tarikh pembelian.
If you encounter issues that cannot be resolved using the troubleshooting guide, or require technical assistance, please contact InFocus customer support. Contact details can usually be found on the manufacturer's webtapak atau dalam dokumentasi produk anda.


