1. Pengenalan
This manual provides detailed instructions for the installation, operation, and maintenance of your Foxconn TSAA725 ATX Tower Case. Please read this manual thoroughly before beginning installation to ensure proper setup and safe use of the product. Keep this manual for future reference.
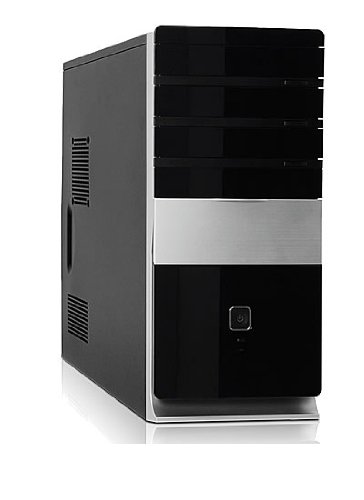
Imej: Depan view of the Foxconn TSAA725 ATX Tower Case, showcasing its design and front panel ports.
2. Maklumat Keselamatan
Patuhi langkah berjaga-jaga keselamatan berikut untuk mengelakkan kerosakan pada produk atau kecederaan pada diri anda:
- Always disconnect the power supply from the wall outlet before opening the computer case or performing any installation/maintenance.
- Handle internal components with care to avoid electrostatic discharge (ESD) damage. Use an anti-static wrist strap if available.
- Pastikan pengudaraan yang betul di sekitar bekas untuk mengelakkan terlalu panas.
- Do not expose the case to moisture or extreme temperatures.
- Jauhkan bahagian kecil daripada kanak-kanak.
3. Kandungan Pakej
Sahkan bahawa semua item terdapat dalam pakej:
- Foxconn TSAA725 ATX Tower Case
- 350W Power Supply (pre-installed)
- Kit aksesori (skru, pengikat, pengikat kabel)
- Manual arahan ini
4. Ciri-ciri Utama
The Foxconn TSAA725 ATX Tower Case offers the following features:
- Bahan: 0.5mm SGCC Alloy Steel construction for durability.
- Sokongan Papan Induk: Compatible with ATX and Micro ATX motherboards.
- Teluk Pandu:
- 3x 5.25" External Bays
- 2x 3.5" External Bays
- 4x 3.5" Internal Bays
- Sistem Penyejukan:
- 1x 80/92/120mm rear fan support (fan not included)
- Optional 1x 80/92/120mm front fan support (fan not included)
- 80mm Air Duct for CPU cooling.
- Panel I/O Hadapan:
- 2x port USB 2.0
- 1x Headphone jack
- 1x Microphone jack
- Bekalan Kuasa: Integrated 350W Power Supply.
5. Persediaan dan Pemasangan Komponen
Follow these steps to install your computer components into the Foxconn TSAA725 case:
- Sediakan Kes:
Place the case on a flat, stable surface. Remove the side panel(s) by unscrewing the thumbscrews at the rear of the case and sliding the panel backward.
- Pasang Papan Induk:
Install the necessary standoffs onto the motherboard tray according to your motherboard's form factor (ATX or Micro ATX). Carefully place the motherboard onto the standoffs, aligning the screw holes. Secure the motherboard with screws provided in the accessory kit.
- Install Drives (HDD/SSD):
For 3.5" internal drives, slide the drive into an available 3.5" internal bay and secure it with screws from the side. For 5.25" external drives (e.g., optical drives), remove the front panel bay cover, slide the drive in from the front, and secure it with screws.
- Pasang Kad Pengembangan:
Remove the appropriate expansion slot covers at the rear of the case. Insert your graphics card or other expansion cards into the PCIe/PCI slots on the motherboard and secure them with screws.
- Sambungkan Kabel:
Connect the power supply cables to the motherboard (24-pin ATX, 4/8-pin CPU), graphics card (if applicable), and drives (SATA power). Connect the front panel cables (USB, audio, power switch, reset switch, LED indicators) to the corresponding headers on the motherboard. Refer to your motherboard manual for header locations.
- Pengurusan Kabel:
Route cables neatly to improve airflow and aesthetics. Use cable ties from the accessory kit if needed.
- Tutup Kes:
Once all components are installed and cables are connected, reattach the side panel(s) and secure them with the thumbscrews.
6. Arahan Operasi
After successful assembly, connect your peripherals (monitor, keyboard, mouse) and power cable to the case. Press the power button on the front panel to start your computer.
Port I/O Panel Hadapan:
- Port USB 2.0: For connecting USB devices such as keyboards, mice, and external storage.
- Jack fon kepala: Untuk menyambungkan fon kepala atau pembesar suara.
- Jack Mikrofon: Untuk menyambungkan mikrofon.
- Butang Kuasa: To turn the computer on or off.
- Butang Tetapkan Semula: To restart the computer.
7. Penyelenggaraan
Regular maintenance helps ensure optimal performance and longevity of your computer case:
- Pembersihan Habuk: Periodically clean dust from inside the case, especially from fans and heatsinks, using compressed air. Ensure the computer is powered off and unplugged before cleaning.
- Pembersihan Luaran: Lap bahagian luar bekas dengan lembut, damp kain. Elakkan pembersih atau pelarut yang melelas.
- Pengurusan Kabel: Periksa penghalaan kabel secara berkala untuk memastikan tiada kabel yang menghalang aliran udara atau operasi kipas.
8. Penyelesaian masalah
Jika anda menghadapi masalah, rujuk kepada penyelesaian biasa berikut:
- Komputer tidak boleh dihidupkan:
- Ensure the power cable is securely connected to both the case's power supply and the wall outlet.
- Check if the power supply switch (if present) is in the 'ON' position.
- Sahkan bahawa kabel butang kuasa panel hadapan disambungkan dengan betul ke papan induk.
- No display on monitor:
- Ensure the monitor is powered on and connected to the correct video output on your graphics card or motherboard.
- Pasang semula kad grafik dan modul RAM.
- Port USB tidak berfungsi:
- Verify that the front panel USB cables are correctly connected to the motherboard's USB headers.
- Try connecting the device to a different USB port.
9. Spesifikasi
| Ciri | Perincian |
|---|---|
| Jenama | FOXCONN |
| Model | TSAA725-ISO450 |
| bahan | 0.5mm SGCC Alloy Steel |
| Keserasian Papan Induk | ATX, Micro ATX |
| Drive Bays (External) | 3x 5.25", 2x 3.5" |
| Drive Bays (Internal) | 4x 3.5" |
| Sokongan Sistem Penyejukan | 1x 80/92/120mm rear fan, 1x 80/92/120mm front fan (optional), 80mm Air Duct |
| Pelabuhan I / O Depan | 2x USB 2.0, 1x Headphone, 1x Microphone |
| Bekalan Kuasa | 350W (Bersepadu) |
| Dimensi Produk (LxWxH) | 50.17 x 24.13 x 54.61 cm |
| Berat Barang | 6.96 kg |
10. Waranti dan Sokongan
For warranty information and technical support, please refer to the official Foxconn webtapak atau hubungi peruncit tempatan anda. Simpan bukti pembelian anda untuk tuntutan waranti.
Sumber Dalam Talian: For additional support and updated drivers, visit the official Foxconn support page.
Nota: Terma jaminan mungkin berbeza mengikut wilayah.


