1. Produk Lebihview
The Kodak EasyShare M320 is a compact digital camera designed for ease of use and high-quality imaging. It features a 9.2-megapixel resolution sensor, a 3x optical zoom lens, and a 2.7-inch color LCD screen for clear viewing dan navigasi.
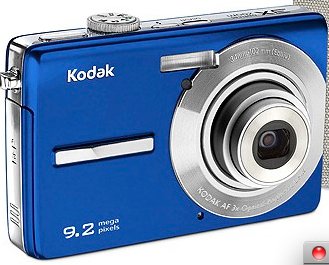
Rajah 1: Depan view of the Kodak EasyShare M320 Digital Camera, showcasing its compact design and blue casing.
Ciri-ciri Utama:
- 9.2-megapixel resolution for detailed images.
- 3x optical zoom lens for capturing distant subjects.
- 2.7-inch color LCD screen for easy framing and review.
- Face detection technology for optimized portraits.
- Blur reduction for sharper photos.
- Kodak Perfect Touch technology for enhanced image quality.
- ISO settings up to 1600 for low-light conditions.
- HD picture capability.
- VGA video recording at 24 frames per second.
2. Persediaan dan Penggunaan Pertama
Before using your Kodak EasyShare M320 camera, follow these steps to prepare it for operation.
2.1. Pemasangan Bateri
- Cari pintu petak bateri di bahagian bawah kamera.
- Slide the latch to open the compartment door.
- Insert the rechargeable battery, ensuring the correct polarity (+/-) as indicated inside the compartment.
- Tutup pintu petak bateri dengan selamat sehingga ia terkunci pada tempatnya.
2.2. Memasukkan Kad Memori
The camera supports SD/SDHC memory cards (not included). A memory card is required to store photos and videos.
- Buka penutup slot kad memori, biasanya terletak berhampiran petak bateri.
- Insert the SD/SDHC card with the metal contacts facing the front of the camera until it clicks into place.
- Tutup penutup slot kad memori.
2.3. Kuasa Awal Hidup
- Tekan butang Kuasa untuk menghidupkan kamera.
- The first time you power on, you may be prompted to set the date, time, and language. Follow the on-screen instructions using the navigation buttons and the OK button.
3. Mengendalikan Kamera
This section covers basic operations for capturing photos and videos.
3.1. Mengambil Foto
- Hidupkan kamera.
- Select the desired shooting mode (e.g., Auto, Scene modes) using the mode dial or menu.
- Bingkai tangkapan anda menggunakan skrin LCD.
- Press the Shutter button halfway down to focus. The focus indicator will illuminate when focus is achieved.
- Press the Shutter button all the way down to capture the photo.
3.2. Merakam Video
- Hidupkan kamera.
- Switch to video recording mode (if available via a dedicated button or mode dial).
- Press the Record button to start recording. A red indicator or timer will appear on the screen.
- Tekan butang Rakam sekali lagi untuk menghentikan rakaman.
3.3. ReviewImej dan Video
- Press the Playback button (often indicated by a triangle icon).
- Use the navigation buttons to scroll through your captured photos and videos.
- Kepada view a video, select it and press the OK button to start playback.
- Press the Playback button again or the Shutter button to return to shooting mode.
4. Penyelenggaraan dan Penjagaan
Proper care ensures the longevity and optimal performance of your camera.
4.1. Membersihkan Kamera
- Badan Kamera: Gunakan kain lembut dan kering untuk mengelap badan kamera. Untuk kotoran degil, sedikit dampen the cloth with water. Avoid harsh chemicals or solvents.
- Kanta: Gunakan berus kanta atau blower untuk mengeluarkan habuk. Untuk kotoran, gunakan kain pembersih kanta khusus dan penyelesaian pembersihan kanta. Jangan sentuh permukaan kanta dengan jari anda.
- Skrin LCD: Gently wipe the screen with a soft, lint-free cloth. Avoid pressing too hard.
4.2. Penyimpanan
- Simpan kamera di tempat yang sejuk dan kering jauh dari cahaya matahari langsung dan suhu yang melampau.
- Jika menyimpan untuk tempoh yang lama, keluarkan bateri untuk mengelakkan kebocoran.
- Use a camera case to protect it from dust and scratches.
5. Penyelesaian masalah
Rujuk bahagian ini untuk penyelesaian kepada isu biasa yang mungkin anda hadapi.
| Masalah | Kemungkinan Punca / Penyelesaian |
|---|---|
| Kamera tidak dihidupkan. |
|
| Tidak boleh mengambil gambar. |
|
| Gambar kabur. |
|
| Flash tidak menyala. |
|
6. Spesifikasi
Technical specifications for the Kodak EasyShare M320 Digital Camera.
| Ciri | Perincian |
|---|---|
| Nama Model | EasyShare M320 |
| maksimum Webcam Resolusi Imej | 9.2 MP |
| Zum Optik | 3x |
| Penstabilan Imej | Digital, Optik |
| Teknologi Penderia Foto | CMOS |
| Disokong File Format | JPEG, RAW |
| Nisbah Aspek | 16:9 |
| Minimum ISO Dikembangkan | 1600 |
| Berat Barang | 15.2 auns |
| Dimensi Pakej | 9 x 6.5 x 2.8 inci |
| Pengeluar | Kodak |
| Tarikh Mula-mula Tersedia | 13 April 2010 |
7. Waranti dan Sokongan
For detailed warranty information, please refer to the warranty card included with your product at the time of purchase. Warranty terms and conditions may vary by region.
For technical support, service, or additional product information, please visit the official Kodak support weblaman web atau hubungi jabatan khidmat pelanggan mereka. Butiran hubungan biasanya diberikan dalam pembungkusan produk atau pada pengilang webtapak.
You can visit the KODAK Store for more information: Kedai KODAK di Amazon