1. Pengenalan
This manual provides comprehensive instructions for the installation, operation, and maintenance of your LUX Pro PSD010B Mechanical Non-Programmable Thermostat. This thermostat is designed for use with 1 Heat Only systems, including fireplaces, stoves, and in-floor radiant heating. It does not require a fan switch and is battery-powered for reliable operation.

Imej 1.1: Depan view of the LUX Pro PSD010B Thermostat, displaying a temperature of 72 degrees Fahrenheit on its digital screen, along with up and down arrow buttons for temperature adjustment.
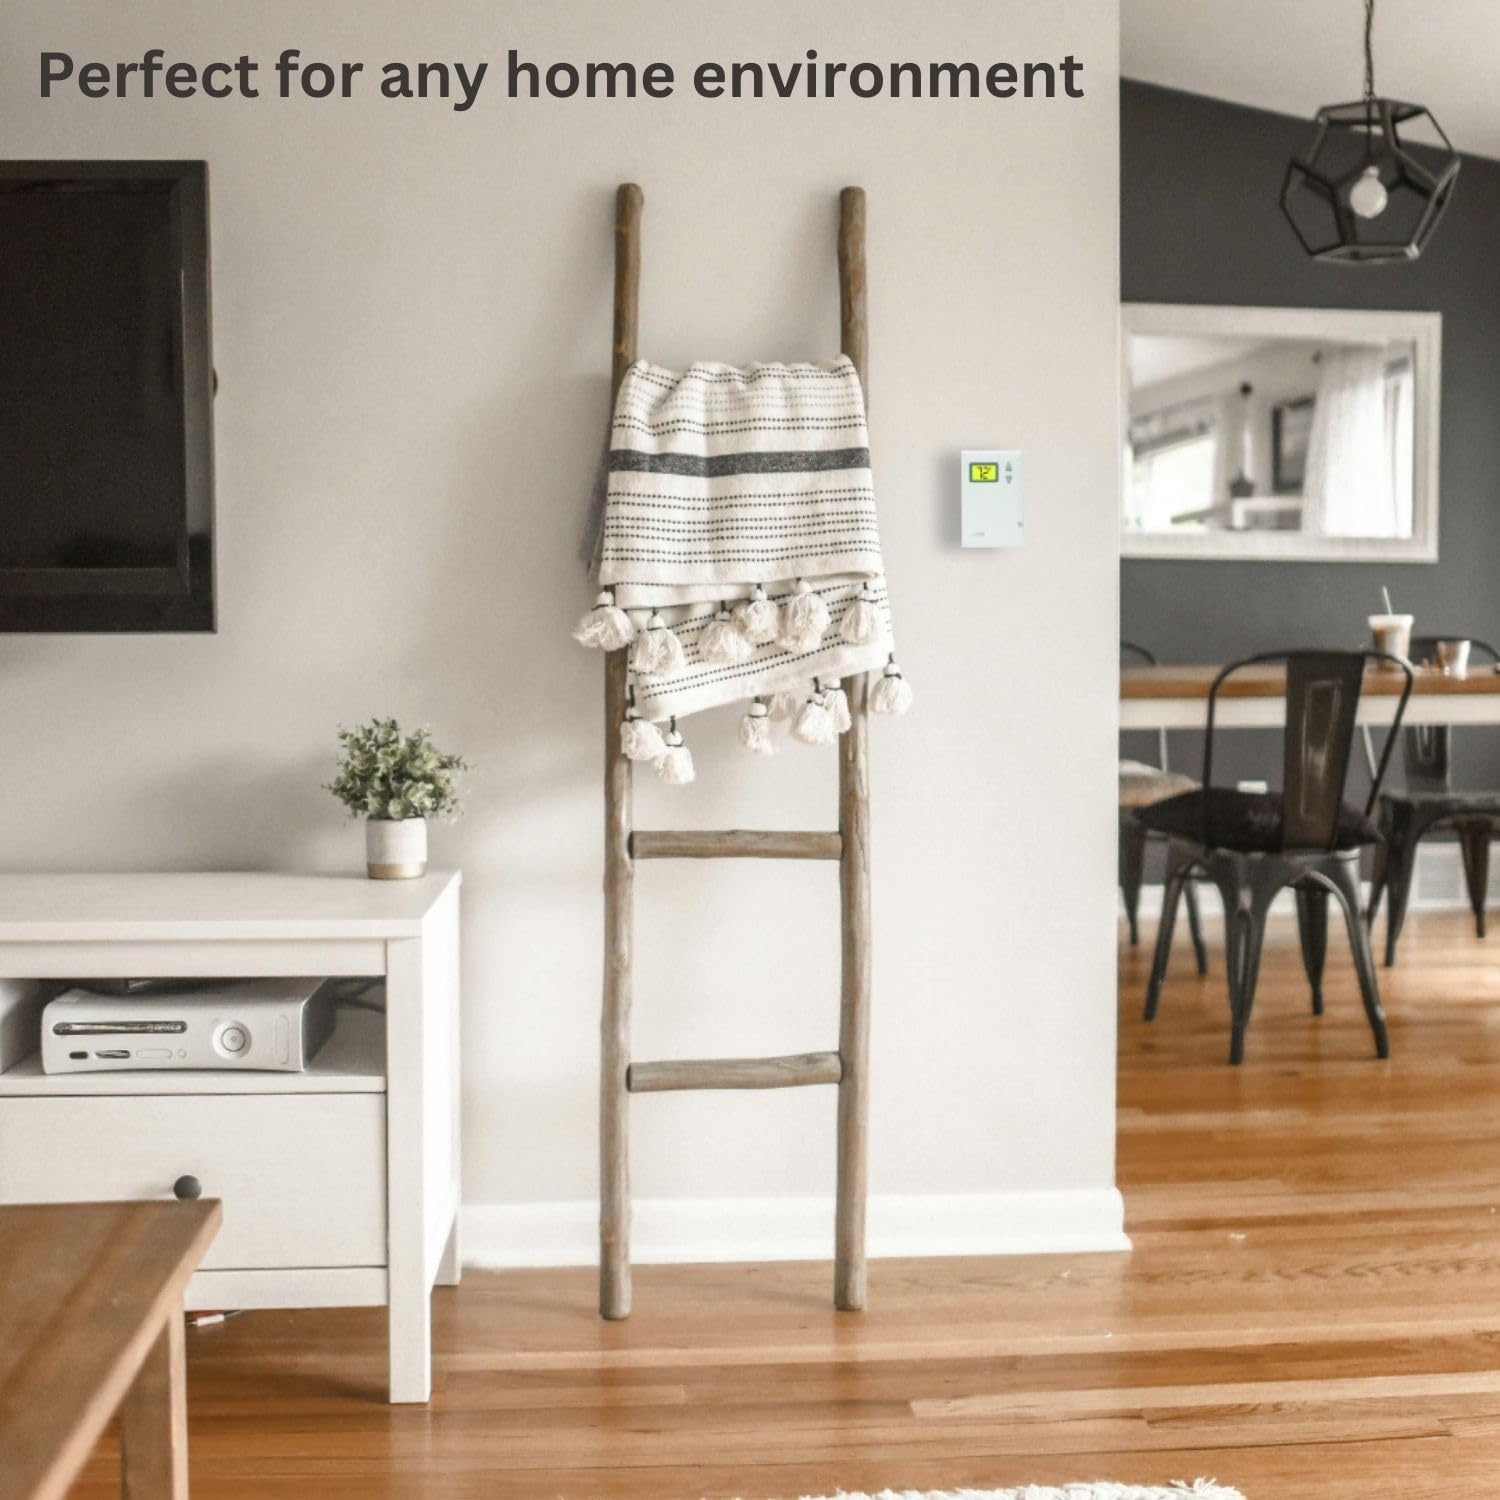
Imej 1.2: The LUX Pro PSD010B Thermostat mounted on a wall in a contemporary living room, demonstrating its discreet integration into a home environment.
2. Maklumat Keselamatan
- Sentiasa matikan kuasa pada sistem pemanasan pada fius utama atau panel pemutus litar sebelum memasang atau menservis termostat.
- Termostat ini direka bentuk untuk voltan rendahtage (24V) heating systems or millivolt systems. Do not use with line voltage (120V/240V) systems.
- Pastikan semua sambungan pendawaian selamat dan mematuhi kod elektrik tempatan.
- Lupuskan bateri mengikut peraturan tempatan. Jangan bakar bateri.
3. Kandungan Pakej
Sahkan bahawa pakej anda mengandungi item berikut:

Imej 3.1: Visual representation of the items included in the product box: the PSD010B thermostat, two AA LR6 batteries, two ST screws, two wall anchors, and wire labels.
- LUX Pro PSD010B Thermostat
- 2 AA LR6 Batteries
- 2 Mounting Screws (ST screws)
- 2 Jangkar Dinding
- Label Kawat
- Manual Arahan (dokumen ini)
4. Pemasangan
4.1 Senarai Semak Pra-Pemasangan
- Ensure your heating system is compatible (see Section 6: System Compatibility).
- Gather necessary tools: Phillips screwdriver, wire strippers (if needed), drill (if installing wall anchors).
- Turn off power to your heating system at the circuit breaker or fuse box.
4.2 Mengeluarkan Termostat Lama Anda
- Turn off the power to your heating system.
- Tanggalkan penutup termostat lama anda.
- Note the wire connections. This thermostat is designed for 2-wire heat-only systems. Label the wires (e.g., R and W) using the provided wire labels.
- Putuskan sambungan wayar dan keluarkan pangkalan termostat lama dari dinding.
4.3 Memasang Termostat Baharu
- Pisahkan penutup hadapan daripada tapak termostat.
- Position the thermostat base on the wall where the old thermostat was located. Ensure it is level.
- Mark the mounting holes. If new holes are required, drill pilot holes and insert wall anchors if mounting into drywall.
- Pasangkan tapak termostat pada dinding menggunakan skru yang disediakan.
4.4 Pendawaian
The PSD010B is compatible with 2-wire heat-only systems. Connect the wires from your heating system to the terminals on the thermostat base. Typically, these are R (power) and W (heat call) wires. Ensure connections are tight.
4.5 Pemasangan Bateri
- Insert the two AA batteries into the battery compartment on the back of the thermostat, observing the correct polarity (+/-).
- Snap the front cover onto the thermostat base.
- Restore power to your heating system at the main fuse or circuit breaker panel.
5. Operasi
5.1 Display and Controls Overview
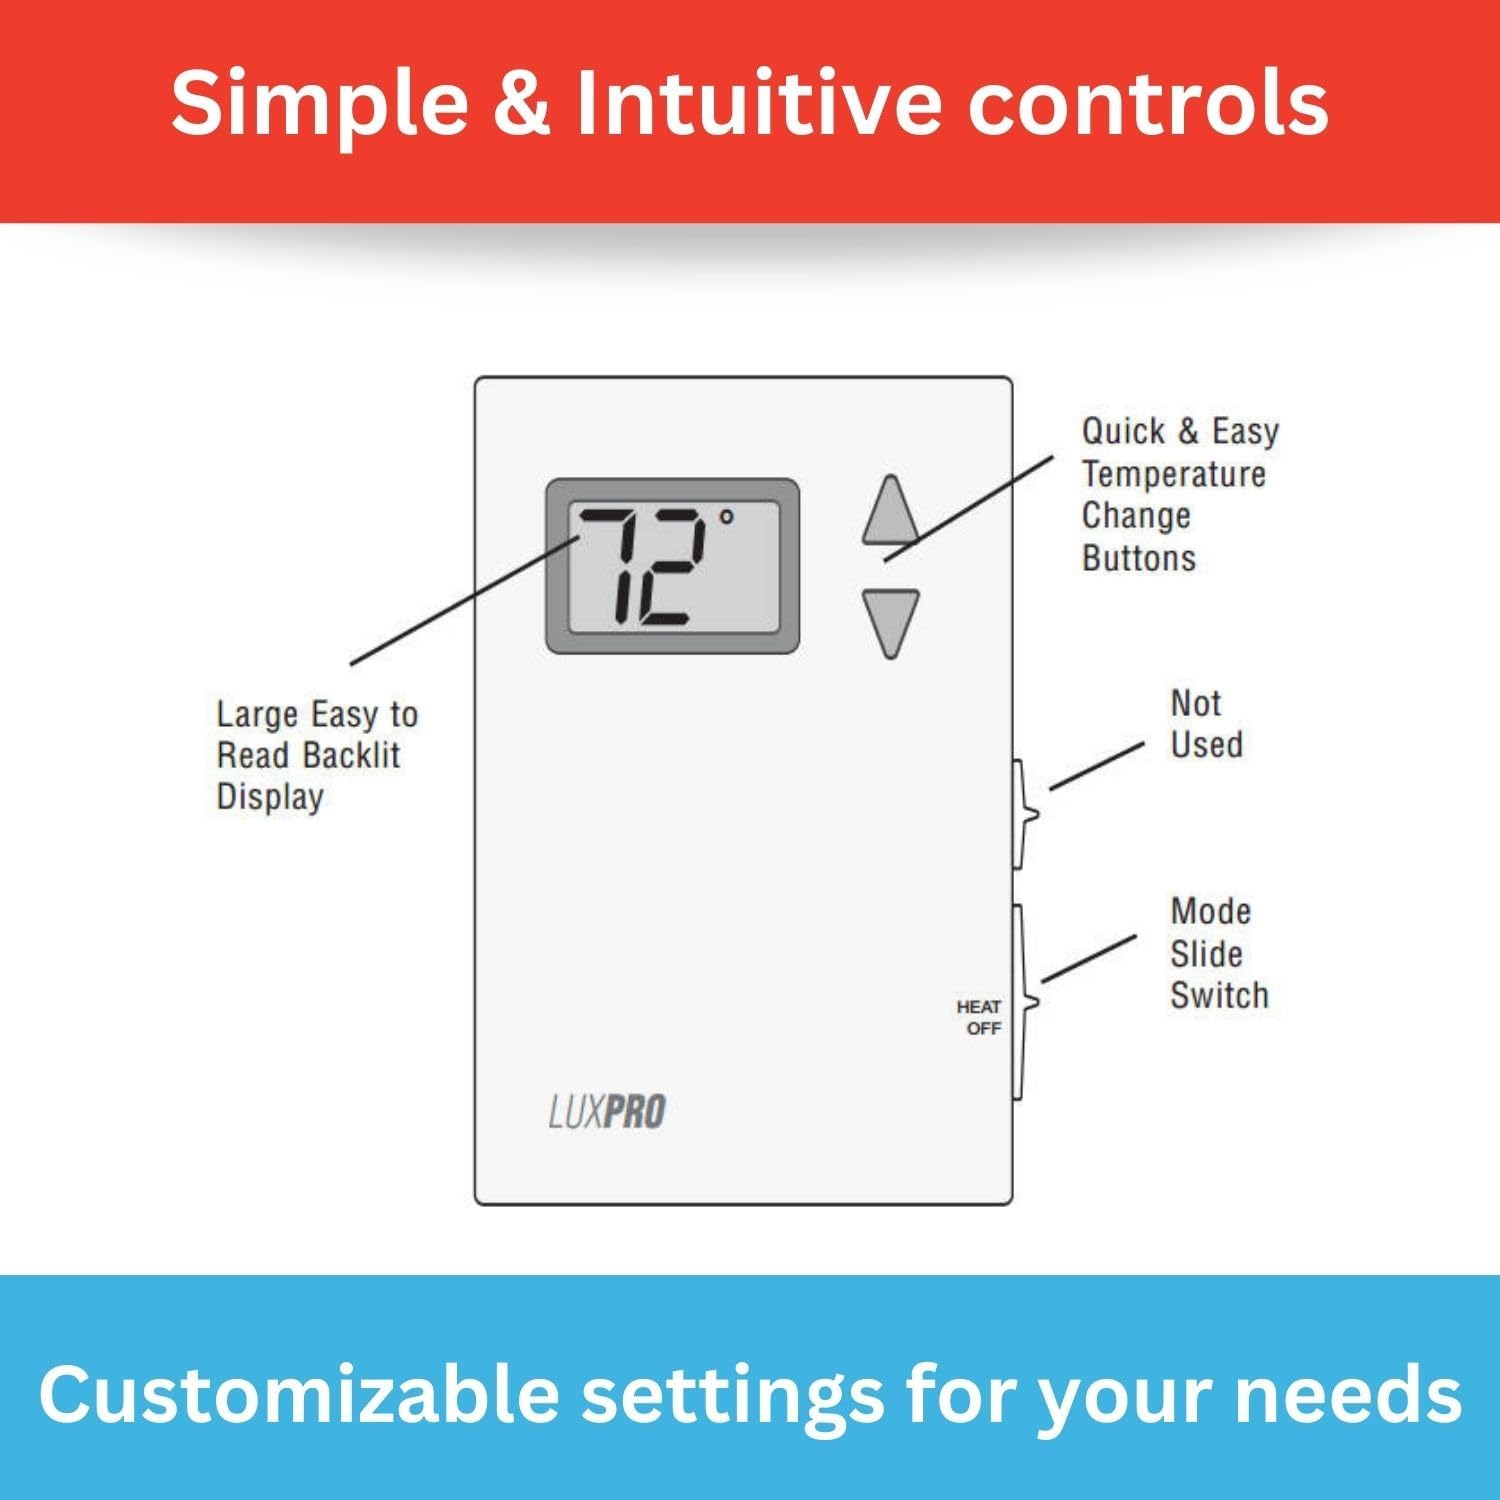
Imej 5.1: Diagram illustrating the controls of the LUX Pro PSD010B Thermostat, highlighting the large backlit display, quick and easy temperature change buttons (up/down arrows), and the Heat/Off mode slide switch on the side.
- Paparan Digital: Shows the current room temperature and the set temperature. It is backlit for easy reading.
- Butang Naik / Turun: Used to adjust the desired temperature setting.
- Suis Slaid Mod: Located on the side of the thermostat. Select 'HEAT' for heating operation or 'OFF' to turn the system off.
5.2 Menetapkan Suhu
Untuk melaraskan suhu yang dikehendaki, gunakan Up or Bawah arrow buttons. The display will show the set temperature as you adjust it, then revert to showing the current room temperature after a few seconds. The thermostat will automatically activate your heating system when the room temperature falls below your set temperature.
5.3 Pemilihan Mod
Use the slide switch on the side of the thermostat to select the operating mode:
- HABA: Termostat akan mengawal sistem pemanasan anda untuk mengekalkan suhu yang ditetapkan.
- MATI: The heating system will remain off.
5.4 Pemilihan Fahrenheit/Celsius
The thermostat allows selection between Fahrenheit and Celsius temperature display. Refer to the detailed specifications or the full manual for instructions on how to switch this setting, typically involving a button combination or a switch on the circuit board.
5.5 Adjustable Temperature Limits
The thermostat features adjustable temperature limits, allowing you to set a minimum and maximum temperature range. This prevents the temperature from being set too high or too low. Consult the full manual for instructions on how to configure these limits.
6. Keserasian Sistem
The LUX Pro PSD010B thermostat is designed for specific heating systems. Please review the compatibility information below before installation.

Imej 6.1: A chart detailing the system compatibility of the LUX Pro PSD010B Thermostat. It is compatible with 2-wire Hydronic (Hot Water), 750 Millivolt, and Gas Fireplaces (24V). It is not compatible with Heat Pump Multistage, Radiant Ceiling Heat, Electric Baseboards, Heat Pump w/ Auxiliary Heat, Portable space heaters, 3-wire Hydronic (Hot Water), Gas/Oil/Electric Furnace - Multistage, Cool Multistage, Cooling only, Plug-in air conditioners, Heat Pump w/o Auxiliary Heat, Gas/Oil/Electric Furnace - Heating only, and Gas/Oil/Electric Furnace - Single Stage.
Compatible Systems (Heat Only - 24V or Millivolt)
- 2-wire Hydronic (Hot Water) systems
- 750 Millivolt systems (e.g., gas fireplaces, floor furnaces)
- Gas Fireplaces (24V)
Tidak Serasi Dengan
- Heat Pump Multistagsistem e
- Radiant Ceiling Heat
- Electric Baseboards
- Pam Haba dengan Haba Bantu
- Portable space heaters
- 3-wire Hydronic (Hot Water) systems
- Gas/Oil/Electric Furnace - Multistage
- Cool Multistagsistem e
- Cooling only systems
- Plug-in air conditioners
- Pam Haba tanpa Haba Bantu
- Gas/Oil/Electric Furnace - Heating only (if it requires a fan control)
- Gas/Oil/Electric Furnace - Single Stage (if it requires a fan control)
7. Penyelenggaraan
7.1 Penggantian Bateri
The thermostat is powered by two AA batteries. When the battery power is low, a low battery indicator will appear on the display. Replace batteries annually or when the low battery indicator appears to ensure continuous operation.
- Gently pull the bottom of the thermostat cover forward to release it from the base.
- Tanggalkan bateri AA lama.
- Masukkan dua bateri beralkali AA baharu, memastikan kekutuban yang betul.
- Snap the cover back onto the thermostat base.
7.2 Pembersihan
Bersihkan bahagian luar termostat dengan lembut, damp kain. Jangan gunakan pembersih atau pelarut yang melelas. Elakkan menyembur cecair terus ke termostat.
8. Penyelesaian masalah
| Masalah | Kemungkinan Punca | Penyelesaian |
|---|---|---|
| Tiada paparan atau skrin kosong | Bateri mati atau tidak dipasang dengan betul | Gantikan bateri dengan bateri alkali AA baharu, memastikan kekutuban yang betul. |
| Heating system not turning on |
|
|
| Bacaan suhu tidak tepat | Thermostat located near heat source/draft, or internal sensor issue. | Pastikan termostat tidak terdedah kepada cahaya matahari langsung, draf atau sumber haba. Jika masalah berterusan, hubungi sokongan. |
9. Spesifikasi

Imej 9.1: A detailed list of features for the LUX Pro PSD010B Thermostat, including digital, non-programmable operation, battery power, temperature range of 40°F to 90°F, clean design, large backlit display, easy installation, F/C selectable display, 5-minute minimum run/off time, and adjustable temperature stop.
- model: PSD010B
- Jenis: Mechanical, Non-Programmable
- Keserasian Sistem: 1 Heat Only (2-wire Hydronic, 750 Millivolt, 24V Gas Fireplaces)
- Sumber Kuasa: 2 Bateri AA (termasuk)
- Julat Suhu: 40°F hingga 90°F (4°C hingga 32°C)
- Jenis Paparan: Digital, LCD Bercahaya Belakang
- Jenis Kawalan: Button Control (Up/Down arrows), Slide Switch (Heat/Off)
- Dimensi: 1.13"D x 5"W x 3.5"H
- Berat Barang: 0.4 paun (6.4 auns)
- Voltage: 24 Volts (compatible with millivolt systems)
- Bahan: plastik
- Jenis Pemasangan: Lekap di dinding
- UPC: 021079070107
10. Waranti dan Sokongan
The LUX Pro PSD010B Thermostat comes with a Waranti Terhad 5 Tahun, ensuring reliable performance and peace of mind. For warranty claims, technical assistance, or further inquiries, please refer to the contact information provided with your product packaging or visit the official LUX webtapak.

Imej 10.1: The LUX Pro PSD010B Thermostat displayed with icons highlighting its key features: a backlit display, adjustable temperature limits, battery-only power, and a 5-year limited warranty.


