pengenalan
This manual provides instructions for the safe and effective use of your Slik PRO714-CFII Carbon Fiber Tripod. Please read this manual thoroughly before using the product and retain it for future reference. The Slik PRO714-CFII is a lightweight and sturdy carbon fiber tripod designed for photographers seeking portability and stability.
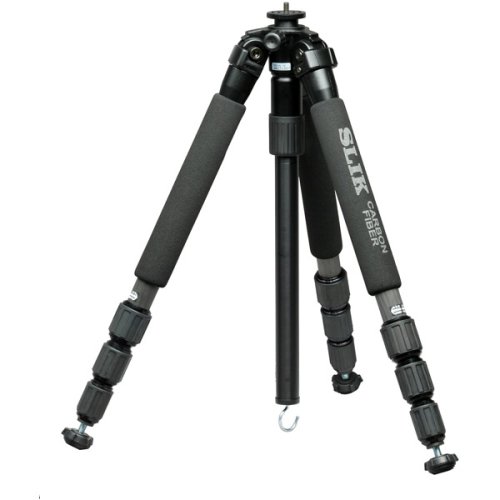
Image: The Slik PRO714-CFII Carbon Fiber Tripod, illustrating its lightweight carbon fiber construction and four-section leg design. This tripod is designed for stability and portability, ideal for various photographic applications.
Maklumat Keselamatan
To ensure safe operation and prevent damage to your equipment or injury, please observe the following safety guidelines:
- Always ensure the tripod legs are fully extended and locked before mounting a camera or other equipment.
- Do not exceed the maximum load capacity of the tripod, which is approximately 10 pounds (4.5 kg) for this model. Overloading can cause instability and damage.
- Avoid placing the tripod on unstable, slippery, or excessively uneven surfaces. Always check for a firm footing.
- Keep hands and fingers clear of moving parts, such as leg locks and the center column, when adjusting to prevent pinching.
- Do not leave the tripod unattended with a camera mounted, especially in windy conditions or near children and pets.
- Clean the tripod regularly to prevent dirt, sand, or debris from accumulating in the leg locks and joints, which can impair operation.
- When carrying the tripod, ensure all sections are fully collapsed and locked, and the legs are folded together.
Kandungan Pakej
Sila sahkan bahawa semua item berikut disertakan dalam pakej anda:
- Slik PRO714-CFII Carbon Fiber Tripod
- Short Center Column (for low-angle photography)
- Manual Pengguna (dokumen ini)
Persediaan
Follow these steps to set up your Slik PRO714-CFII tripod:
- Membuka Tripod: Gently spread the tripod legs until they are fully extended or set to your desired angle. The multi-angle leg locks allow each leg to be positioned individually for stability on uneven terrain.
- Extending Leg Sections: For each leg, rotate the Twist-Lock Leg Locks counter-clockwise to loosen the sections. Pull out the leg sections to the desired length. Once extended, rotate the locks clockwise to secure them firmly. Ensure all sections are locked before placing any equipment on the tripod.
- Attaching a Tripod Head (if not integrated): The tripod features a standard mounting screw (1/4" or 3/8" with adapter). If using a separate tripod head, screw it onto the tripod's mounting plate until it is secure and does not rotate freely.
- Adjusting Center Column: Loosen the center column lock knob. Raise or lower the center column to achieve the desired height. Once positioned, tighten the lock knob firmly to secure the column in place. For extremely low-angle shots, the standard center column can be removed and replaced with the included short column.
Beroperasi
Once set up, operate your Slik PRO714-CFII tripod as follows:
- Memasang Kamera Anda: Attach your camera to the tripod head's quick release plate (if applicable) or directly to the mounting screw. Ensure the camera is securely fastened and balanced on the head.
- Melaraskan Sudut Kaki: Each leg is equipped with a multi-angle leg lock mechanism. Press the release tab at the top of each leg to adjust its angle independently. This feature is crucial for achieving stability on uneven surfaces or for creative low-angle compositions.
- Achieving Low Angles: To position your camera very close to the ground (down to 7.25 inches), first remove the standard center column. Then, insert the included short center column. Adjust the leg angles as needed to achieve your desired low-angle shot.
- Mengangkut Tripod: When you are finished using the tripod, collapse all leg sections fully, lower the center column completely, and fold the legs together. This makes the tripod compact and easy to carry or store.
Penyelenggaraan
Proper maintenance will extend the life and performance of your tripod:
- Pembersihan: After each use, especially if exposed to dirt, sand, dust, or saltwater, wipe down the tripod with a soft, damp cloth. For stubborn dirt, a mild soap solution can be used, followed by a clean, damp cloth. Ensure all parts are dry before storage. Avoid using harsh chemicals or abrasive cleaners.
- Pelinciran: The leg locks and moving parts are designed for smooth operation and typically do not require lubrication. Do not apply oil or grease unless specifically instructed by Slik customer support, as this can attract dirt and impair function.
- Storan: Store the tripod in a dry, cool place, away from direct sunlight and extreme temperatures. Prolonged exposure to harsh conditions can affect the material integrity.
- Pemeriksaan: Periodically check all screws, bolts, and leg locks for tightness. Ensure they are secure but do not overtighten, as this can strip threads or damage components.
Menyelesaikan masalah
Rujuk jadual di bawah untuk isu biasa dan penyelesaiannya:
| Masalah | Kemungkinan Punca | Penyelesaian |
|---|---|---|
| Leg sections do not extend or retract smoothly. | Dirt, sand, or debris inside leg sections or locks. | Thoroughly clean leg sections and locks. Ensure locks are fully loosened before attempting to extend/retract. |
| Tripod feels unstable or wobbly. | Leg locks not fully tightened; tripod on uneven ground; camera not balanced. | Ensure all leg locks are securely tightened. Adjust individual leg angles for stability on uneven surfaces. Balance camera weight on the tripod head. |
| Center column slips down. | Center column lock knob not tightened sufficiently. | Tighten the center column lock knob firmly. Do not overtighten. |
| Camera not securely attached to tripod head. | Camera mounting screw loose; quick release plate not properly engaged. | Ensure the camera is tightly screwed onto the head. Verify that the quick release plate is fully seated and locked into the head. |
| Tripod is difficult to carry. | Not fully collapsed or folded. | Ensure all leg sections are fully retracted, the center column is lowered, and the legs are folded together for maximum compactness. This model is designed to be lightweight (approx. 3.65 lbs). |
Spesifikasi
Key specifications for the Slik PRO714-CFII Carbon Fiber Tripod:
- model: PRO714-CFII
- Jenama: Telan
- Bahan: Serat Karbon
- Number of Leg Sections: 4
- Berat Barang: Lebih kurang 3.65 paun (1.66 kg)
- Ketinggian Maksimum: Sehingga 61 inci (155 cm)
- Ketinggian Minimum: Down to 7.25 inches (18.4 cm) (with short column)
- Panjang dilipat: Kira-kira 18.1 inci (46 cm)
- Kapasiti Muatan: Sehingga 10 paun (4.5 kg)
- Peranti Serasi: Kamera
- UPC: 049368701969
Waranti dan Sokongan
For detailed warranty information, product registration, or technical support, please refer to the official Slik website or contact your local authorized Slik distributor. It is recommended to retain your purchase receipt as proof of purchase for any warranty claims.
For further assistance and to access the latest support resources, please visit the official Slik webtapak: www.slik.com


